Building NLU Flows With Firebase GenKit and GitHub Models Powered by LLMs
Learn how to set up an NLU flow using Firebase Genkit AI and Firebase Functions to detect intents and entities from text using GitHub Models.
Join the DZone community and get the full member experience.
Join For FreeIn this project, we’ll set up a Natural Language Understanding (NLU) flow using Firebase’s Genkit AI and Firebase Functions. For reference, the NLU flow detects intents and extracts entities from a given text input.
We'll use GitHub Models using the Genkit GitHub models plugin, along with the following tools:
We'll also use the following Node.js packages:
@genkit-ai/firebase: Genkit Firebase SDK, to be able to use Genkit in Firebase Functionsgenkitx-github: Genkit GitHub plugin, to be able to use GitHub Models in Genkit@genkit-ai/ai,@genkit-ai/coreand@genkit-ai/flow: Genkit AI Core SDK@genkit-ai/dotprompt: Plugin to use DotPrompt in Genkit
Primary Setup
- Clone this repository: GitHub repository.
- Run
npm installto install the dependencies in the functions folder. - Run
firebase loginto log in to your Firebase account. - Install genkit-cli by running
npm install -g genkit.
This repository is supposed to be used with NodeJS version 20.
Step-by-Step Guide
1. Run the Firebase Emulator
To run the function locally, run GENKIT_ENV=dev firebase emulators:start --inspect-functions.
The emulator will be available at http://localhost:4000.
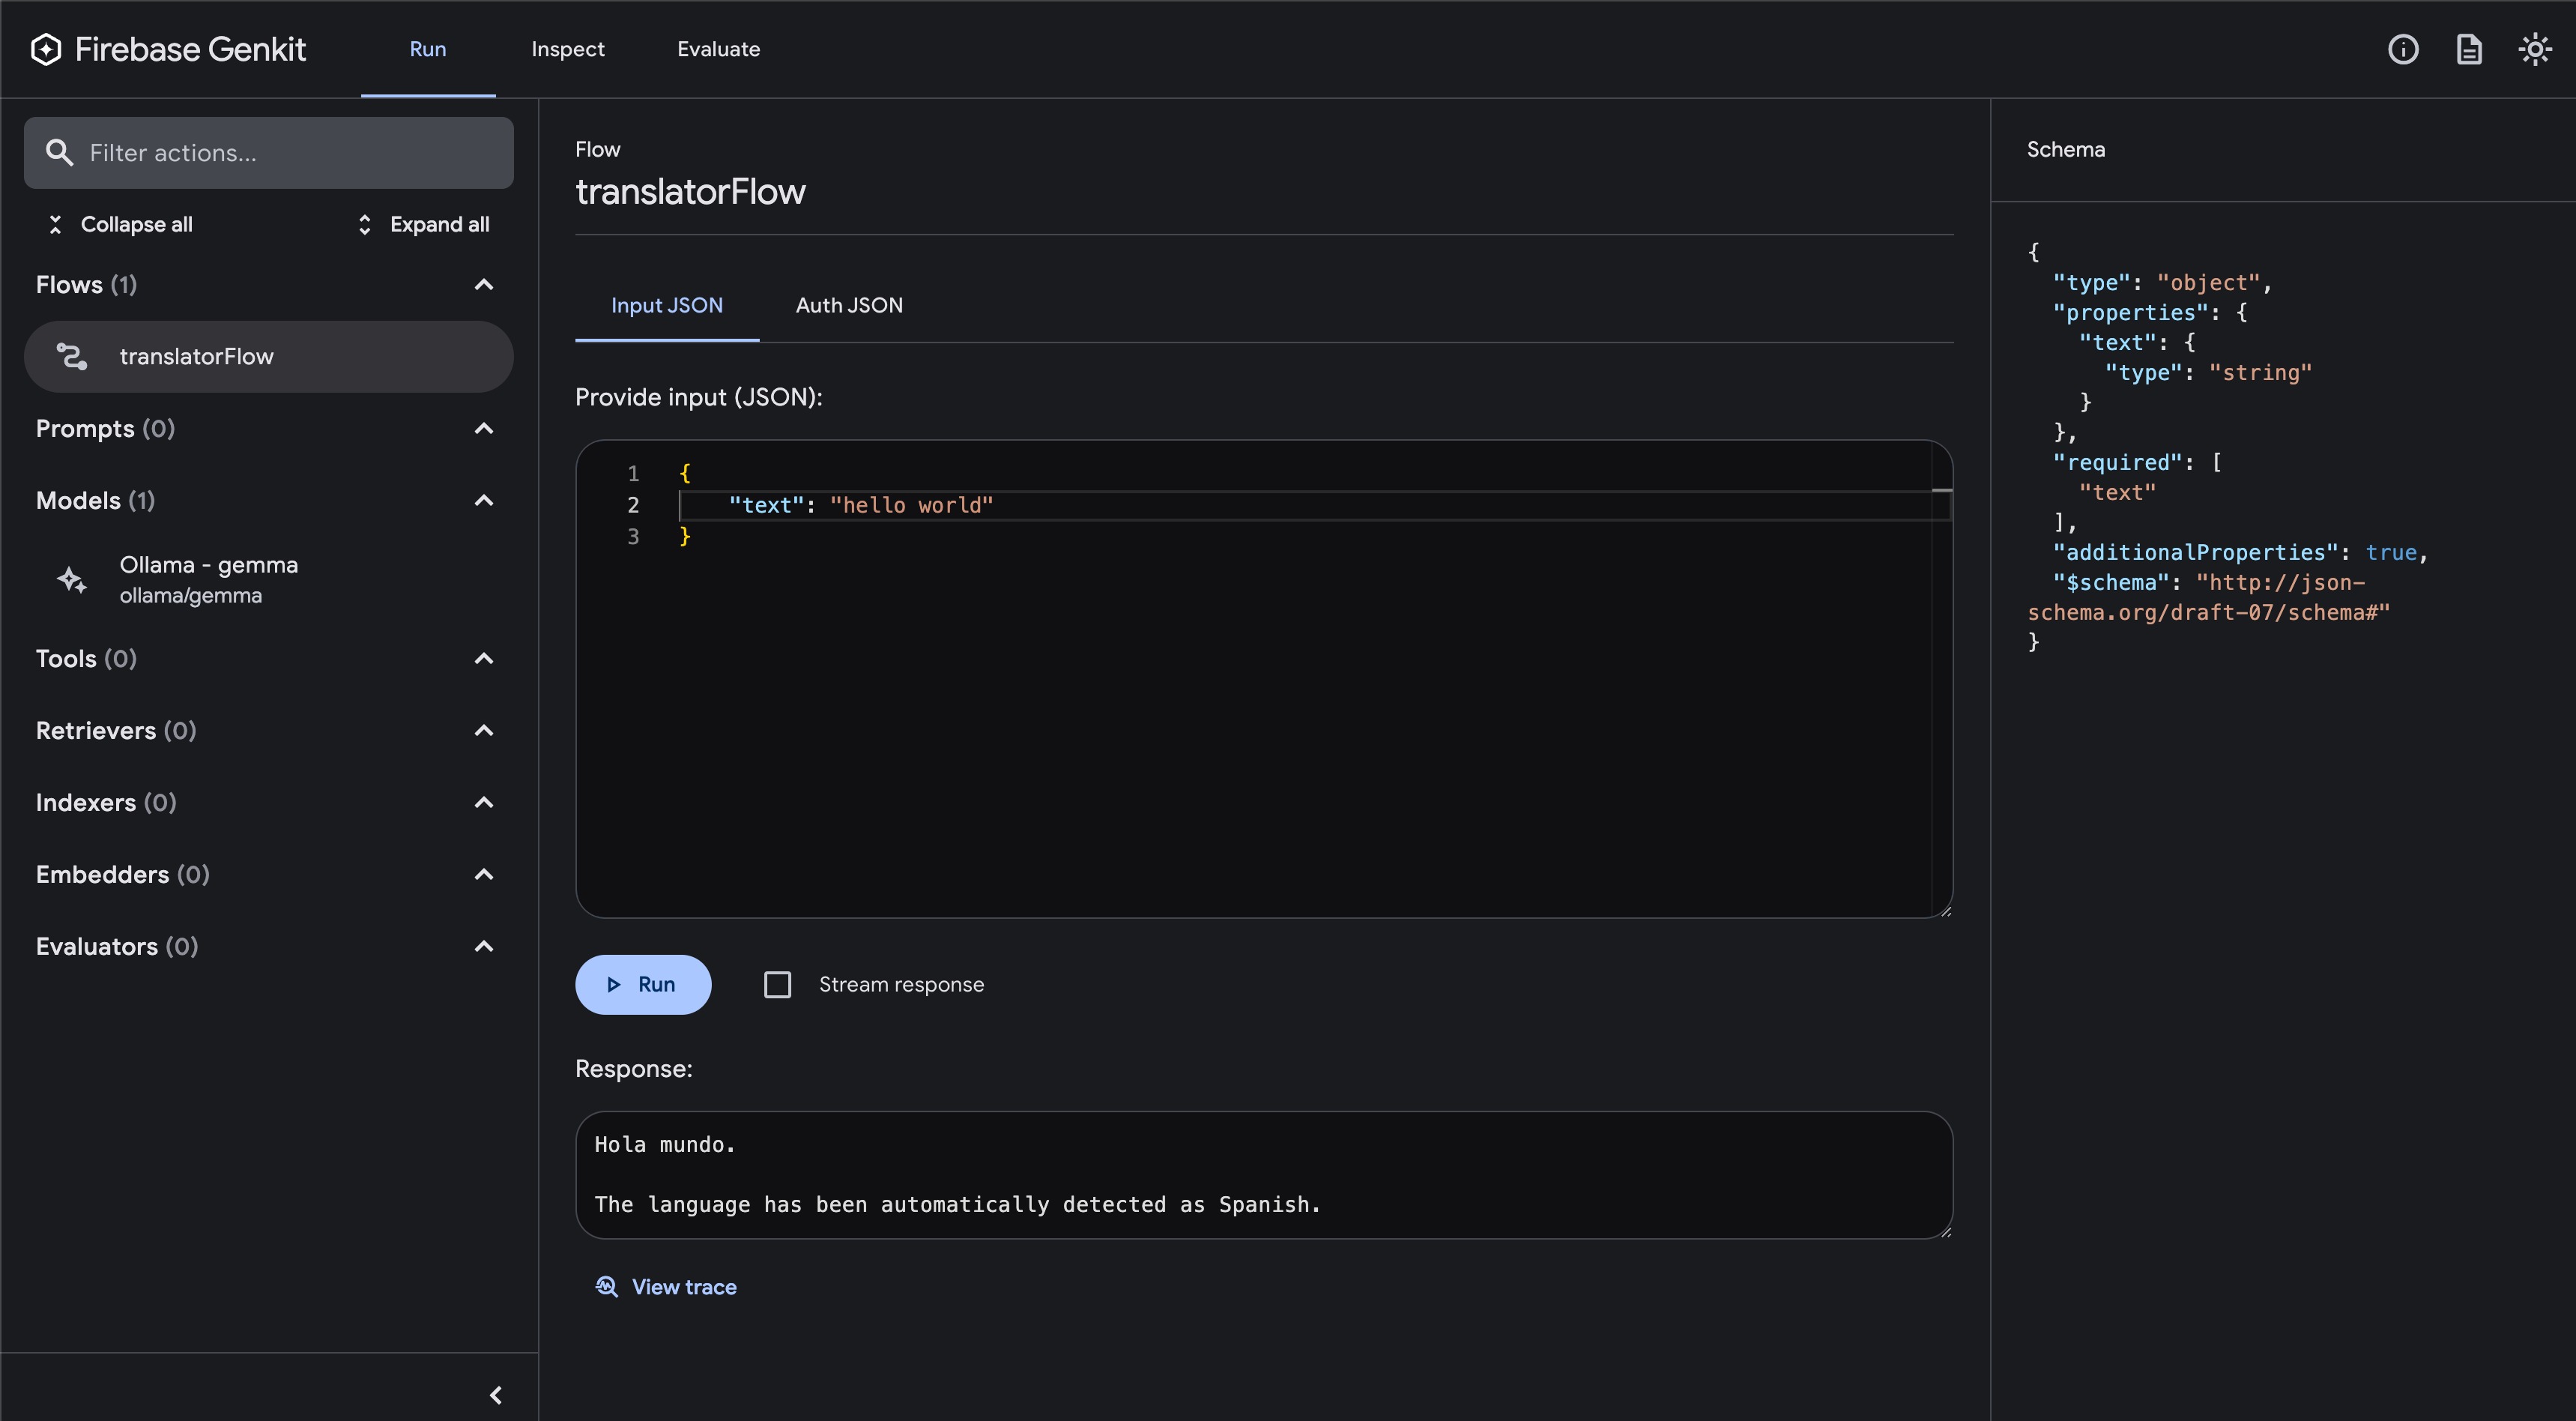
2. Open Genkit UI
Go to the functions folder and run genkit start --attach http://localhost:3100 --port 4001 to open the Genkit UI. The UI will be available at http://localhost:4001.
3. Set Up Configuration
- Ensure you have the necessary Firebase configuration files (
firebase.json,.firebaserc). - Update the
nlu/intents.ymlandnlu/entities.ymlfiles with your intents and entities.
4. Run Development Tasks
Linting
Run ESLint to check for code quality issues:
npm run lintBuilding
Compile the TypeScript code:
npm run build5. Review the Code Explanation
Configuration
The configureGenkit function is called to set up the Genkit environment with plugins for Firebase, GitHub, and Dotprompt. It also sets the log level to “debug” and enables tracing and metrics.
configureGenkit({
  plugins: [firebase(), github({}), dotprompt()],
  logLevel: "debug",
  enableTracingAndMetrics: true,
});
Flow Definition
The nluFlow is defined using the onFlow function.
- Configuration: The flow is named
nluFlowand has input and output schemas defined using Zod. The input schema expects an object with a text string, and the output schema is a string. The flow does not require authentication (noAuth). - nluFlow: The flow processes the input.
- Schema definition: Defines an
nluOutputschema with intent and entities. - Prompt reference: Gets a reference to the “nlu” dotprompt file.
- File reading: Reads
intents.ymlandentities.ymlfiles. - Prompt generation: Uses the
nluPromptto generate output based on the input text and the read intents and entities. - Return output: Returns the generated output with type
nluOutput.
- Schema definition: Defines an
export const nluFlow = onFlow(
  {
    name: "nluFlow",
    inputSchema: z.object({text: z.string()}),
    outputSchema: z.string(),
    authPolicy: noAuth(), // Not requiring authentication.
  },
  async (toDetect) => {
    const nluOutput = defineSchema(
      "nluOutput",
      z.object({
        intent: z.string(),
        entities: z.map(z.string(), z.string()),
      }),
    );

    const nluPrompt = promptRef("nlu");

    const intents = readFileSync('nlu/intents.yml','utf8');
    const entities = readFileSync('nlu/entities.yml','utf8');

    const result = await nluPrompt.generate<typeof nluOutput>({
      input: {
        intents: intents,
        entities: entities,
        user_input: toDetect.text,
      },
    });

    return result.output();
  },
);
6. Define the Prompt
This nlu.prompt file defines a prompt for an NLU model. Here’s a breakdown of its components:
Model Specification
This specifies the LLM model to be used; in this case, github/gpt-4o.
model: github/gpt-4oInput Schema
This defines the input schema for the prompt. It expects three string inputs:
intents: A string representing the intents.entities: A string representing the entities.user_input: A string representing the user’s input text.
input:
  schema:
    intents: string
    entities: string
    user_input: string
Output Specification
This defines the output format and schema. The output will be in JSON format and should conform to the nluOutput schema.
output:
  format: json
  schema: nluOutput
Prompt Text
This is the actual prompt text that will be used by the model. It provides context and instructions to the model:
- It describes the role of the model as an NLU system.
- It includes placeholders (
{{intents}},{{entities}},{{user_input}}) that will be replaced with the actual input values. - It asks the model to specify the detected intent and entity based on the provided user input.
  ---
  model: github/gpt-4o
  input:
 schema:
   intents: string
   entities: string
   user_input: string
  output:
 format: json
 schema: nluOutput
  ---
You are a NLU that detects intents and extract entities from a given text.

you have these intents and utterances:
{{intents}}
You also have these entities:
{{entities}}

The user says: {{user_input}}
Please specify the intent detected and the entity detected
7. Use the NLU Flow
The main NLU flow is defined in index.ts. It reads intents and entities from YAML files and uses a prompt defined in nlu.prompt to generate responses.
Intents
The intents are defined in the nlu/intents.yml file. Each intent has a name and a list of training phrases.
As an example, the following intent is defined in the nlu/intents.yml file:
order_shoes:
  utterances:
    - I want a pair of shoes from {shoes_brand}
    - a shoes from {shoes_brand}
The format is as follows:
intent-name:
  utterances:
    - training phrase 1
    - training phrase 2
    - ...
Entities
The entities are defined in the nlu/entities.yml file. Each entity has a name and a list of synonyms.
As an example, the following entity is defined in the nlu/entities.yml file:
shoes_brand:
  examples:
    - Puma
    - Nike
The format is as follows:
entity-name:
  examples:
    - synonym 1
    - synonym 2
    - ...
Example
To trigger the NLU flow, send a request with the following structure:
{
  "text": "Your input text here"
}
The response will be a JSON object with the following structure:
{
  "intent": "intent-name",
  "entities": {
    "entity-name": "entity-value"
  }
}
8. Deploy the Function
To deploy the function, run firebase deploy --only functions.
Conclusion
Using Genkit and GitHub Models in Firebase Functions provides an easy way to set up NLU flows. You can use this example as a foundation to create customized functions using Genkit and GitHub Models. You can find the full code of this project in the GitHub repository.
Published at DZone with permission of Xavier Portilla Edo. See the original article here.
Opinions expressed by DZone contributors are their own.
Comments