Compress File Using Mule 4 With AES 256 Encryption
This article will take the reader through a discussion of the process of zipping a file using Mule 4 with AES 2565 encryption.
Join the DZone community and get the full member experience.
Join For FreeIn this article, I will discuss the process of zipping a file using Mule 4 with AES 2565 encryption.
Here is the background in some cases after generating the output file in the Unix server.
the file needs to move to a window's location for business, to which the developer team does not have access.
Let's say the file is generated in location A.
But the file needs to move to location B which might be a windows folder, mounted.
This is usually done using the infrastructure team by using some automated job.
Now, in most cases, the infrastructure team is a third party.
So, it would be a risk to expose a file that contains sensitive client information.
That is why zip with a strong passphrase is required so that can't be shown to a third party.
For zipping the file:
We are using the lingala zip4 as below.
It is open-source, using Java.
The below dependency we are adding in pom.xml as below:
<!-- https://mvnrepository.com/artifact/net.lingala.zip4j/zip4j -->
        <dependency>
            <groupId>net.lingala.zip4j</groupId>
            <artifactId>zip4j</artifactId>
            <version>2.11.5</version>
        </dependency>
And we are using the below Java class, which is actually responsible for zipping the file.
Here we are using an HTML file as output which will be zipped here. PFA the entire code of the Java class mentioned.
/**
 *
 */
package au.com.test;

import java.io.File;
import java.util.Arrays;
import java.util.List;

import net.lingala.zip4j.ZipFile;
import net.lingala.zip4j.model.ZipParameters;
import net.lingala.zip4j.model.enums.AesKeyStrength;
import net.lingala.zip4j.model.enums.EncryptionMethod;

public class PasswordProtectedZip {

    public static File zip(String fileName, String password) throws Exception {

        System.out.println("Zipping " + fileName);

        File file = null;

        try {

            ZipParameters zipParameters = new ZipParameters();

            zipParameters.setEncryptFiles(true);

            zipParameters.setEncryptionMethod(EncryptionMethod.AES);

            zipParameters.setAesKeyStrength(AesKeyStrength.KEY_STRENGTH_256);

            List<File> filesToAdd = Arrays.asList(new File(fileName));

            ZipFile zipFile = new ZipFile(fileName + ".zip", password.toCharArray());

            zipFile.addFiles(filesToAdd, zipParameters);

            file = zipFile.getFile();

            System.out.println("file = " + file.getAbsolutePath());

            zipFile.close();

        } catch (Exception e) {

            e.printStackTrace();

            throw e;

        }

        return file;

    }

}- Now we need to work on the Mule side.
- PFB the mule flow that I have created, which contains the
- HTTP listener (inbound endpoint).
- One Java caller invokes static.
- Set the payload.

Now To achieve the AES 256 encryption for a password, we need to use:
Mule Secure Module
For importing the Mule Secure Module from Anypoint Exchange, see below.
1. Go To The Mule Pallet and Click on Settings.
2. Click on the From Exchange option, as shown below, to download the mule secure module from exchange. (In case you are not connected to the exchange, Please give ur user id and password to connect with the exchange).

5. Choose the Mule Secure Configuration Properties.

6. Click on finish once the module is successfully imported to Anpoint Studio.
You can validate this by the below two things:
6.1. Check this artifact is added to the pom.xml as shown below:
mule-secure-configuration-property-module
		<dependency>
			<groupId>com.mulesoft.modules</groupId>
			<artifactId>mule-secure-configuration-property-module</artifactId>
			<version>1.2.5</version>
			<classifier>mule-plugin</classifier>
		</dependency>
6.2 One more thing you can see, you can see the Mule Properties Editor While Right Click on the config.properties. Without this module imported, you can not be able to see this option.

7. Now, we need to add the secure-properties-config as a global element in Mule 4.
Here we need to use the encryption key,
File name (config.properties) as shown in the below screenshot:

We need to always remember the key for encryption and decryption as below:
password12345678
Let’s Encrypt a Password Using Mule Properties Editor
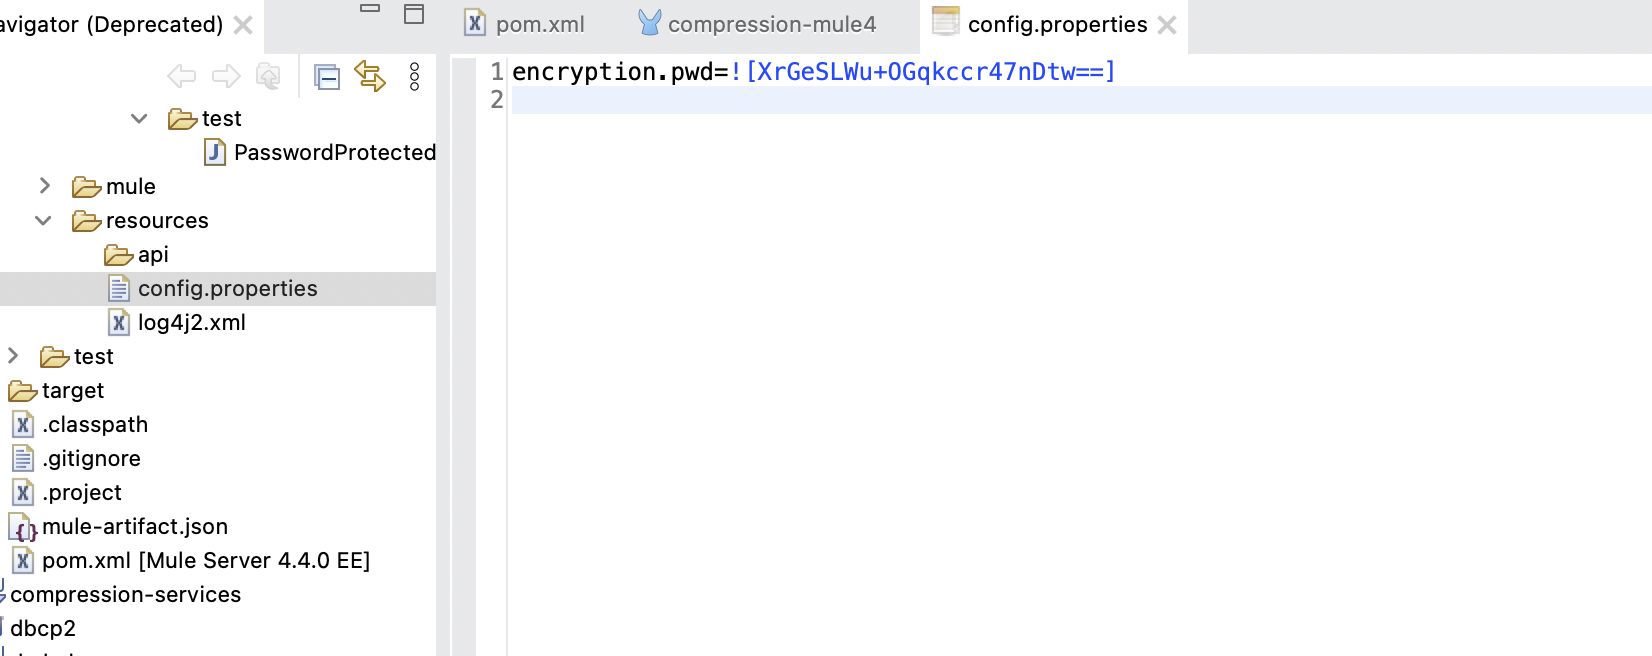
1. Open the config.properties file using the Mule Secure Editor.

2. Go to the text editor, and create a key and a password as shown below.

3. Now Click On the Table Editor --> Double Click on the Property --> It will show your password
--> Now Click on the -- > Encrypt Button

You need to use your key to encrypt the password.
4. Now, your password becomes encrypted using the AES 256 encryption.
And nobody can decrypt it until and unless he/she gets the key.

5. If it is deployed in the server also, it will be deployed with the encrypted password.
So, nobody is unable to identify what the actual password is.
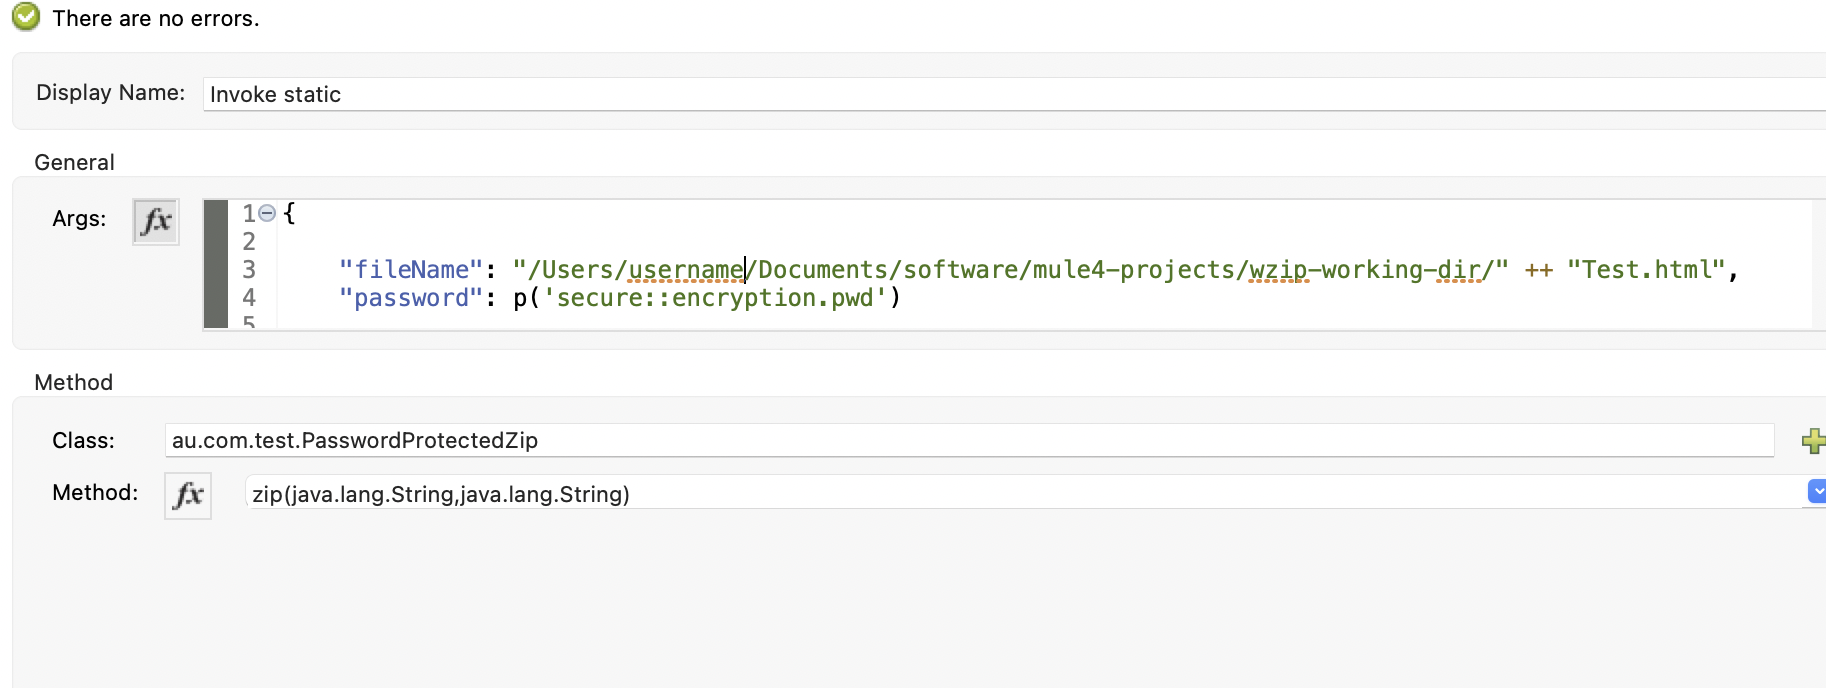
6. Now, I want to show one important thing here. Closely look at the argument:

They are using it while giving the argument for a password.
secure::
The reason behind doing this is that it is actually converting encrypted passwords to decrypted passwords.
And passing the same. So, the output file is actually zipped using a decrypted password.
Now Let’s Run the Project
1. We are hitting the inbound endpoint, and the HTML file got zipped.

2. Now go to the folder, and let's try to unzip the file.

When trying to unzip, it is asking for a password.
3. Once you provide the decrypted password, the Test.html is generated and, while opening shows the content as expected.

Attaching the project as a reference.
Opinions expressed by DZone contributors are their own.

Comments