Containerizing Your Spring Boot Application With Jib
Using Jib as a facilitator for building optimized images of our Spring Boot applications
Join the DZone community and get the full member experience.
Join For FreeAfter quite some time using Spotify’s docker-maven-plugin (including after it entered in an inactive state of development), I started looking for some other plugins or tools with the same purpose, up-to-date and straightforward to use.
I found some that were pretty cool, such as the dockerfile-maven, that is nice and relies completely on Dockerfile, and that was ok. I found a couple of other projects too, but to be honest, none of them made me want to move from docker-maven-plugin until I’ve reached a blog post from GCP about Jib, promising to build images better and with Maven and Gradle plugin.
As the blog post depicted the common build flow with lots of arrows pointing here and there until the image is finally stored in the repository, Jib’s flow was a simple and straight arrow to the repository. I was like — No way that stuff is so simple!
Really Simple
It is really simple. Take a look:

As I kept reading the docs, I started migrating some personal projects with little effort needed as I always try not to bloat my Dockerfiles with single build stages.
To show some practical example, in two simple steps, we are able to start using Jib in a glimpse:
- Choose the current version of Jib plugin.
- Set your image/container configuration with Jib Plugin
By the time I write this article, the current Jib version is 2.6.0, and the application is based on Spring Boot 2.3.5 with a single controller for testing purposes only.
Ladies and Gentlemen, the get controller:
public String theAnswer(){
return "The Answer to the Ultimate Question of Life, the Universe, and Everything is 42";
}
The Configuration
And now the build Gradle file with the parts that are important to our Jib configuration:
xxxxxxxxxx
// Several parts omitted
plugins {
id 'com.google.cloud.tools.jib' version '2.6.0'
}
group = 'net.diogosilverio.medium'
version = '0.0.1-SNAPSHOT'
sourceCompatibility = '11'
repositories {
mavenCentral()
}
tasks {
build {
dependsOn(tasks.jib)
}
}
jib {
from {
image = 'amazoncorretto:11-alpine'
}
to {
image = 'diogosilverio/simple-app'
credHelper = 'secretservice'
tags = ['latest', project.version]
}
container {
appRoot = '/simpleApp'
jvmFlags = ['-Xms360m', '-Xmx360m']
ports = ['8080']
workingDirectory = '/simpleApp'
}
allowInsecureRegistries = false
}
I really recommend using the credHelper instead of username and password.
By this time, we recognize many parameters we would normally supply to a Dockerfile and the dockerbuild command, such as FROM image, ports, and workingDirectory.
It is also important to note that, as stated in the build.gradle, Jib build task is attached to the default build phase, thus it will build and publish each time build tasks are executed for this tutorial/repository.
Reading the snippet, it is easy to state that:
- Our base image is Amazon Correto 11 — Alpine
- We are publishing our app to the repository diogosilverio/simple-app
- The image is tagged with latest and the current project.version
- The container has port 8080 exposed
And the application will be limited to 360mb of memory and will be deployed to /simpleApp folder.
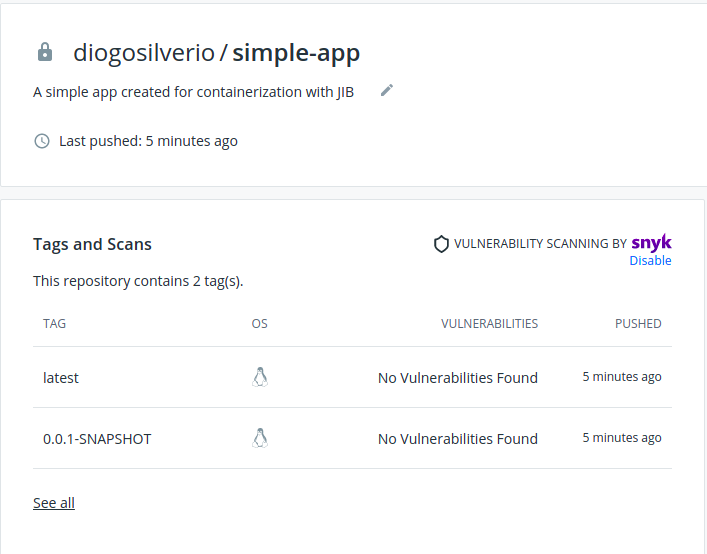
For a basic test, that is all we need for a simple packaged Spring Boot application. Just issue the command gradle jib. As soon as the process succeeds, your image will be published and ready to use:

After pulling the image, is just run as any other container:

But the ease of configuration is not the only good part!
Jib is smart enough to use layers in our favor by organizing our classes, dependencies, and everything else, pushing only what is really needed, not just the whole fat jar. Let's take a look inside the running container:

There it is! Classes, libs, and resources exploded(as the expected default behavior). Are these folders the layers? We can check it with docker history command:

There they are! The first three layers are well defined, and our classes layer is super slim, containing only our compiled classes. Resources containing our application.properties and any other arbitrary resources we created and, the heaviest part of our applications, dependencies with 16.4 MB. All other layers are related to the base image we choose, and in our case, Amazon Correto 11 with Alpine distro and other small details.
Evolving the application to a 0.0.2-SNAPSHOT and changing the controller, we are ready to build our new image and run our new container. But this time, pay attention to which layers were pulled:

A single layer with a few kilobytes was pulled, decreasing the time to spin new containers in several seconds if we had to download an entire layer of unchanged dependencies.
What About Other Configurations?
Jib docs are pretty complete and straightforward, and Jib itself provides very flexible configurations properties to shape to your container’s needs.
You may need/want to:
- Provide arguments at the start of the container: jib.container.args
- Set some environment variables: jib.container.environment
- Specify some volumes: jib.container.volumes
- Copy arbitrary files to your image with jib.extraDirectories
Check Maven and Gradle docs pages for more details!
In Summary
I’m pretty comfortable using Jib for now and planning to move more projects as soon as possible(I’m not being paid for that :D).
But I will definitely look at a couple of other tools, including Spring Boot OCI Images with Cloud Native Buildpacks.
P.S. Jib FAQ — But, I’m not a Java Developer might be useful for other languages too!
Published at DZone with permission of Diogo Silvério. See the original article here.
Opinions expressed by DZone contributors are their own.

Comments