Creating EFS Using CloudFormation and Mounting it With EC2 Linux Instance
This tutorial goes step by step through the steps of creating and mounting an Elastic Files Storage instance using CloudFormatino and EC2 Linux.
Join the DZone community and get the full member experience.
Join For FreeThere are multiple ways of storing information on an instance, like EBS or EFS. EBS is Elastic Block Storage and can be considered as if you have a high capacity Storage Device attached to your computer. Whereas EFS is Elastic File Storage and can be considered as if you have attached an external storage device attached to your computer. It may depend on your application or use case you choose to use what among both, but for our case, that we are discussing today, we are going to use EFS with EC2 Linux instance.
Create EFS Using CloudFormation
Let's create EFS using CloudFormation. You can use the following template to create the resource. Just pass the appropriate values when asked while creating the resource.
- Just save the below template in a file with a file extension JSON.
x
{
"AWSTemplateFormatVersion": "2010-09-09",
"Description": "This cloudformation will create encryped Elastic File System.",
"Parameters": {
"SystemName" : {
"Type": "String",
"Description" : "System for which this cloudformation is created.",
"Default" : "myLinuxSystem"
},
"Environment" : {
"Type": "String",
"Description" : "Environment for which this cloudformation is getting created",
"Default" : "dev"
},
"RegionName" : {
"Type": "String",
"Description" : "Region Name in which resources are to be created.",
"Default" : "eu"
},
"BackbonePrivateSubnetAZa": {
"Type": "String",
"Description" : "Private subnet in availability zone A"
},
"BackbonePrivateSubnetAZb": {
"Type": "String",
"Description" : "Private subnet in availability zone B"
},
"EC2InstanceLinkedEFSFileSystemTagName": {
"Type": "String",
"Description": "Tag name of Elastic File System.",
"Default": "elastic-file-system"
},
"FileSecurityGroup": {
"Type": "String",
"Description": "File System Security Group"
}
},
"Resources": {
"EFSFileSystem": {
"Type" : "AWS::EFS::FileSystem",
"Properties" : {
"FileSystemTags": [
{
"Key": "Name",
"Value": { "Fn::Join": [ "-", [ { "Ref": "SystemName" }, { "Ref": "Environment" }, { "Ref": "RegionName" }, { "Ref": "EC2InstanceLinkedEFSFileSystemTagName" } ] ] }
}
]
}
},
"EFSMountTargetAZa": {
"Type": "AWS::EFS::MountTarget",
"Properties": {
"FileSystemId": {"Ref": "EFSFileSystem"},
"SubnetId": {"Ref": "BackbonePrivateSubnetAZa"},
"SecurityGroups": [{"Ref": "FileSecurityGroup"}]
}
},
"EFSMountTargetAZb": {
"Type": "AWS::EFS::MountTarget",
"Properties": {
"FileSystemId": {"Ref": "EFSFileSystem"},
"SubnetId": {"Ref": "BackbonePrivateSubnetAZb"},
"SecurityGroups": [{"Ref": "FileSecurityGroup"}]
}
}
},
"Outputs" : {
"ElasticFileSystem" : {
"Description": "Elastic file system.",
"Value" : {"Ref": "EFSFileSystem"}
},
"EFSMountTargetAZaId" : {
"Description": "EFS mount target Id in availability zone A.",
"Value" : {"Ref": "EFSMountTargetAZa"}
},
"EFSMountTargetAZbId" : {
"Description": "EFS mount target Id in availability zone B.",
"Value" : {"Ref": "EFSMountTargetAZb"}
}
}
}
- Open the AWS console and login with your credentials.
- Open CloudFormation. You can traverse there by clicking on Services and then typing CloudFormation on the top right search bar.
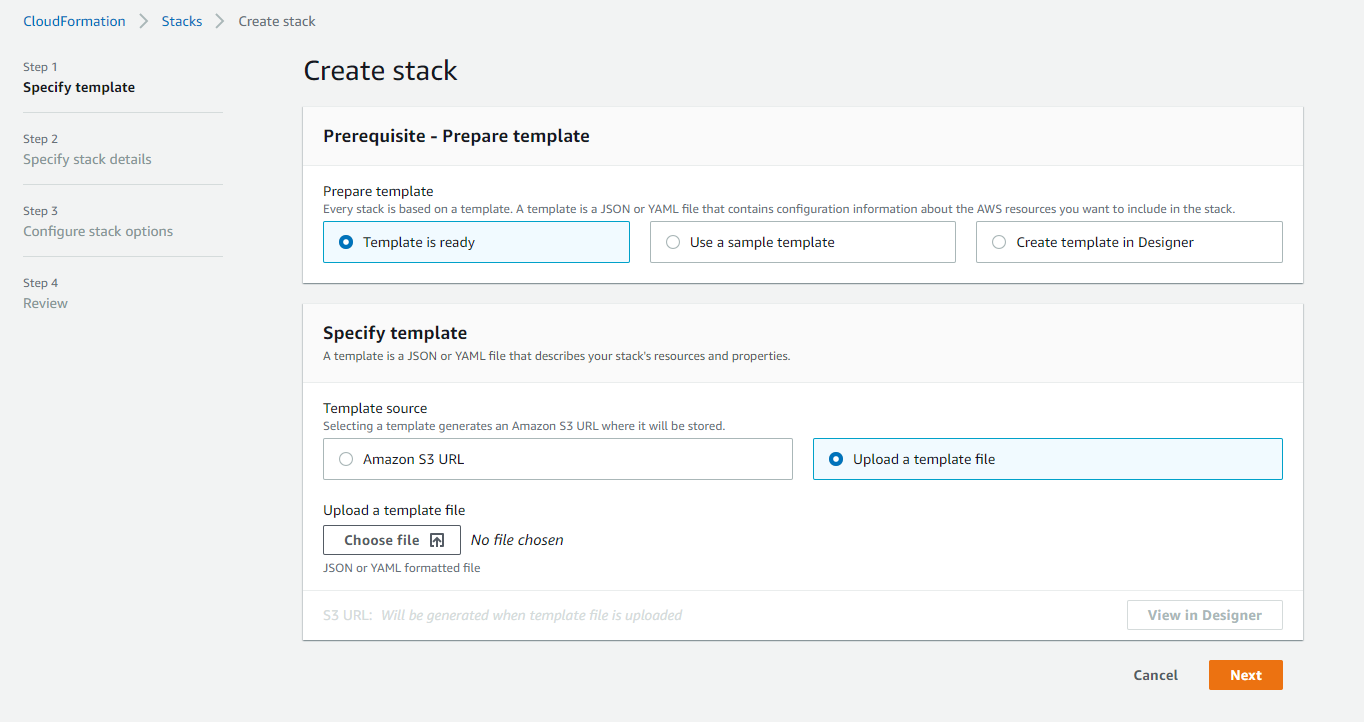
- Once there, click on the Create Stack (With new resource (standard)) button.
- You will see a screen similar to one below:
![]()
- Click on Upload template file and then Choose file.
- Upload the template JSON file which you have saved on your system from previous steps.
- Provide the values asked on the screen. There are few default values which are already provided in the template. Modify them as per your need.
- Follow the wizard to create the required stack.
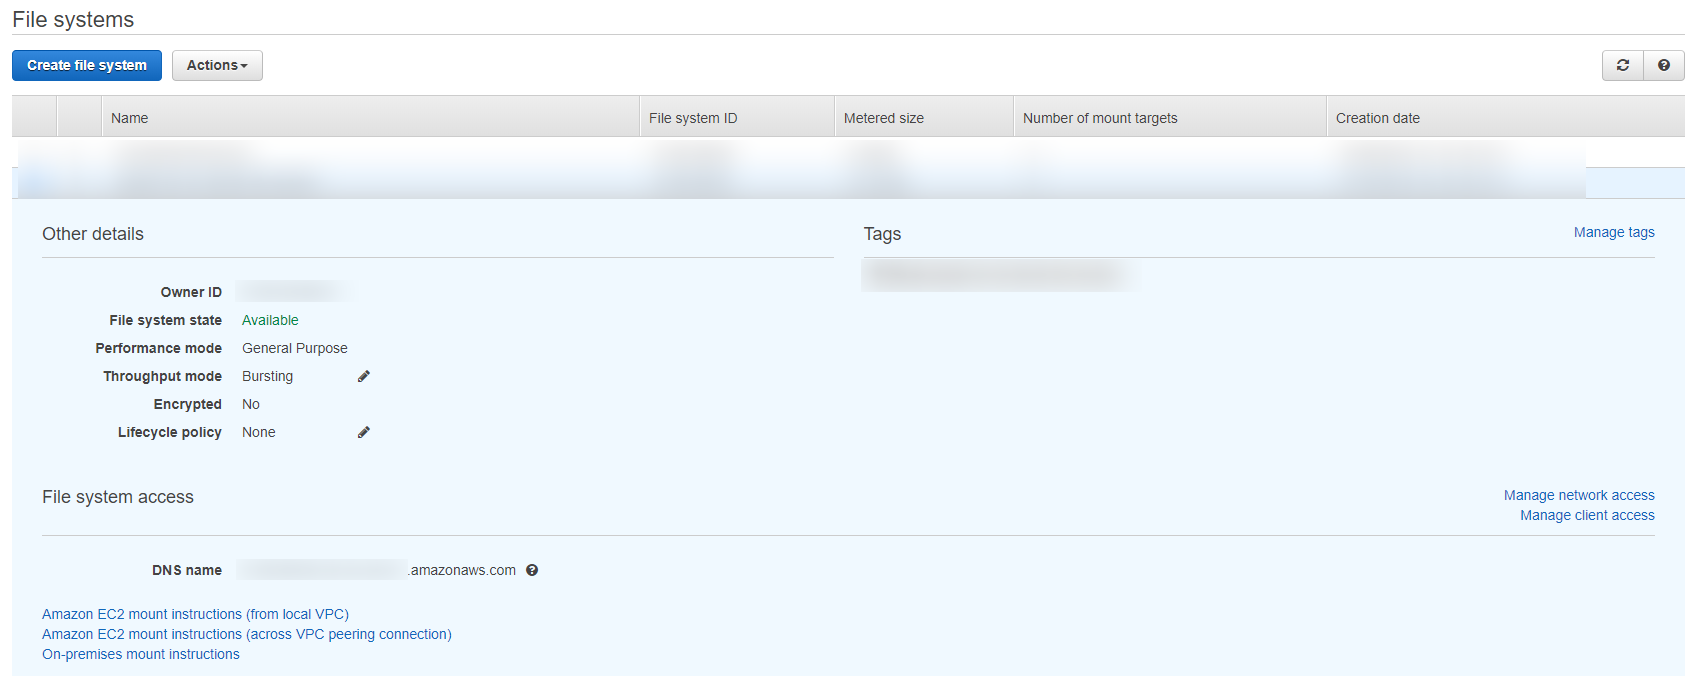
- After some time, you will see the resources created.
- You can go to Services -> EFS and see the resource created.
![See created resources]()
Attaching EFS with your EC2 instance.
- Login to your EC2 instance.
- Log in as superuser. You can use the following command as well:
-
Shell
xxxxxxxxxx1
1sudo su
- Execute the following command to create a file directory that will be mounted to save the data on EFS.
-
Shell
xxxxxxxxxx1
1mkdir -p /mnt/myefsdata/2chown ec2-user:ec2-user /mnt/myefsdata/
xxxxxxxxxx
# mkdir -p /mnt/myefsdata/
# chown ec2-user:ec2-user /mnt/myefsdata/
- Now you need to execute the following command after modifying, to mount the newly created EFS
-
Shell
x
1mount -t nfs4 -o nfsvers=4.1,rsize=1048576,wsize=1048576,hard,timeo=600,retrans=2 fs-xxxxxxxx.efs.eu-west-1.amazonaws.com:/ /mnt/myefsdata
- is the DNS name of the EFS which you have created.
- Execute the following command to know if the drive is mounted successfully:
-
Shell
xxxxxxxxxx1
1df -h
- You will see the output similar to one below:
-
Shell
x
1Filesystem Size Used Avail Use% Mounted on2devtmpfs 3.8G 72K 3.8G 1% /dev3tmpfs 3.8G 4.0K 3.8G 1% /dev/shm4/dev/nvme0n1p1 50G 6.7G 43G 14% /5fs-xxxxxxxx.efs.eu-west-1.amazonaws.com:/ 8.0E 14G 8.0E 1% /mnt/myefsdata
- Now anything that you will save under /mnt/myefsdata will be stored to EFS attached.
Congratulations.!! You Did It..!!
Opinions expressed by DZone contributors are their own.
Comments