Data-Driven Automated Testing Using Testsigma
Learn how to use an automated testing tool to perform data-driven tests, more easily than with Selenium, which requires more experience.
Join the DZone community and get the full member experience.
Join For FreeEvery software product deals with some form of data input that comes from either the user or an external system. It is imperative that execution of test cases is done with carefully crafted test data that mimics the expected input data to ensure optimal test coverage.
Test data can be anything you can think of, such as user credentials, input/output data, uploaded files, database tables, etc. The test data need not be hard-coded into the test framework in case of automated testing. It can be imported from external files (Excel, JSON, properties file, or even plain text files) or data sources and fed into our automated test cases. The test steps iterate for the data and consequent rows of data are fed to the test steps as input.
Though Selenium is a good tool for creating and executing data-driven testing, it can be quite overwhelming for a beginner, or even an experienced manual tester. Testsigma Automated Testing Tool provides an easy to use interface to provide the test data, which makes incorporating data-driven testing easier. This article discusses how data-driven testing is done using Testsigma.
While creating test cases with Testsigma Test Automation Tool, data can either be hard-coded into the test steps or passed from the Test Data Profile for data-driven testing. We have already talked about the former, i.e. normal non-data-driven test cases in this article - Web Application Automated Testing With Testsigma.
We will be talking about adding data-driven testing capabilities to a regular test case in the current article.
Create/Import Test Data for Data-Driven Testing
You can navigate to the Test Data page from the main page of Testsigma Test Automation Tool by going through Applications > Select Application > Select Version > Test Data.
Note: It is highly recommended to go through our previous article(linked above) which explains creating a non-data-driven test case before going forward with this article to become familiar with the creation of normal test cases.
Let us begin by creating a Test Data Profile now.
In Testsigma Test Automation Tool, a Test Data Profile can be created using three methods:
- Creating a Test Data Profile using JSON Object format.
- Creating a Test Data Profile using Test Data Table entry.
- Importing a Test Data Profile from an Excel file.
Creating a Test Data Profile Using JSON Object Format
After reaching the Test Data Profile page, click on the Create button to open the Create Test Data Profile page.

In the Create Test Data Profile page that opens up, enter a name for the Test Data Profile.
Enter the test data in JSON Objects format in the Enter Test Data Profile box.
Click on the Create button to create the Test Data profile.
Creating a Test Data Profile Using Test Data Table Entry
In the Create Test Data Profile page, enter a Name for the Test Data Profile.
Enter the Test Data in tabular form as a set of name-value pairs similar to the data shown in the image below:
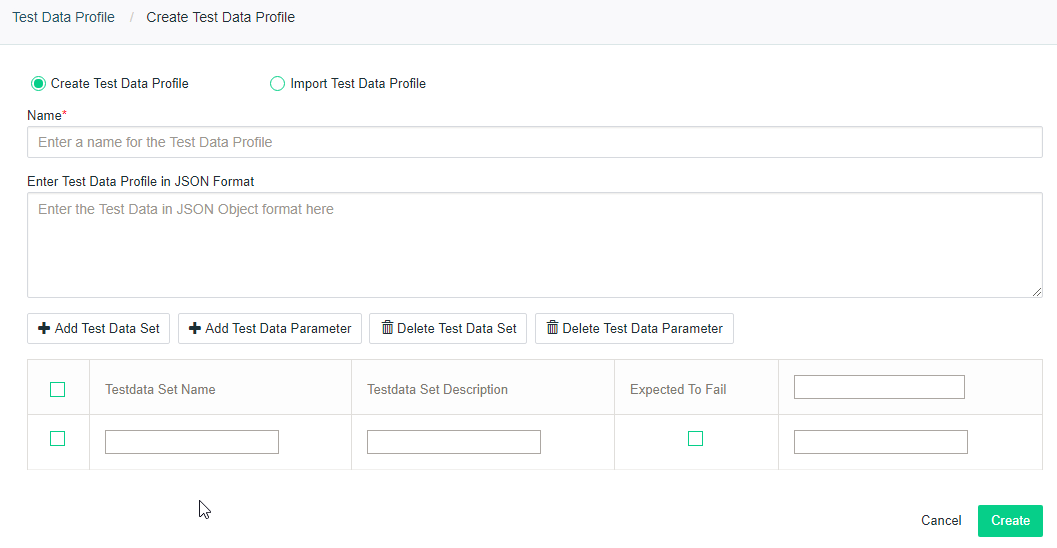
The very first line on top of the table is the Headers line. The first three column headers are constant and we can specify the parameter names in the remaining columns of the header row.
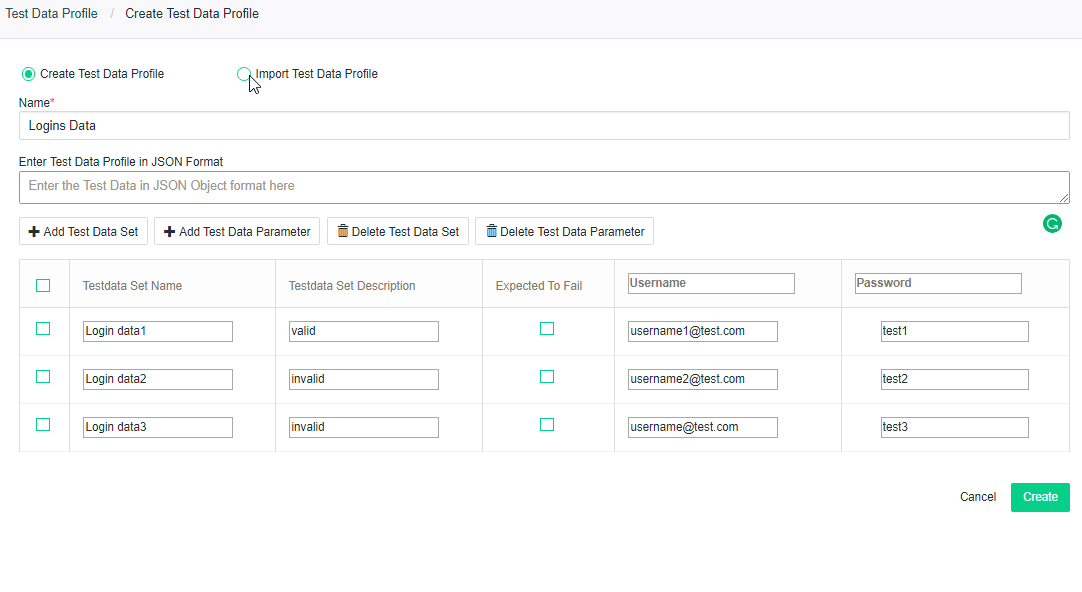
In this case, there are two test data parameters: Username and Password. We can add more parameters by clicking on the Add Test Data Parameter button on top of the table.
Each row of the table specifies different sets of data for the two test data parameters.
"Expected to Fail" is used to indicate negative test data and the test result will be marked as "Passed" if the test fails with the negative data. This can be used for negative testing.
Importing Test Data From an Excel File
You can also choose to import the Test Data Profile from an external file such as a Microsoft Excel file.
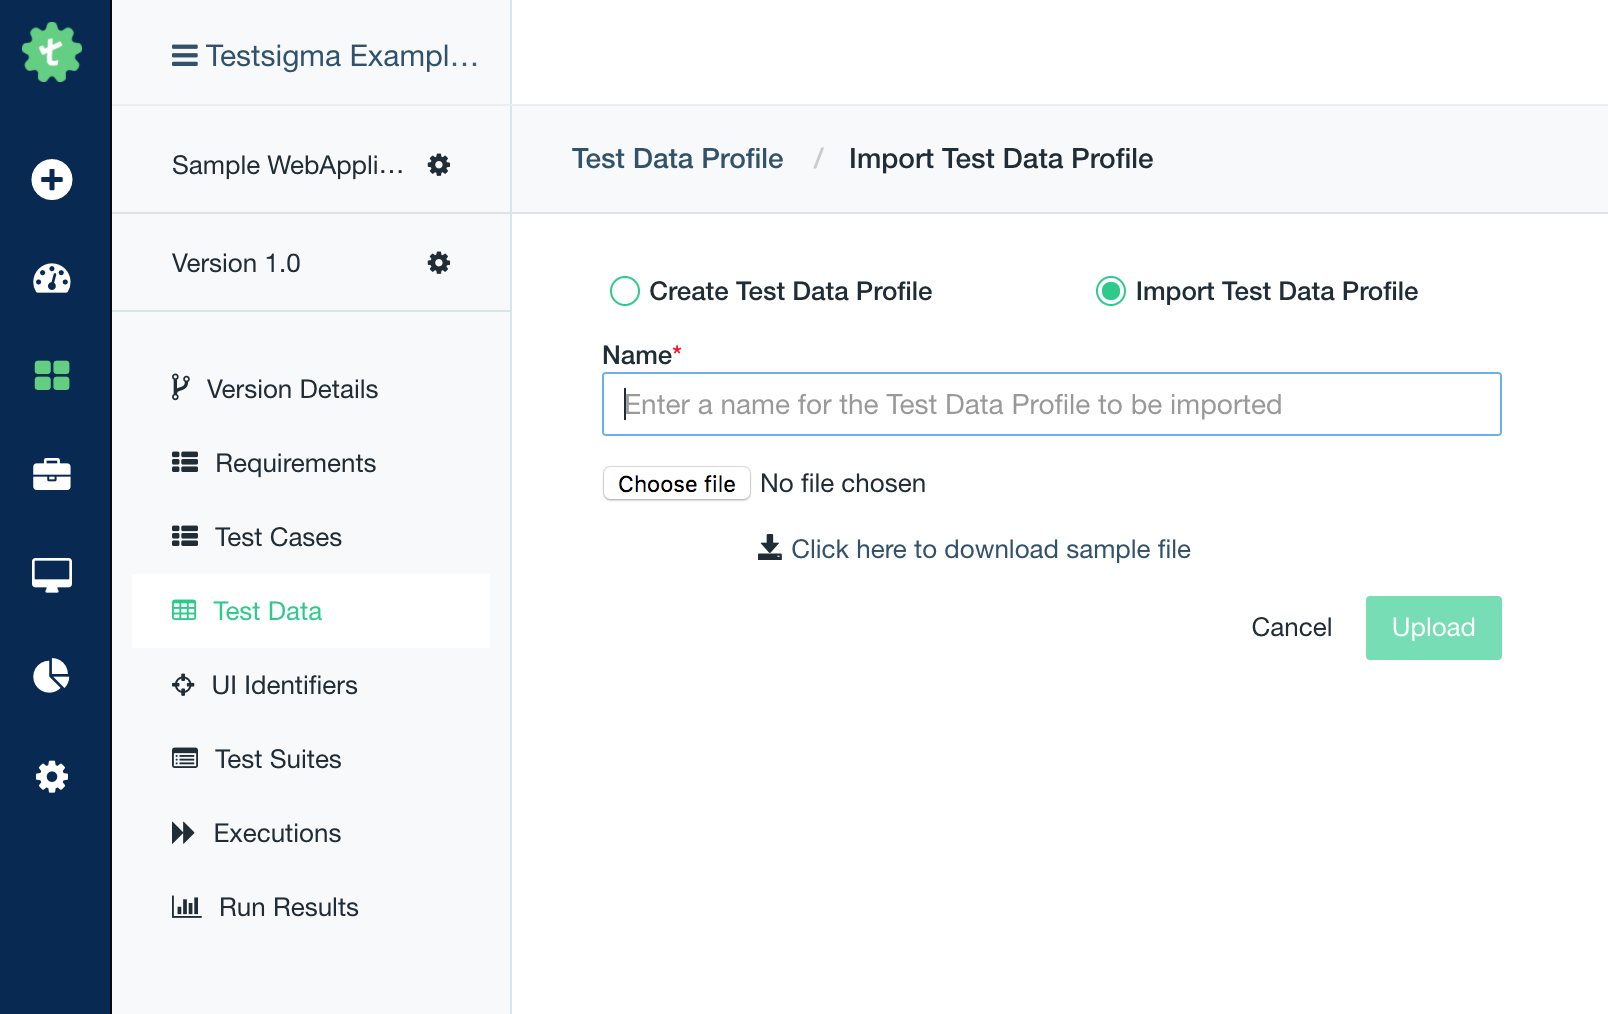
Click on the Create button in the Test Data Profile Page and select the "Import Test Data Profile" radio button.
Enter a name for the Test Data Profile.
Click on Upload and select an Excel file containing the test data to upload.
Note: Before uploading an Excel file containing the test data, you may need to convert it to a format that is recognizable by Testsigma Test Automation Tool. The required format is pretty straightforward and you can download a sample test data file from the Import Test Data Profile page.
Once the file is uploaded, you can see the name you specified while importing the test data on the list of Test Data Profiles page.
After the Test Data Profile is created, you can use it in any of your test cases. That is discussed in the next section.
Creating a Data-Driven Test Case for Automated Testing
You can navigate to the Test Cases page from the home page by going through Applications > Select Application > Select Version > Test Cases.
- Click on the + Test Case button to open the Create Test Case page as shown below:
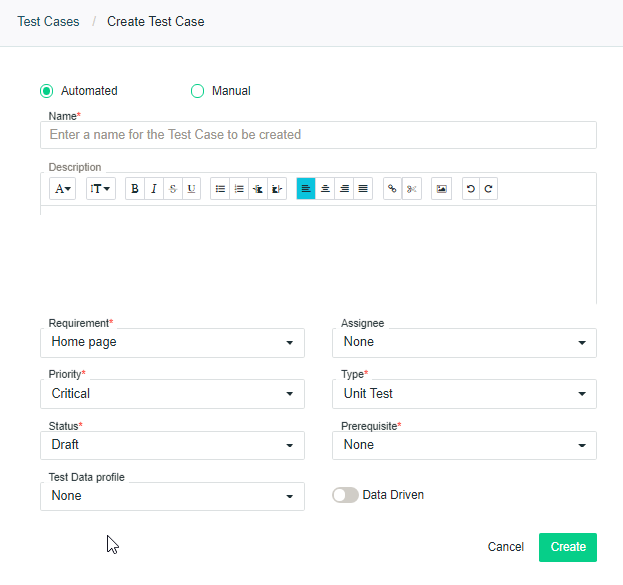
Enter all the required details such as name, requirement, assignee, priority, etc.
- Provided the Test Data Profile is already created, we can select the Test Data Profile in Test Data Profile field while creating the test case.
Finally, toggle the Data Driven radio button to the right to make a data-driven test case.
Using Test Data in Data-Driven Test Steps
Once the Test Data Profile is selected in the test case creation step and a test case is created, we can use the Test Data Profile in a test step.
While using the Type [test data] in [UI Identifier] grammar in Test Steps, double-click on [test data] part and clear it using delete key to get the available Test Data types as a drop-down list.
From the list, select @|Parameter| block and then clear the Parameter text block. Start typing between the two '|' symbols to get a suggested list of parameters. Username and Password will be visible in our case if the Test Data Profile is selected correctly.
Complete the Test Step with UI identifier details and click on create to create the Test Step. Add a few more Test Steps if required.
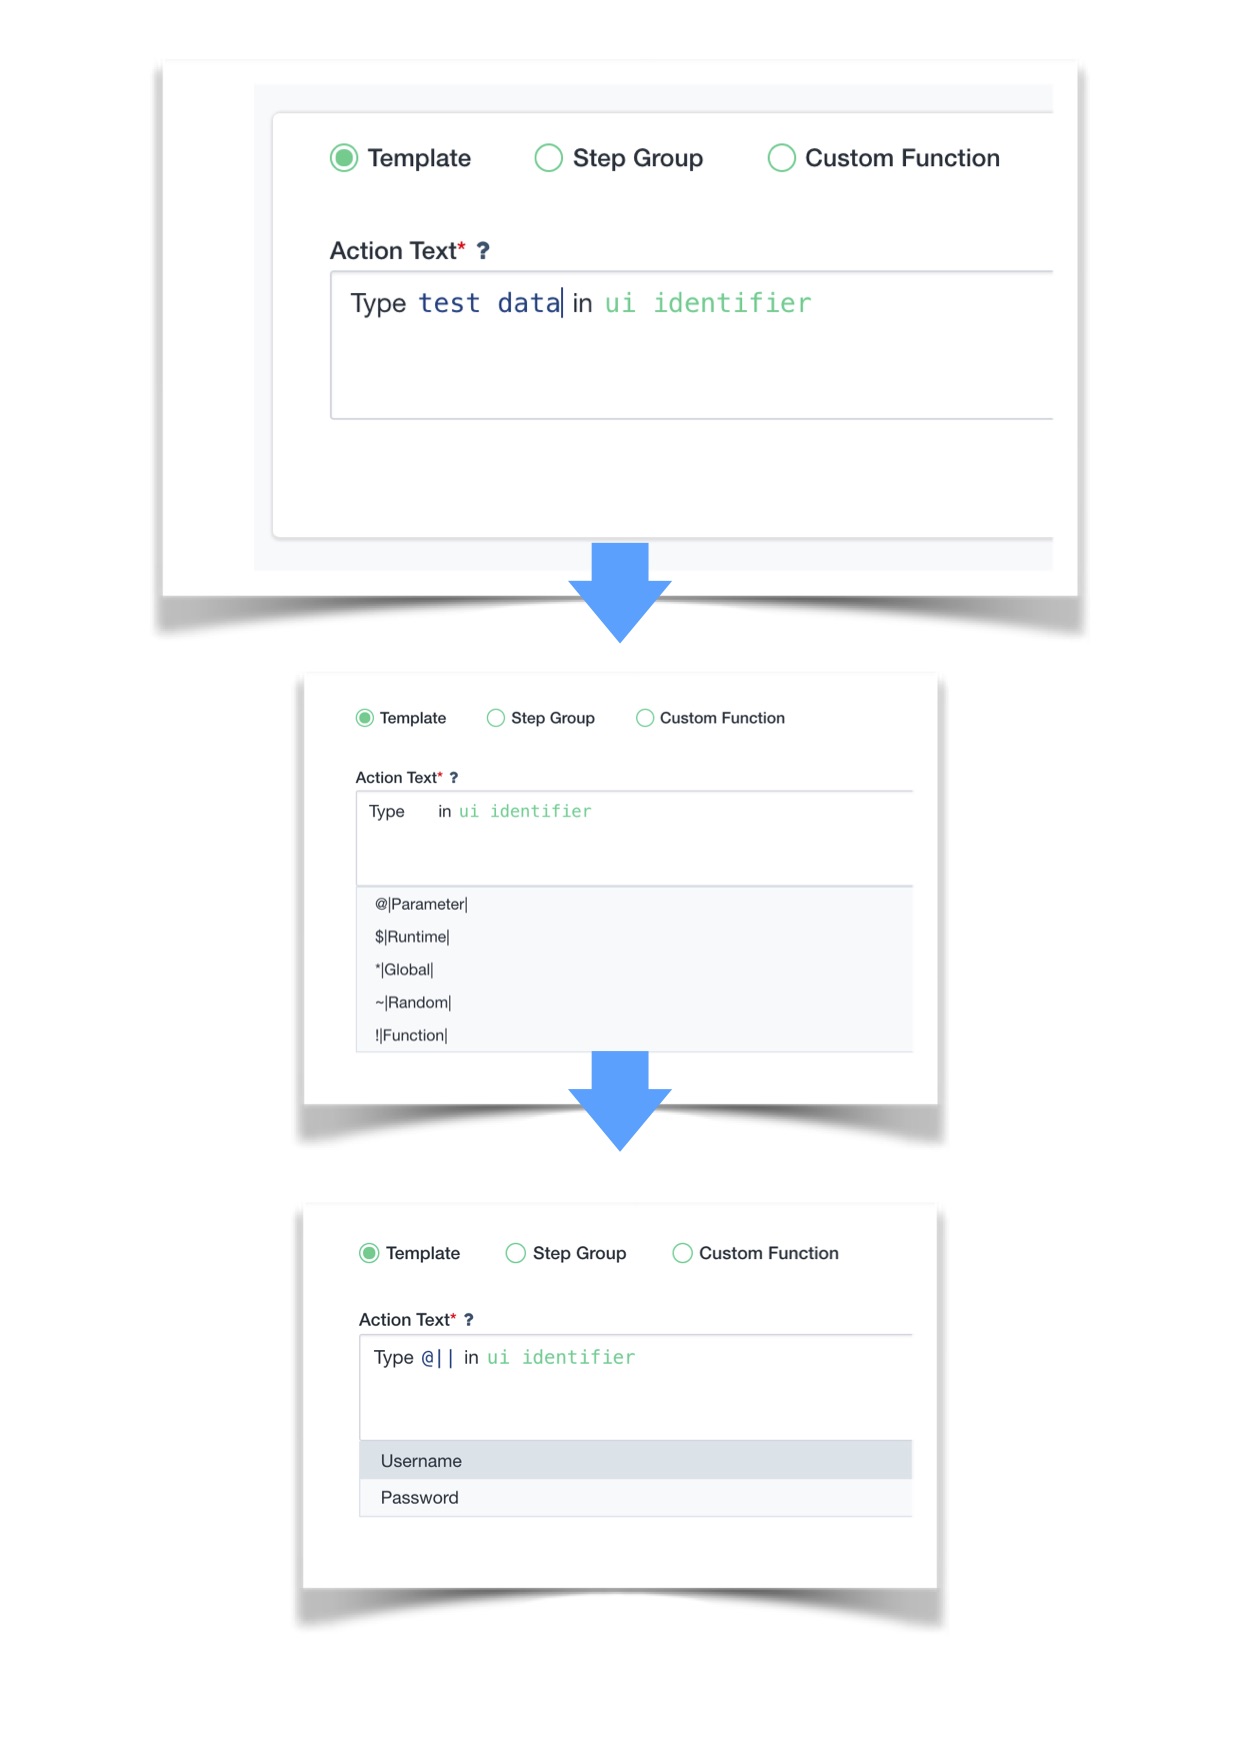
When executed, the test case will be iterated with the Parameter values, i.e. the steps will be repeated as many times as there are data sets in the Test Data Profile.
Executing the Test Steps
Now that all the automated Test Steps are added, let us see how they are executed.
There are 3 execution methods in Testsigma:
Dry Run is the quickest method to execute a single test case in Testsigma.
Quick Run can be used to execute a set of test cases quickly without creating a Test Suite.
Parallel Execution is the most powerful option and can be used to execute multiple test cases and Test Suites (a group of test cases). Parallel Executions can be done on your local devices (Hybrid Execution), on Testsigma’s very own cloud infrastructure called Testsigma Lab and also on third-party platforms like BrowserStack and Sauce Labs.
Let’s perform a Dry Run of the automated test case.
Simply click on Run at the top right corner of the Test Case details page.
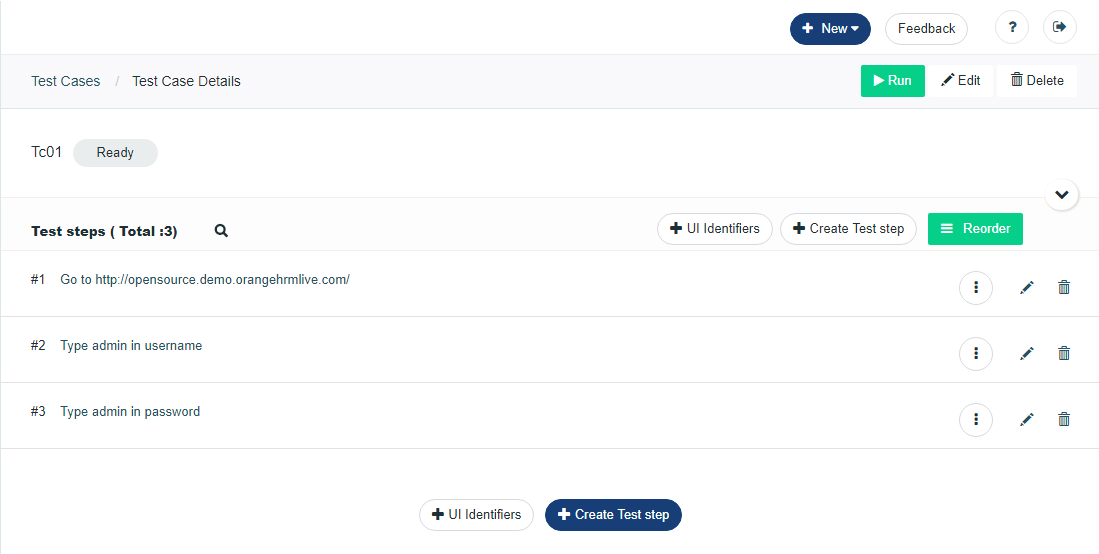
In the next page that opens up, enter the details of the execution like the Name of the Execution, The Operating System, OS version, the browser and the browser version being used for the test execution.
We are choosing Testsigma Lab as the Execution Model here. Click on Create and Run.
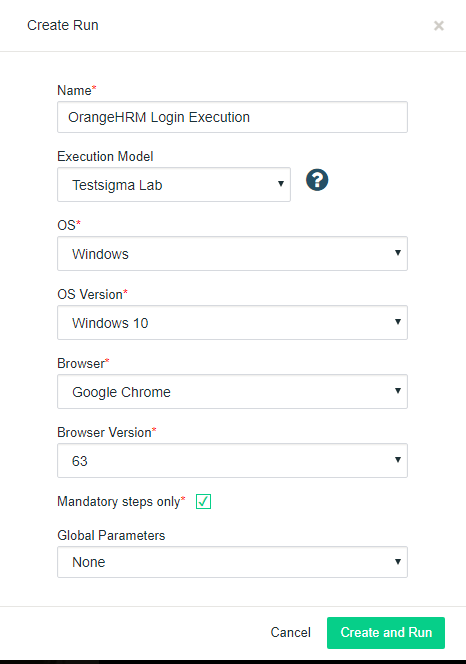
The test case execution will start now.
Viewing Results
We will be taken to the Run Results page once the Execution is started.
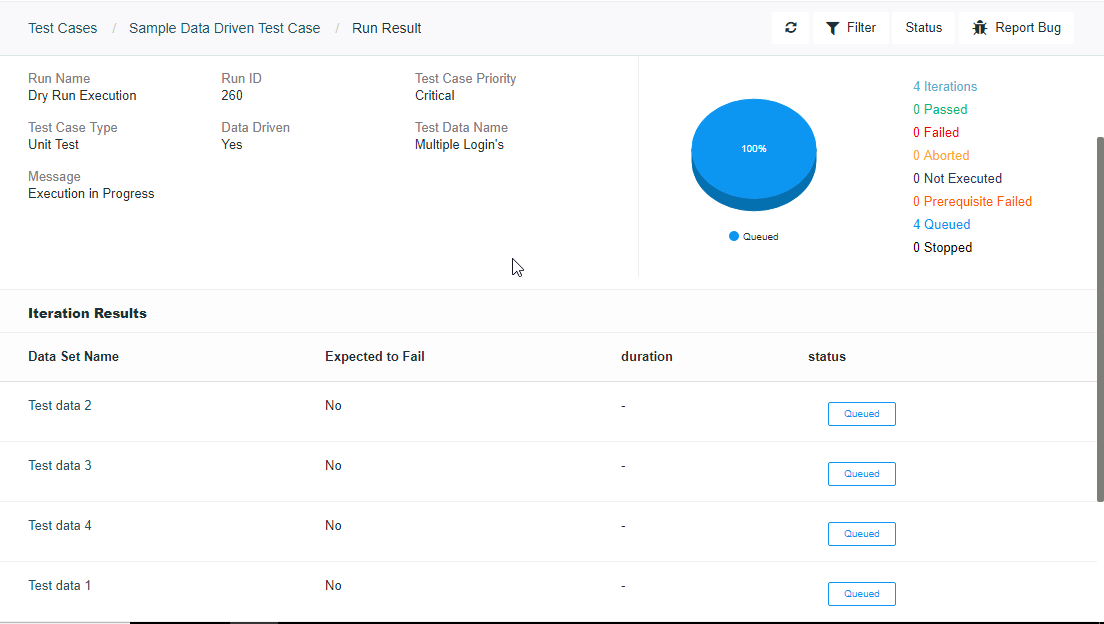
Wait for some time once the Execution is started and click Refresh. Depending on the number and complexity of Steps it will take some time to complete. On an average, a test of 5 steps will be complete in less than 30 seconds.
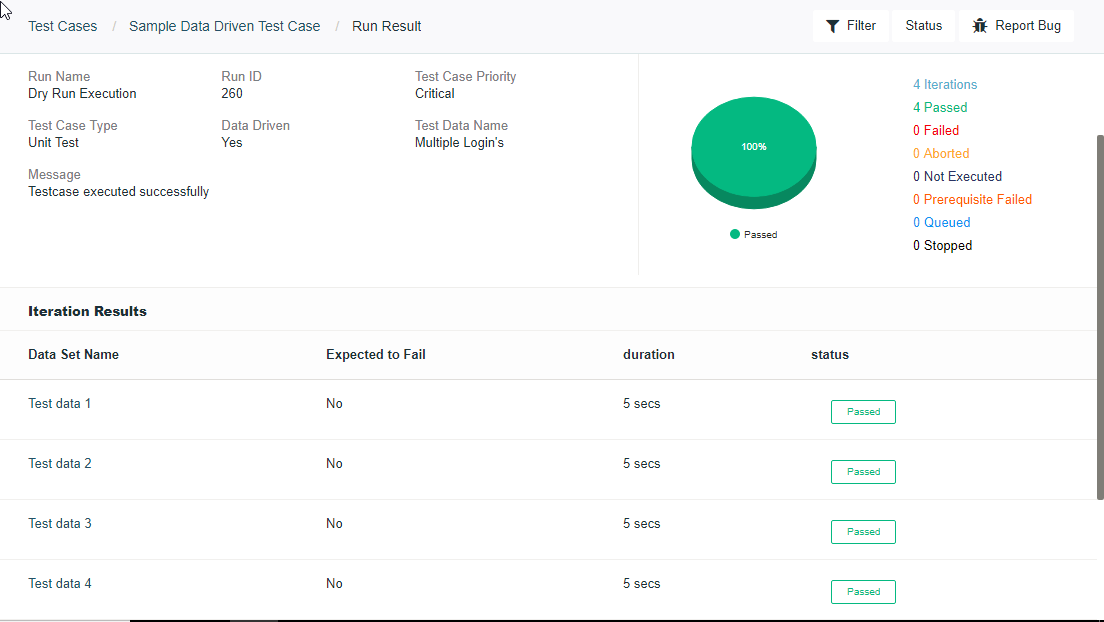
Note: Dry Run results are not shown in Run Results page as it is for Quick Run and Regular Execution. They can be viewed later only in the corresponding Test Case Details page under Recent Dry Run Results.
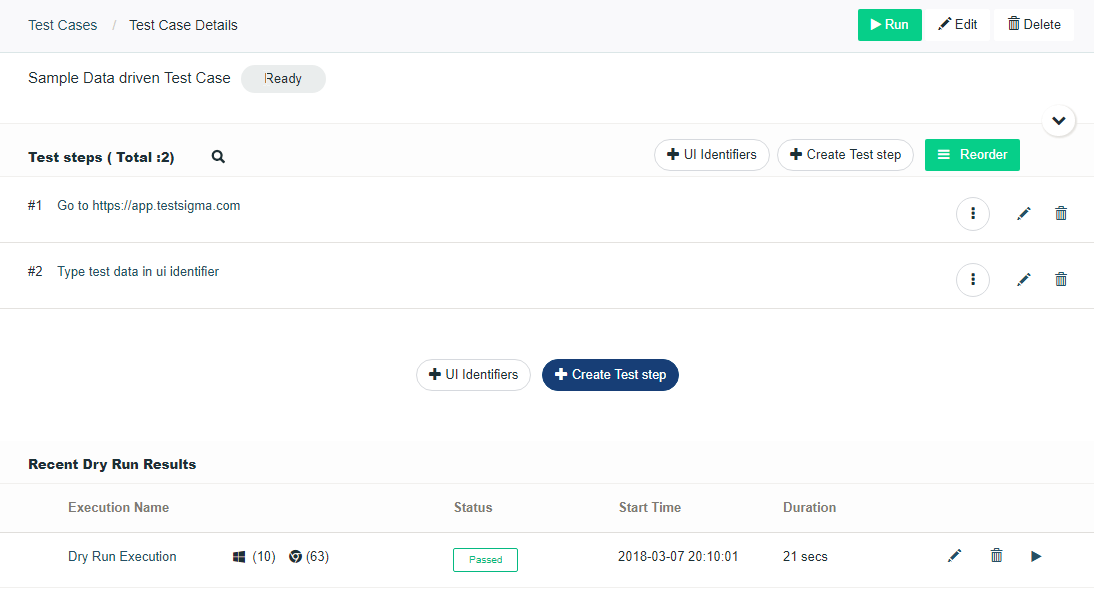
After clicking on the Execution name under Dry Run Results on Test Case details page, you will be taken to the Run Results page for the Dry Run Execution.
Click on the Data Set name under Iteration Results to view the results and screenshots of each Test Step.
That's all we need to create a data-driven test and execute it.
Happy testing!
Opinions expressed by DZone contributors are their own.

Comments