Delivering Your Code to the Cloud With JFrog Artifactory and GitHub Actions
Artifactory and Github actions work great together to manage your cloud deployments. In this post, we’re showing an example that deploys an application to Microsoft Azure
Join the DZone community and get the full member experience.
Join For FreeIntroduction
Artifactory and GitHub actions work great together to manage your deployments to the cloud. In this post, we’re showing an example that deploys an application to Microsoft Azure. This case involves an Azure web app, but the techniques we’re showing today could be used to deploy to any cloud service, virtual machines, or Kubernetes. Also, the application highlighted today is written in Java, but you could use any type of application code in the same way. I’m using Azure web apps because it has built-in CI/CD integration and it integrates easily with JFrog products, including Artifactory and X-Ray. The IDE I’m using is Visual Studio Code, an open-source, free text editor you can get at code.visualstudio.com. Our code is in a GitHub repo, and we're storing some of the dependency artifacts using Artifactory. Here’s a screenshot of the application:
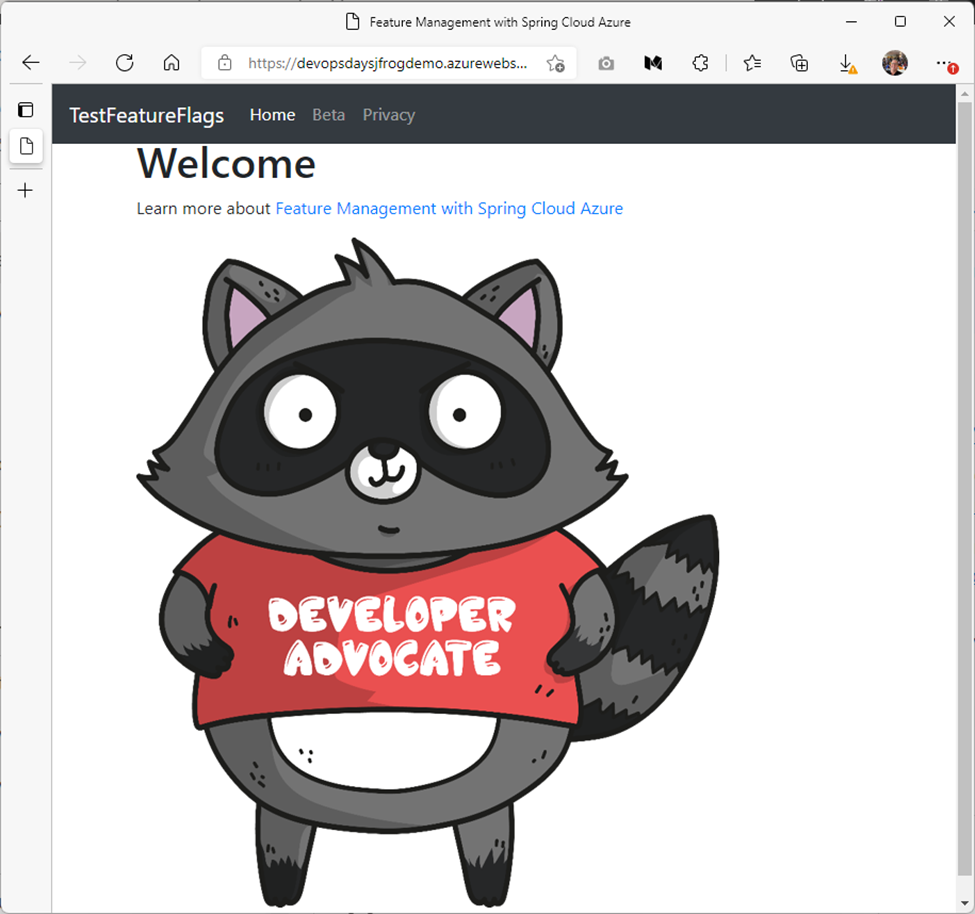
It's a Spring Boot application that shows the Microsoft Developer Advocate mascot named Bit. You can find the source code in this repo.
Controlling Your Application Using Azure App Configuration Manager
The demo app has built-in code that relies on an Azure App Configuration manager to turn features on and off. The feature manager enables A/B testing, blue-green deployments, and other features from a remote, centralized, and secure place. The feature is enabled in this example displaying an image of the Microsoft Developer Advocate mascot named Bit. If the feature flag is disabled, you'll see a version of this application without Bit. The cool thing about app configuration is that you can turn features on and off depending on certain conditions, so users see a version of the page that you want them to see without changing your code and deploying a new version. The reason I’m showing this simple example is that this requires a custom connection string for your application, as most applications do. You’ll see why that’s important as I go through the demo and show you where you need to customize your CI/CD workflow and the application to make connections to other services and/or data sources that work securely with your cloud application. We’ll also show you the best practices for integrating with JFrog Artifactory to store and version the artifacts that the application depends on.
Setting Up an Artifactory Account on Azure
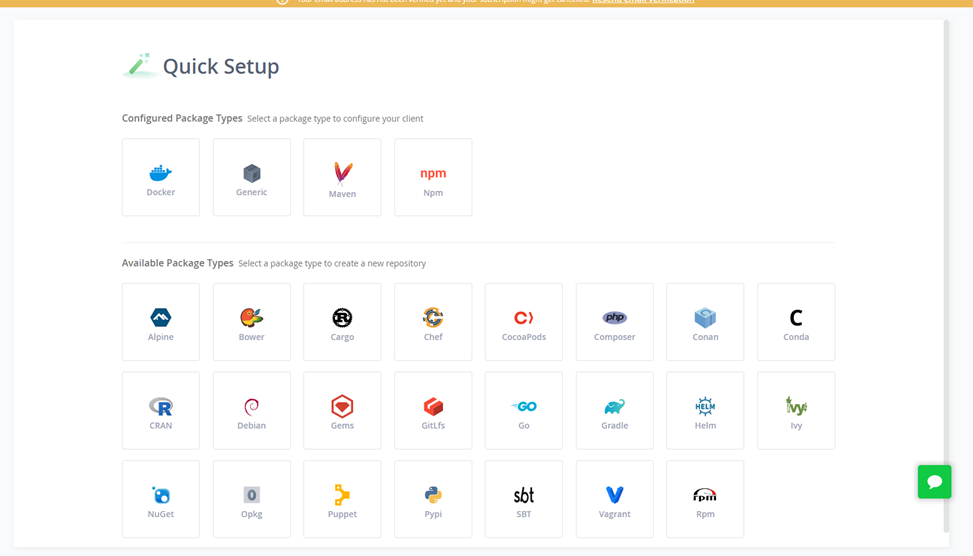
JFrog has hosted cloud-specific versions of tools, which is advantageous if you have compliance requirements that determine the cloud that you need to choose, or you might just want to have your products hosted together with everything managed in one domain for identity management. To set up Artifactory on Azure, go to this link, choose the region you want for hosting, provide a username password, and you'll get something that looks like this:
Authenticating With Your Artifactory Repository Securely Using GitHub Actions
To authenticate with the Artifactory server during your CI/CD build in GitHub actions, you must supply your username, password, and hostname that you use for the Artifactory repo in GitHub actions via your settings.xml file.
However, in this case, the settings.xml file needs to be in a public repo, and you don’t want to share your Artifactory authentication information in settings.xml with the world, for hopefully obvious reasons.
To make the settings.xml work with GitHub actions while preserving the security of your Artifactory repo, we use GitHub secrets. You also store the connection strings to control feature flags in the GitHub repo, and to authenticate with the app service that runs the application. I’ll share more details on setting up the feature flags and authentication with an app service later. For now, here are the secrets we’re using for this repo:
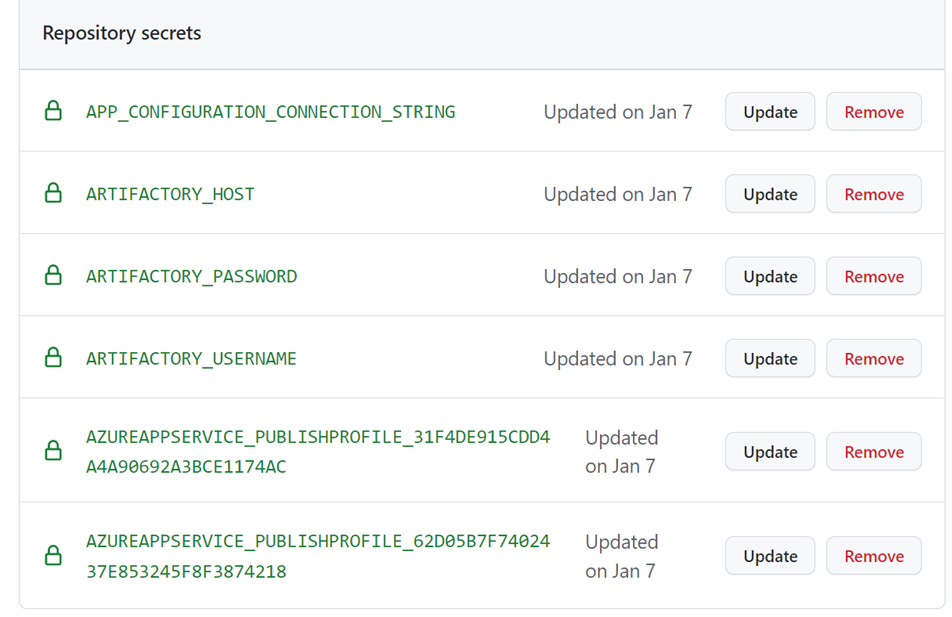
You won’t be able to access my secrets because of GitHub’s built-in security. To create your own secrets, go into the repository named default-maven-virtual repository in your JFrog account, click the Configure tab, enter your JFrog account password, then click the lock to add your username and password. Click generate settings, download the settings.xml file, and save it locally. Note that you could create your own Maven repository via the Quick Start wizard, but for this exercise, we are using the default Maven repositories that already exist in your JFrog account.
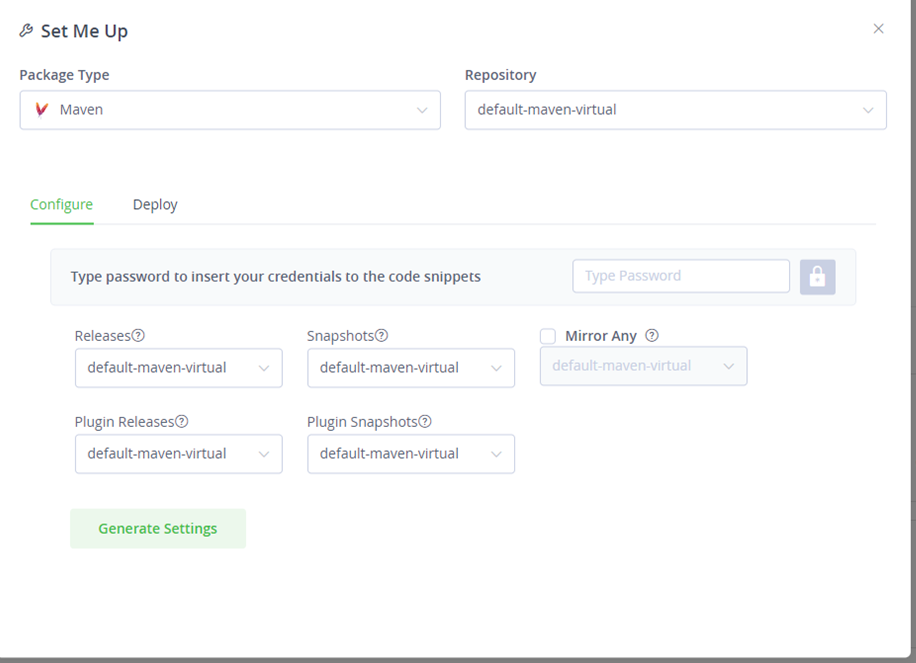
Next, fork this repo, and then add the host, password, and username in the settings.xml file as secrets in your fork of the repo, with the names ARTIFACTORY_HOST, ARTIFACTORY_PASSWORD, and ARTIFACTORY_USERNAME.
If you use those exact names for your secrets, the secrets in your fork will automatically work with references that I’ve already added to the settings.xml file that I’ve included in my sample repo. Here’s how those references are set up in the provided settings.xml file:
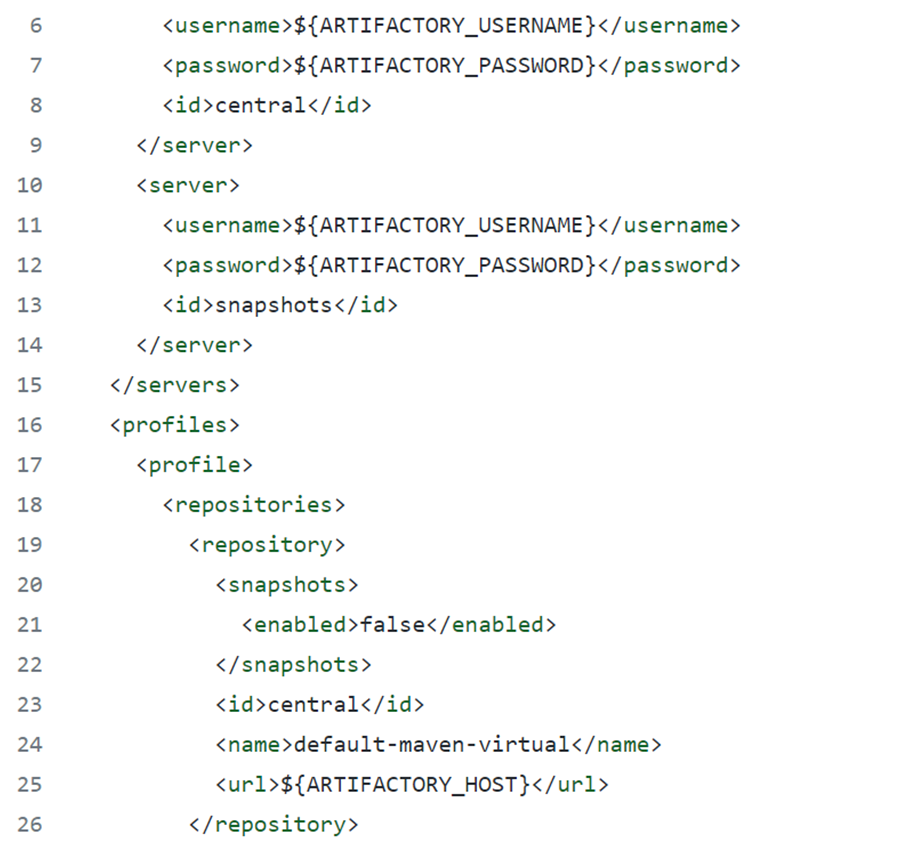
This preserves the security of the authentication information for your Artifactory repository while enabling authentication from a public GitHub repo.
Activating Artifactory Repository Artifact Archiving in pom.xml
Next, you want to enable archiving of your artifacts in Artifactory. In your JFrog account, go back in the configuration settings for the default-maven-virtual repo and click the deploy tab. This provides you with a distributionManagement snippet that you can add to your pom.xml to store Maven build artifacts on Artifactory. Add them to the pom.xml in your fork of the repo, replacing the existing distributionManagement snippet in the existing pom.xml that contains references to my repo.
At this point, you have a working copy of the GitHub repo that authenticates with Artifactory and is ready to run on Azure. The rest of the setup will be executed in the Azure portal. We’ll be creating two services — an Azure App Configuration service to manage the feature flag in the app and an Azure App Service to run the application.
Setting Up Feature Management Using Azure App Config
Go to the Azure Portal and either log in to your existing Azure account or set yourself up for a free trial.
In the search bar at the top of the portal, search for app configuration. You should get results that look something like this:
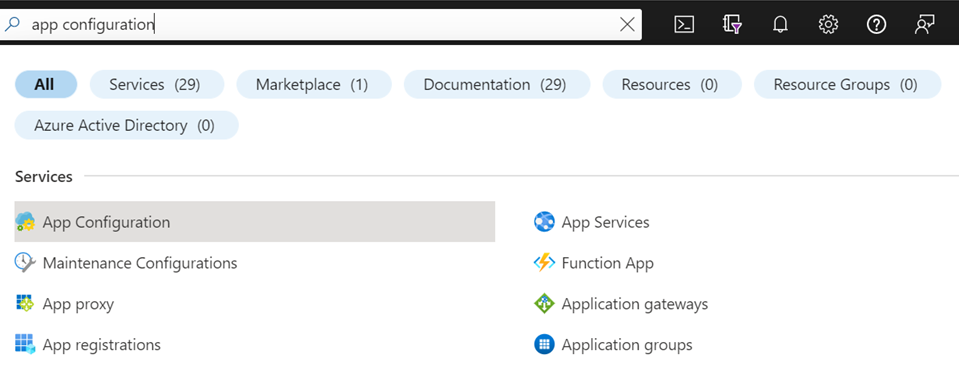
Select app configuration, click the create button, and follow the prompts to set up a new Azure resource group and App Configuration service. If you need more information or have issues, refer to the full Azure App Configuration documentation.
Once your App Configuration is set up, go to feature manager and click add to create a new feature flag. Choose access keys as the authentication method and name your new feature flag Beta.
Next, go to access keys and copy the primary key connection string. Go back to your forked GitHub repo, and go to settings > secrets. Create a new secret with the name APP_CONFIGURATION_CONNECTION_STRING, then paste the copied connection string from the Azure App Configuration as the value.
At this point, you have a GitHub secret that will connect to the feature flag in the Azure App Configuration service. Next, we’ll set up a new Azure App Service.
Create an Azure Web App
If you need more information or have issues setting up the Azure Web App, refer to the Azure App Configuration and deployment documentation.
In the Azure portal, select create a resource, then select new > web app.
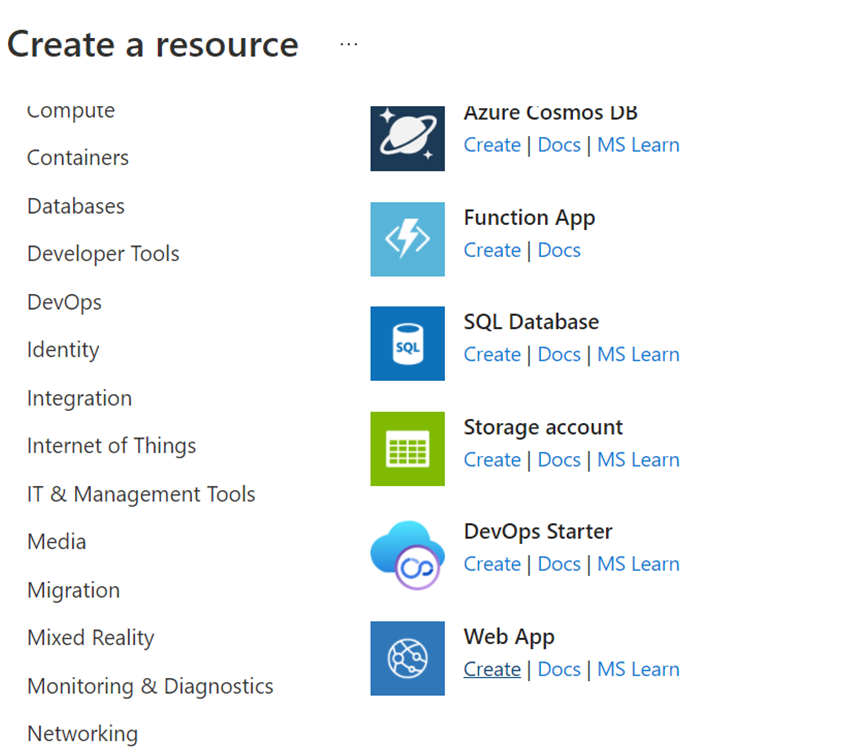
Configure the instance details:
- Choose Java 11 for the runtime stack, Java SE for the Java web server stack, and Linux for the operating system.
In the App Service Plan section, select create new. When creating a plan, you can select the pricing tier of the new plan. In SKU and size, choose the default.
Next, navigate to the web app that you just created, and on the left side, click deployment center.
- Under continuous deployment (CI/CD), select GitHub.
- Next, select GitHub actions and use the dropdowns to select your GitHub repository, branch, and application stack.
On the final screen, you can review your selections and preview the workflow file that will be committed to the repository. If the selections are correct, click Finish. This will commit the workflow file to the repository. The workflow to build and deploy your app will start immediately. Note that this workflow will fail, as we have not yet set up a connection string to the App Configuration in the GitHub workflow.
Add a Connection String Secret Reference to the Generated GitHub Action
For the GitHub action to build, you need to add a reference to the feature flag secret that you’ve already set up. Edit the generated workflow in the .github/workflows directory of the repo, and then edit and add this reference under the name:
env: APP_CONFIGURATION_CONNECTION_STRING: ${{ secrets.APP_CONFIGURATION_CONNECTION_STRING }}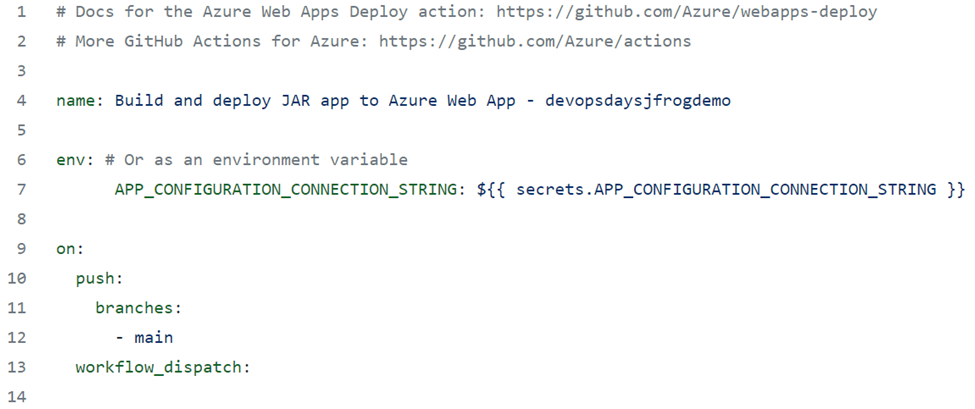
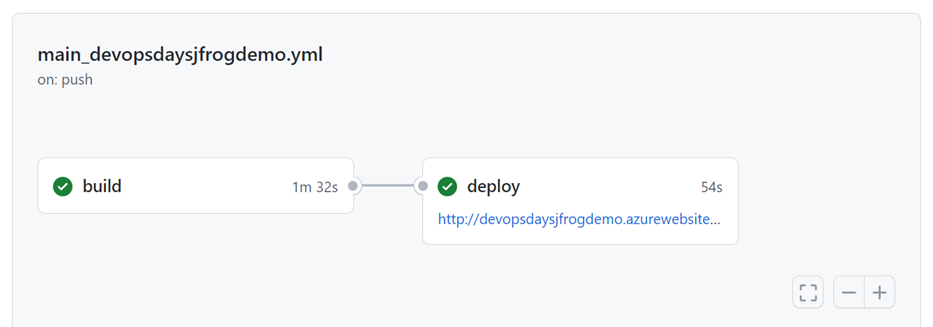
When you commit the code to the repo, the GitHub action will restart, and the build and deploy jobs in the action should deploy with no issues:
Add the App Configuration Connection String to the Azure Web App
When you click on the link to the Azure Web App from the GitHub action, add append or welcome to the end of the URL:
https://<yourAzureWebAppURL>/welcomeThe app will open but the application itself will not be running. That’s because the app startup fails (as expected). There is one more step to get the Azure Web app to run — connecting the new Azure Web app to the feature flag in the App Configuration.
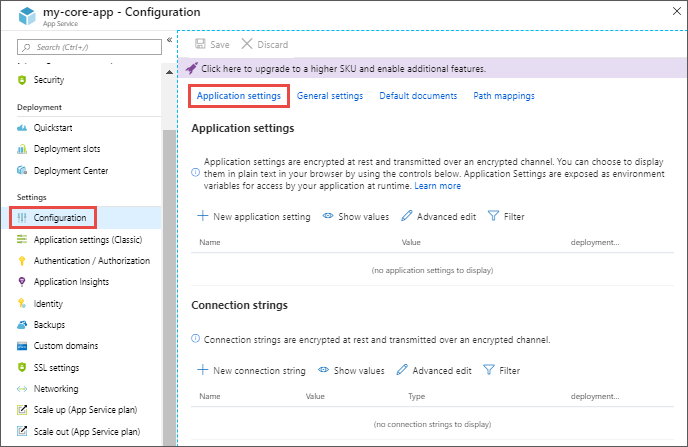
In the Azure portal, open your newly created Azure Web App. In the app's left menu, select configuration > application settings.
To add a new application setting, click new application setting.
The name should be APP_CONFIGURATION_CONNECTION_STRING and the value should be the primary connection string from your App Configuration, starting with endpoint.
When finished, click save.
The Azure Web app should restart at this time. Refresh the website address to see the working website at:
https://<yourAzureWebAppURL>/welcomeThis may take a few refreshes due to caching.
Test the Feature Flag in App Configuration
Open your App Configuration, and enable/disable the Beta feature flag. When the feature is enabled, you should see our Developer Advocacy mascot bit and when disabled you'll see a version without bit.
Summary
Congratulations! You have successfully deployed an example web app to the cloud with JFrog and GitHub actions! Now that you have something up and running to start with, take the opportunity to further enhance the application. Add another feature with a feature flag or take JFrog one step further and scan for security vulnerabilities in the dependencies involved in this application. Good luck on your journey!
Opinions expressed by DZone contributors are their own.

Comments