DZone
Thanks for visiting DZone today,
Edit Profile
  • Manage Email Subscriptions
  • How to Post to DZone
  • Article Submission Guidelines
Sign Out View Profile
  • Post an Article
  • Manage My Drafts
Over 2 million developers have joined DZone.
Log In / Join
Please enter at least three characters to search
Refcards Trend Reports
Events Video Library
Refcards
Trend Reports

Events

View Events Video Library

Zones

Culture and Methodologies Agile Career Development Methodologies Team Management
Data Engineering AI/ML Big Data Data Databases IoT
Software Design and Architecture Cloud Architecture Containers Integration Microservices Performance Security
Coding Frameworks Java JavaScript Languages Tools
Testing, Deployment, and Maintenance Deployment DevOps and CI/CD Maintenance Monitoring and Observability Testing, Tools, and Frameworks
Culture and Methodologies
Agile Career Development Methodologies Team Management
Data Engineering
AI/ML Big Data Data Databases IoT
Software Design and Architecture
Cloud Architecture Containers Integration Microservices Performance Security
Coding
Frameworks Java JavaScript Languages Tools
Testing, Deployment, and Maintenance
Deployment DevOps and CI/CD Maintenance Monitoring and Observability Testing, Tools, and Frameworks

The software you build is only as secure as the code that powers it. Learn how malicious code creeps into your software supply chain.

Apache Cassandra combines the benefits of major NoSQL databases to support data management needs not covered by traditional RDBMS vendors.

Generative AI has transformed nearly every industry. How can you leverage GenAI to improve your productivity and efficiency?

Modernize your data layer. Learn how to design cloud-native database architectures to meet the evolving demands of AI and GenAI workloads.

Related

  • Building a Simple Todo App With Model Context Protocol (MCP)
  • Mastering React App Configuration With Webpack
  • How to Build a React Native Chat App for Android
  • How to Build Slack App for Audit Requests

Trending

  • Understanding the Shift: Why Companies Are Migrating From MongoDB to Aerospike Database?
  • How To Build Resilient Microservices Using Circuit Breakers and Retries: A Developer’s Guide To Surviving
  • Analyzing Techniques to Provision Access via IDAM Models During Emergency and Disaster Response
  • Operational Principles, Architecture, Benefits, and Limitations of Artificial Intelligence Large Language Models
  1. DZone
  2. Coding
  3. JavaScript
  4. Deploy Node Express App on Heroku: 8 Easy Steps

Deploy Node Express App on Heroku: 8 Easy Steps

Deploy your Heroku app including nodejs buildpacks and environment variables with step-by-step explanation and code snippets.

By 
NAMAN AGGARWAL user avatar
NAMAN AGGARWAL
·
Aug. 13, 20 · Tutorial
Likes (3)
Comment
Save
Tweet
Share
33.2K Views

Join the DZone community and get the full member experience.

Join For Free

heroku node js logo

With so many deploying interfaces on the web like firebase, netlify, AWS….none have an effective way to deploy a node app server except Heroku.

Deploying a node app on Heroku using CLI is not difficult if you follow my steps. Otherwise, they pose one or other problems especially when it comes to adding build packs and config vars. Here is a quick guide to deploying a node app with environments variables too.

Before you follow the following steps I believe your project is running well on your localhost.

Step 1: Setting Port Number

In root file like app.js/index.js you must have specified a local PORT, for example, 8000, on which your app runs. To run the app on the Heroku server it gives its global port.

Add the following line:-

app.listen(process.env.PORT || 3000);

app.listen(process.env.PORT || 3000);

A more efficient way to define port

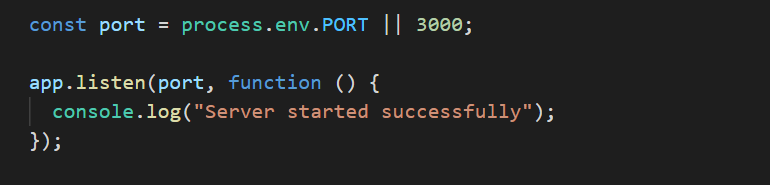
This ensures that when connected to Heroku the app runs on process.env.PORT and if tested locally it can also run on port 3000.

Step 2: Change package.json

While initializing npm it creates package.json.

Here you will find a property of scripts that comes by default.

Just add the following line inside scripts property:-

scripts test and start loop

Snippet from package.json

Step 3: Install Heroku CLI.

You can download it from this link.

After that, verify it by running the following command (if you are on windows)

heroku -v

Step 4: Create Your Procfile

Inside the root of your folder, create a Procfile(make sure that there is no extension in the file and “P” is capital). It is the Heroku file in which you will define the dynos setting like after uploading the app, how Heroku will start the node js web server.

Your Procfile should look like this (specify your project entry file) like app.js, index.js, or anything you named it.

Like mine here is app.js

web: node app.js


Step 5: Heroku Logging from Terminal

Open your terminal inside the root of the project. Type the following command to log in to your Heroku command.

heroku login

If you are not already login it will open a separate web-window asking for your login credentials.

Step 6: Initialize git.

You must initialize your project to a git repo using the following command.

git init

Then type the following command.

heroku create <app-name>

This will create your app in the Heroku server using the specified name.

(If the name is not specified it uses its own generated name which is sometimes not pleasing)

Its now time to push your files to the Heroku platform. (Using the git commands)

git add .

git commit -m “< Any message you want to give>”

Push the changes to the server.

git push heroku master

After that, you can see that we have successfully deployed our node js application.

Step 7: If Your App Has a Separate .env file

.env files are very useful for storing environment variables to keep API keys and other credentials in private mode.

But these pose a problem while deploying to Heroku. So you have to configure Heroku so that its server can also use those hidden keys.

Run the following commands on your terminal

heroku config:set <key=value>

Note: You must do this for all the key and value pairs in your created .env files.

Step 8: View Your Heroku App on The Browser.

In your terminal, type the following command to open the application in life.

heroku open

This will open your app up in the browser

Congrats!! Your app has been successfully deployed and ready to be shared with your friends.

app Express

Opinions expressed by DZone contributors are their own.

Related

  • Building a Simple Todo App With Model Context Protocol (MCP)
  • Mastering React App Configuration With Webpack
  • How to Build a React Native Chat App for Android
  • How to Build Slack App for Audit Requests

Partner Resources

×

Comments
Oops! Something Went Wrong

The likes didn't load as expected. Please refresh the page and try again.

ABOUT US

  • About DZone
  • Support and feedback
  • Community research
  • Sitemap

ADVERTISE

  • Advertise with DZone

CONTRIBUTE ON DZONE

  • Article Submission Guidelines
  • Become a Contributor
  • Core Program
  • Visit the Writers' Zone

LEGAL

  • Terms of Service
  • Privacy Policy

CONTACT US

  • 3343 Perimeter Hill Drive
  • Suite 100
  • Nashville, TN 37211
  • support@dzone.com

Let's be friends:

Likes
There are no likes...yet! 👀
Be the first to like this post!
It looks like you're not logged in.
Sign in to see who liked this post!