Dockerizing, Clustering, and Queueing Up With Mule Enterprise
In this tutorial, you'll learn how to build Mule instances and cluster instances, and Dockerize a Mule application to run in a container.
Join the DZone community and get the full member experience.
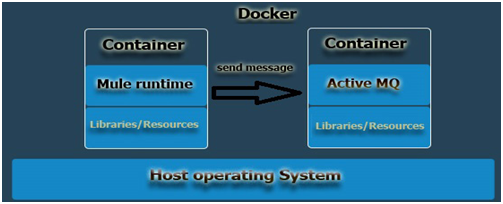
Join For FreeDockerizing a Mule application is the process of converting a Mule application to run within a Docker container. Docker containers are based on isolation feature of Linux and run on all Linux and Microsoft OSes and have an independent isolated environment from a host system containing all the required libraries and resources for the system or server to run independently.
Docker is an open platform for all the developers and system admins where we can build, ship, and run our distributed applications. The advantage of a Docker container is it is a lightweight, portable, and a different container of the same instance can be run in parallel on the same host with different parameters and it uses only the resources assigned to it.
We can build our Mule instances, build our Mule cluster instances, deploy our Mule application within the Mule instances- which can talk to different systems like ActiveMQ- and send messages to the queue.
Here in this blog, we will see two different use cases:
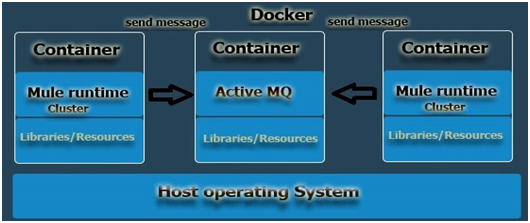
- Create a Mule instance in Docker container and deploy a Mule application into it. The Mule application will send a message to the ActiveMQ queue, which we will also be in a Docker container.
- Create two different Mule instance clusters in the Docker container and deploy the application that will send a message to the ActiveMQ queue.
Create a Mule Instance in Docker
We will start creating our own Docker image file by which we can create and install the Mule instance and ActiveMQ server in the Docker container.
The first step we need is to create and install an ActiveMQ server as a container so it will be a dependency to our Mule application which we will deploy in the Mule instance.
Here is the image file we create to install ActiveMQ server as a Docker container:
FROM webcenter/openjdk-jre:8
MAINTAINER Anirban Sen Chowdhary
#Add ActiveMQ runtime in Docker Container
CMD echo "------ ActiveMQ runtime in Docker Container --------"
ADD  apache-activemq-5.8.0-bin.tar.gz  /AMQ
CMD echo "------ Adding Work Directory --------"
WORKDIR /AMQ
ENV ACTIVEMQ_VERSION 5.8.0
ENV ACTIVEMQ apache-activemq-$ACTIVEMQ_VERSION
ENV ACTIVEMQ_HOME /AMQ/apache-activemq-5.8.0
RUN  tar -xzvf apache-activemq-5.8.0-bin.tar.gz && \
     rm apache-activemq-5.8.0-bin.tar.gz
EXPOSE 1883 5672 8161 61613 61614 61616 51515 5672
#USER activemq
WORKDIR $ACTIVEMQ_HOME
CMD ["/bin/sh", "-c", "bin/activemq console"]
Here we can see that in the image, we are adding the ActiveMQ server runtime from our local system to the container using the command:ADD apache-activemq-5.8.0-bin.tar.gz /AMQ, extracting it, and then installing it in the container.
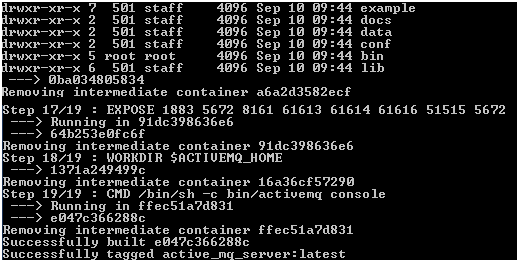
We will now build the image using the following command:

We can see, the build is successful:
We can now run the newly installed ActiveMQ server runtime in the Docker container using the following command:

As we are running this Docker in the Windows with Docker Machine, we need to get the IP address of the virtual machine using the following command:
 We can now use this virtual host IP to see if our ActiveMQ server runtime is running by logging into the ActiveMQ console as follows:
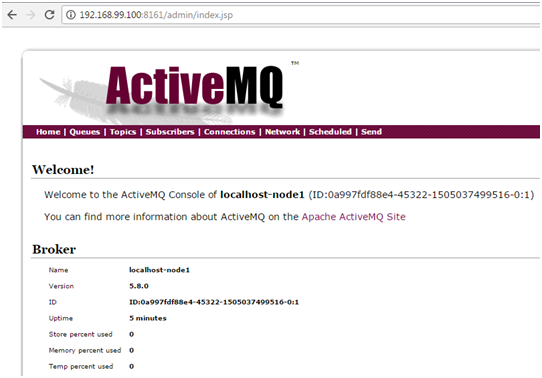
We can see our ActiveMQ server running in a Docker container separately.
Now, let's create and install a Mule instance as a Docker container. To do that, let's first create a Mule application that will be deployed in this Mule Docker container as soon the instance starts running in the container.
Let's create the following Mule application in Anypoint Studio:
<http:listener-config name="HTTP_Listener_Configuration" host="0.0.0.0" port="9082" doc:name="HTTP Listener Configuration"/>
    <jms:activemq-connector name="Active_MQ" brokerURL="tcp://192.168.99.100:61616" validateConnections="true" doc:name="Active MQ"/>
    <flow name="TestApplicationFlow">
        <http:listener config-ref="HTTP_Listener_Configuration" path="/testApplication" doc:name="HTTP"/>
        <logger message="--------application started-------" level="INFO" doc:name="Logger"/>
        <dw:transform-message doc:name="Transform Message">
            <dw:set-payload><![CDATA[%dw 1.0
%output application/json
---
{
message:"This is a sample message",
code:200
}]]></dw:set-payload>
        </dw:transform-message>
        <object-to-string-transformer doc:name="Object to String"/>
        <jms:outbound-endpoint queue="test_queue"  doc:name="JMS" connector-ref="Active_MQ"/>
    </flow>
The corresponding Mule flow will be:
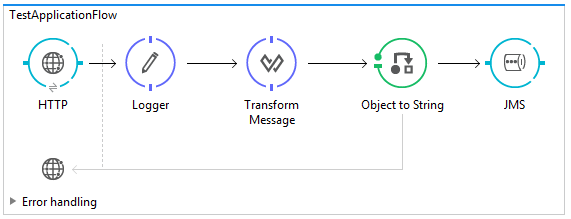
We can clearly see that the flow will push the message to a queue in ActiveMQ.
Let's save the application in our local system as a Mule deployable zip file and name it TestApplication.zip.
We now create a Docker image file as follows:
FROM java:openjdk-8-jdk
MAINTAINER Anirban Sen Chowdhary
#Add Mule runtime in Docker Container
CMD echo "------ Add Mule runtime in Docker Container --------"
ADD  mule-ee-distribution-standalone-3.8.5.zip /Mule
#Adding Work Directory
CMD echo "------ Adding Work Directory --------"
WORKDIR /Mule
#Unzipping the added zip
CMD echo "------ Unzipping the added zip --------"
RUN         unzip mule-ee-distribution-standalone-3.8.5.zip && \
            rm mule-ee-distribution-standalone-3.8.5.zip
# Define mount points
VOLUME      ["/Mule/mule-enterprise-standalone-3.8.5/logs", "/Mule/mule-enterprise-standalone-3.8.5/apps", "/Mule/mule-enterprise-standalone-3.8.5/domains"]
# Copy and install license
CMD echo "------ Copy and install license --------"
COPY        mule-ee-license.lic mule-enterprise-standalone-3.8.5/conf/
RUN         mule-enterprise-standalone-3.8.5/bin/mule -installLicense mule-enterprise-standalone-3.8.5/conf/mule-ee-license.lic
#Check if Mule Licence installed
RUN ls -ltr mule-enterprise-standalone-3.8.5/conf/
CMD echo "------ Licence installed ! --------"
#Copy and deploy mule application in runtime
CMD echo "------ Deploying mule application in runtime ! --------"
COPY  TestApplication.zip mule-enterprise-standalone-3.8.5/apps/
RUN ls -ltr mule-enterprise-standalone-3.8.5/apps/
# HTTP Service Port
# Expose the necessary port ranges as required by the Mule Apps
EXPOSE      8081-8082
EXPOSE      9000
EXPOSE      9082
# Mule remote debugger
EXPOSE      5000
# Mule JMX port (must match Mule config file)
EXPOSE      1098
# Mule MMC agent port
EXPOSE      7777
# AMC agent port
EXPOSE      9997
# Start Mule runtime
CMD echo "------ Start Mule runtime --------"
CMD         ["mule-enterprise-standalone-3.8.5/bin/mule"]
If we see the image we are using to create Mule instance, the line ADD mule-ee-distribution-standalone-3.8.5.zip /Mule here will add the Mule runtime from our local system to the Docker container.
The line RUN unzip mule-ee-distribution-standalone-3.8.5.zip && \ rm mule-ee-distribution-standalone-3.8.5.zipwill extract and install the Mule runtime in the container.
The line COPY mule-ee-license.lic mule-enterprise-standalone-3.8.5/conf/ RUN mule-enterprise-standalone-3.8.5/bin/mule -installLicense mule-enterprise-standalone-3.8.5/conf/mule-ee-license.licwill copy the Mule license file in the runtime and install the license.
If you don't have any license file with you, don't worry; you can comment it out or remove it and the Mule runtime will be created with the trial version.
The line COPY TestApplication.zip mule-enterprise-standalone-3.8.5/apps/will copy the Mule application we just created from our local system to the Docker container and will deploy in the runtime when it starts.
So, all set and done! We will now go ahead and build this image and create a Docker image which will create the Mule runtime and deploy the application inside it:

This will build the image in the container which will create, install, and license as well as deploy our Mule application in the instance our Mule runtime:
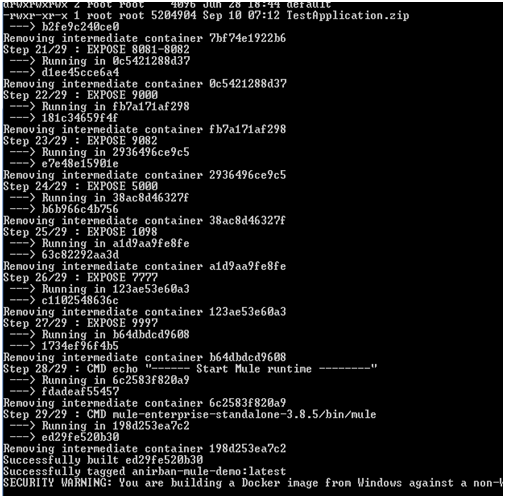
Once the build is completed successfully, we now run the image exposing the ports to start our Mule runtime:

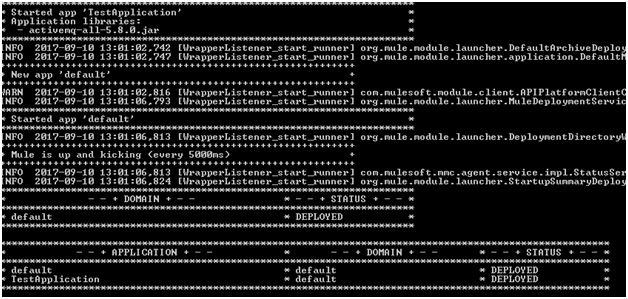
Our Mule instance will be running as below:
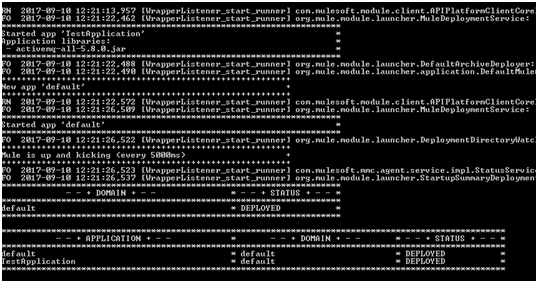
We can see now the Mule runtime has started in the container and the Mule application has been deployed as well.
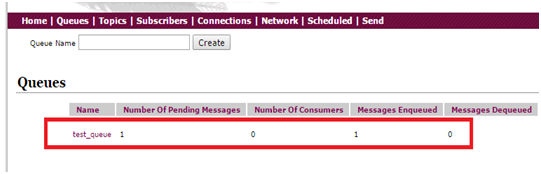
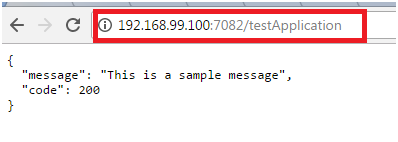
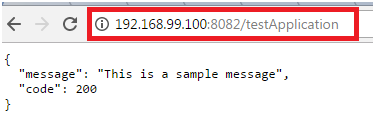
Now, let's test the application deployed in the Mule Docker container by hitting the application URL in the browser.

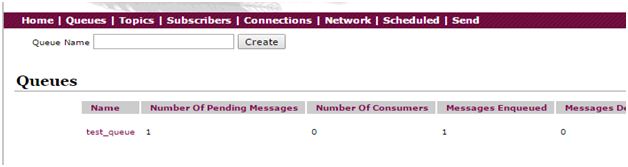
We can see the application is running fine and the message is sent to the ActiveMQ queue. We will now go to the ActiveMQ console running in the Docker container to confirm it and find that one message is there in the queue:
Create a Mule Cluster in Docker
We will now create a Mule cluster in a Docker container and perform the same test again with all the clustered instances.
To create a cluster, we will use the docker-compose command and require a yaml file which will define the defining services, networks, ports, cluster config properties files and volumes.
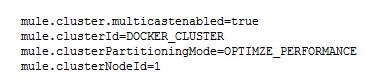
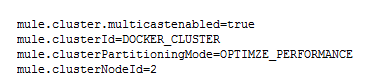
We also require 2 properties config files for each cluster as follows:
Cluster_node1.properties:
Cluster_node2.properties:
And the YAML file:
version: '2'
services:
  node1:
    container_name: node1
    build:
      context: .
      args:
        cluster_conf: cluster_node1.properties
    ports:
            - "8081:9082"
    volumes:
      - ~/mule/cluster/cluster_node1/apps:/Mule/mule-enterprise-standalone-3.8.5/apps
      - ~/mule/cluster/cluster_node1/logs:/Mule/mule-enterprise-standalone-3.8.5/logs
    networks:
      - cluster-net
    environment:
      - NODE_ID=1
      - MULE_ENV=dev
      - http.port=9082
  node2:
    container_name: node2
    build:
      context: .
      args:
        cluster_conf: cluster_node2.properties
    ports:
      - "9081:9082"
    volumes:
      - ~/mule/cluster/cluster_node2/apps:/Mule/mule-enterprise-standalone-3.8.5/apps
      - ~/mule/cluster/cluster_node2/logs:/Mule/mule-enterprise-standalone-3.8.5/logs
    networks:
      - cluster-net
    environment:
      - NODE_ID=2
      - MULE_ENV=dev
      - http.port=9082
networks:
  cluster-net:
    driver: bridge
You can see above, we have defined 2 different HTTP ports for 2 different clustered nodes/instances here.
Our Docker image file will be as follows:
FROM        anirban-mule-demo
MAINTAINER Anirban Sen Chowdhary
ARG         cluster_conf
ENV         NODE_ID 1
ENV         MULE_ENV dev
COPY        ./properties/$cluster_conf /Mule/mule-enterprise-standalone-3.8.5/.mule/mule-cluster.properties
RUN         sed -i '/wrapper.java.additional.15=-Dorg.quartz.scheduler.skipUpdateCheck=true/a wrapper.java.additional.16=-Dmule.nodeId=%NODE_ID%\nwrapper.java.additional.17=-Dmule.env=%MULE_ENV%' /Mule/mule-enterprise-standalone-3.8.5/conf/wrapper.conf
# Hazelcast ports
EXPOSE      5701 54327
Please note here, we will be usingFROM anirban-mule-demo so that it takes that as a base image, creates the Mule runtime, and deploys the Mule application based on what is defined there.
That's it! We are ready to go!
We will use the following Docker command now to build the Mule cluster within the Docker container:
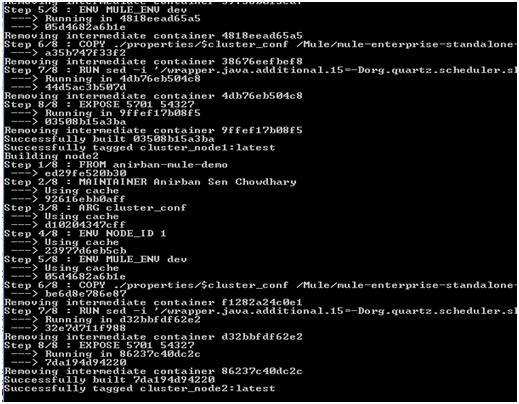
We can see below that the build is successful and our Mule cluster is built, configured, and ready to go:
We can now start each of the Mule clustered nodes individually; we first start node1 of the cluster as follows:

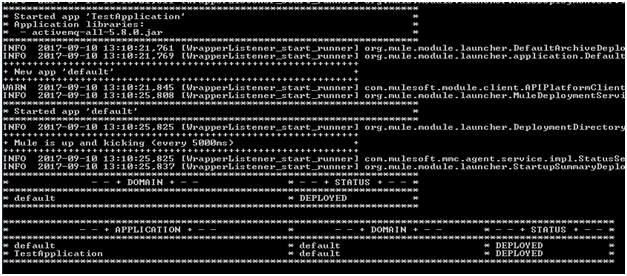
We can see the node1 of the cluster exposing HTTP port 7082 will be running as below:
We will run the node2 of the cluster same as below:

This time we slightly change the HTTP port number while running the node2 and the node will come up and run as below:
Let's test the application deployed in both the clustered nodes by hitting the HTTP port of each application. We will first hit the HTTP url of the application of node1:
If we check the ActiveMQ console, we will find that the message has been sent from node1 to the queue successfully:
In the same way, we will hit the HTTP url of the application deployed in node2 of the cluster as follows:
If we now check the ActiveMQ console, we will find that the message is sent to the queue from node2 application:
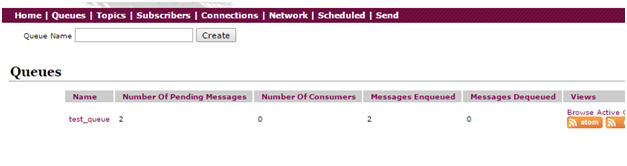
If we see above, the queue has 2 messages inside, which have been sent by the application deployed on both the nodes of the cluster.
So, we can see that with all the above examples, we can create Mule instances which can be either a single or multiple in a cluster within a Docker container, and can easily integrate and talk to other systems in different containers in Docker.
Opinions expressed by DZone contributors are their own.
Comments