Easy Oracle Database Migration with SQLcl
Migrate Oracle databases using SQLcl with built-in Data Pump and OCI support
Join the DZone community and get the full member experience.
Join For FreeDatabase migration is not a fun or easy activity. It is often a significant hurdle in working with databases for developers unfamiliar with the process. It turns into this looming task that hangs over you like a black cloud. It must be done, but you are not looking forward to it.
While there are many tools to help with Oracle Database Migration, can’t we just get it down to a simple command? And can that same mythical tools help move these exports to other magical lands like the cloud?
Does such a tool exist to slay this ever-foreboding specter of simple database migration?
It’s SQLcl, of course (you probably guessed that from the title of this article), and with the 21.4 release of SQLcl in December of 2021, we added Data Pump functionality to help aid in this quest.
Easy Does It
Imagine a common migration scenario; you need to move a local database from one server to another for some reason or another. Why not use Data Pump? Even better, why not use Data Pump in SQLcl to connect to any database on the fly and issue 2 simple commands to perform this task?
You simply call Data Pump at the SQLcl prompt with dp.
SQL> dpConnecting to a database uses the conn command and a JDBC connect string:
conn dpdemo@cooldemo:1521/demodatabase.demos.oraclevcn.comSo, you can see how you can connect into a database, run some commands, and instantly connect to another database to run more commands.
Let’s start with a simple local export. The command is as follows:
SQL> dp export -dumpfile db_dumpfile.dmpThat’s it; this will export the current schema you logged on as.
And if you wanted to do a simple local import:
SQL> dp import -dumpfile db_dumpfile.dmpThat’s all there is to it. The goal of including Data Pump functionality into SQLcl was to make the commands simply integrate directly into your workflows. Also remember, SQLcl is great to use for running batch programs and this new Data Pump functionality opens up many new doors.
To the Cloud!
Now that the basics are out of the way, let’s set up a scenario. Say you are tasked with moving a database from your local data center into Oracle’s cloud. The final target could be a VM DB, an Autonomous Database, or even an Exadata Cloud Service; you just need to get it migrated over.
We will jump right into the scenario but included at the end of this article are some setup steps you can use to get your environment ready to perform the same operations.
The Export
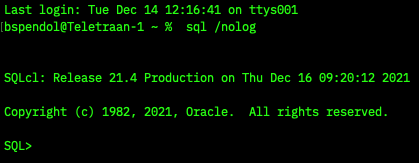
Using SQLcl, we are going to start with the /nolog option.
> sql /nologThis will start SQLcl but not log us into a database.
Next, connect to a database with a JDBC connection string. JDBC connection strings use the format of:
username@host_name:port/sid_or_service_name_of_the_database
In my example:
- the username is dpdemo
- the hostname of where the database lives is cooldemo
- the port is 1521
- and the servicename of my database is cooldatabase.publicsubnet.demos.oraclevcn.com
Put it all together and tell SQLcl to connect, and I get:
conn dpdemo@cooldemo:1521/cooldatabase.publicsubnet.demos.oraclevcn.comNext, it asks for the password for the dpdemo user. Supply that, and you will connect to the database. For folks familiar with connection strings, yes, you can include the password, but it’s not always wise to do so for security/privacy reasons.
Now that we are connected to the database, we can perform the export. But remember, we want to have this export go straight to the OCI Object Store. First, we tell SQLcl what OCI profile to use. Using the DEFAULT profile in our OCI config file, we issue the following command:
SQL> oci profile DEFAULTwith the output being:
Region set to: eu-frankfurt-1
OCI Profile set to DEFAULT
Transfer method set to oci
Next, we tell SQLcl what object store bucket we want to use for the export. The command syntax is as follows:
cs BUCKET_URLThe bucket I want to use is called datapumpDemo, and my OCI tenancy is cooltenancy, therefore my command would be:
SQL> cs https://swiftobjectstorage.eu-frankfurt-1.oraclecloud.com/v1/cooltenancy/datapumpDemo/with the output being:
DBMS_CLOUD Credential: Not Set
OCI Profile: DEFAULT
Transfer Method: oci
URI as specified: https://swiftobjectstorage.eu-frankfurt-1.oraclecloud.com/v1/cooltenancy/datapumpDemo/ 
We are now ready to create the Data Pump export and automatically store it on the cloud. The export command is as follows:
SQL> dp export -copycloud -dumpfile dpdemo.dmpand the output would be:
** Datapump Command Start ** at 2022.01.12-12.55.22
Initiating DATA PUMP
DATABASE TIME ZONE: VERSION:32 CON_ID:0
Log Location: DATA_PUMP_DIR:ESQL_1738.LOG
Starting "DPDEMO"."ESQL_1738":
Processing object type SCHEMA_EXPORT/TABLE/TABLE_DATA

…

DataPump Operation Status 'COMPLETED'
Jobname = ESQL_1738
File DATA_PUMP_DIR/dpdemo.dmp copied to https://swiftobjectstorage.eu-frankfurt-1.oraclecloud.com/v1/cooltenancy/datapumpDemo/dpdemo.dmp
** Datapump Command End ** at 2022.01.12-12.57.21
The -copycloud flag tells SQLcl to stream the export file from the database to the client then immediately put the file into object store in the cloud using the bucket we supplied earlier.
This is the part where your mileage will vary. If you have a very robust connection to OCI and the export is of reasonable size (a few GB), then this process will be quite fast. There are a few variables at play here with networks and please be cognizant of speed and size to that expectations are set correctly.
Over in the OCI Web Console, if I bring up the datapumpDemo bucket’s contents, I can see the export.
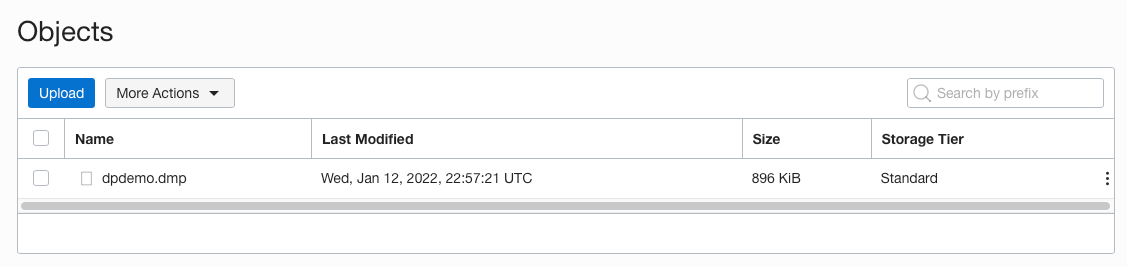
That was easy. Now let’s import the file into a cloud database.
The Import
We can handle the import in a few ways. For one, we could continue our SQLcl session with all the OCI locations/profiles set and just log into a cloud database, or we could start from a new session and set our OCI variables again. For this example, let’s remember what we set and the commands used, but continue using the same SQLcl session.
As promised, here are the prerequisites we used when we started the initial SQLcl session with the export:
# set the OCI profile
SQL> oci profile DEFAULT
and
# set the OCI Object Store bucket location we want to use
SQL> cs https://swiftobjectstorage.eu-frankfurt-1.oraclecloud.com/v1/cooltenancy/datapumpDemo/
The cloud database we are going to connect to is an Always Free Autonomous Database with mTLS enabled; requiring clients connecting to the database to use a trusted client CA certificate.
To use this certificate in our SQLcl session, specify a wallet location using set cloudconfig:
SQL> set cloudconfig /Users/bspendol/Keys/Wallet_dpdemo.zip
Once we have the cloudconfig set for our Autonomous Database, we can connect using the service name, the admin user, and the high consumer group:
SQL> conn admin@dpdemo_highSupply the Admin user’s password, and you have connected to the database.

Just as when we did the export, we can immediately run the import. Seeing we are in an autonomous database as the admin user, we can run this import, and the schema and objects will be created for us.
To import the Data Pump export from OCI Object Store, use the following command. We are passing the -rt (remap tablespace) flag because this schema was using the USERS tablespace in our original database, but in the Autonomous Database, we are using the DATA tablespace. The remap tablespace option tells the Data Pump import job to do this conversion for us.
SQL> dp import -copycloud -dumpuri dpdemo.dmp -rt USERS=DATAWith the output being:
** Datapump Command Start ** at 2022.01.12-13.36.18
File https://swiftobjectstorage.eu-frankfurt-1.oraclecloud.com/v1/adexacs2/datapumpDemo/dpdemo.dmp copied to DATA_PUMP_DIR/ISQL_454.DMP
Initiating DATA PUMP

…

Processing object type SCHEMA_EXPORT/TABLE/INDEX/STATISTICS/INDEX_STATISTICS
Processing object type SCHEMA_EXPORT/TABLE/STATISTICS/TABLE_STATISTICS
Processing object type SCHEMA_EXPORT/STATISTICS/MARKER
DataPump Operation Status 'COMPLETED'
Jobname = ISQL_454
** Datapump Command End ** at 2022.01.12-13.40.50
We have just moved a database from a local, on-premises data center into an Oracle Cloud Database in just a couple of simple steps.
But Wait... There's More!
CICD
The easy database migration is one use case, but what else can I do with Data Pump in SQLcl? With the ease of installing SQLcl from just about anywhere, one use case is to include it into your CICD pipelines. Imagine a pipeline that executes when a database developer commits their code or makes a pull request. In the build scripts, download and use SQLcl to import a Data Pump export to bring the database to a level similar to what is in production so that the CICD tests reflect a more realistic environment.
If I were using OCI DevOps and a build runner, in my build_spec.yml file, I could include something similar to:
- type: Command
   name: "terraform work"
   command: |
      wget https://download.oracle.com/otn_software/java/sqldeveloper/sqlcl-latest.zip
      unzip sqlcl-latest.zip
I can then use SQLcl in a Terraform script to log into the test database, import the Data Pump export, then apply the code the developer just committed:
resource "null_resource" "sqlcl-liquibase" {

   provisioner "local-exec" {
       command = <<-EOT
                ./sqlcl/bin/sql -cloudconfig wallet.zip admin/${random_string.password.result}@TESTDB_high @lb.sql
       EOT
   }
(You can refer to the previous article we have about using change management with the Oracle Database for more info)
OCI Database Tools Service
The Database Tools Service in OCI allows you to create connections to any Oracle Cloud database you have access to. It stores all the needed information to connect to this database and keeps the password in an OCI Vault encrypted. If you remember from the above example, when we connected to each of the DBs, we needed to know some information about that database (host, port, servicename, user, and password). The Tools Service can help here by allowing you to pass a pointer to this stored connection and let SQLcl take care of the rest; there are no passwords or connect strings to remember.
This quick tutorial will create a Database Tools Service connection and use it with SQLcl. For this, all you need is a free OCI account and an always-free Autonomous Database. The Database Tools Service is also free.
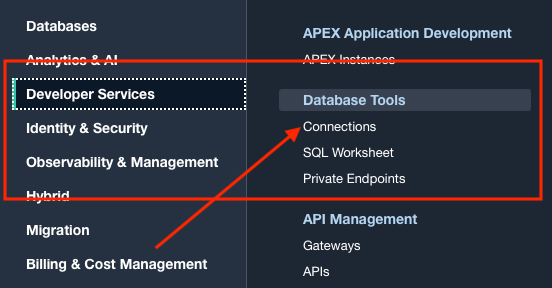
In the OCI web console, Developer Services, find the Database Tools sections and click on Connections.
 On this page, click the Create Connection button, and using the Create Connection slider, we can start creating the connection.
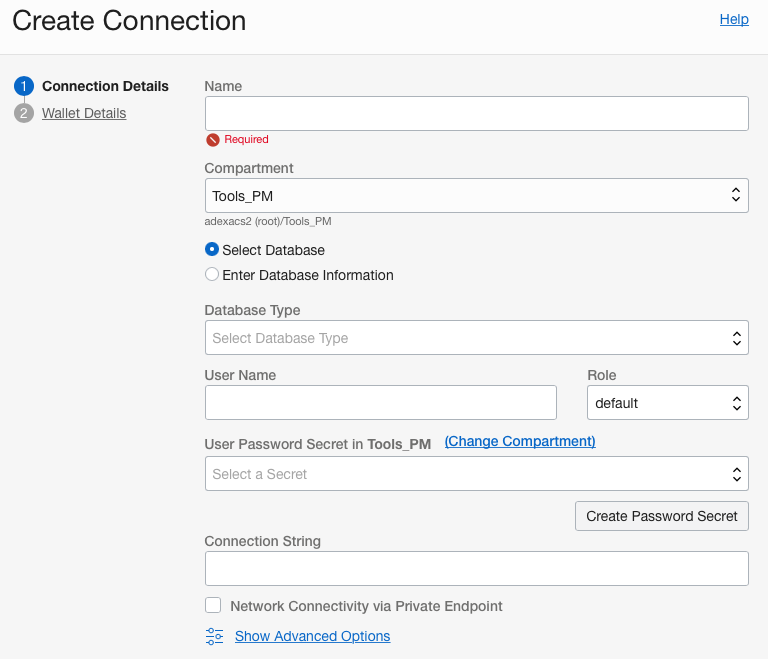
Give the connection a name and find the compartment your always free Autonomous Database is in. Then, once the radio button for Select Database has been selected, use the Database Type dropdown and choose Autonomous Database.
Here is where the magic happens. The service will automatically find all the Autonomous Database you have in this compartment and fill in the Database select list for you. In fact, if you only have a single database, the UI will pre-fill the value for you.

For the User Name, we can use the Admin user, and for the User Password, we can create a secret in an OCI vault right here in the UI to store the password encrypted. The Connection String value will be auto-populated for you, so click next on the UI.
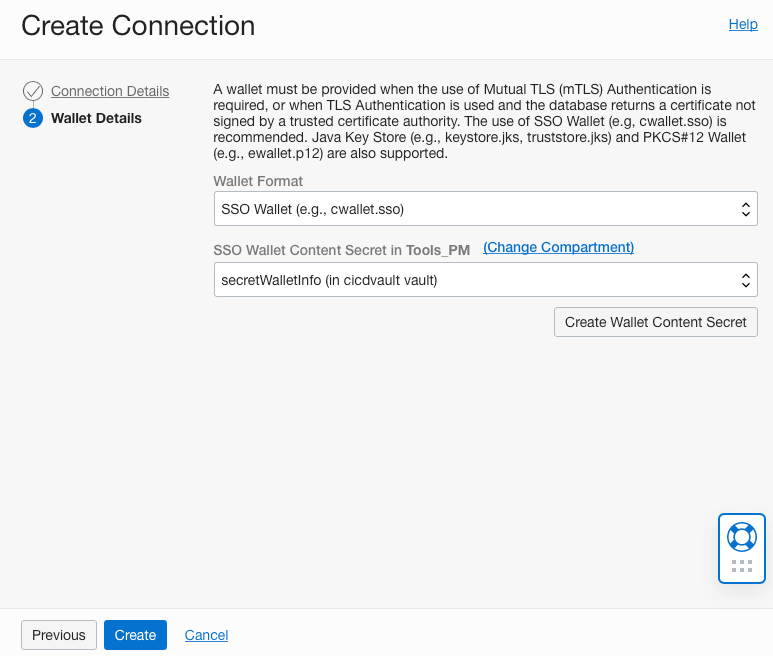
The next part of the Create Connection wizard needs the credentials from the Autonomous Database wallet. All you need to do here is click the Create Wallet Content Secret button, have the service get what you need via the Retrieve regional auto login wallet from the Autonomous Database option, and done. Once the secret is created, you can use the Create button and create the connection.
Once the connection is created, you can see the OCID in the Connection Information section of the page on the details page.
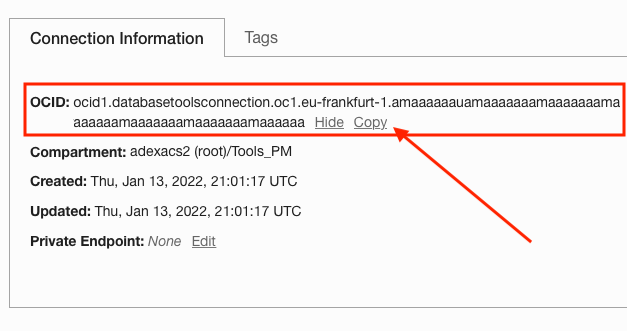
Use the Copy link to copy the OCID to your clipboard. Next, start SQLcl with the /nolog option.
Set the oci profile:
SQL> oci profile DEFAULTAnd now use the OCI to connect to the database with the following syntax:
conn OCIDFor my connection, I would issue the following:
SQL> conn ocid1.databasetoolsconnection.oc1.eu-frankfurt-1.amaaaaaauamaaaaaaamaaaaaaamaaaaaaamaaaaaaamaaaaaaamaaaaaa
And that’s it; it gets all the information for me and logs me directly into the database.

No passwords, no remembering long service names; just supply an OCID and done. Also can be used in those CICD pipelines to ensure no passwords show up in log files or are being passed as variables!
Would You Like to Know More?
If you have any questions, please do not hesitate to reach out to myself or anyone else on our team. One of the main goals in the Oracle Database Development Tools team is to make features of the database accessible to more people and even expose new and exciting functions when we can.
OCI Database Tools Service documentation
Setup Steps
Get the Goods on the Right Path
The first step is to get SQLcl. Oracle makes this super easy by providing a URL that downloads the latest version with no strings attached. Just go to:
https://download.oracle.com/otn_software/java/sqldeveloper/sqlcl-latest.zip
Once SQLcl is downloaded, you can install it by unzipping it and running the SQL command in the bin directory. It does require Java (JRE 11) to be installed locally. You can add this to your path on your Mac by adding the following to the .zshrc file (for Linux, it’s the .bashrc file) in the home directory:
export PATH=/Users/USERNAME/sqlcl/bin:$PATHUSERNAME is the username you use to log into your Mac.
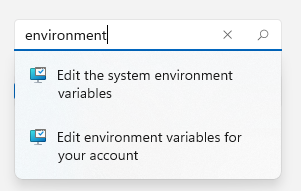
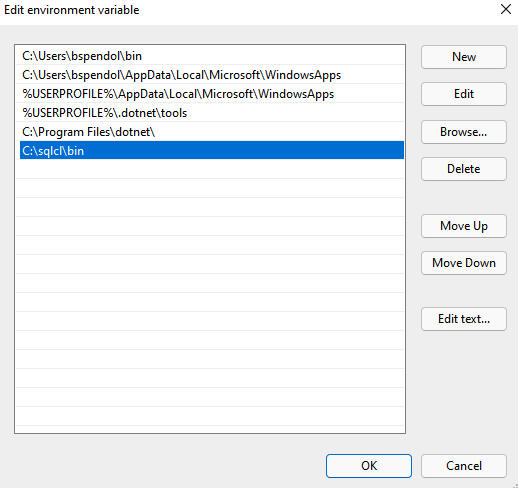
And on windows, you can search the system for environment and select “Edit environment variables for your account”.
 Here, just edit the Path
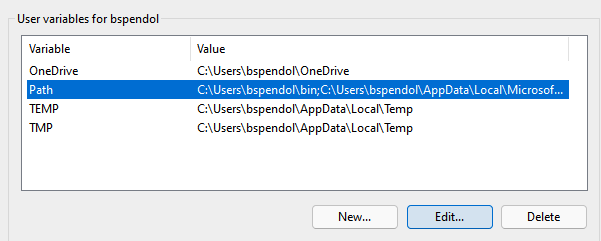
And add the location of the sqlcl/bin directory
You should now be able to access SQLcl by just typing sql in the macOS Terminal or Windows command prompt/Powershell.
Now, if you are using Linux, SQLcl is available via YUM. Just yum install sqlcl and done! In OCI, the yum repo is set up for this but is available via Oracle’s public YUM repositories if you are in another cloud or on a local instance.
Picture Perfect Profile
This example will use the OCI Object Store to stage the local Data Pump export, so we need to set our OCI profile if not already done. The simplest way to do this is to use the Users page in the OCI Web Console.
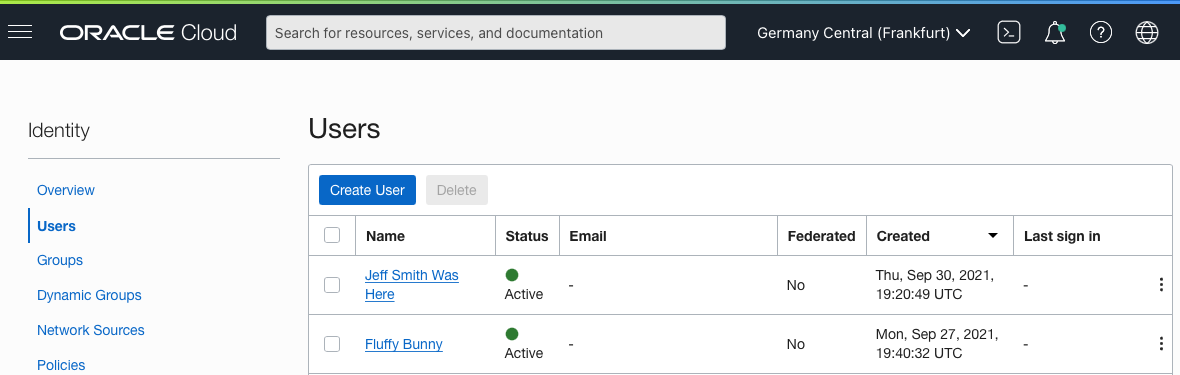
Select your username, and on the details page, on the left-hand side, select API Keys.
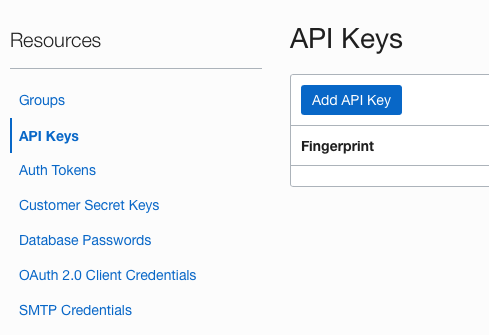
Click the Add API Key button and have the OCI Web Console generate you a pair of keys.
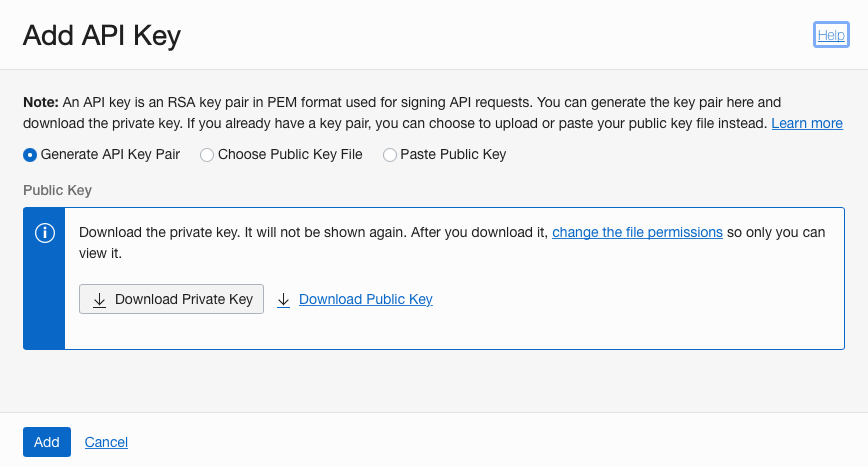
Download the key and then click Add.
After the key is added, a Configuration File Preview modal will appear. Here is the configuration information you will need for your OCI profile file.
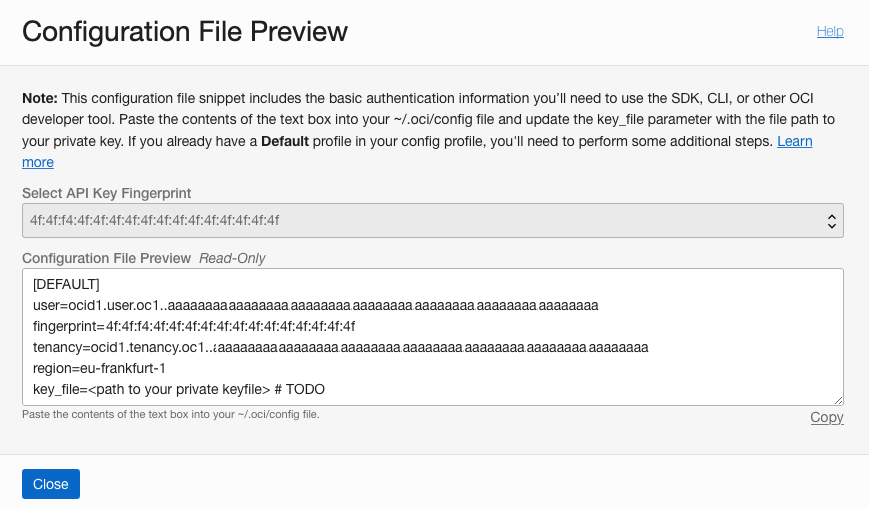
Use the copy link to copy the contents of this file and paste them into a file named config in a .oci directory that’s in your home directory.
For example, I would put the .oci directory on my Mac in /Users/bspendol/. Then create the confile file and paste the contents of the Configuration File Preview modal. When the contents are pasted into this config file, update the key_file= to be the location of the key you downloaded in the previous step. You can always put the key in the .oci directory.
Again, in my example, the key_file would be /Users/bspendol/.oci/key.pem. Once this is done, save the file. On a Linux or Mac, you would also have to change the permissions of the key file to 600 (chmod 600 key.pem).
Opinions expressed by DZone contributors are their own.
Comments