Flutter 2.0 State Management Introduction With Provider 5.0
New Flutter developers need to understand state management in order to build more complex applications with multiple screens and data storage options.
Join the DZone community and get the full member experience.
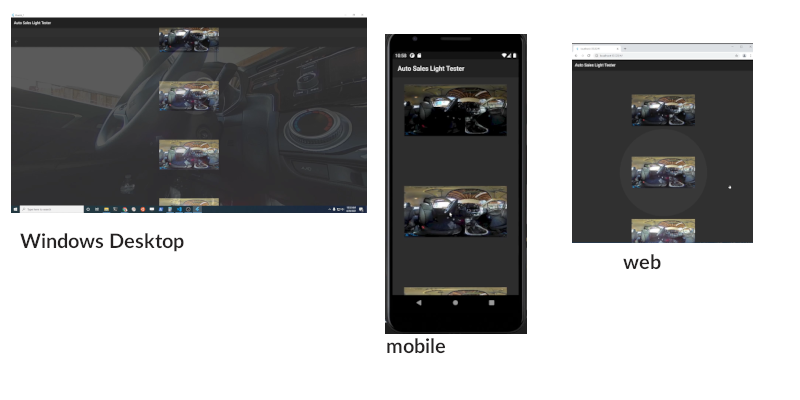
Join For FreeWith Flutter 2.0, you can build apps on mobile, web and desktop. Graphics performance is fantastic and the development tools are great. The main barrier to learning Flutter is an understanding of state management. This tutorial covers the Provider package, one of the most popular and easiest tools to manage state in Flutter.
A video version of this tutorial is available. Code and image files are on GitHub.
When to Use Provider
If your application is on a single screen with limited interaction with outside data sources and APIs, you should use the built-in setState method of Flutter. You do not need to use a provider for simple applications. If your application has multiple screens with multiple API calls, you should use the provider.
How Provider Works
Provider makes it easier to set widgets to listen a variable and wait for a change. You can also use the provider to send a notification to a listener when data changes.
For our simplified example, we have two screens. The first screen is a list of thumbnails.
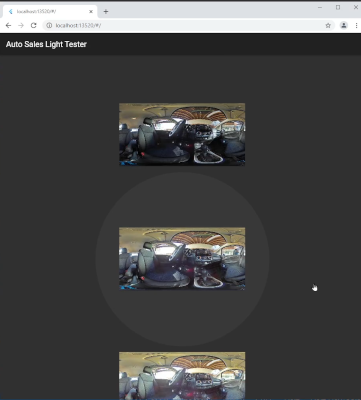
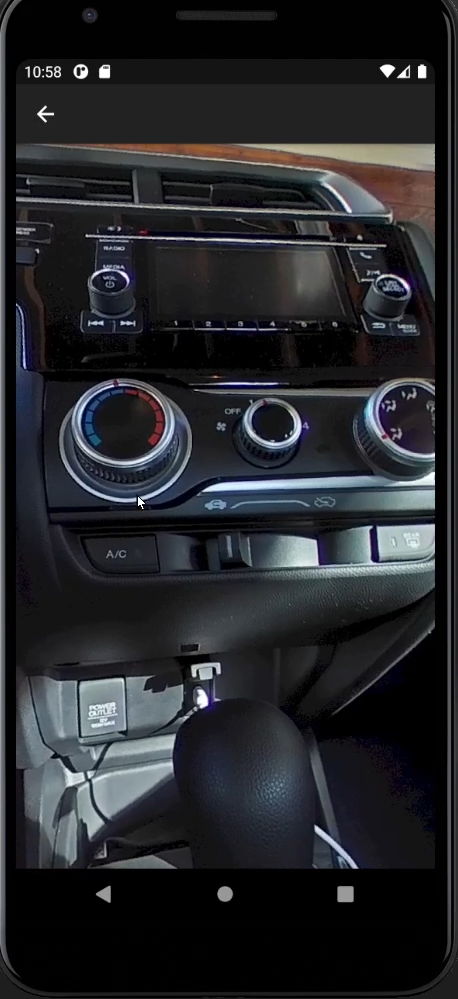
Each thumbnail is 9KB with a size of 320x160. The thumbnails are designed to be fast to load over a network. To make the tutorial easier, the thumbnails and full-size images are stored locally. The thumbnails and images are in equirectangular format to provide a virtual 360° experience. When a thumbnail is tapped, the application goes to another screen that displays a full-size image with 360° navigation.
ChangeNotifier and notifyListeners
The core concept of a provider is that a widget listens for changes. To help manage the changes and notifications to the listeners, we use the ChangeNotifer Flutter class. In the example below, the class ImageNotifier manages changes to a variable called image.
import 'package:flutter/material.dart';
class ImageNotifier extends ChangeNotifier {
Image _image = Image.asset('assets/images/R0011911.JPG');
// getter
Image get image => _image;
// update
void updateImage(Image image) {
_image = image;
notifyListeners();
}
}
When a person presses the thumbnail button on screen 1, the updateImage() method is run. On screen 2, the image is displayed with the getter image.
ChangeNotifierProvider
Up to this point, we haven't used provider. ChangeNotifier is built into Flutter.
Our first step to using a provider starts in the main() method. It's the first thing you run in runApp(). In the main.dart file, we need to wrap ChangeNotifierProvider around your main app. I've called the main app MyApp().
xxxxxxxxxx
import 'package:thumb_1/image_notifier.dart';
import 'thumb_screen.dart';
import 'package:provider/provider.dart';
void main() {
runApp(
ChangeNotifierProvider(
create: (_) => ImageNotifier(),
child: MyApp(),
),
);
}
Change, Notification, and Provide
Let's review the core concepts up to this point.
- Data changes. In our example, we're changing an image. The change starts by clicking on the thumbnail. The
imagevariable is changed with theupdateImage()method we created. - Create a notification of the change. In our example, our notification is that the full resolution image has changed. The notification is created with
notifyListeners()which is also in theupdateImage()method. - Provide the notification to the widgets that are listening for the specific change.
Although these concepts are fairly easy to understand, it is different from a procedural programming paradigm.
Procedural Process
Let's look at an alternative process with psuedo-code.
On screen 1
buttonPress(image=imageName)
On screen 2
displayImage(imageName)
The process above is easier to understand for simple applications. It becomes increasingly difficult to manage as the application gets more complex.
Provider Process
The provider process adds a few additional steps. More importantly, it requires a change in thinking about how the image is displayed. Instead of the button changing the imageName variable in screen 2 directly, the button talks to an intermediary that sends a notification to any widget that has subscribed to the change.
Screen 1
buttonPress(updateImage(imageName))
Change Notification Manager
updateImage(imageName)
notifyListeners(imageName)
Screen 2
displayImage(imageName)
Updating the Image
From screen 1, we need to call the updateImage() method. The code may look a bit confusing at first, but you'll quickly get used to it with just a little bit of practice.
context.read<ImageNotifier>().updateImage(...
ImageNotifier is the name of the class we created that extends ChangeNotifier, which is built into Flutter.
The full code for the widget of the thumbnail is shown below.
x
import 'package:flutter/material.dart';
import 'package:thumb_1/details_screen.dart';
import 'package:provider/provider.dart';
import 'package:thumb_1/image_notifier.dart';
class CarThumbButton extends StatelessWidget {
const CarThumbButton(
{Key? key, required this.imageNameBase, required this.toolTip})
: super(key: key);
final String imageNameBase;
final String toolTip;
Widget build(BuildContext context) {
return IconButton(
icon: Image.asset('assets/images/$imageNameBase\_THUMB.jpg'),
iconSize: 300,
onPressed: () {
context.read<ImageNotifier>().updateImage(
Image.asset('assets/images/$imageNameBase.JPG'),
);
Navigator.push(
context, MaterialPageRoute(builder: (context) => DetailsScreen()));
},
tooltip: this.toolTip,
);
}
}
Displaying the Image
The image is displayed with a similar process of reading from the context.
context.read<ImageNotifier>().image
The last word in the line, image, is the getter from ImageNotifier.
I've wrapped the image in Panorama() to get the 360° navigation.
xxxxxxxxxx
import 'package:flutter/material.dart';
import 'package:panorama/panorama.dart';
import 'package:thumb_1/image_notifier.dart';
import 'package:provider/provider.dart';
class DetailsScreen extends StatelessWidget {
Widget build(BuildContext context) {
return Scaffold(
appBar: AppBar(),
body: Center(
child: Panorama(
child: context.read<ImageNotifier>().image,
),
),
);
}
}
Running the Code
You need to have Flutter 2.0 and Dart 2.12.
xxxxxxxxxx
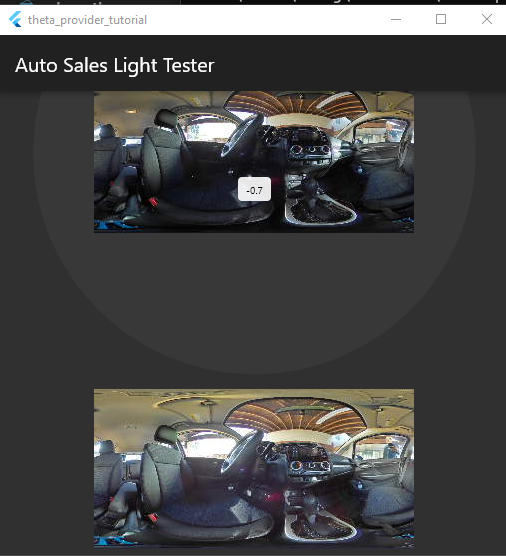
git clone https://github.com/codetricity/theta_provider_tutorial
cd .\theta_provider_tutorial\
flutter pub get
flutter create .
flutter run
Select the Device
Note, to run Windows, you will need Visual Studio (not just VS Code) installed. To run macOS and iOS, you'll need XCode. To run Android, you need an Android Virtual Device. The easiest way to get the AVD is to install Android Studio.
Desktop App
More information on building for Windows desktop is available in my previous DZone article, Build Great Windows Desktop Apps With Flutter.
To quickly gain practice modifying the example code for this tutorial, you can add a new variable to image_notifier.dart.
Remember to add the following for each new variable:
- Private variable initialization. Note that the example uses Dart 2.12 with sound null safety. You need to assign a default value to all variables or explicitly tell dart the variable can be null. You cannot do something like
String _caption; - Getter.
- Setter with
notifyListeners.

If you prefer to start with a completely blank editor and a new Flutter project, go through the steps in the video I mentioned at the start of the article.
Other State Management Techniques
There are many other Flutter state management techniques. Refer to the Flutter official documents for more options. Provider is a great way for you to get started.
Summary
Flutter is a wonderful framework for rapidly building mobile, desktop, and web apps. There are many options for state management. If your app has more than a few screens and data storage options, you should use a state management package instead of relying on setState(). Provider is one of the most popular packages for state management. It's easy to use once you understand the process of making a change, creating a notification of the change, providing the change, and listening for the change.
The best way to really understand the concept of state management is to implement it. Open up VS Code and starting coding right now!
Opinions expressed by DZone contributors are their own.
Comments