Start Modernizing to Microservices With Strangler Fig on AWS in Minutes
This blog post will help you quickly start experimenting with the Strangler Fig pattern and breaking up an application to microservices on AWS.
Join the DZone community and get the full member experience.
Join For FreeCongratulations - you’ve decided that a microservices architecture will help you achieve your business goals! Matheus Guimaraes did a re:Invent 2022 chalk talk on using the Strangler Fig pattern to incrementally and safely move to microservices. In the talk, he mentioned how AWS Migration Hub Refactor Spaces can accelerate getting started with the Strangler Fig pattern in AWS, and in this blog, we’ll show you how.
Microservices offer exciting benefits including increased team independence, higher development velocity, and reduced blast radius for changes. However, you might find yourself spending months architecting, implementing, and testing refactor infrastructure (e.g., a strangler-fig proxy) before even starting to refactor. This months-long wait to realize refactor value is no more. You can have a best practices based refactor environment in minutes deployed in your AWS account by Refactor Spaces. Once created, you can quickly launch new features in microservices or start breaking apart your application into microservices. Let’s create the environment, so you can start refactoring.
A Customizable Refactor Environment, Ready in Minutes
Refactor Spaces not only orchestrates AWS services for you, it does it inside your own AWS account, so you can customize them as needed (some CloudFormation examples of customizing the infrastructure are here on GitHub). In this blog, you’ll use the CDK to create a Refactor Spaces environment and application along with an example service and default route. If you prefer to use Terraform, there is a Refactor Spaces Terraform Module. Let’s get started!
First, be sure to have Node.js and the AWS CDK Typescript package installed.
Clone the Refactor Spaces CDK example project and change to the cdk directory:
git clone https://github.com/mshish/aws-refactor-spaces-cdk-example.git

cd aws-refactor-spaces-cdk-example/cdk
Next, you’ll have the CDK synthesize a CloudFormation stack and deploy it. CDK will ask to confirm security-related changes (e.g., IAM) prior to deployment.
> npm install
> cdk synth
    ...
    Generated CFn
    ...

> cdk deploy
...
Do you wish to deploy these changes (y/n)? y
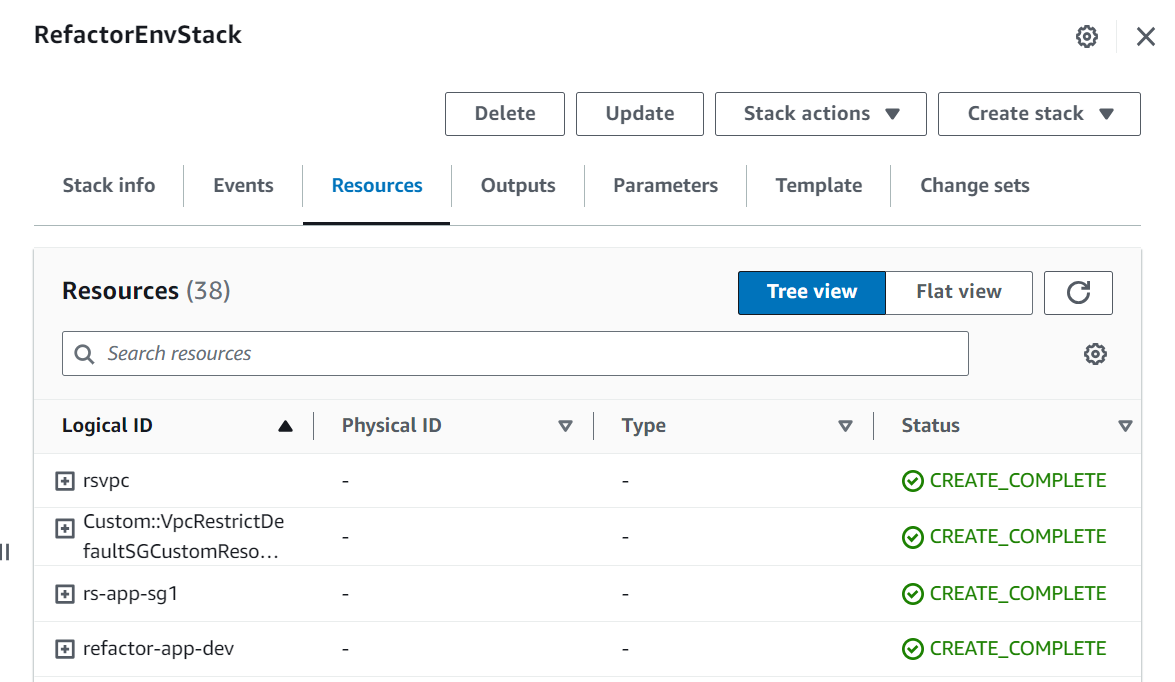
The deployment will take about 15 minutes to create the refactor environment and application proxy. You can track the progress in the terminal or in CloudFormation’s console: CloudFormation > Stacks > RefactorEnvStack.
RefactorEnvStack
 ✅  RefactorEnvStack

✨  Deployment time: ###.##s

Outputs:
RefactorEnvStack.proxyurl = https://execute-api.amazonaws.com...
RefactorEnvStack.rsapplink = https://console.aws.amazon.com...
RefactorEnvStack.rsenvlink = https://console.aws.amazon.com...
Stack ARN:
arn:aws:cloudformation:us-east-2:...
What’s in a Refactor Environment?
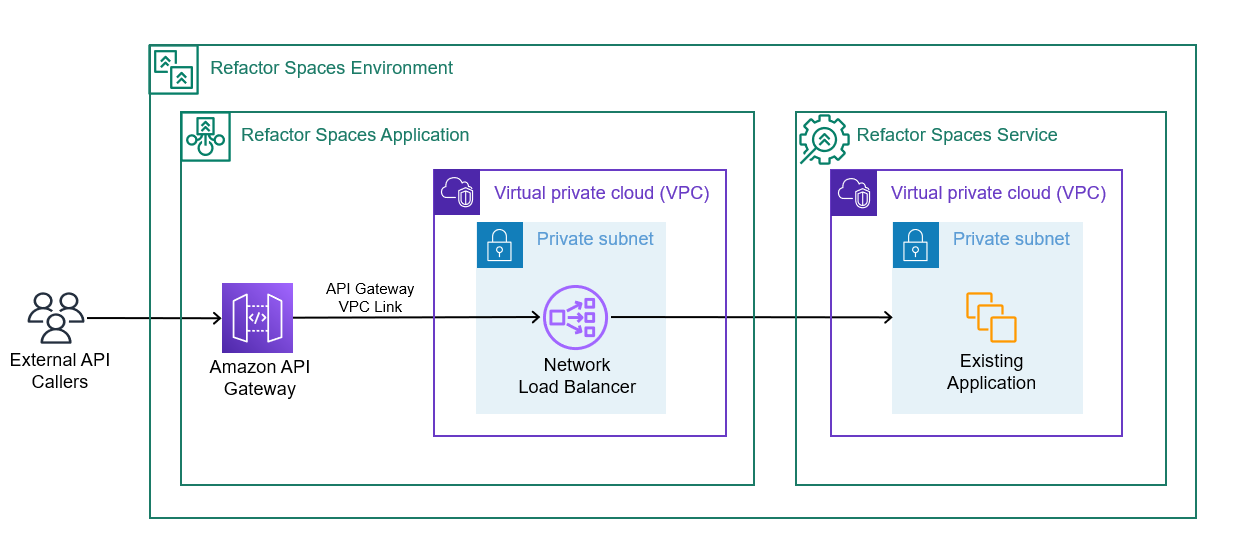
Now that the refactor environment is running, let's take a quick tour of what Refactor Spaces created inside your AWS account. At a high level, Refactor Spaces provisioned everything in this diagram (note: it did not create the existing application running in EC2, which is included here as an example).

Refactor Spaces Environment
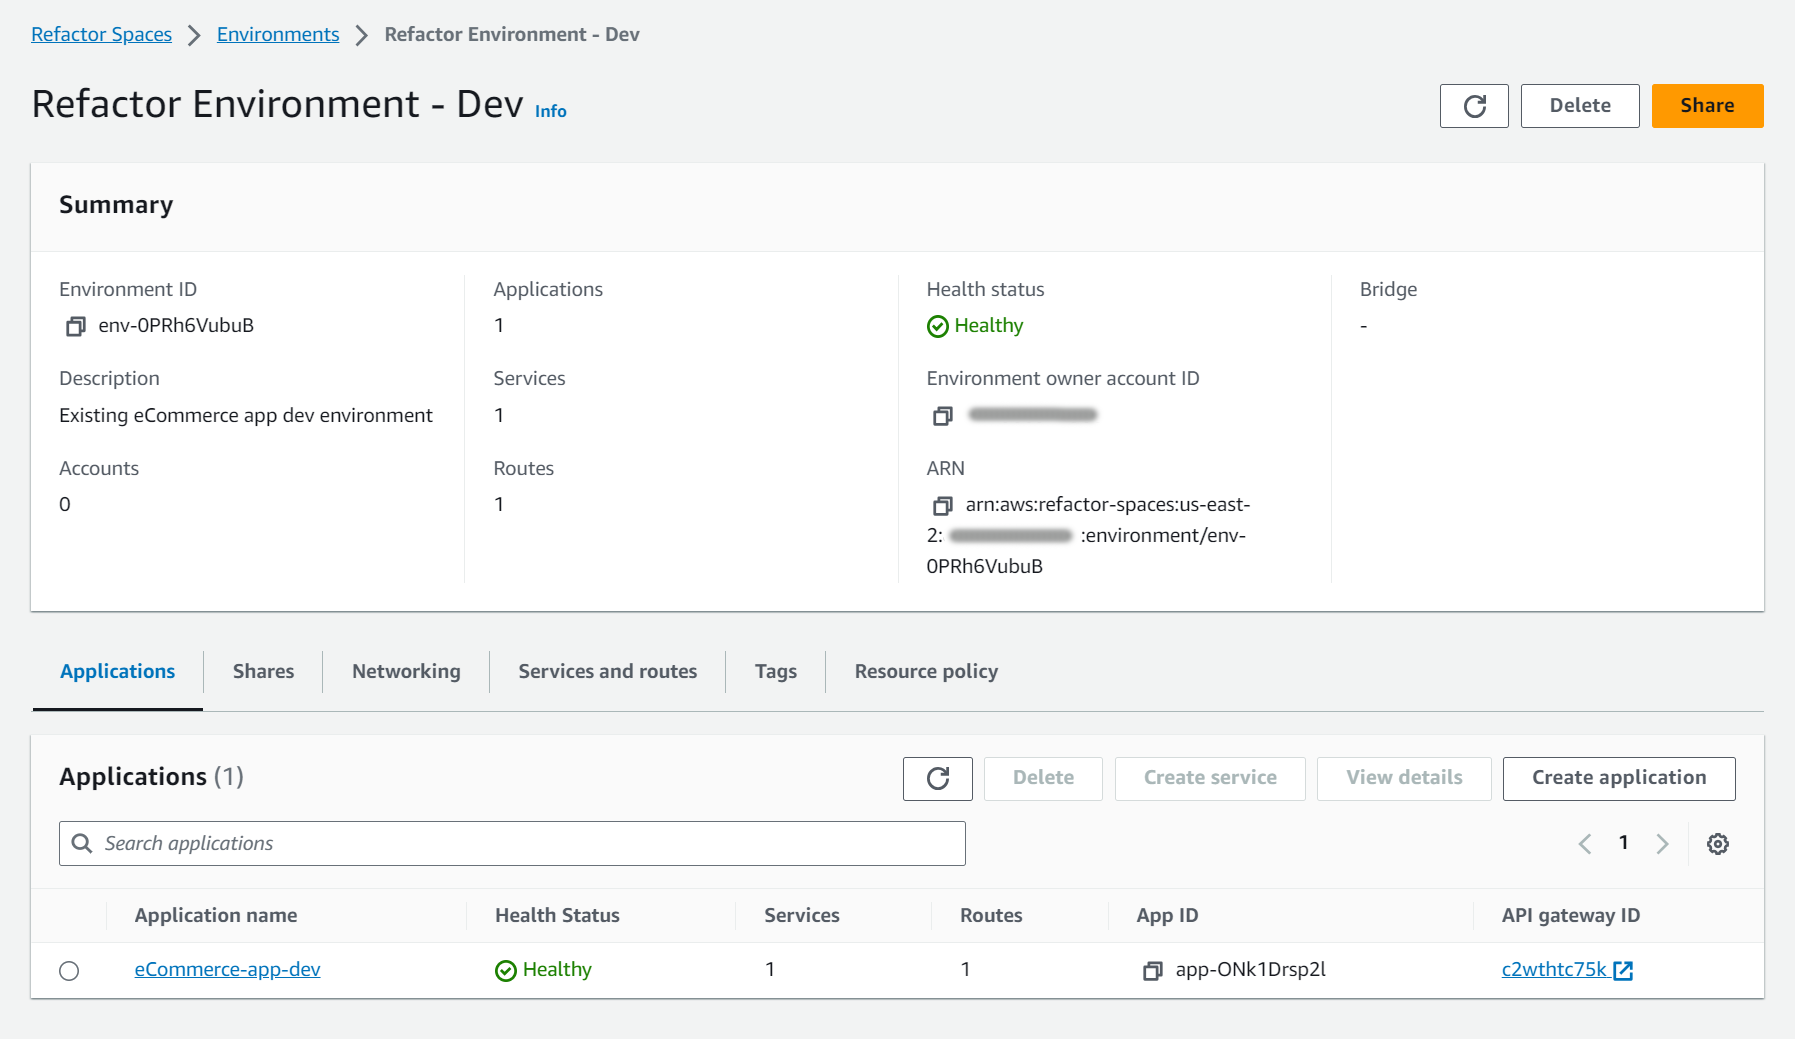
The terminal output from cdk deploy includes a link to the refactor environment on the AWS console (under AWS Migration Hub Refactor Spaces). Navigate to the link for RefactorEnvStack.rsenvlink.
The environment is an AWS resource that contains apps and services. It can be shared with other AWS accounts using AWS Resource Access Manager (more on that later) to simplify multi-account routing and gain cross-account visibility into the app as new services are added. The environment page provides an overview of what is in the environment:

Refactor Spaces Application
From the environment page, click on the eCommerce-app-dev application. The Refactor Spaces application will become the new frontend for your application and provides a single endpoint for external callers. As you launch new features or refactor existing functionality into microservices, you’ll add Refactor Spaces services and routes to the application. Every time a route is added and set to active, traffic is automatically cut over to the target service and Refactor Spaces ensures no traffic drops happen in the transition.
 The app provisions several resources which are linked on this page. Explore API Gateway, which provides the strangler-fig proxy, by clicking on the API Gateway link in the Summary section. Refactor Spaces configures API Gateway for you whenever you add, delete, activate, or deactivate Refactor Spaces routes.
In order to route traffic to VPCs, API Gateway has a feature named VPC Link. You may want to check out the “VPC Link” section in the left navigation of the API Gateway console to explore more of what Refactor Spaces created. Also note that VPC Link requires an NLB, so Refactor Spaces also created that and you can see the NLB by clicking the link under Network Load Balancer in the Summary of the application page.
Refactor Spaces Service and Route
The CDK stack created an example service with a public URL endpoint. In reality, this first service will point to your existing application, likely in a VPC. A default route was also created to send all traffic from the API Gateway to the service. You can see the traffic routing in action by navigating to the Proxy URL output as part of the CDK deployment (output named RefactorEnvStack.proxyurl) or listed under the Proxy table on the Refactor Spaces application page. Prior to cutting over real traffic to your new front door, you’ll probably want to hide the proxy's generated URL using API Gateway Custom Domains.
Ready, Set, Refactor
You now have the AWS infrastructure to incrementally move to microservices. Instead of using the example service and route, you’ll want to create a Refactor Spaces service that points to the app being modernized. This blog focused on getting the refactor environment up and running quickly. The next step is to choose between launching a new feature without touching the existing application or starting to break functionality out of the existing app. Either way, routing traffic to the new microservices — whether in Lambda, ECS, or EKS — can now be done with no additional infrastructure and two simple Refactor Spaces resources - services and routes.
Service and route creation can be built into your CI/CD pipelines using CDK, similar to the environment and application creation. As you create additional services, you’ll add Refactor Spaces routes that send specific HTTP paths (e.g., /shipping) to the service. Note, the AWS console is a great way to safely experiment at first. Services and routes can be created from the AWS Migration Hub console.
Best Practices Baked-In
Now, you might be wondering, "Why use Refactor Spaces when I can create this infrastructure myself?" You can create it yourself; however, using Refactor Spaces saves you the time to learn, design, build, and test refactor infrastructure. The Refactor Spaces environment comes with other benefits we haven’t discussed yet.
Multi-Account Automation
Fast forward a few months and your new features have driven more usage. If you put all your microservices in the same account as the existing app, you’re probably ready to follow best practices, ensure deployment and operational independence, and break out of a single account. Thanks to Refactor Spaces, moving services into different accounts is simple and safe. You keep creating services and routes the same way you did before, albeit from a different account.
For example, Refactor Spaces orchestrates Resource Policies, so when you have a team in another account that is launching a new feature using Lambda, routing to the Lambda becomes as simple as sharing the environment with AWS Resource Access Manager. This creates a Refactor Spaces service with the Lambda as the endpoint, and creates a route to the service - et voila, cross-account traffic is live without having to learn about API Gateway’s Lambda integration and IAM Resource Policies (both automated by Refactor Spaces).
Traffic Management
Refactor Spaces handles other things like traffic management during route cutover and route DNS updates. For route cutover, when you add a new route to Refactor Spaces, it automatically manages the cutover to the new service and ensures no traffic is dropped in the transition. For DNS updates, if you create the API GW and NLB yourself, NLB target groups only accept IP addresses or ALB ARNs. Unless you’re sending traffic to an ALB, you’d need to set up infrastructure to periodically re-resolve the DNS name and update NLB. Refactor Spaces automatically re-resolves DNS names at their Time-to-Live (TTL) and updates NLB for you for Refactor Spaces Services with a DNS name in the URL endpoint.
Clean Up
Let’s delete all the resources we created:
> cdk destory
Are you sure you want to delete: RefactorEnvStack (y/n)? y
RefactorEnvStack: destroying... [1/1]
...
Wrap Up
In this blog, you created an AWS Migration Hub Refactor Spaces environment so you can start incrementally moving to microservices in AWS faster. You can use this example to start experimenting with Refactor Spaces and to bake Refactor Spaces into an IaC template for new services that your teams can use for Strangler Fig refactoring on AWS. Refactor Spaces resources are available via the CDK (as shown), CloudFormation, the AWS SDK, and Terraform (linked earlier).
Enjoy the speed of the Strangler Fig pattern and achieve the business agility of microservices!
Opinions expressed by DZone contributors are their own.

Comments