How to Create Modular Groovy Applications in 5 Steps!
Join the DZone community and get the full member experience.
Join For Freelet's create a modular groovy application! why?! modularity is an enabler of scaleability. as your groovy application increases in size, you increasingly need to manage code dependencies, structure your code in units that are larger than packages, and distribute pieces of your application to developers located in different locations and conflicting time zones. welcome to modularity.
the netbeans platform already provides it (plus, osgi is coming to the netbeans platform ). beyond modularity, there are specific features that the netbeans platform provides that will remain unique, such as a shared filesystem for intermodular communication and the concept of "context" (i.e., netbeans lookup), which not only applications have (as with the jdk 6 serviceloader class), but netbeans platform objects such as windows themselves. welcome to loosely coupled modularity.
now, let's get started.
- start up netbeans ide 6.5.
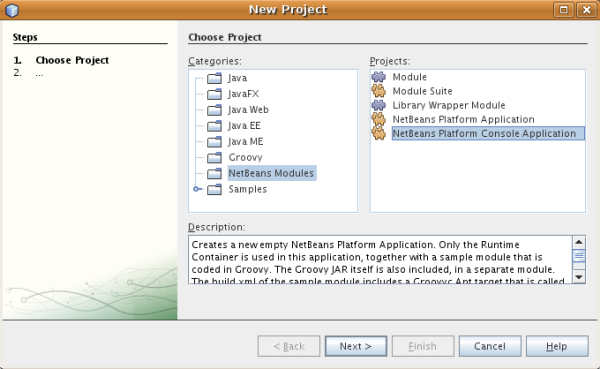
- go to this page and download the groovy console template and use the plugin manager (in the tools menu) to install it into the ide.
-
now, in the new project dialog, you should see this new project template:

-
click next, give your new application a name (such as "helloworld") and a location on disk, and then click finish. expand a few folders and you should now see this:

briefly, the template gives you a groovy pojo, with this content:
package org.my.app

public class demopojo {

    def foo

}
the template also gives you a moduleinstall class, which handles the lifecycle of the module:
package org.my.app

import org.openide.modules.moduleinstall as mi

public class installer extends mi {

    @override
    public void restored() {

        for(int i = 0; i < 10; i++) {
            demopojo dp = new demopojo()
            dp.setfoo(i)
            println("number: " + dp.getfoo())
        }

    }

}
so, we have some standard groovy constructs here, simply to get you started in the ecosystem of the netbeans platform. the module also includes a properties file for internationalization purposes and a layer.xml file, for the module's contributions to the shared filesystem.
-
run the application (i.e., without doing anything at all, no tweaking, no post processing, nothing at all, just run it). look in the output window of netbeans ide and you will see this:

so, you can see that you only have the absolute minimum set of modules to start with. also you're using the groovy compiler (thanks to an additional target that's added to the demo module's build.xml file). that's how to get started with modular groovy applications. have fun with groovy on the netbeans platform!
Opinions expressed by DZone contributors are their own.

Comments