How to Add a Jenkins Agent With Docker Compose
A comprehensive step-by-step tutorial to add a Jenkins agent using Docker Compose. Simplify CI/CD setup with this step-by-step guide for scalable automation.
Join the DZone community and get the full member experience.
Join For FreeIn the previous article on installing Jenkins with Docker Compose, we learned how to install and set up Jenkins using Docker Compose. It is now time to learn how to add a Jenkins agent using Docker Compose.
With the installation of Jenkins using Docker Compose, we are familiar with Docker Compose and its related file contents. Before we talk about adding the Jenkins agent using Docker Compose, let’s first understand what Jenkins agents are and what they are used for.
What Is a Jenkins Agent?
An agent is usually a machine or container that links to a Jenkins controller and carries out tasks as instructed by the controller.
It is not recommended to run any Jenkins builds directly using the Jenkins controller. It is best practice to use a Jenkins agent from a security and performance perspective to execute your tasks.
Setting Up a Jenkins Agent With Docker Compose
The following installations are prerequisites that are required for successfully setting up the agent on the machine with Docker Compose:
- Java
- Docker
- Jenkins
I have broken the Jenkins agent configuration steps into clear, easy-to-follow steps mentioned below:
Step 1: Generating an SSH Key Pair
The SSH Key pair can be generated by running the following command in the terminal:
ssh-keygen -t ed25519 -f Jenkins-agentExplanation for the above command:
ssh-keygenis the command to generate the SSH key pair. It will generate the public and private keys in two separate files.-t ed25519states the type of key to create. Here, ed25519 is the recommended modern secure algorithm.-f Jenkins-agentspecifies the name of the generated key pair. The private key will be saved as Jenkins-agent, and the public key will be saved as Jenkins-agent.pub.
After running the command, it will ask to enter the passphrase. It is an optional step and can be skipped by pressing the Enter Key.
Adding a passphrase is optional, but if you choose to set one, make sure to remember it — you’ll need to use the same passphrase in Jenkins later.
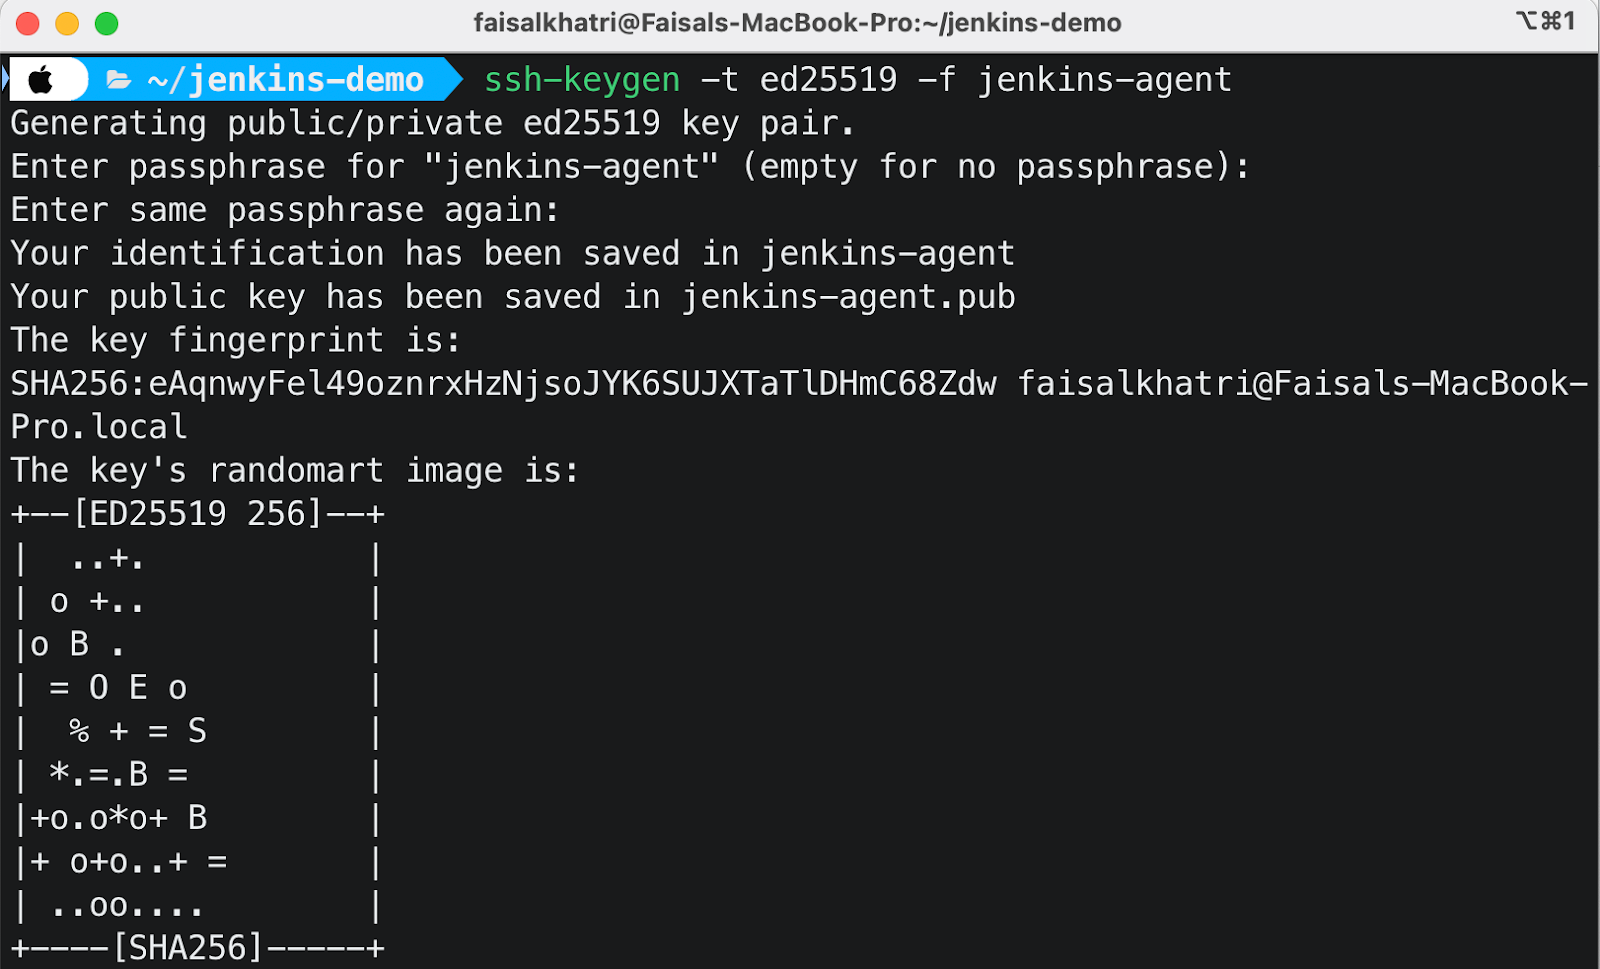
The SSH Keygen files will be generated on the same path where the command is executed.
Step 2: Add Credentials Using SSH Key in Jenkins
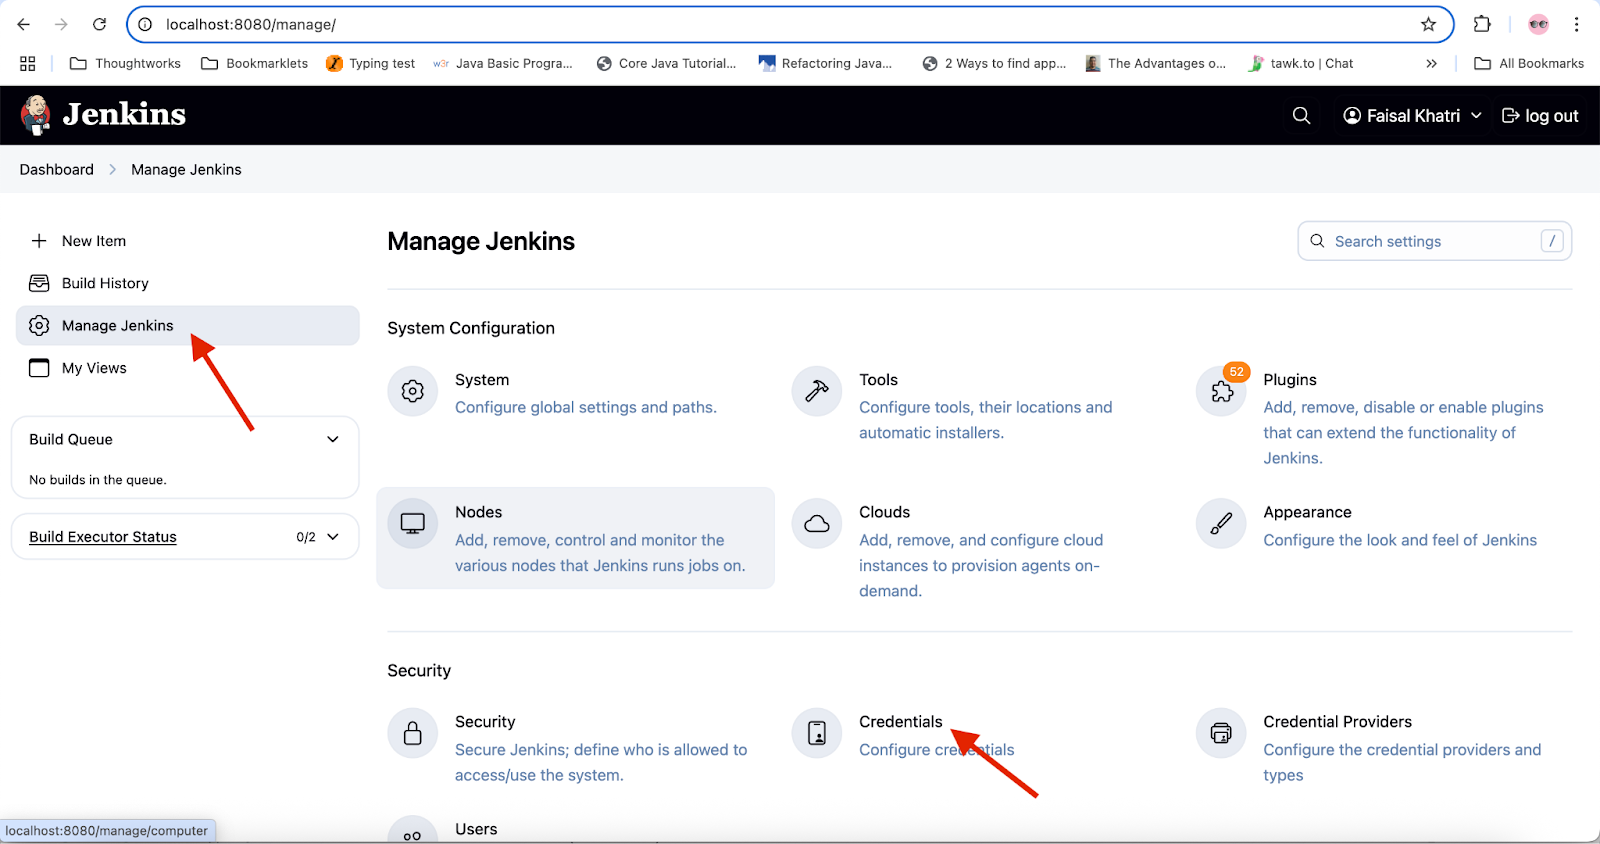
Navigate to Jenkins and open the Manage Jenkins menu. Next, open the Credentials page by clicking on the “Credentials” menu on the right-hand side of the page.
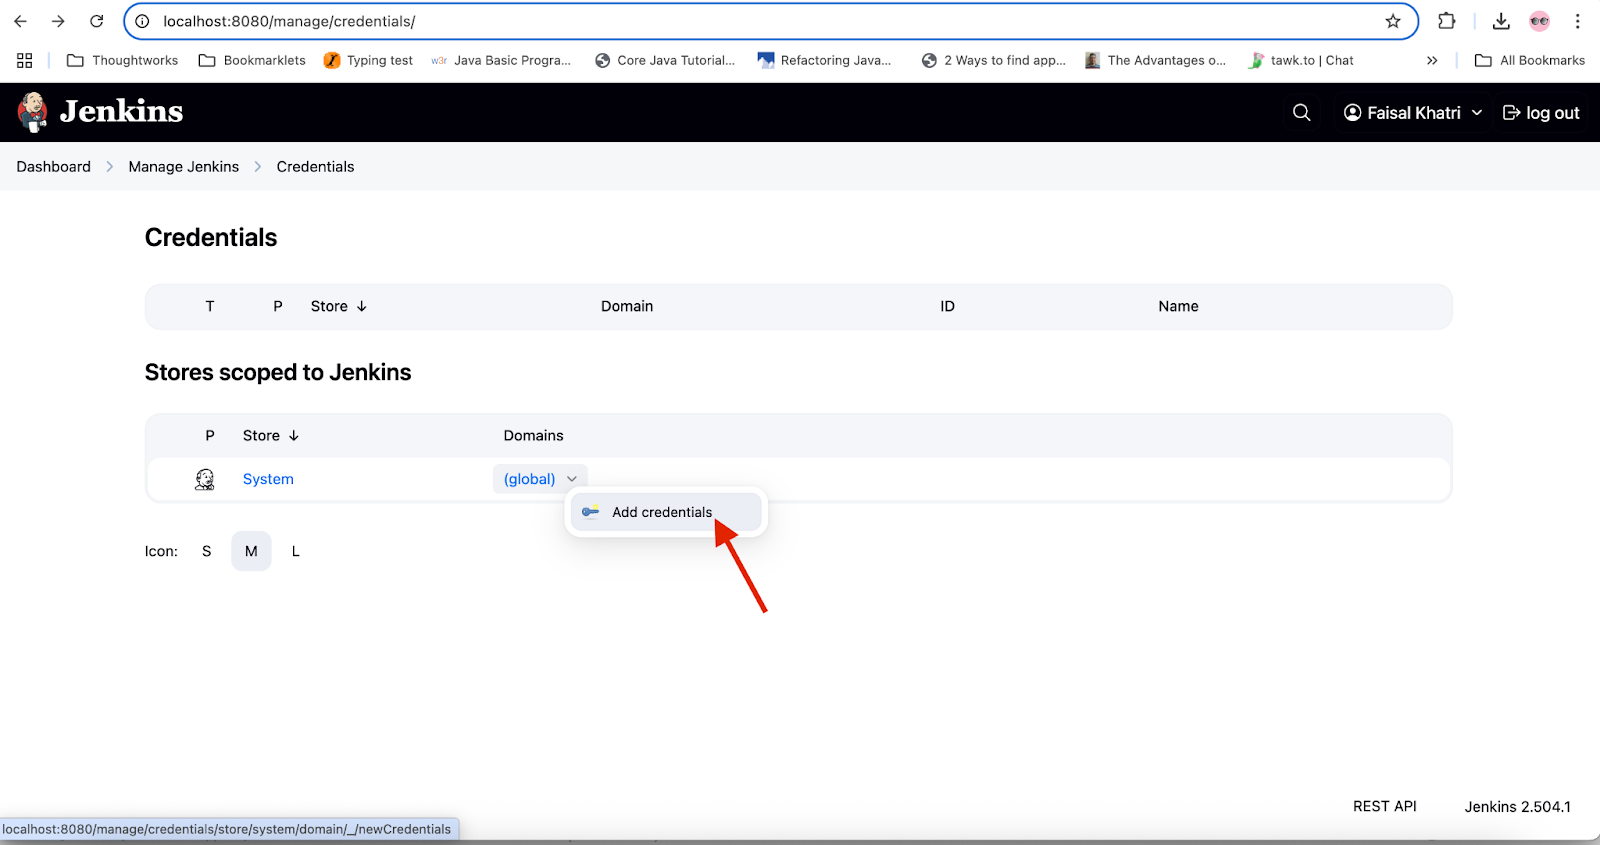
On the Credentials page, click on “(global)” under the “Domains” column. Click on the “Add Credential” option.
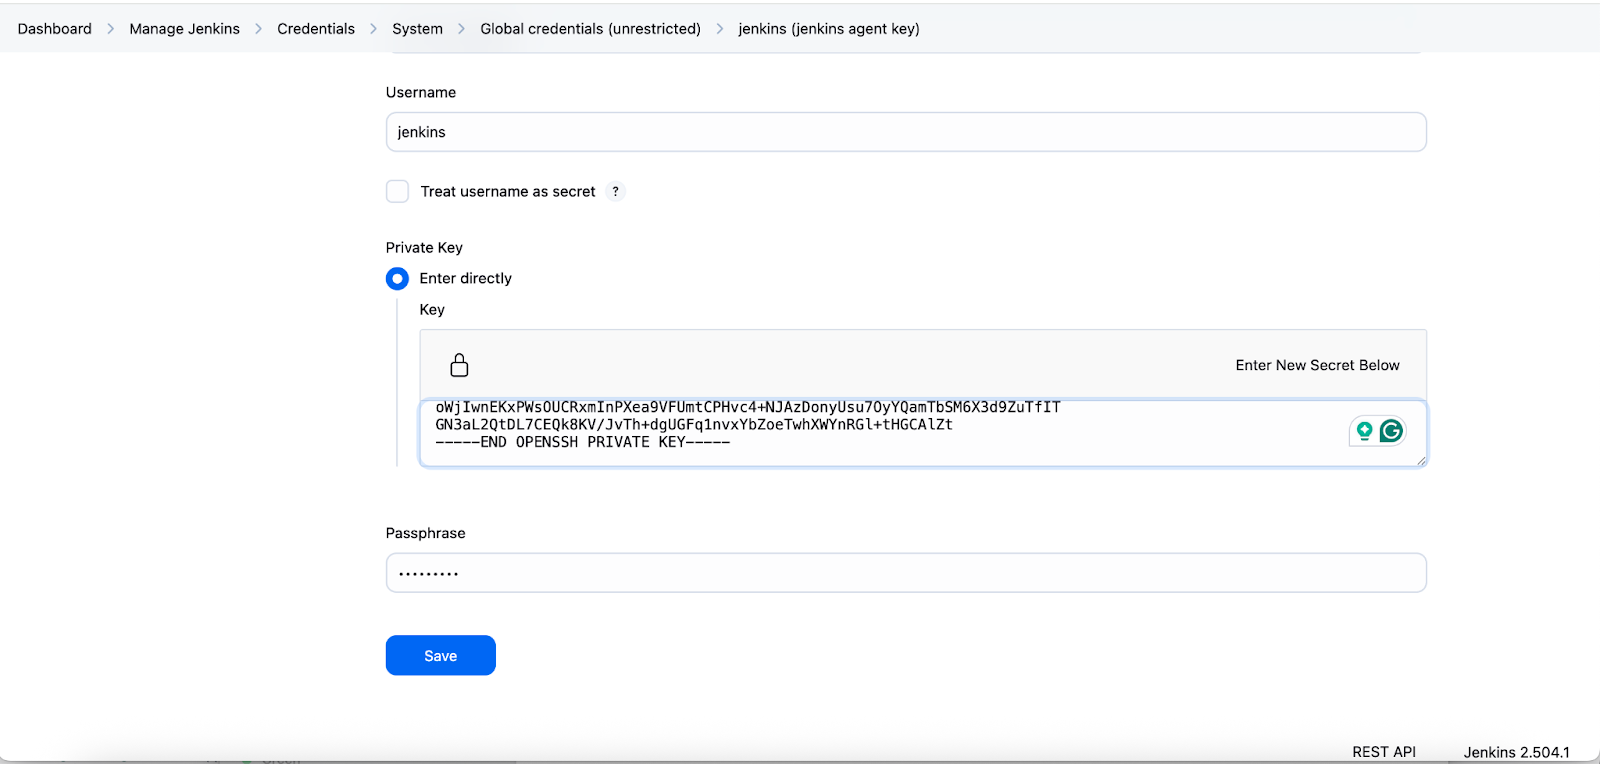
Select/Update the following options in the “New Credentials” screen:
1. Kind — Select “SSH Username with private key.”
2. Scope — System (Jenkins and nodes only). By setting this option, the key can be used for Jenkins and nodes only and cannot be used for jobs.
3. Provide the ID and Description.
4. Enter Username as “jenkins.”
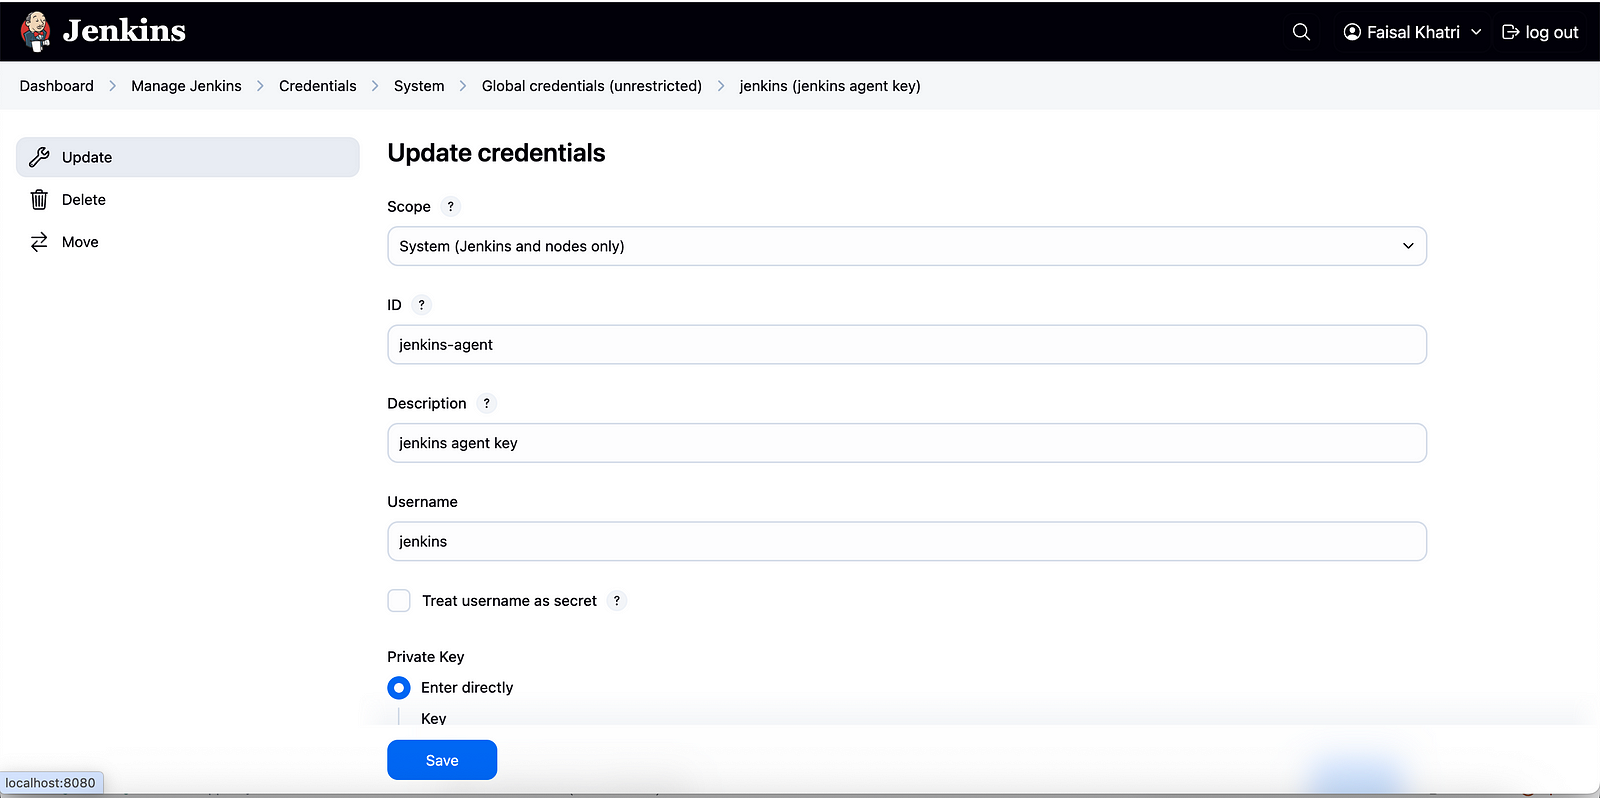
5. Select “Enter Directly” for the Private Key option. Paste the content of the “jenkins-agent” that we generated in Step 1.
6. If you used a passphrase while generating the SSH key, enter it in the “Passphrase” field.
7. Click on the “Create” button.
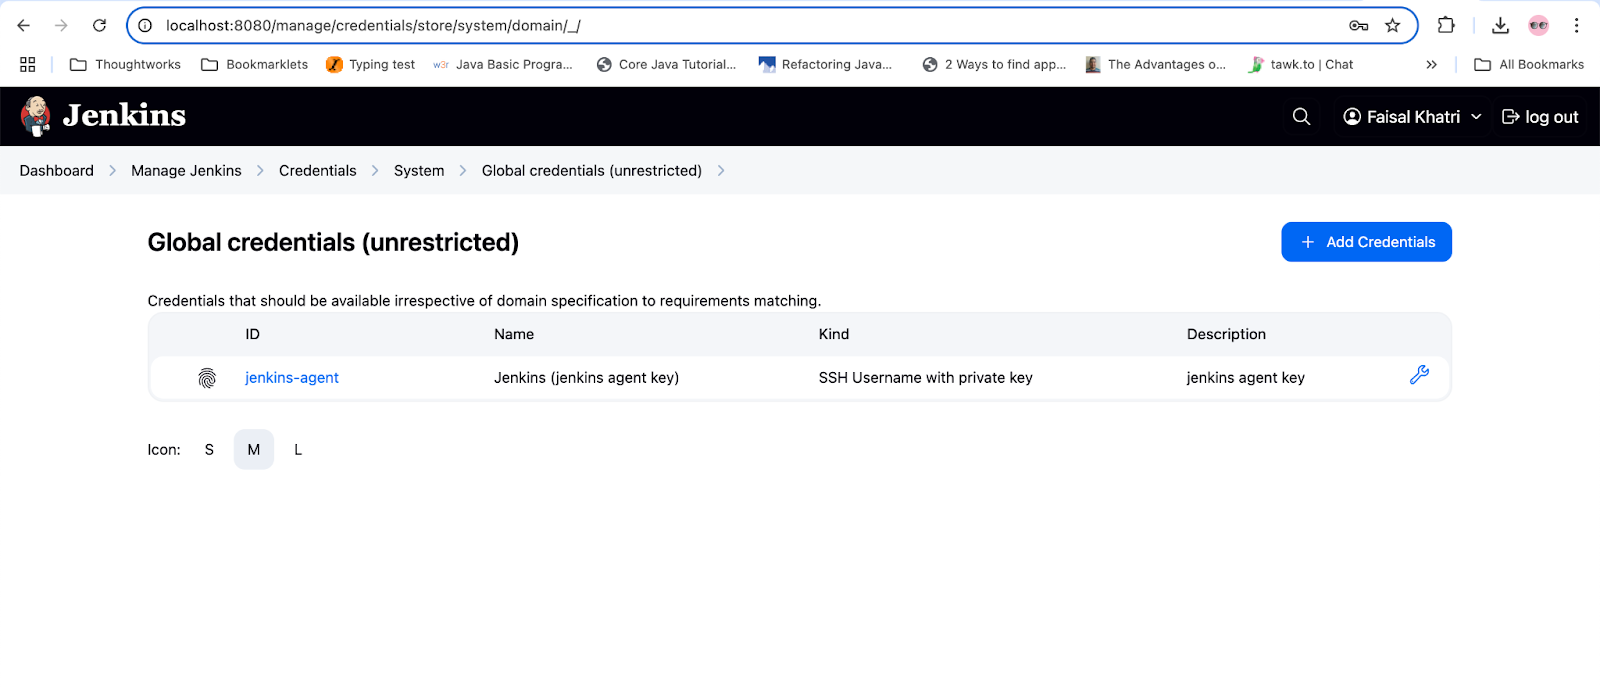
The Jenkins-agent credentials should be added successfully.
Step 3: Update the Docker Compose File and Add a New Service for the Jenkins Agent
The Docker Compose file must be updated, and a new service for the Jenkins agent should be added to it.
agent:
      image: jenkins/ssh-agent:latest-jdk21
      privileged: true
      user: root
      container_name: agent
      expose:
        - 22
      environment:
      - JENKINS_AGENT_SSH_PUBKEY=ssh-ed25519 AAAAC3NzaC1lZDI1NTE5AAAAIEnvpBuTsaCCG3zts8liJY/h6J7gKI6y6q0pc7xxcGZI [email protected]
Understanding the Agent Service
The “agent“ service block contains the details of the image, user, port, and SSH key pair details.
The “image” specifies the Docker image used for this service. In our case, we are using the “jenkins/ssh-agent:latest-jdk21”, which is a pre-built Jenkins SSH agent image with JDK 21 support.
The “privileged” is set to true, which means the container is given extended privileges. It is sometimes necessary to build Docker containers within Docker.
To provide full administrative access within the container, the “user” is set to “root”. The “container_name” is set to “agent”. The “expose: 22” exposes port 22 (SSH port) from the container, which allows Jenkins to communicate with the agent over SSH.
Under the “environment” attribute, the JENKINS_AGENT_SSH_PUBKEY is the environment variable, and the value after “=” is the content of the public SSH key “jenkins-agent.pub” that we generated in Step 1. It allows the Jenkins Controller to connect securely to this agent via SSH.
With this service block updated in the “docker-compose.yaml” file, we are all set to use the Jenkins Controller and the agent via a single Docker Compose file.
Following is the full “docker-compose.yaml” file for your reference:
# docker-compose.yaml
  version: '3.8'
  services:
    jenkins:
      image: jenkins/jenkins:lts
      privileged: true
      user: root
      ports:
       - 8080:8080
       - 50000:50000
      container_name: jenkins
      volumes:
      - /Users/faisalkhatri/jenkins-demo/jenkins-configuration:/var/jenkins_home
      - /var/run/docker.sock:/var/run/docker.sock

    agent:
      image: jenkins/ssh-agent:latest-jdk21
      privileged: true
      user: root
      container_name: agent
      expose:
        - 22
      environment:
      - JENKINS_AGENT_SSH_PUBKEY=ssh-ed25519 AAAAC3NzaC1lZDI1NTE5AAAAIO5oiJGVDyuW+09Runc87mpZDJBtMe8e4TQwWLHzXqvB [email protected]
Step 4: Restart Jenkins Using Docker Compose
First, the already running Jenkins instance must be stopped by running the following command in the terminal:
docker compose down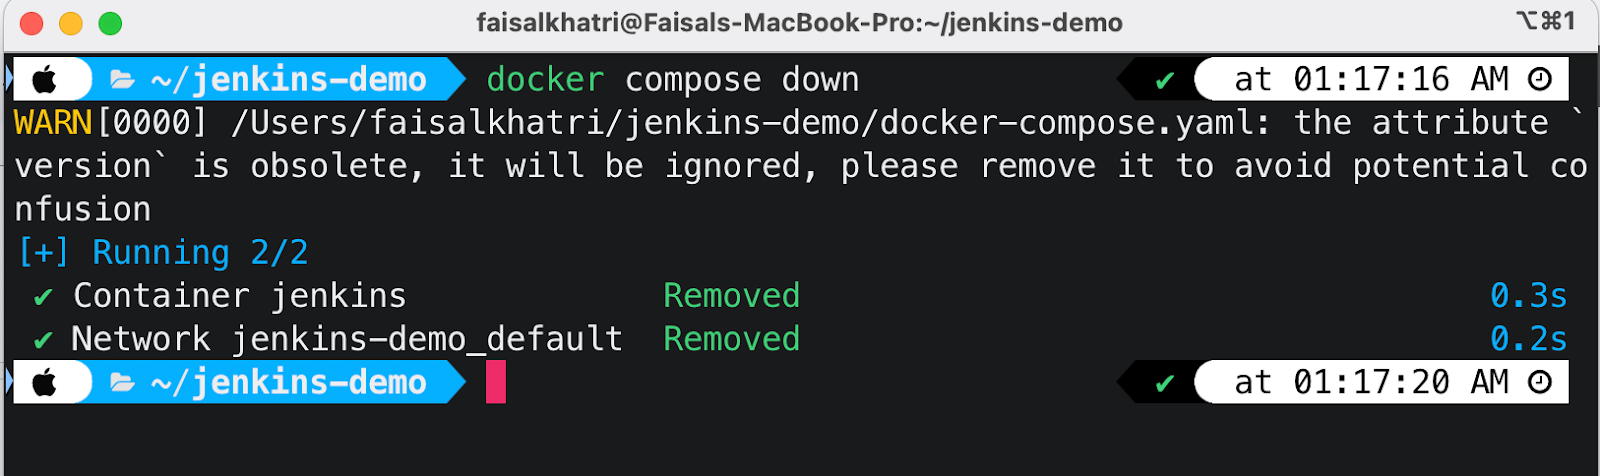
Next, start Docker Compose again by running the following command in the terminal:
docker compose up -dStep 5: Create a New Node in Jenkins
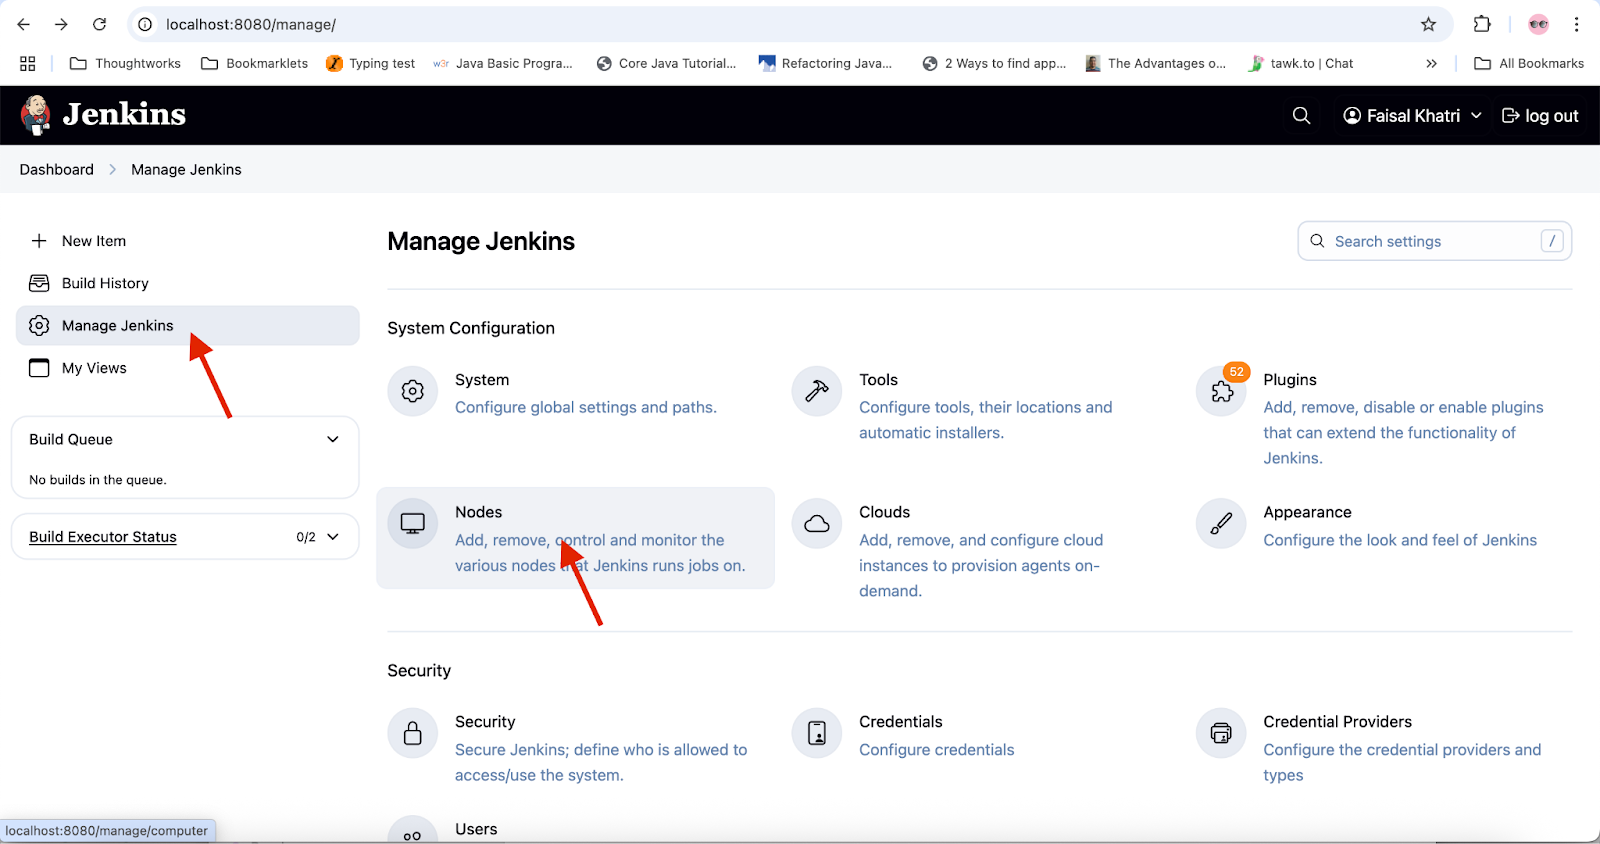
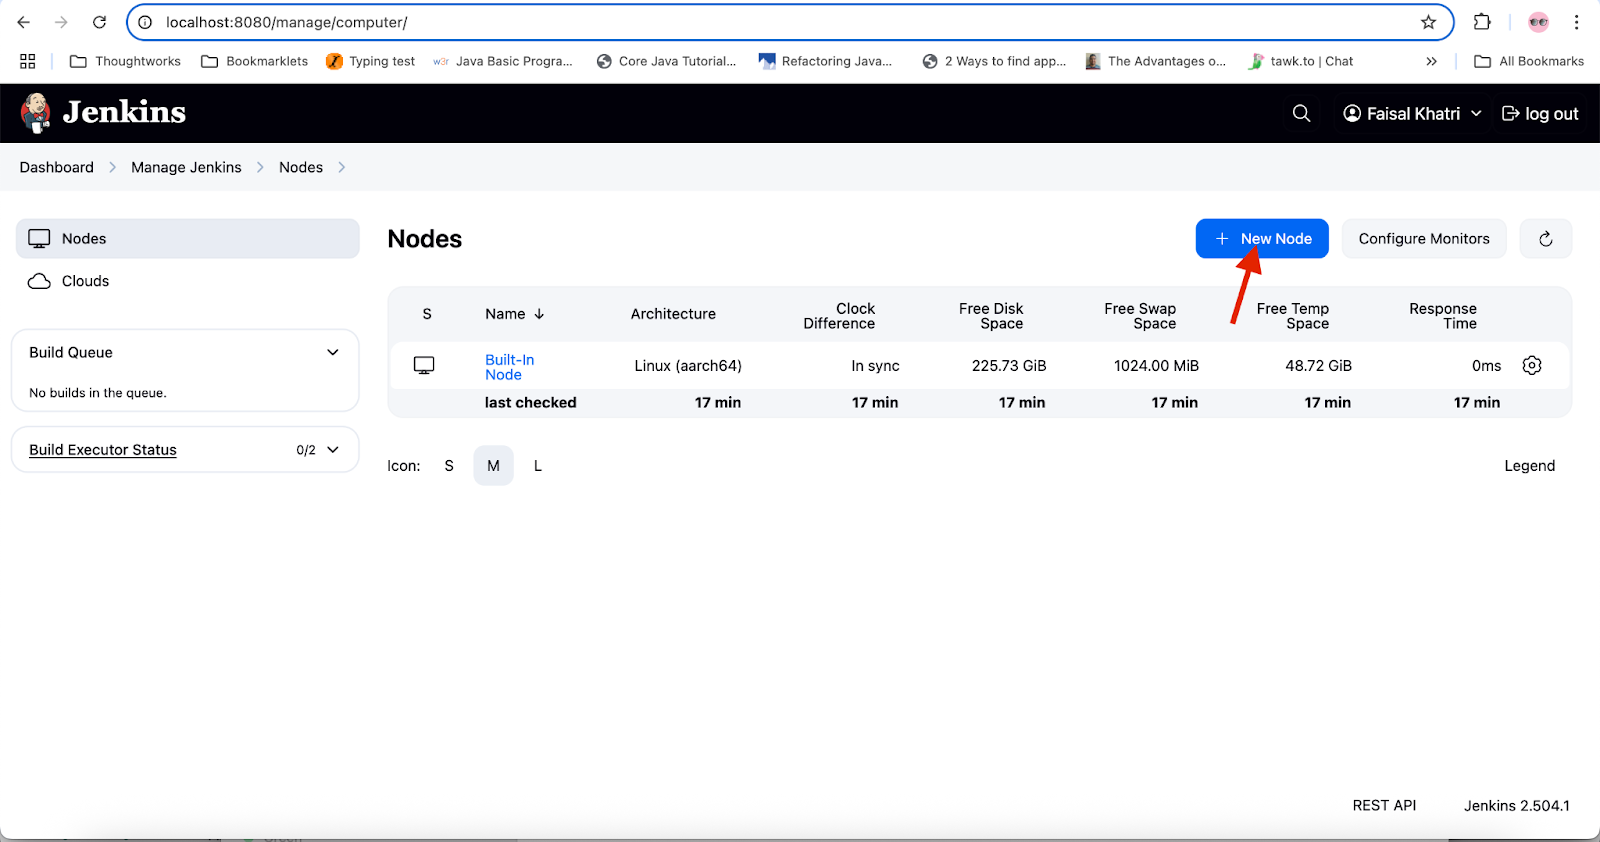
Open the browser and navigate to Jenkins (https://localhost:8080). Open the “Nodes” window by navigating to the “Manage Jenkins” menu.
Click on the “New Node” button to add a new node.
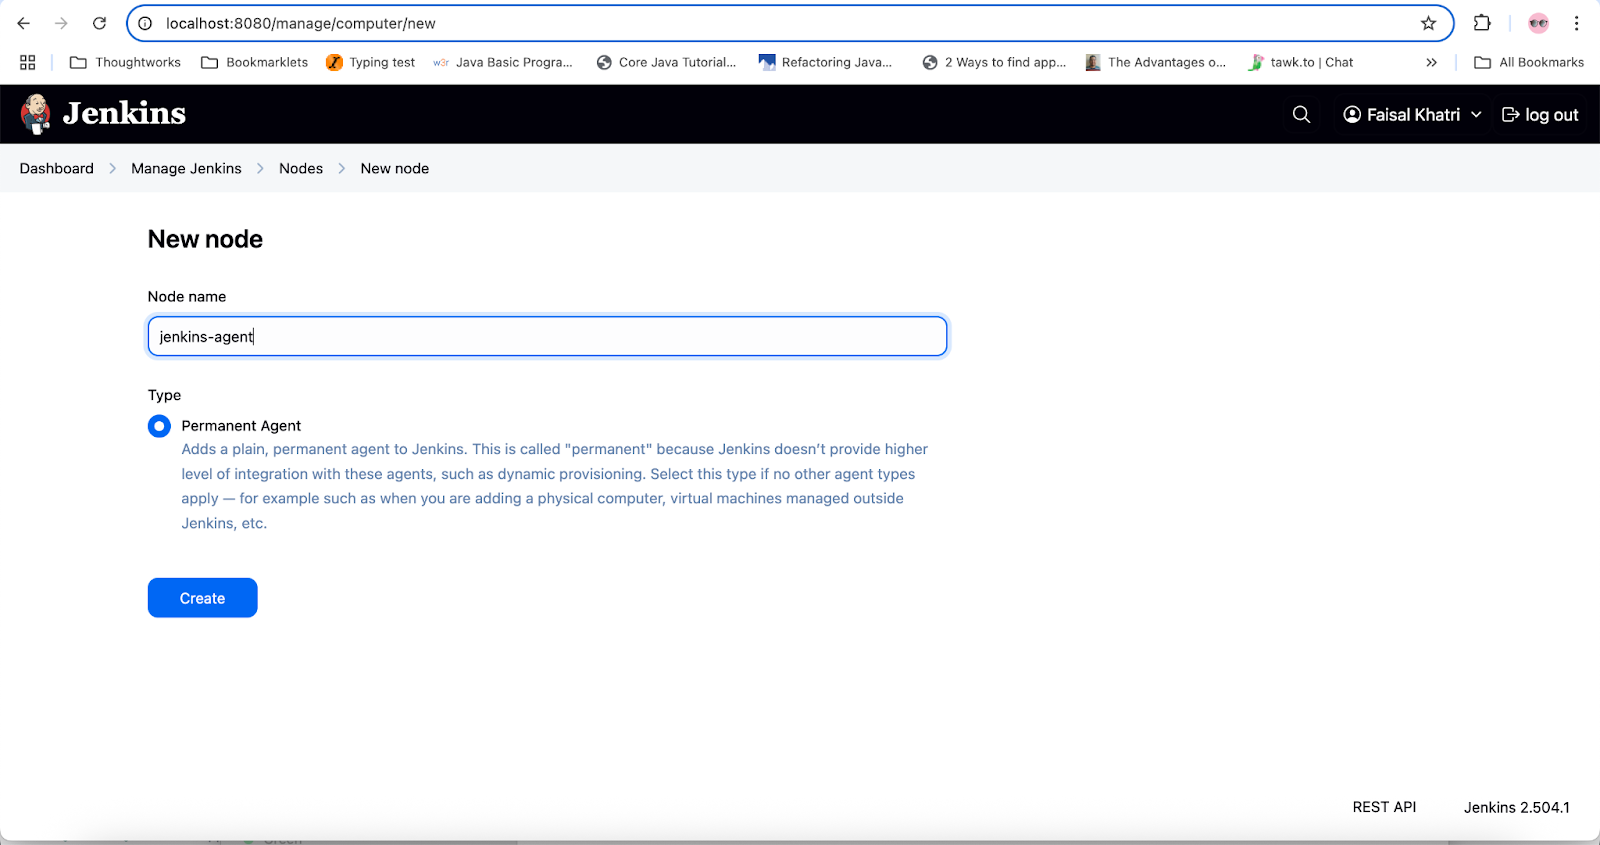
Add the “Node name” and select “Type — Permanent Agent” and click on the “Create” button to proceed.
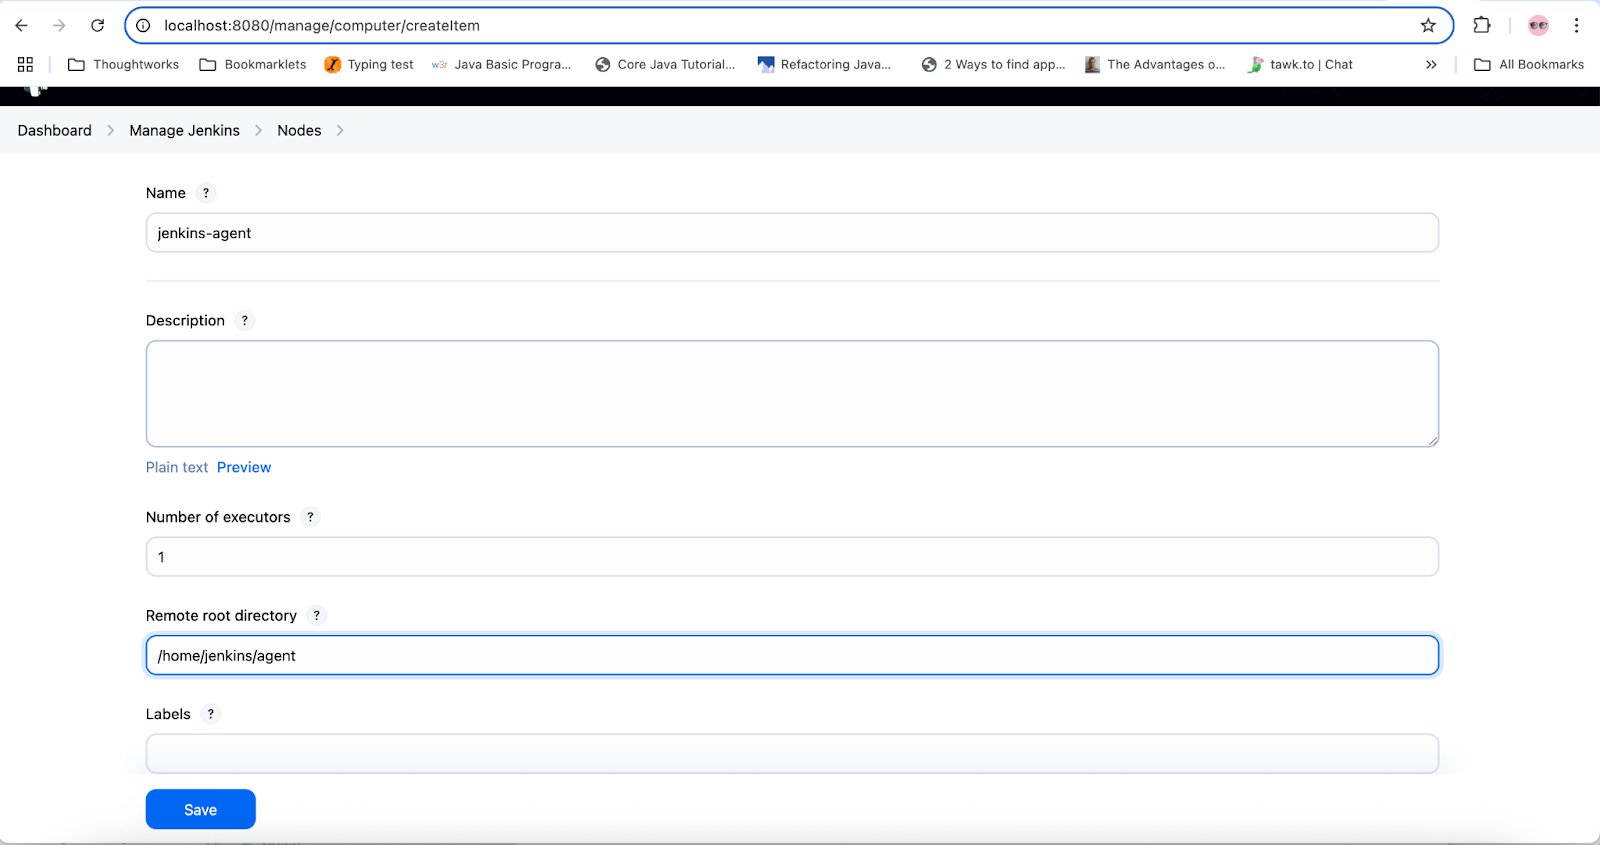
In the next screen, update the values as provided below:
1. Description – It is an optional field; update any meaningful value describing the agent, or it can be left blank
2. Number of Executors – 1
3. Remote root directory – ”/home/jenkins/agent”
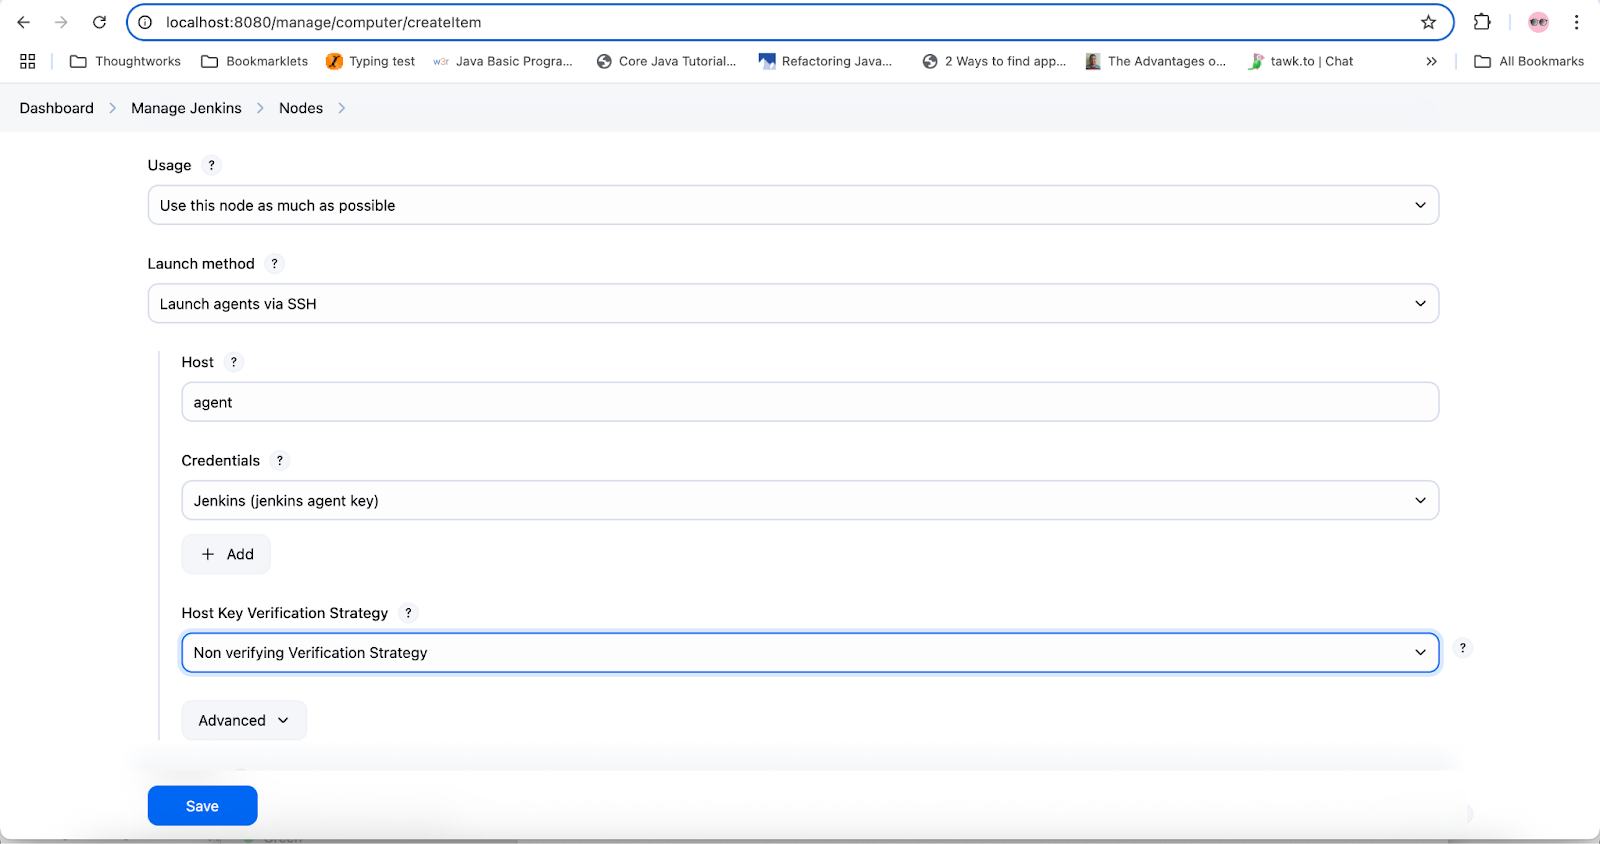
4. Usage – Use this node as much as possible
5. Launch method – Launch agents via SSH
6. Host – agent. The hostname is the container name that has been set in the “agent” service in the Docker Compose file. Each container can communicate with others by using its container name as a hostname.
7. Credentials – Jenkins (jenkins-agent key)
8. Host Key Verification Strategy – “Non-verifying Verification Strategy”
9. Click on the “Advanced” button to update a few Advanced Settings:
- Port – 22
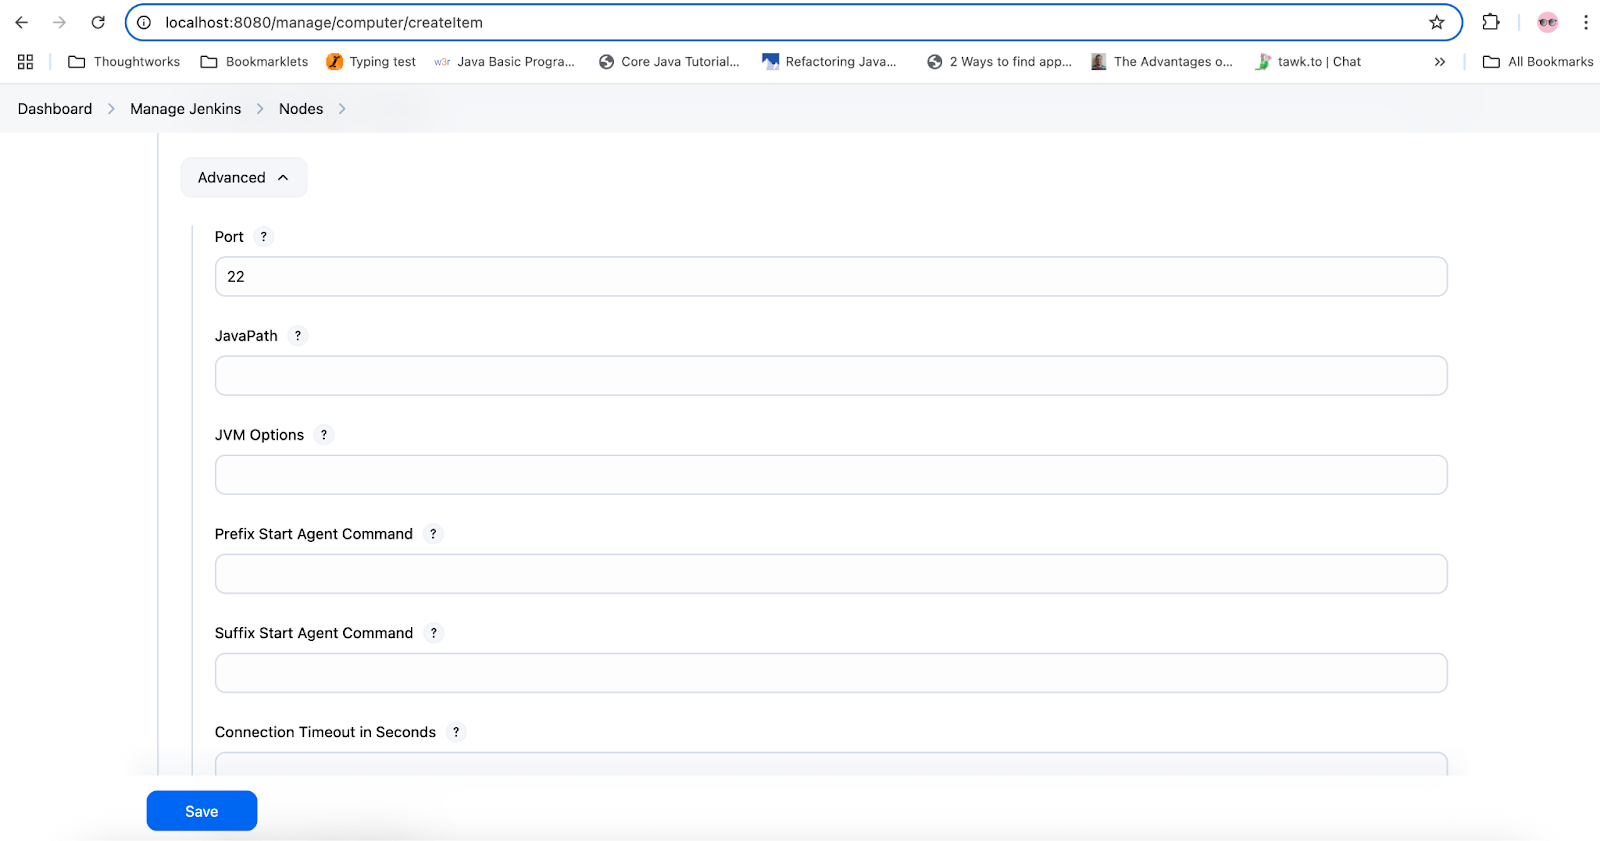
There is no need for adding the Java Path here, as we have already used the latest JDK 21 image for the agent in the Docker Compose file.
- Connection Timeout in Seconds – 60
- Maximum Number of Retries – 10
- Seconds To Wait Between Retries – 15
The rest of the settings should be left as default. Click on the Save button. With these settings, the configuration for the Jenkins agent is completed.
The following steps should be performed to check that the agent is successfully up and running:
1. Navigate to the Manage Jenkins > Nodes.
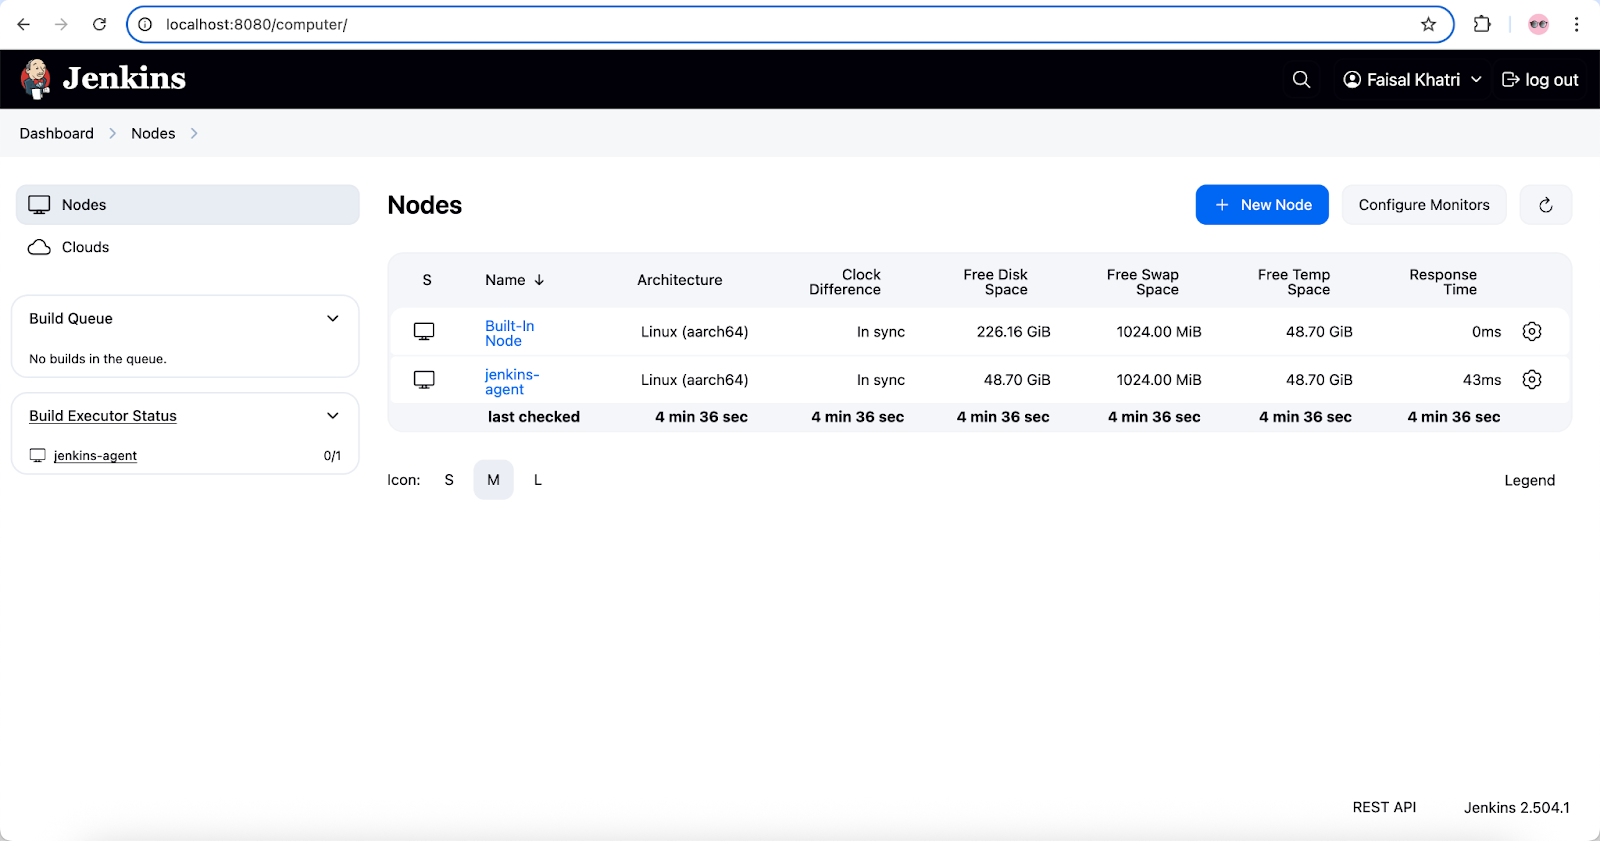
2. Click on the “jenkins-agent” node.
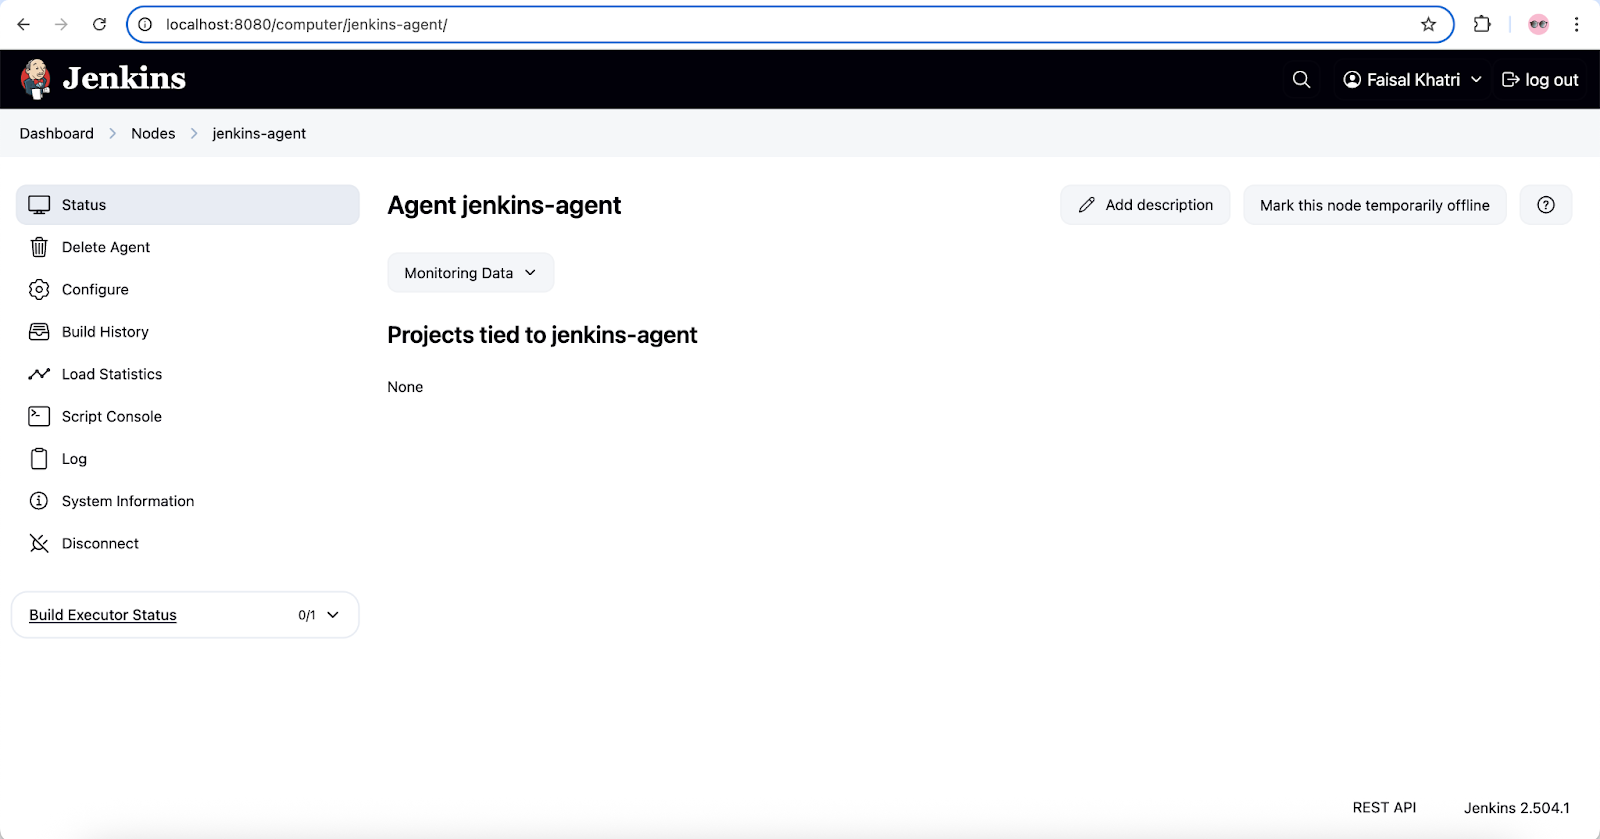
3. On the left-hand side, click on the Log menu to check for the agent logs.
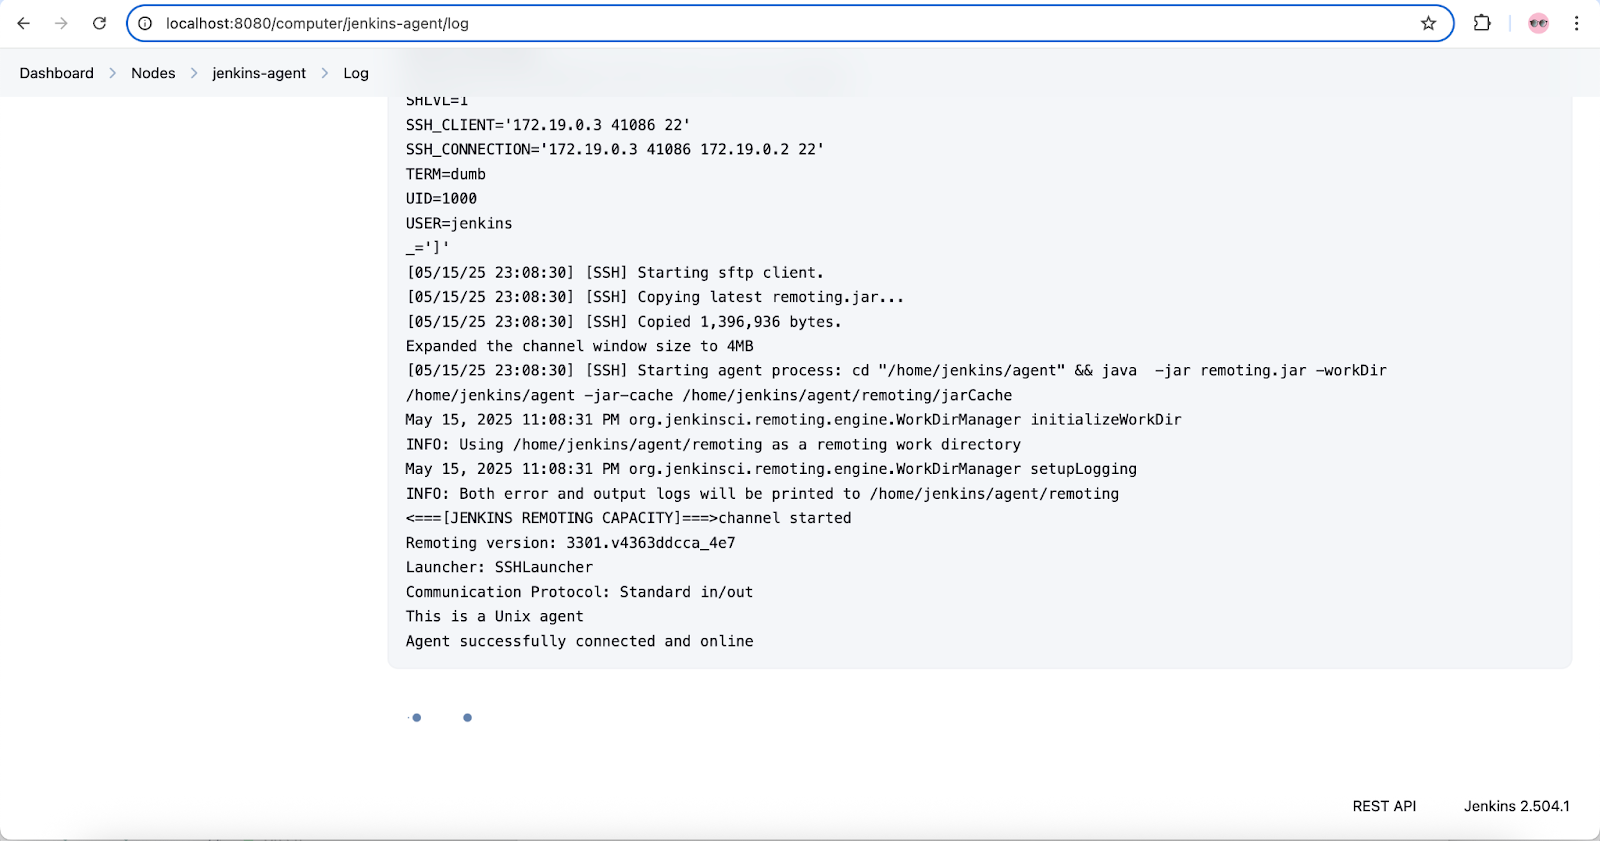
It can be seen in the logs — “Agent successfully connected and online”.
Congratulations! You have successfully added a Jenkins agent in Jenkins. This agent can be further used for executing the Jenkins jobs.
Summary
The Jenkins agent is a machine or container that links to the Jenkins Controller to execute the Jenkins tasks. With Docker Compose, the configuration was fast and easy.
The Jenkins node creation step is a one-time activity, and once it is set up, we can run any task using the agent. Since we used Docker Volume to set up Jenkins, all data related to the Jenkins instance is preserved across restarts, enabling smooth and uninterrupted usage.
Published at DZone with permission of Faisal Khatri. See the original article here.
Opinions expressed by DZone contributors are their own.
Comments