How to Build a Serverless App With Vue, Azure Functions and FaunaDB Part 2
Dive head-first into Azure functions.
Join the DZone community and get the full member experience.
Join For Free
This article is the second part of our three-part series on building a serverless application with Vue.js, Azure functions, and FaunaDB. In this section, we'll focus on building out Azure functions to work with our application's database.
Azure Functions
Azure Functions are hosted on the Azure public cloud. With it, you can build small computing units called “Functions,” host them on this cloud, and trigger them based on a variety of event triggers, such as: HTTP Trigger and a new message arriving to Azure Service Bus Queue.
In this section, we are going to build two Azure Functions, Create a new Note and Read All Notes. Both of these functions belong to the HTTP Trigger event-based functions.
Azure creates two new HTTP Endpoints pointing to these functions. This way, both functions are exposed to the public, and our app can easily request them via REST API calls.
You may also like: FaunaDB: An Architectural Overview.
Prerequisites
To start building Azure Functions, you have the option to either use the Azure Portal or Visual Studio/Visual Studio Code.
Today, I am going to show you how you can build Azure Functions from within VS Code. If you want to learn more about building Azure Functions inside the Azure Portal, click here: Create your first function in the Azure portal.
In order to develop and build Azure Functions inside VS Code, you are required to install a few tools and extensions. To create a new Azure Functions project, and other Azure services, start by installing the Azure Tools VS Code extension.
To locally debug and run an Azure Function, install the Azure Functions Core Tools. Once installed, your VS Code should look like this:

Now, you can start working with Azure Functions!
Create a New Azure Functions Project in VS Code
Click the Create New Project link under the Functions section. You will be prompted to select the folder where you want to create a new project.
Next, you select the programming language you will be using to build your Azure Functions. Let’s select JavaScript.

Once you select the language, you are prompted to select the Trigger Template for your Azure Functions. For now, let’s skip this option. We will come back to it shortly once we create the Azure Functions.

Finally, you are asked where you want to store the new project. Select the Add to workspace option.

The new project should look like this:

Now that the Azure Functions project is created, we can move forward, and start adding our Azure Functions.
Build the Create a New Note
Click the Local Project (azure-serverless) item, and then click the “thunder” icon on the toolbar to start creating a new function.

Go ahead and select the HTTP Trigger. This type of Azure Functions allows us to access the function hosted on Azure via a REST API Endpoint.
Next, provide a name for this function and hit Enter.

Finally, you are prompted to select an authorization level. Select Anonymous for now. This means that calling this Azure Function doesn’t require any authorization or authentication.
You can read more about authorization levels on the Azure Functions HTTP triggers and bindings.

The process generates the following basic Azure Function source code:
module.exports = async function (context, req) {
    context.log('JavaScript HTTP trigger function processed a request.');

    if (req.query.name || (req.body && req.body.name)) {
        context.res = {
            // status: 200, /* Defaults to 200 */
            body: "Hello " + (req.query.name || req.body.name)
        };
    }
    else {
        context.resS = {
            status: 400,
            bodyS: "Please pass a name on the query string or in the request body"
        };
    }
};
The function accepts the context of the request and the actual request object as parameters. To communicate with the response object, you can access it via context.res.
Switch to the VS Code Explorer view to find the function source code. Every function is created under its own folder. The function folder contains two files:
- index.js the source code of the function.
- function.json is a configuration file that contains function bindings, inputs, outputs, authorization levels, and other configuration data.
I will make one change to the function.json file by allowing only POST requests to this function. Replace the function.json file with the content:
{
  "bindings": [
    {
      "authLevel": "anonymous",
      "type": "httpTrigger",
      "direction": "in",
      "name": "req",
      "methods": [
        "post"
      ]
    },
    {
      "type": "http",
      "direction": "out",
      "name": "res"
    }
  ]
}
Now, let’s install the faunadb NPM package once again on this project by issuing this command:
npm install --save faunadb
Start by creating the faunadb Client and Query objects to be used later on inside the function. Open the notes-create/index.js file and add the following:
const faunadb = require('faunadb');
const q = faunadb.query;
const client = new faunadb.Client({ secret: 'fnADZPpx4EACAGpcBmat4T-ZHYRIdX607Upcve3x' });
Then, replace the existing function source code with the one below:
module.exports = async function (context, req) {
    const data = {
        title: req.body.title,
        body: req.body.body
    };

    context.log('Function `notes-create` is invoked', data);

    const notesDocument = { data };

    /* create and execute a FaunaDB query to create a new note */
    return client.query(q.Create(q.Collection("Notes"), notesDocument))
        .then(response => {
            context.log('Note document created', response);
            context.res = {
                status: 200,
                body: JSON.stringify(response)
            };
        })
        .catch(error => {
            context.log('Note document cannot be created', error);
            context.res = {
                status: 400,
                body: JSON.stringify(response)
            }
        });
};
The code:
- Starts by accessing the HTTP Request object to construct a new Notes object.
- Creates the Notes Document in the form of
{ data: { title: "", body: "" } }. - Constructs a new Faunadb Query Expression to create a new Notes Document.
- If the response is a success, the function returns the actual response to the caller.
- If the response is a failure, the function returns the error to the caller.
To run the function locally, go to the Debug section in VS Code and hit the Debug Arrow to launch and expose the Azure function:
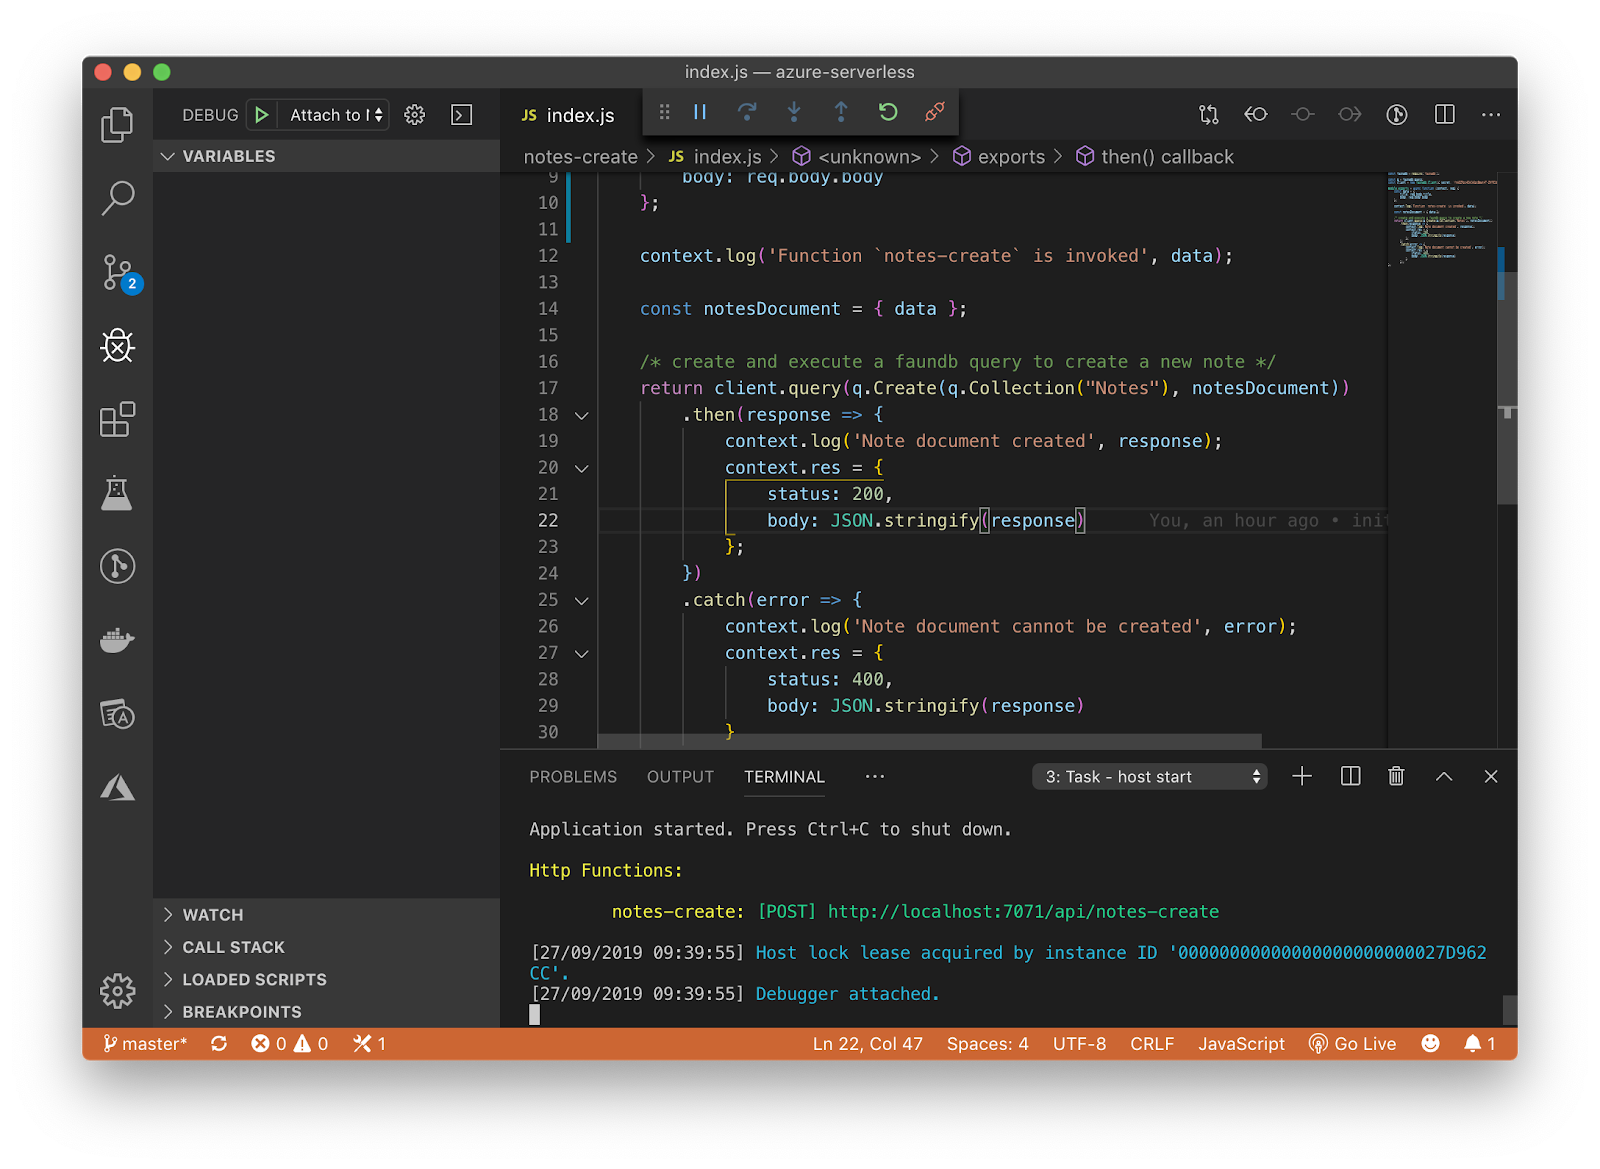
As you can see in the Terminal window, Azure Core Tools lists the functions that are currently active and awaiting new requests.
In this case, we can see a single function named notes-create that accepts POST requests on the http://localhost:7071/api/notes-create Endpoint API.
notes-create: [POST] http://localhost:7071/api/notes-create
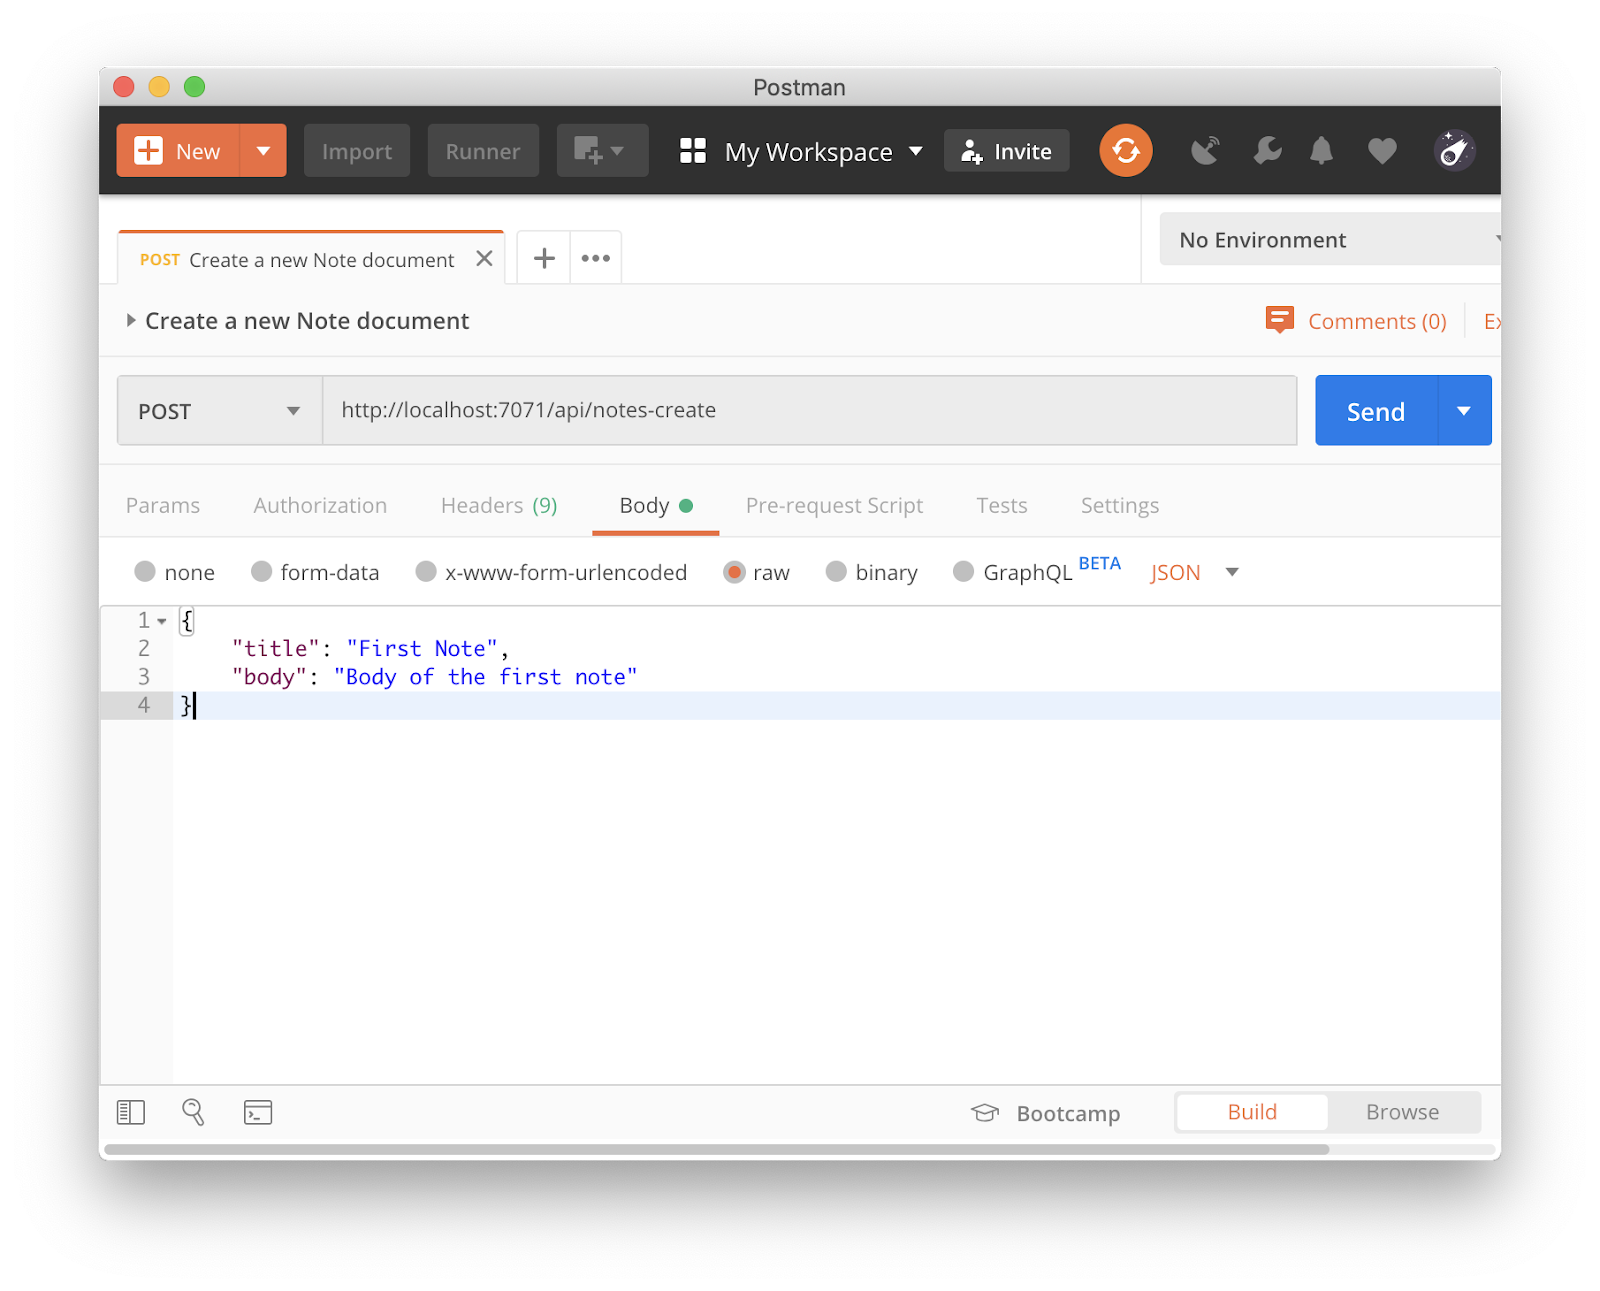
To test the notes-create function, open Postman, and issue the following POST request.
TIP
If you are unfamiliar with Postman, my article on Postman for busy developers provides details on how to use Postman and its advanced features.
The payload of the POST request contains the title and body of the note you want to create. To run the request, simply click on the button named Send.
Switch back to the VS Code terminal to view the executing context of the current POST request.
27/09/2019 09:51:40] Executing HTTP request: {
[27/09/2019 09:51:40]   "requestId": "c84ae9d0-d9d0-4b89-9f31-6379e620d58d",
[27/09/2019 09:51:40]   "method": "POST",
[27/09/2019 09:51:40]   "uri": "/api/notes-create"
[27/09/2019 09:51:40] }
[27/09/2019 09:51:41] Executing 'Functions.notes-create' (Reason='This function was programmatically called via the host APIs.', Id=df100e15-e168-4251-b84e-256d373b7d17)
[27/09/2019 09:51:41] Function `notes-create` is invoked { title: 'First Note', body: 'Body of the first note' }
[27/09/2019 09:51:42] Note document created { ref: Ref(Collection("Notes"), "244652758234300928"),
[27/09/2019 09:51:42]   ts: 1569577902030000,
[27/09/2019 09:51:42]   data: { title: 'First Note', body: 'Body of the first note' } }
[27/09/2019 09:51:42] Executed 'Functions.notes-create' (Succeeded, Id=df100e15-e168-4251-b84e-256d373b7d17)
[27/09/2019 09:51:42] Executed HTTP request: {
[27/09/2019 09:51:42]   "requestId": "c84ae9d0-d9d0-4b89-9f31-6379e620d58d",
[27/09/2019 09:51:42]   "method": "POST",
[27/09/2019 09:51:42]   "uri": "/api/notes-create",
[27/09/2019 09:51:42]   "identities": [
[27/09/2019 09:51:42]     {
[27/09/2019 09:51:42]       "type": "WebJobsAuthLevel",
[27/09/2019 09:51:42]       "level": "Admin"
[27/09/2019 09:51:42]     }
[27/09/2019 09:51:42]   ],
[27/09/2019 09:51:42]   "status": 200,
[27/09/2019 09:51:42]   "duration": 1812
[27/09/2019 09:51:42] }
Note the following major stages along the execution process:
- Executing HTTP request.
- Executing Functions.notes-create.
- Note document created (a custom log message we included in the source code).
- Executed Functions.notes-create.
- Executed HTTP request.
The function, upon successful creation of a Note document, returns the response it received from FaunaDB server to the caller.
Switch back to Postman to check the response:
{
    "ref": {
        "@ref": {
            "id": "244652758234300928",
            "collection": {
                "@ref": {
                    "id": "Notes",
                    "collection": {
                        "@ref": {
                            "id": "collections"
                        }
                    }
                }
            }
        }
    },

    "ts": 1569577902030000,

    "data": {
        "title": "First Note",
        "body": "Body of the first note"
    }
}
The response contains a reference to the new document created together with a timestamp and the content of the new document.
Let’s navigate to the FaunaDB Dashboard to verify that the document is actually created:

Viola!
Let’s move on and build the second Azure Function to read all the notes stored in the database.
Build the Read All Notes
To start building this Azure Function, follow the steps mentioned above to create a new Azure Function and name it notes-read-all.
Paste the code below into your new function. We’ll go through it line by line:
const faunadb = require('faunadb');
const q = faunadb.query;
const client = new faunadb.Client({ secret: 'fnADZPpx4EACAGpcBmat4T-ZHYRIdX607Upcve3x' });

module.exports = async function (context, req) {
    context.log('Function `notes-read-all` is invoked');

    try {
        const dbs = await client.query(
            q.Map(
                // iterate each note document
                q.Paginate(
                    // make paginateable
                    q.Match(
                        // query index
                        q.Index("all_notes")
                    )
                ),

                q.Lambda("X", q.Get(q.Var("X")))
            )
        );

        context.res = {
            status: 200,
            body: JSON.stringify(dbs.data)
        };
    } catch (error) {
        context.res = {
            status: 400,
            body: JSON.stringify(error.message)
        }
    }
};
The most noticeable things about this function are:
- Using async/await pattern.
- The FaunaDB query expression.
To read documents in FaunaDB you have to use an Index. When creating the collection Notes above, we created the Index all_notes. The Match() function searches the results of the Index. In this case, Match() returns all records in the Index.
The query then uses the Paginate() function to paginate the results. By default, FaunaDB places 64 documents into a single page. The size is variable and can be changed. In this case, we will only have one page of one document so far.
The Paginate() function returns references to the Notes documents. Therefore, the query passes the Paginate() results into the Map() function to iterate over the Document Refs, and for each Ref, the query uses the Lambda() function to execute an expression.
The expression uses the Get() function to retrieve a single Document. The Get() function makes use of Var() function to retrieve the Document Ref passed to the Lambda() function.
Let’s run the function in the same way we ran the function above. The terminal now shows the availability of two functions to execute:
Http Functions:
notes-read-all: [GET,POST] http://localhost:7071/api/notes-read-all
notes-create: [POST] http://localhost:7071/api/notes-create
Let’s use Postman to send a GET request to load all Note documents.

A GET request was sent to the URL http://localhost:7071/api/notes-read-all, and the response returned is an array of Note documents. In this case, there is only one Note document stored in the database.
For this article, we'll continue using Azure Functions locally. However, in case you want to learn how to deploy Azure Functions to Azure, you may check the below resources:
In the next (and final) part of the series, we'll build the Vue.js app that will be communicating with Azure Functions to create and retrieve notes. The final source code for the Azure Functions app can be found at this GitHub repo.
Further Reading
Opinions expressed by DZone contributors are their own.
Comments