How To Build a Simple GitHub Action To Deploy a Django Application to the Cloud
In this article, we’ll demonstrate how GitHub Actions and Heroku can be used to quickly deploy a Django application to the cloud.
Join the DZone community and get the full member experience.
Join For FreeContinuous integration and continuous delivery (CI/CD) capabilities are basic expectations for modern development teams who want fast feedback on their changes and rapid deployment to the cloud. In recent years, we’ve seen the growing adoption of GitHub Actions, a feature-rich CI/CD system that dovetails nicely with cloud hosting platforms such as Heroku. In this article, we’ll demonstrate the power of these tools used in combination — specifically how GitHub Actions can be used to quickly deploy a Django application to the cloud.
A Quick Introduction to Django
Django is a Python web application framework that’s been around since the early 2000s. It follows a model-view-controller (MVC) architecture and is known as the “batteries-included” web framework for Python. That’s because it has lots of capabilities, including a strong object-relational mapping (ORM) for abstracting database operations and models. It also has a rich templating system with many object-oriented design features.
Instagram, Nextdoor, and Bitbucket are examples of applications built using Django. Clearly, if Django is behind Instagram, then we know that it can scale well. (Instagram hovers around being the fourth most visited site in the world!)
Security is another built-in feature; authentication, cross-site scripting protection, and CSRF features all come out of the box and are easy to configure. Django is over 20 years old, which means it has a large dev community and documentation base — both helpful when you’re trying to figure out why something has gone awry.
Downsides to Django? Yes, there are a few, with the biggest one being a steeper learning curve than other web application frameworks. You need to know parts of everything in the system to get it to work. For example, to get a minimal “hello world” page up in your browser, you need to set up the ORM, templates, views, routes, and a few other things. Contrast that with a framework like Flask (which is, admittedly, less feature-rich), where less than 20 lines of code can get your content displayed on a web page.
Building Our Simple Django Application
If you’re not familiar with Django, their tutorial is a good place to start learning how to get a base system configured and running. For this article, I’ve created a similar system using a PostgreSQL database and a few simple models and views. But we won’t spend time describing how to set up a complete Django application. That’s what the Django tutorial is for.
My application here is different from the tutorial in that I use PostgreSQL — instead of the default SQLite — as the database engine. The trouble with SQLite (besides poor performance in a web application setting) is that it is file-based, and the file resides on the same server as the web application that uses it. Most cloud platforms assume a stateless deployment, meaning the container that holds the application is wiped clean and refreshed every deployment. So, your database should run on a separate server from the web application. PostgreSQL will provide that for us.
The source code for this mini-demo project is available in this GitHub repository.
Install Python Dependencies
After you have cloned the repository, start up a virtual environment and install the Python dependencies for this project:
(venv) ~/project$ pip install -r requirements.txtSet up Django To Use PostgreSQL
To use PostgreSQL with Django, we use the following packages:
- psycopg2 provides the engine drivers for Postgres.
- dj-database-url helps us set up the database connection string from an environment variable (useful for local testing and cloud deployments).
In our Django app, we navigate to mysite/mysite/ and modify settings.py (around line 78) to use PostgreSQL.
DATABASES = {"default": dj_database_url.config(conn_max_age=600, ssl_require=True)}We’ll start by testing out our application locally. So, on your local PostgreSQL instance, create a new database.
postgres=# create database django_test_db;Assuming our PostgreSQL username is dbuser and the password is the password, then our DATABASE_URL will look something like this:
postgres://dbuser:password@localhost:5432/django_test_dbFrom here, we need to run our database migrations to set up our tables.
(venv) ~/project$ \
  DATABASE_URL=postgres://dbuser:password@localhost:5432/django_test_db\
  python mysite/manage.py migrate

Operations to perform:
  Apply all migrations: admin, auth, contenttypes, movie_journal, sessions
Running migrations:
  Applying contenttypes.0001_initial... OK
  Applying auth.0001_initial... OK
  Applying admin.0001_initial... OK
  Applying admin.0002_logentry_remove_auto_add... OK
  Applying admin.0003_logentry_add_action_flag_choices... OK
  Applying contenttypes.0002_remove_content_type_name... OK
  Applying auth.0002_alter_permission_name_max_length... OK
  Applying auth.0003_alter_user_email_max_length... OK
  Applying auth.0004_alter_user_username_opts... OK
  Applying auth.0005_alter_user_last_login_null... OK
  Applying auth.0006_require_contenttypes_0002... OK
  Applying auth.0007_alter_validators_add_error_messages... OK
  Applying auth.0008_alter_user_username_max_length... OK
  Applying auth.0009_alter_user_last_name_max_length... OK
  Applying auth.0010_alter_group_name_max_length... OK
  Applying auth.0011_update_proxy_permissions... OK
  Applying auth.0012_alter_user_first_name_max_length... OK
  Applying movie_journal.0001_initial... OK
  Applying sessions.0001_initial... OK
Test Application Locally
Now that we have set up our database, we can spin up our application and test it in the browser.
(venv) ~/project$ \
  DATABASE_URL=postgres://dbuser:password@localhost:5432/django_test_db\
  python mysite/manage.py runserver

…
Django version 4.2.11, using settings 'mysite.settings'
Starting development server at http://127.0.0.1:8000/
Quit the server with CONTROL-C.
In our browser, we visit this localhost. This is what we see:
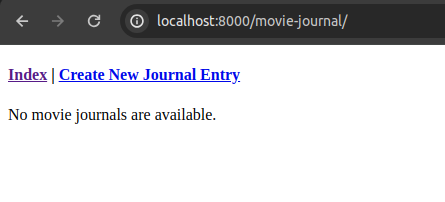
We’re up and running! We can go through the flow of creating a new journal entry.
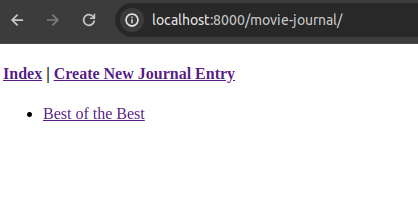
Looking in our database, we see the record for our new entry.
django_test_db=# select * from movie_journal_moviejournalentry;
-[ RECORD 1 ]+-------------------------------------------------------------
id           | 1
title        | Best of the Best
imdb_link    | https://www.imdb.com/title/tt0096913/
is_positive  | t
review       | Had some great fight scenes. The plot was amazing.
release_year | 1989
created_at   | 2024-03-29 09:36:59.24143-07
updated_at   | 2024-03-29 09:36:59.241442-07
Our application is working. We’re ready to deploy. Let’s walk through how to deploy using GitHub Actions directly from our repository on commit.
The Power of GitHub Actions
Over the years, GitHub Actions has built up a large library of jobs/workflows, providing lots of reusable code and conveniences for developers.
With CI/CD, a development team can get fast feedback as soon as code changes are committed and pushed. Typical jobs found in a CI pipeline include style checkers, static analysis tools, and unit test runners. All of these help enforce good coding practices and adherence to team standards. Yes, all these tools existed before. But now, developers don’t need to worry about manually running them or waiting for them to finish.
Push your changes to the remote branch, and the job starts automatically. Go on to focus on your next coding task as GitHub runs the current jobs and displays their results as they come in. That’s the power of automation and the cloud, baby!
Plug-And-Play GitHub Action Workflows
You can even have GitHub create your job configuration file for you. Within your repository on GitHub, click Actions. You’ll see an entire library of templates, giving you pre-built workflows that could potentially fit your needs.

Let’s click on the Configure button for the Pylint workflow. It looks like this:
name: Pylint

on: [push]

jobs:
  build:
    runs-on: ubuntu-latest
    strategy:
      matrix:
        python-version: ["3.8", "3.9", "3.10"]
    steps:
    - uses: actions/checkout@v3
    - name: Set up Python ${{ matrix.python-version }}
      uses: actions/setup-python@v3
      with:
        python-version: ${{ matrix.python-version }}
    - name: Install dependencies
      run: |
        python -m pip install --upgrade pip
        pip install pylint
    - name: Analysing the code with pylint
      run: |
        pylint $(git ls-files '*.py')
This configuration directs GitHub Actions to create a new workflow in your repository named Pylint. It triggers a push to any branch. It has one job, build, that runs the latest Ubuntu image. Then, it runs all the steps for each of the three different versions of Python specified.
The steps are where the nitty-gritty work is defined. In this example, the job checks out your code, sets up the Python version, installs dependencies, and then runs the linter over your code.
Let’s create our own GitHub Action workflow to deploy our application directly to Heroku.
Deploying to Heroku via a GitHub Action
Here’s the good news: it’s easy. First, sign up for a Heroku account and install the Heroku CLI.
Login, Create App, and PostgreSQL Add-On
With the Heroku CLI, we run the following commands to create our app and the PostgreSQL add-on:
$ heroku login

$ heroku apps:create django-github
Creating ⬢ django-github... done
https://django-github-6cbf23e36b5b.herokuapp.com/ | https://git.heroku.com/django-github.git

$ heroku addons:create heroku-postgresql:mini --app django-github
Creating heroku-postgresql:mini on ⬢ django-github... ~$0.007/hour (max $5/month)
Database has been created and is available
 ! This database is empty. If upgrading, you can transfer
 ! data from another database with pg:copy
Add Heroku App Host To Allowed Hosts List in Django
In our Django application settings, we need to update the list of ALLOWED_HOSTS, which represent the host/domain names that your Django site can serve. We need to add the host from our newly created Heroku app. Edit mysite/mysite/settings.py, at around line 31, to add your Heroku app host. It will look similar to this:
ALLOWED_HOSTS = ["localhost", "django-github-6cbf23e36b5b.herokuapp.com"]Don’t forget to commit this file to your repository.
Procfile and requirements.txt
Next, we need to add a Heroku-specific file called Procfile. This goes into the root folder of our repository. This file tells Heroku how to start up our app and run migrations. It should have the following contents:
web: gunicorn --pythonpath mysite mysite.wsgi:application
release: cd mysite && ./manage.py migrate --no-input
Heroku will also need your requirements.txt file so it knows which Python dependencies to install.
Get Your Heroku API Key
We will need our Heroku account API key. We’ll store this on GitHub so that our GitHub Action has authorization to deploy code to our Heroku app.
In your Heroku account settings, find the auto-generated API key and copy the value.

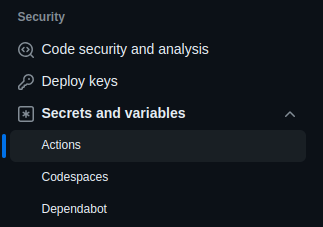
Then, in your GitHub repository settings, navigate to Secrets and variables > Actions.
On that page, click New repository secret. Supply a name for your repository secret and. Then, paste in your Heroku API key and click Add secret.
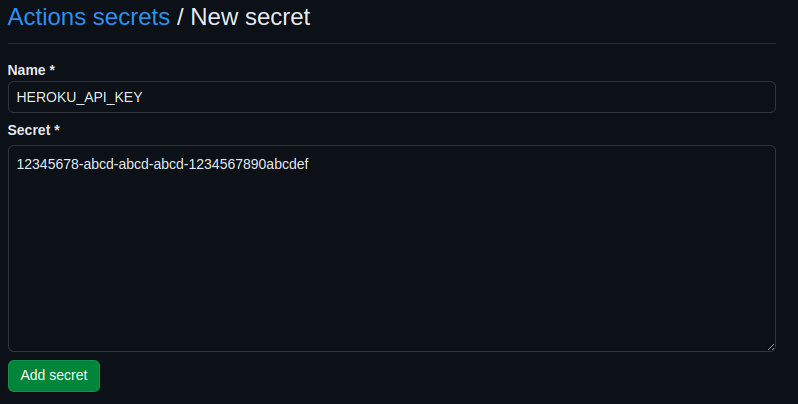
Your list of GitHub repository secrets should look like this:

Create the Job Configuration File
Let’s create our GitHub Action workflow. Typically, we configure CI/CD jobs with a YAML file. With GitHub Actions, this is no different.
To add an action to your repository, create a .github subfolder in your project, and then create a workflows subfolder within that one. In .github/workflows/, we’ll create a file called django.yml. Your project tree should look like this:
.
├── .git
│   └── …
├── .github
│   └── workflows
│       └── django.yml

├── mysite
│   ├── manage.py
│   ├── mysite
│   │   ├── …
│   │   └── settings.py
│   └── …
├── Procfile
└── requirements.txt
Our django.yml file has the following contents:
name: Django CI

on:
  push:
    branches: [ "main" ]

jobs:
  release:
     runs-on: ubuntu-latest
     steps:
       - uses: actions/checkout@v2
       - uses: akhileshns/[email protected]
         with:
           heroku_api_key: ${{ secrets.HEROKU_API_KEY }}
           heroku_app_name: "<your-heroku-app-name>"
           heroku_email: "<your-heroku-email>"
This workflow builds off of the Deploy to Heroku Action in the GitHub Actions library. In fact, using that pre-built action makes our Heroku deployment simple. The only things you need to configure in this file are your Heroku app name and account email.
When we commit this file to our repo and push our main branch to GitHub, this kicks off our GitHub Action job for deploying to Heroku. In GitHub, we click the Actions tab and see the newly triggered workflow. When we click the release job in the workflow, this is what we see:
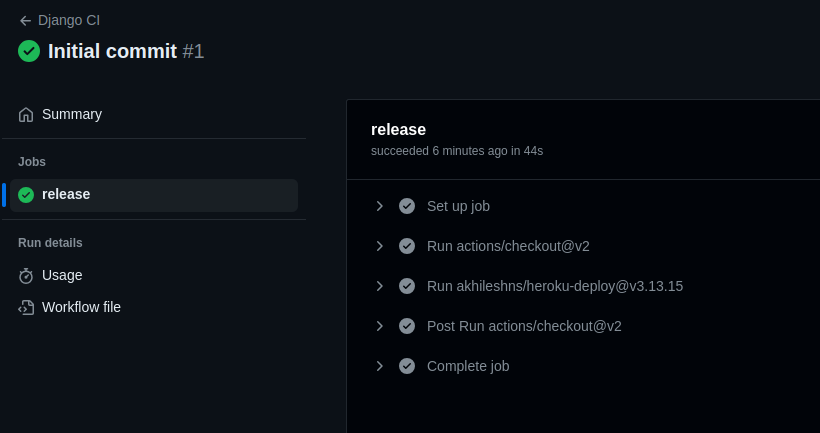
Near the bottom of the output of the deploy step, we see results from the Heroku deploy:

When we look at our Heroku app logs, we also see the successful deploy.

And finally, when we test our Heroku-deployed app in our browser, we see that it’s up and running.
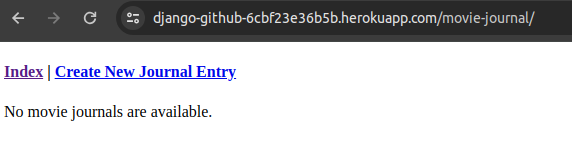
Congrats! You’ve successfully deployed your Django action to Heroku via a GitHub Action!
Conclusion
In this article, we set up a simple Django application with a PostgreSQL database. Then, we walked through how to use GitHub Actions to deploy the application directly to your Heroku on commit.
Django is a feature-rich web application framework for Python. Although for some cloud platforms, it can take some time to get things configured correctly, that’s not the case when you’re deploying to Heroku with GitHub Actions. Convenient off-the-shelf tools are available in both GitHub and Heroku, and they make deploying your Django application a breeze.
Opinions expressed by DZone contributors are their own.
Comments