How to Configure Git in Eclipse IDE
Let's get Git configured in Eclipse so you can import and perform operations on repos within your IDE.
Join the DZone community and get the full member experience.
Join For FreeIn this blog, we're going to learn how to configure Git on Eclipse. I am going to explain every step with screenshots.
Step 1 - Open Eclipse
Step 2 - Clone a Git repository
Step 3 - Choose the source Git repository
Step 4 - Select the branches that need to clone
Step 5 - Storing the Cloned Repository
Eclipse version: Mars.1 Release (4.5.1)
Type of Git: Bitbucket Atlassian.
Step 1 - Open Eclipse
Open Eclipse. On the top-right, you will find all the perspectives like Java, Java EE, debug, etc.
Search for Git and click on it.

Step 2 - Clone a Git repository
Click on the icon marked below to clone a Git repository and add the clone to this view.
Git repositories will be empty to start.

Step 3 - Choose the source Git repository
The window below will appear where we choose our source Git repo.
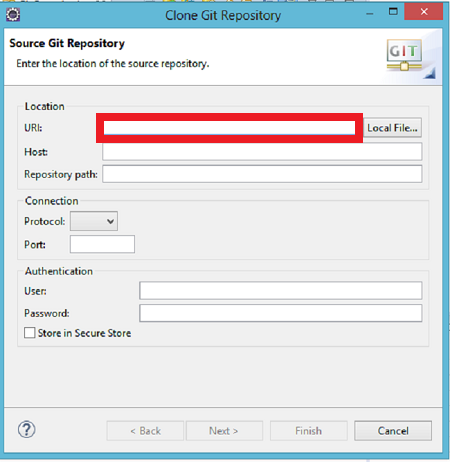
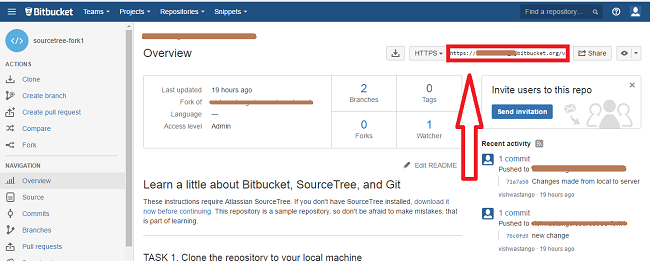
To get the URI, log into your Bitbucket account. Click here to sign-up
Copy your repository's HTTPS link and paste it in the window above.
Once you paste the validated URI, the rest of the fields will get auto-filled.
Click Next.
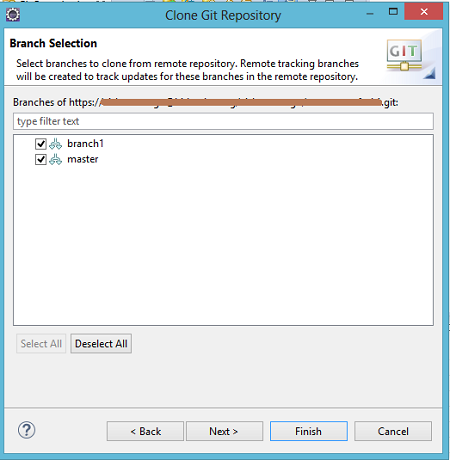
Step 4 - Select the branches that need to clone
Then the Branch Selection window will appear. Just select the branches you want to clone from the repository. Then click Next.
Step 5 - Storing the Cloned Repository
Another model window appears.i.e., Local Destination.
Select directory to store the Cloned Repository.
Select Initial Branch like Master or Branch1 or Branch2.
Click Finish
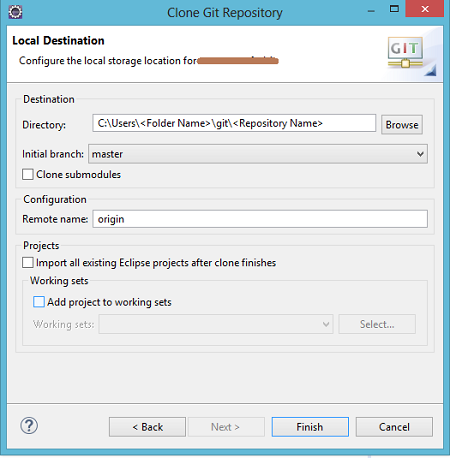
After clicking Finish, you should be able to see newly created repository in the Git Repository Explorer.

Related tutorial: What to do when Tomcat failed to start from Eclipse.
Now you have successfully configured Git on Eclipse! You can import a Git project into Eclipse and perform any Git operations.
Opinions expressed by DZone contributors are their own.
Comments