

How to Create Badges (Item Counts) in Android
Follow along to learn how to put badges on your apps to help notify users.
Join the DZone community and get the full member experience.
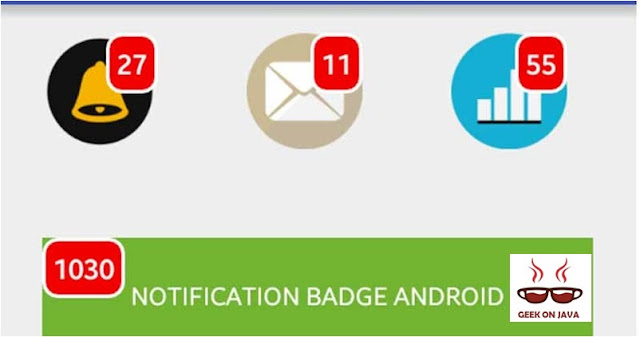
Join For FreeIn this tutorial, we're aiming to create a Badge (Item Count) function for an Android application. Badges are really used to show the number of notifications, messages, and product count. Plenty of Android apps use badges these days. There's no simple way to do it, so we'll do it by coding it ourselves.
Requirements
- JDK 7.0 or above.
- Android Studio 2.0.
Steps:
Inside the Drawable folder, create an XML file called item_count and create a rectangle with 8dp corner radius.
item_count.xml
<?xml version="1.0" encoding="utf-8"?>
<shape xmlns:android="http://schemas.android.com/apk/res/android"
    android:shape="rectangle">
    <corners android:radius="8dp" />
    <solid android:color="#f20000" />
    <stroke
        android:width="2dip"
        android:color="#FFF" />
    <padding
        android:bottom="5dp"
        android:left="5dp"
        android:right="5dp"
        android:top="5dp" />
</shape>
Modify activity_main.xml and add Relativelayout, Buttons, and text. Your activity_main.xml file should look like below. You'll also want to add the required images in the Drawable folder for this layout.
Activity_main.xml
<?xml version="1.0" encoding="utf-8"?>
<!--Adding Badge (Item Count)/Notification Count to Android Button-->
<RelativeLayout xmlns:android="http://schemas.android.com/apk/res/android"
    android:layout_width="fill_parent"
    android:layout_height="match_parent"
    android:gravity="center_horizontal"
    android:orientation="vertical"
    android:padding="16dp">

    <RelativeLayout
        android:id="@+id/badge_layout1"
        android:layout_width="wrap_content"
        android:layout_height="wrap_content">

        <RelativeLayout
            android:id="@+id/relative_layout"
            android:layout_width="wrap_content"
            android:layout_height="wrap_content">

            <Button
                android:id="@+id/button1"
                android:layout_width="65dip"
                android:layout_height="65dip"
                android:background="@drawable/chat_icon" />
        </RelativeLayout>

        <TextView
            android:id="@+id/badge_notification_1"
            android:layout_width="wrap_content"
            android:layout_height="wrap_content"
            android:layout_alignRight="@id/relative_layout"
            android:background="@drawable/item_count"
            android:text="16"
            android:textColor="#FFF"
            android:textSize="16sp"
            android:textStyle="bold" />
    </RelativeLayout>

    <RelativeLayout
        android:id="@+id/badge2"
        android:layout_width="wrap_content"
        android:layout_height="wrap_content"
        android:layout_marginLeft="50dp"
        android:layout_toRightOf="@+id/badge_layout1">

        <RelativeLayout
            android:id="@+id/relative_layout1"
            android:layout_width="wrap_content"
            android:layout_height="wrap_content">

            <Button
                android:id="@+id/myButton1"
                android:layout_width="65dip"
                android:layout_height="65dip"
                android:background="@drawable/email_icon" />
        </RelativeLayout>

        <TextView
            android:id="@+id/badge_notification_2"
            android:layout_width="wrap_content"
            android:layout_height="wrap_content"
            android:layout_alignRight="@id/relative_layout1"
            android:background="@drawable/item_count"
            android:text="21"
            android:textColor="#FFF"
            android:textSize="16sp"
            android:textStyle="bold" />
    </RelativeLayout>

    <RelativeLayout
        android:id="@+id/badge4"
        android:layout_width="wrap_content"
        android:layout_height="wrap_content"
        android:layout_below="@+id/badge_layout1"
        android:layout_marginTop="50dp">

        <RelativeLayout
            android:id="@+id/relative_layout3"
            android:layout_width="wrap_content"
            android:layout_height="wrap_content">

            <Button
                android:id="@+id/myButton4"
                android:layout_width="wrap_content"
                android:layout_height="65dip"
                android:background="#4169E1"
                android:elevation="4dp"
                android:paddingLeft="50dp"
                android:paddingRight="50dp"
                android:text="Notification"
                android:textColor="#fff" />
        </RelativeLayout>

        <TextView
            android:id="@+id/badge_notification_4"
            android:layout_width="wrap_content"
            android:layout_height="wrap_content"
            android:layout_alignLeft="@id/relative_layout3"
            android:background="@drawable/item_count"
            android:text="427"
            android:textColor="#FFF"
            android:textSize="16sp"
            android:textStyle="bold" />
    </RelativeLayout>
</RelativeLayout>
And your MainActivity.java file should look like:
MainActivity.java
import android.support.v7.app.AppCompatActivity;
import android.os.Bundle;
public class MainActivity extends AppCompatActivity {
    @Override
    protected void onCreate(Bundle savedInstanceState) {
        super.onCreate(savedInstanceState);
        setContentView(R.layout.activity_main);
    }
}
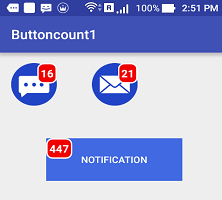
Now when you run your application, you will see the screenshot like:
Published at DZone with permission of Adam Smith. See the original article here.
Opinions expressed by DZone contributors are their own.
Comments