How to Deploy a Spring Boot App on AWS Fargate
Learn how to deploy a basic Dockerized Spring Boot application to AWS Fargate. AWS Fargate is a serverless AWS environment.
Join the DZone community and get the full member experience.
Join For FreeIn this blog, you will learn how to deploy a basic Dockerized Spring Boot application to AWS Fargate. AWS Fargate is a serverless AWS environment. Enjoy!
1. Introduction
In a previous post, you learned how to deploy a basic Dockerized Spring Boot application on an AWS ECS Cluster. You learned about the different components like the ECR Docker repository, Task Definitions, the ECS Cluster itself and Services. It is advised to read that post first when these components are new to you. In this post, you will create and deploy the same Dockerized Spring Boot application. This time you deploy it to AWS Fargate. AWS Fargate is identical to AWS ECS Cluster, but this time you will not need to manage the EC2 instances yourself which is a great advantage! It is completely serverless.
The sources being used in this blog are available at GitHub.
At the time of writing, a new UI is being developed. For most of the actions described in this post, the New ECS Experience toggle has been enabled.
2. Create the App
The Spring Boot App is a basic application with a Hello Rest endpoint which returns a hello message including the host where the application is running. The app is used before in a previous post. The controller is the following:
@RestController
public class HelloController {

    @GetMapping("/hello")
    public String hello() {
        String message = "Hello AWS!";
        try {
            InetAddress ip = InetAddress.getLocalHost();
            message += " From host: " + ip;
        } catch (UnknownHostException e) {
            e.printStackTrace();
        }
        return message;
    }

}
A Dockerfile is available in the root of the repository and the dockerfile-maven-plugin is added to the pom file.
Run the build in order to create the jar file and the corresponding Docker image.
$ mvn clean verifyVerify whether the Docker image is available in your local Docker repository.
$ docker images
REPOSITORY                                          TAG                 IMAGE ID            CREATED             SIZE
mydeveloperplanet/myawsplanet                       0.0.1-SNAPSHOT      765984f7cfc2        24 seconds ago      666MB
3. Upload Image to ECR
Now that you have created the Docker image, you need to upload it to ECR, the AWS Docker repository. Navigate in AWS to the ECS Service and select in the left menu the Repositories section. First thing to do, is to create a repository by clicking the Create repository button.
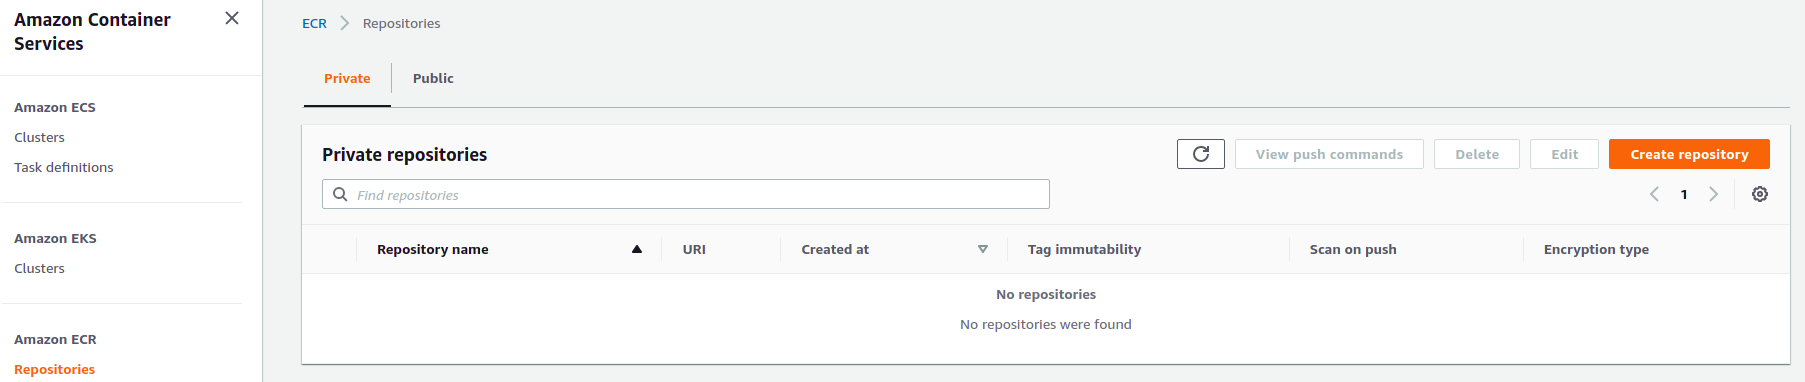
Give the repository a recognizable name like mydeveloperplanet/myawsplanet and click the Create repository button.

In order to see how you can push the Docker image to the repository, click the View push commands button which is available in the repository overview.

Execute step 1, which will provide you temporary credentials in order to be able to gain access to the repository. The <account ID> needs to be replaced with your AWS account ID.
$ aws ecr get-login-password --region eu-west-3 | docker login --username AWS --password-stdin <account ID>.dkr.ecr.eu-west-3.amazonaws.comSkip step2, building the Docker image is already executed by means of the Maven build. In step 3, adjust the command in order to use version 0.0.1-SNAPSHOT instead of latest for identifying the local Docker image.
$ docker tag mydeveloperplanet/myawsplanet:0.0.1-SNAPSHOT <account ID>.dkr.ecr.eu-west-3.amazonaws.com/mydeveloperplanet/myawsplanet:latestIn step 4, you push the local Docker image to the remote AWS Docker repository.
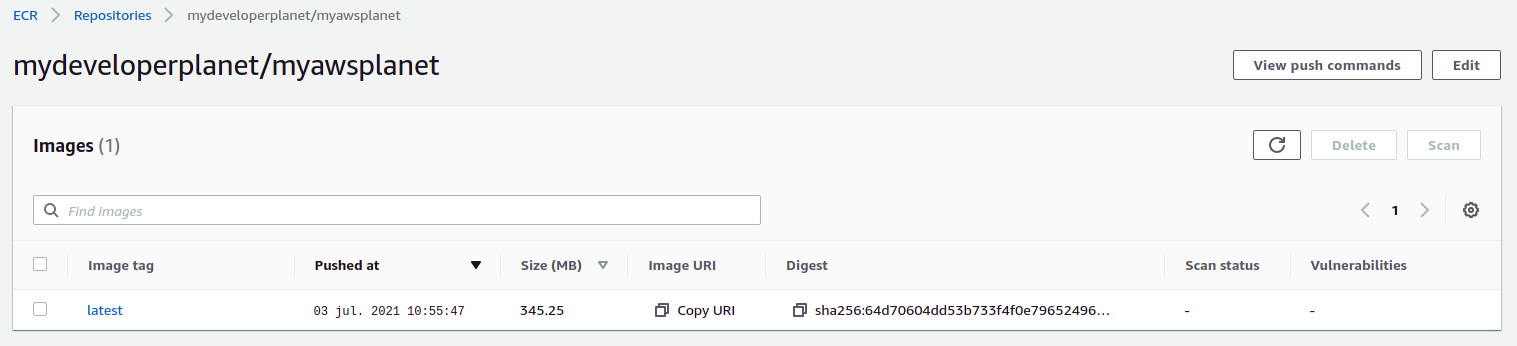
$ docker push <account ID>.dkr.ecr.eu-west-3.amazonaws.com/mydeveloperplanet/myawsplanet:latestAfter successful upload, the Docker image is visible in the repository.
4. Create Task Definition
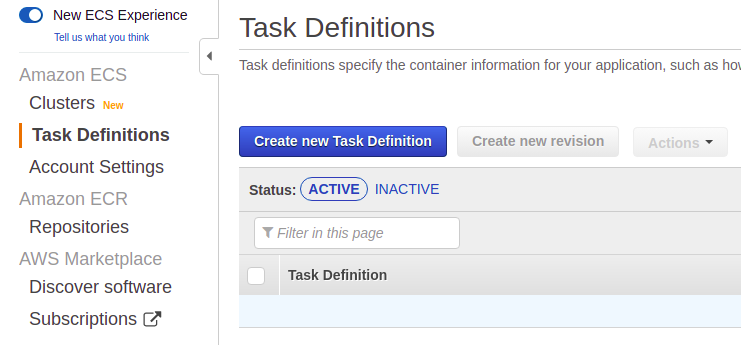
Now that the Docker image is available in ECR, next thing to do is to create a task definition by creating the Create new Task Definition button in the Task Definitions section (left menu).
In step 1, choose Fargate and click the Next step button.

In step 2, give the task definiton the name myawsfargateplanet. Select a Task execution role in the Task execution IAM role section. This role is necessary for pulling the Docker image. If the role does not exist yet, select Create new role in the dropdown list.

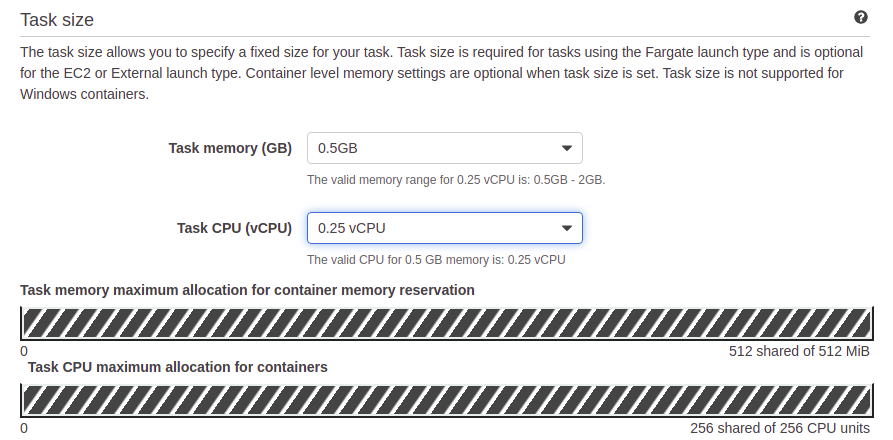
In AWS ECS Cluster, it was not mandatory to specify the Task memory and CPU. Using Fargate, this is mandatory. Set 0.5GB as Task memory and 0.25 vCPU as Task CPU. These are the lowest sizes available and will suffice for the Spring Boot application.
Click the Add container button. Give the container the name myawsplanet. Fill in the image to be pulled. This should be the Image URI of the Docker image from the ECR repository followed by the tag. Define a Soft limit of 256 and a Hard limit of 512 for the Memory Limits. The soft limit is some kind of memory reservation while the hard limit will kill the Docker container when the memory size is exceeded. In the Port mappings, it is sufficient to define the port the Spring Boot application is running at. In AWS ECS Cluster, it was necessary to define a port mapping between the EC2 instance port and the Docker container. Remember that it was neccesary to set the EC2 instance port to 0 in order to be able to run multiple Docker containers onto 1 EC2 machine. This whole setup is not necessary with AWS Fargate because it is serverless. Finally, click the Add button in order to add the container to the task definition.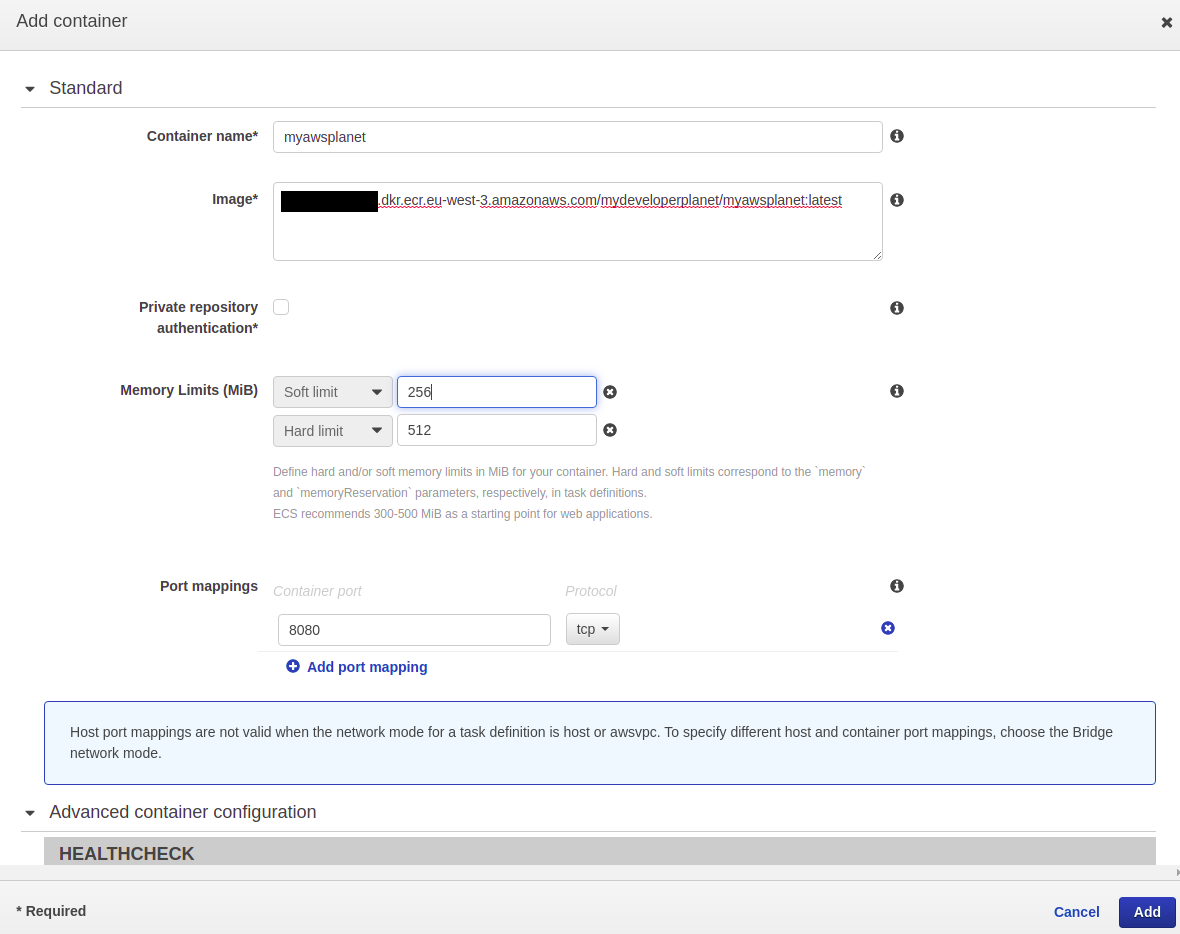
The container is added to the Task Definition. The only thing left to do is to finalize step 2 by clicking the Create button at the bottom of the page.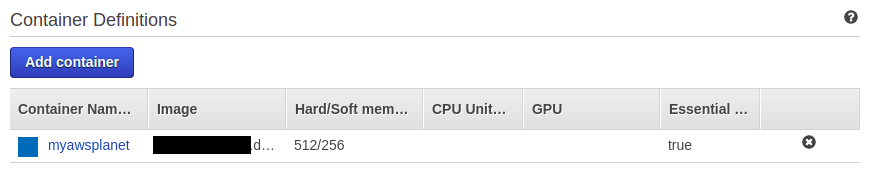
5. Create Cluster
Navigate in the left menu to the Clusters section and click the Create cluster button.
In step 1, choose Networking only and click the Next step button.

In step 2, give the cluster the name myawsfargateplanet and tick the Create VPC box. Leave the defaults as-is and click the Create button in order to create the cluster. After a few minutes, the cluster is created. When you navigate to the AWS CloudFormation service, you can follow the creation of the different resources. AWS CloudFormation is an Infrastructure as Code service which is being used in the background for creating the AWS Fargate cluster.
6. Create ALB
Before creating the Service for the Task Definition, you will create an ALB and a Security Group for the Docker containers. You will need them during the creation of the Service, but it is a bit easier when you create them first. This way, you will only need to select them during Service creation.
Navigate to the EC2 Service to the EC2 Load Balancing section and click Load Balancers in the left menu. Click the Create Load Balancer button.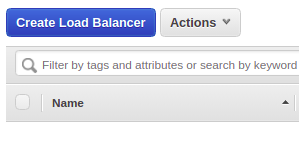
You need an Application Load Balancer, therefore, click the Create button in this section.
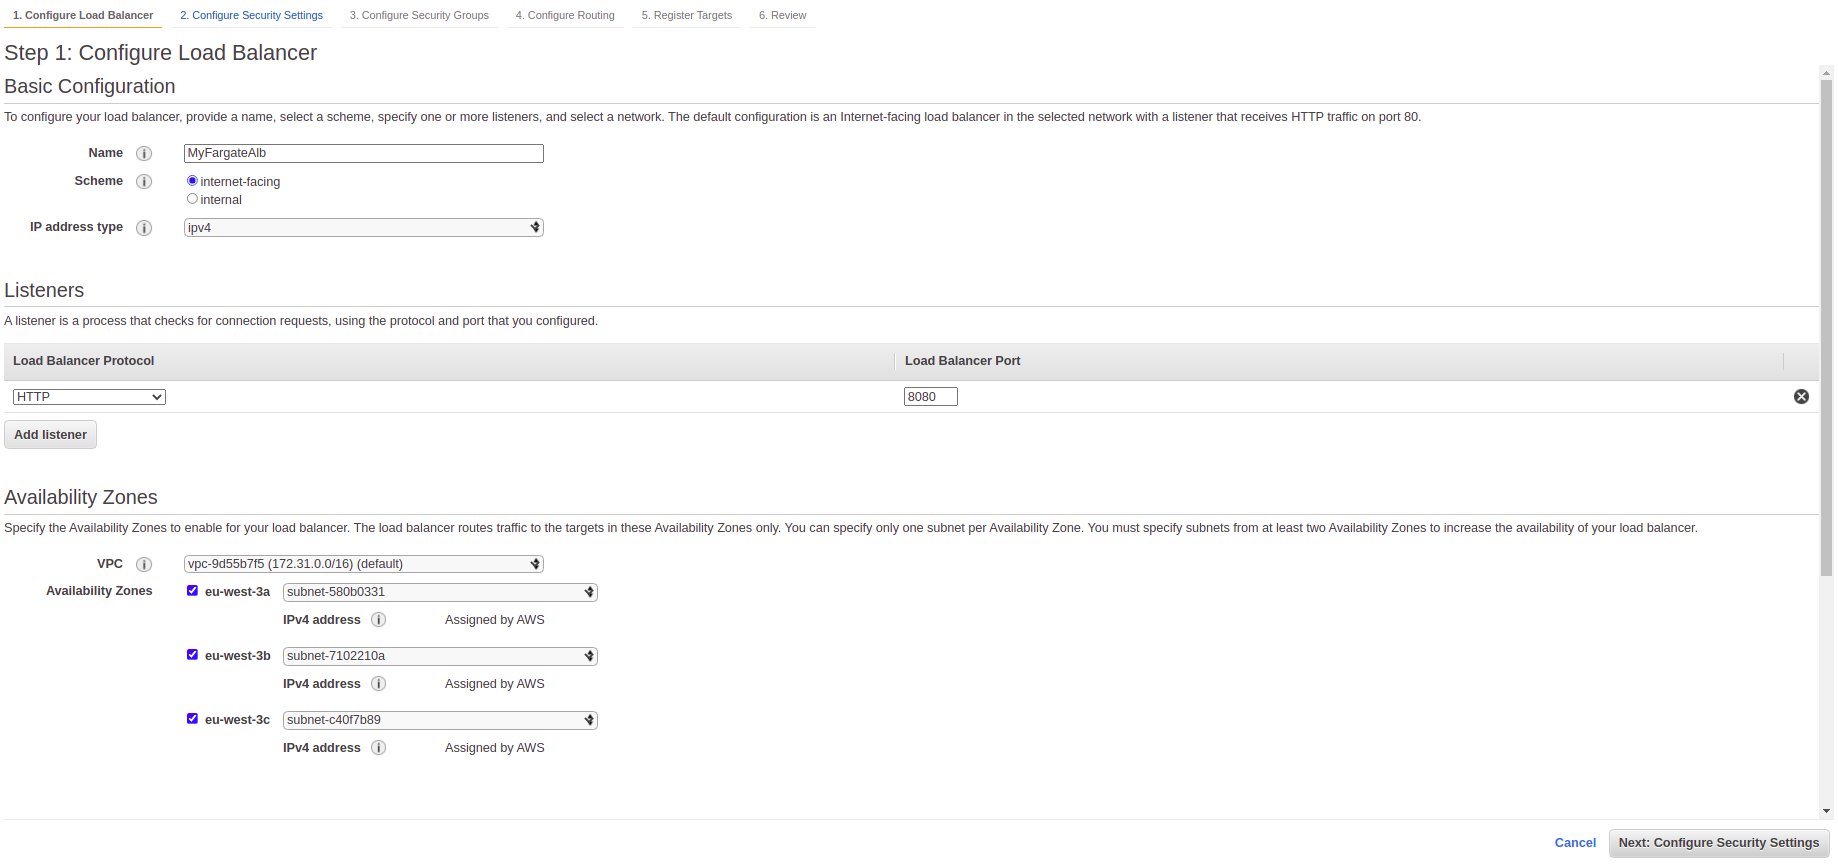
 In step 1, you give the ALB the name MyFargateAlb and set the Load Balancer Port to port 8080. Port 8080 will be the port being used externally to access the Rest endpoint. Tick all subnet tick boxes in the Availability Zones section and click the Next: Configure Security Settings button.
In step 2, just click the Next: Configure Security Groups button.
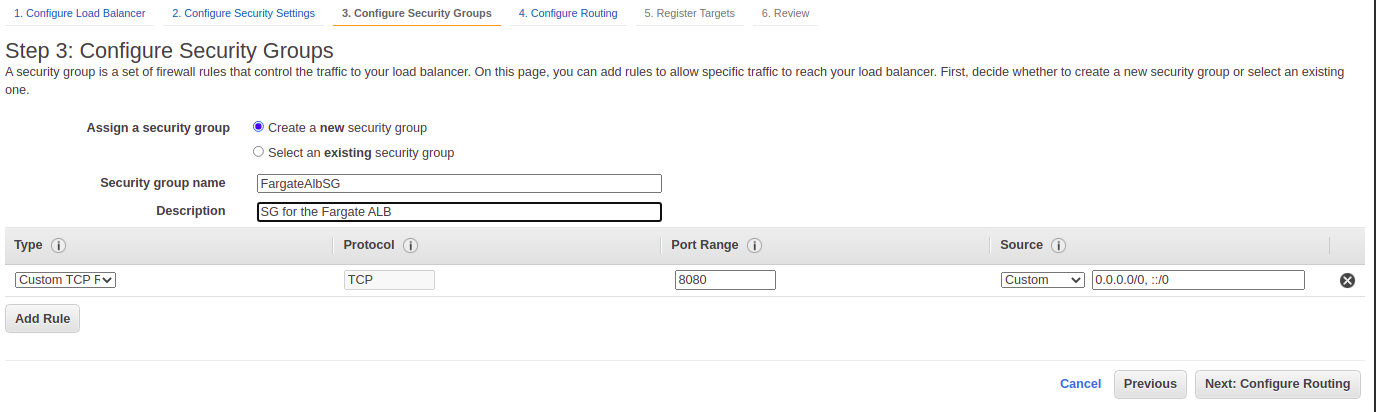
In step 3, Create a new security group. Give it the name FargateAlbSG and give it a description. Click the Next: Configure Routing button.
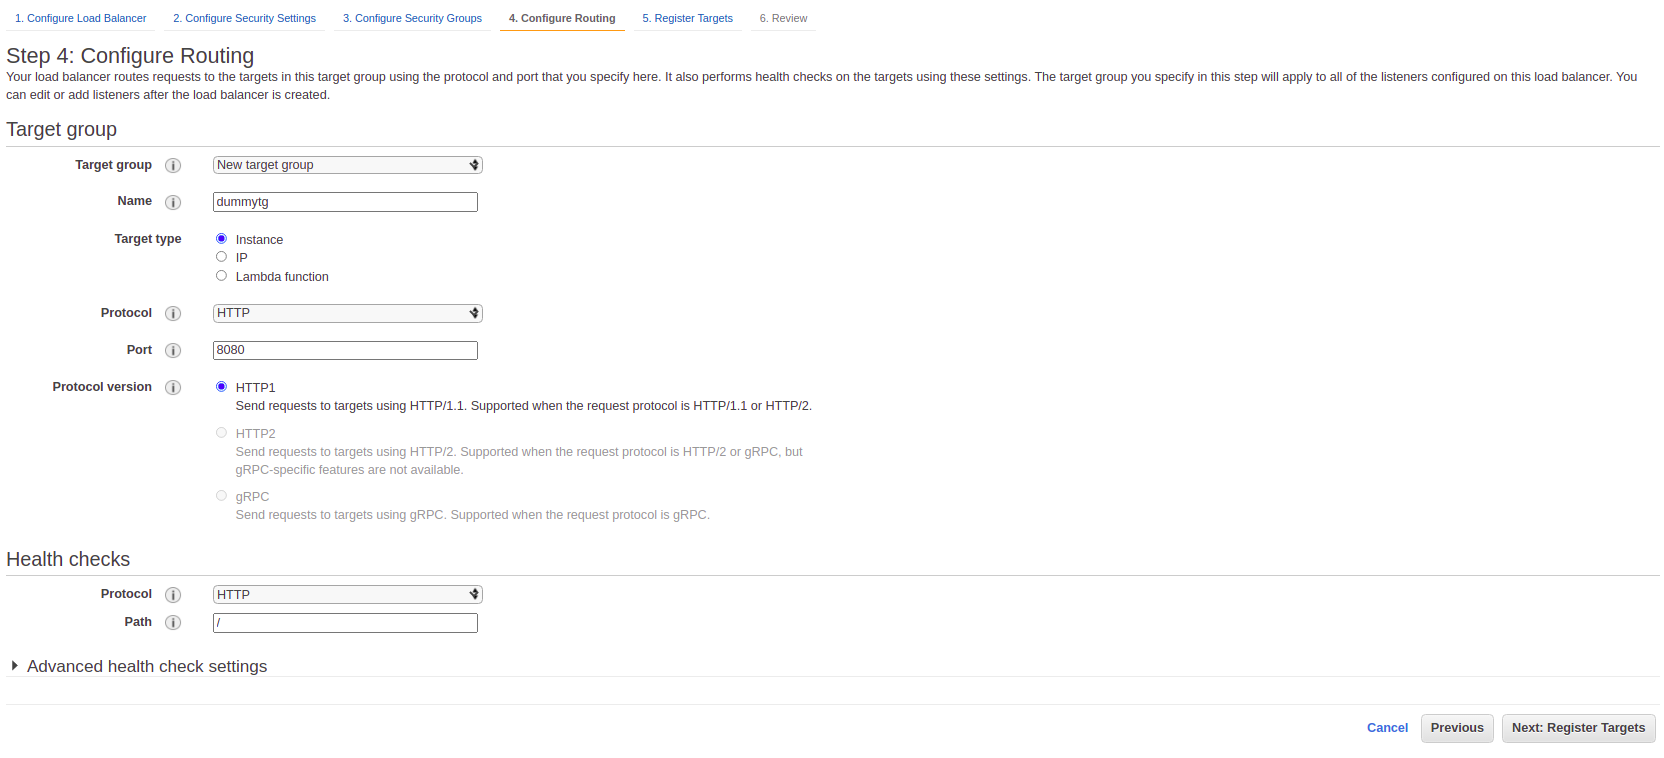
 In step 4, create a dummy Target Group for port 8080 and click the Next: Register Targets button.
In step 5, just click the Next: Review button. At the review page, everything can be verified and finally click the Create button.
7. Create Security Group for Containers
The Docker containers require a Security Group which needs to be selected during Service creation. Navigate to the EC2 Service to the Network & Security section and click Security Groups in the left menu. Click the Create security group button.
Enter a name Alb2FargateContainers, a description and add an inbound rule allowing All traffic from the ALB Security Group FargateAlbSG as Source. You allow all traffic between the ALB and the Docker containers with this configuration. Click the Create security group button at the bottom of the page.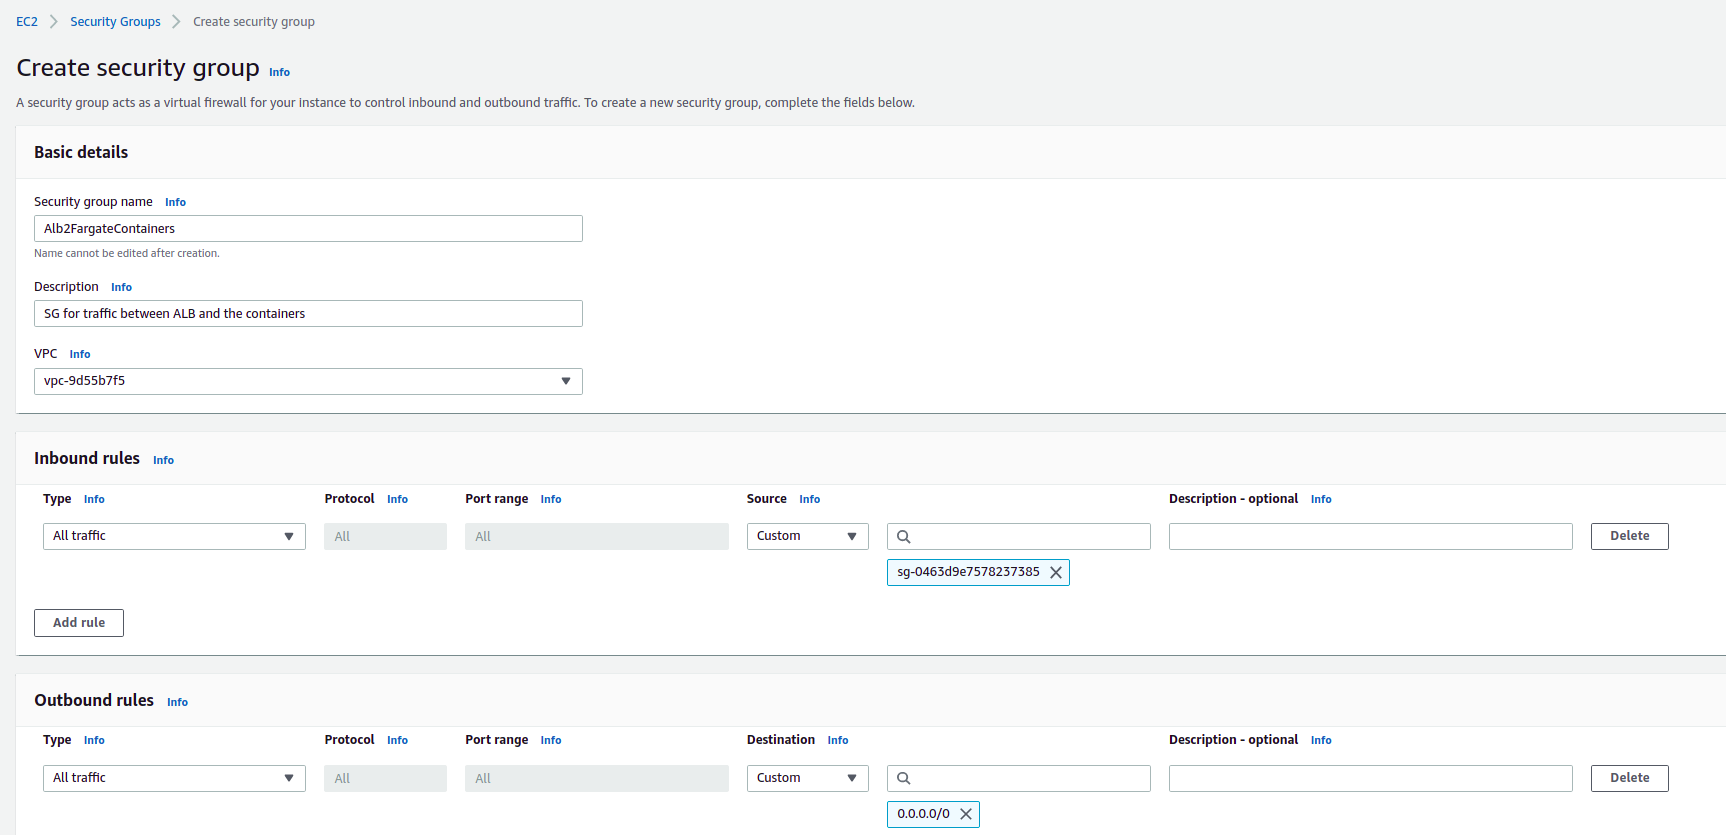
8. Create Service
Time to tie everything together, so let’s create the Service in the AWS Fargate cluster in order to run the Docker image. In this section the classic view will be used. At the time of writing, the New ECS Experience seems to lack some functionality. Navigate to the cluster and click the Create button in the Services tab. Choose FARGATE as Launch type. Choose myawsfargateplanet as Task Definition, leave the revision as-is which is basically the latest revision to be used. Choose FargateService as Service name and choose to run 4 Number of tasks. This will create 4 running Docker containers. Set the Minimum healthy percent to 0 and click the Next step button at the bottom of the page.
 Choose the default VPC and select all three Subnets. Click the Edit button next to the Security groups.
 Choose the previously create security group Alb2FargateContainers and click the Save button.
 Choose in the Load balancing section for Application Load Balancer and choose the previously created load balancer MyFargateAlb.
Click the Add load balancer button in the section Container to load balance.
Choose 8080:HTTP as Production listener port, create a new Target Group, change the Path pattern to /* with Evaluation order 1, and choose /actuator/ as Health check path. Click the Next step button at the bottom of the page.
Click the Next step button at the Set Auto Scaling (optional) page and click the Create Service button at the bottom of the Review page.
After a few minutes, you will see 4 running tasks in the Tasks tab of the cluster. Use the DNS name of the ALB to access the Hello URL from you local machine. Execute it several times and you will see that the returned IP changes which actually means that you are hitting the tasks one after each other.
$ curl http://MyFargateAlb-1074634719.eu-west-3.elb.amazonaws.com:8080/hello
Hello AWS! From host: ip-172-31-31-222.eu-west-3.compute.internal/172.31.31.222
$ curl http://MyFargateAlb-1074634719.eu-west-3.elb.amazonaws.com:8080/hello
Hello AWS! From host: ip-172-31-40-233.eu-west-3.compute.internal/172.31.40.233
$ curl http://MyFargateAlb-1074634719.eu-west-3.elb.amazonaws.com:8080/hello
Hello AWS! From host: ip-172-31-27-15.eu-west-3.compute.internal/172.31.27.15
$ curl http://MyFargateAlb-1074634719.eu-west-3.elb.amazonaws.com:8080/hello
Hello AWS! From host: ip-172-31-12-90.eu-west-3.compute.internal/172.31.12.90
In order to complete the setup, you kan remove the dummy target group rule you created during the setup of the ALB in the ALB listener section. After this removal, you can also remove the dummy target group itself.
9. Cleanup
Execute the following steps in order to remove all resources:
- Navigate to the cluster and the Service. Click the Update button and set the number of tasks to 0;
- Wait until all tasks are removed (remove them by hand when they are not removed automatically) and remove the Service;
- Remove the Cluster, this is at the time of writing only available in the classic view;
- Click the Task Definition, select all revisions and via the Actions menu, click the Deregister item;
- Remove the ECR repository;
- Remove the ALB MyFargateAlb;
- Remove the security group Alb2FargateContainers;
- Remove the target groups;
- Remove the security group FargateAlbSG
- In the CloudFormation service, remove the Stack which was created.
10. Conclusion
In this blog, you learned how to create and configure a Fargate cluster and deployed a Docker image to it containing a Spring Boot Application. You noticed that the setup is easier than with AWS ECS and that Fargate is completely serverless. No need anymore to manage the EC2 instances yourself.
Published at DZone with permission of Gunter Rotsaert. See the original article here.
Opinions expressed by DZone contributors are their own.
Comments