How To Deploy an ERC-20 Smart Contract on Avalanche With Infura
Avalanche has emerged as one of the most formidable alternatives to Ethereum, becoming the fastest smart contract platform in the blockchain industry.
Join the DZone community and get the full member experience.
Join For FreeAlthough Ethereum has firmly established itself as the leading blockchain platform capable of running smart contracts, it isn’t without its defects. It has solved some of its problems, such as enormous energy consumption by switching to a proof-of-stake consensus protocol. However, scaling issues continue to exist. Ethereum has a low transaction throughput (approximately 15 transactions per second), slow transaction finality (around 1 minute), and at times high gas fees when the network is under strain.
Avalanche is an independent blockchain platform designed to overcome some of the barriers to scalability mentioned above. In this article, we will explore what Avalanche is and its benefits compared to other blockchain platforms. We will also create an ERC-20 smart contract on Avalanche from scratch using Infura.
What Is Avalanche?
According to its website, Avalanche is the fastest smart contracts platform in the blockchain industry, as measured by time-to-finality. Unlike Ethereum or Bitcoin, Avalanche consists of several chains, each performing a specific task.
The Avalanche network's three most important chains are the C-Chain, the X-Chain, and the P-Chain.
The C-Chain is an EVM-compatible blockchain capable of running smart contracts. The X-Chain is responsible for token transactions. And finally, the P-Chain maintains consensus among subnets, arguably the most critical component of Avalanche.
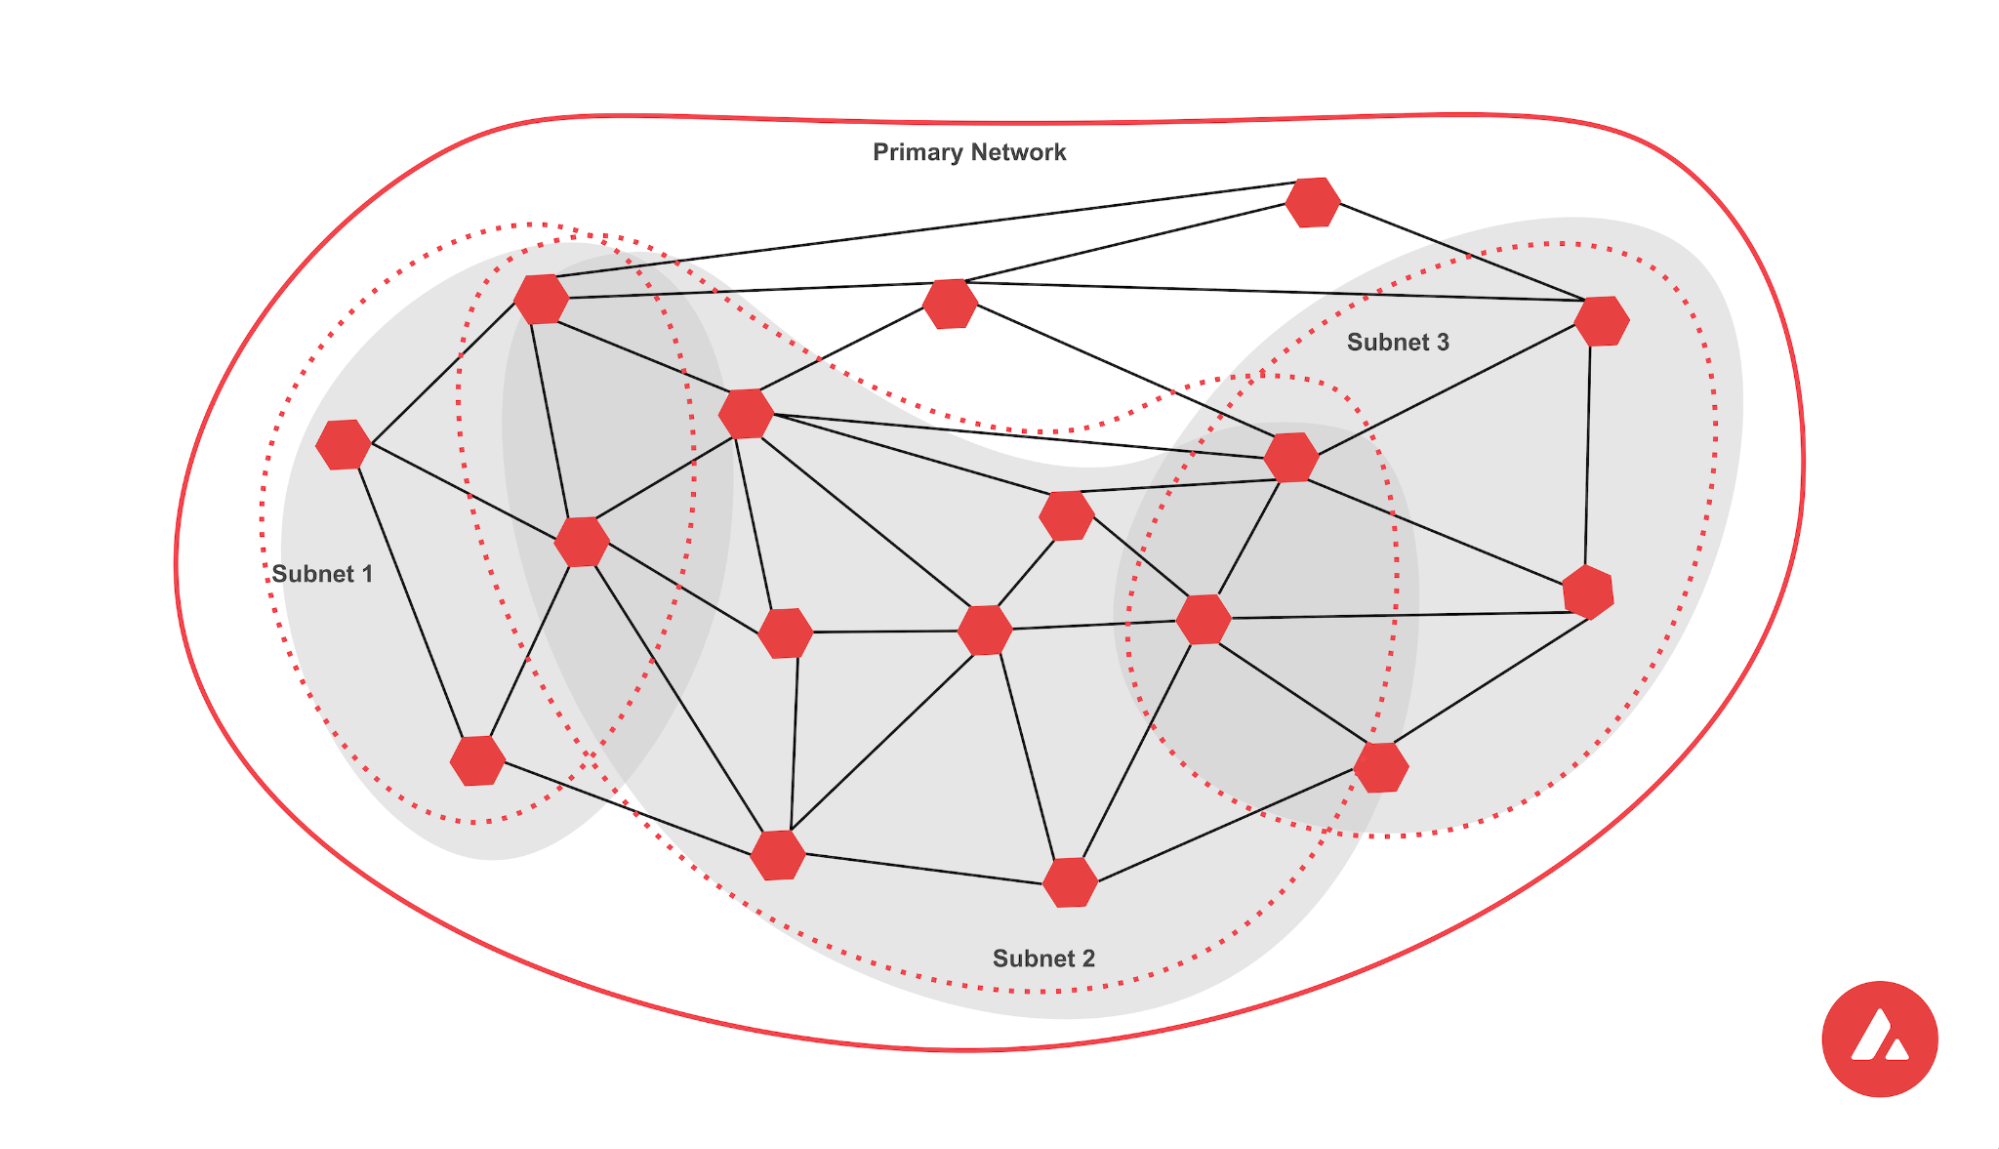
Through subnets, Avalanche allows anyone to spin up their own instance of a blockchain within the ecosystem. Additionally, users can customize these blockchains to suit their own needs. These custom blockchains can use different consensus protocols (proof-of-work or proof-of-stake) and offer over 4,500 transactions per second without putting any additional strain on the rest of the network. Each one is a sovereign network that defines its own rules.
Subnets are one of the most unique features Avalanche offers. Not only can anyone build their own custom blockchain network as a subnet, each one is completely interoperable with the rest of the Avalanche network. This makes subnets a powerful tool for creating custom solutions, while still being part of a broader network.
Benefits of Using Avalanche
Through the usage of subnets and novel consensus protocols, Avalanche can provide the following benefits:
Theoretically Infinite Transactions Per Second
Since there is no upper cap on the number of subnets that can be created, and subnets operate fairly independently, Avalanche can offer extraordinarily high tps rates.Low Transaction Finality
Avalanche has the lowest time-to-finality in the industry, with transaction confirmation in under two seconds.Energy Efficient
Avalanche uses proof-of-stake to secure its network, which makes it extremely energy efficient. It also allows validators without access to high-end GPUs to participate.Extremely Decentralized
Over thousands of validators secure Avalanche. And unlike Ethereum or Bitcoin, a small number of pools do not control the vast majority of the network.
Creating an ERC-20 Token With Avalanche
As mentioned earlier, the Avalanche C-Chain is entirely EVM-compatible. This means it's simple to port projects from Ethereum and other EVM-based chains onto Avalanche. It also means that the mature tools for Ethereum development like devnet, Truffle, and top API suite, Infura work natively to develop on Avalanche.
In this section of the article, we will create an ERC-20 contract that implements a cryptocurrency on Avalanche. We will do so using Solidity, Infura, Truffle, and the Truffle Dashboard.
Step 1: Install the MetaMask Extension
Install the MetaMask extension for your browser in case you haven’t already, and follow the instructions put forward by Metamask to create your wallet.
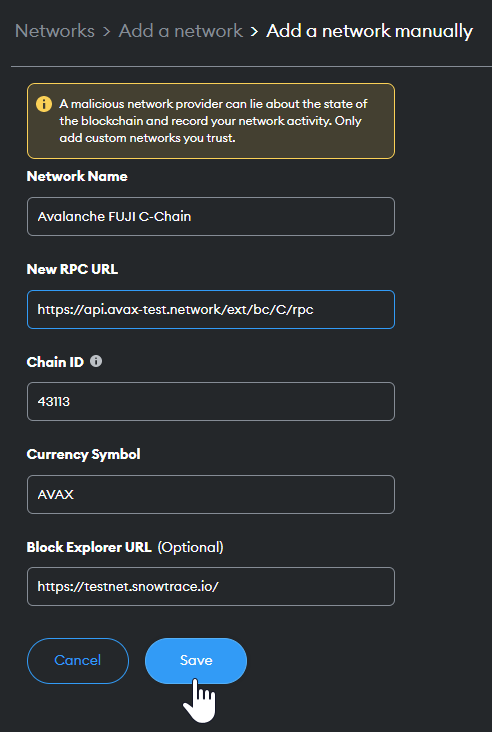
Step 2: Add Avalanche and Fuji Testnet to MetaMask
By default, MetaMask comes configured with only the Ethereum mainnet and Goerli testnet. In order to add the Avalanche C-Chain, and the Fuji testnet, follow the instructions in this document.
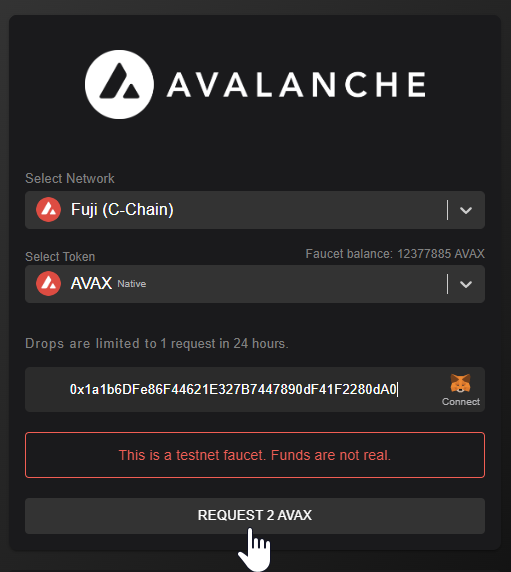
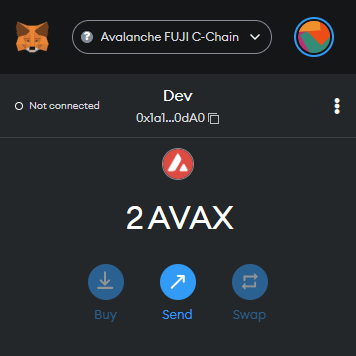
Step 3: Get AVAX From a Faucet
Head over to the Fuji faucet page on the Avalanche website and request a free test AVAX for your wallet. If all goes well, you should see 2 AVAX in your MetaMask wallet.
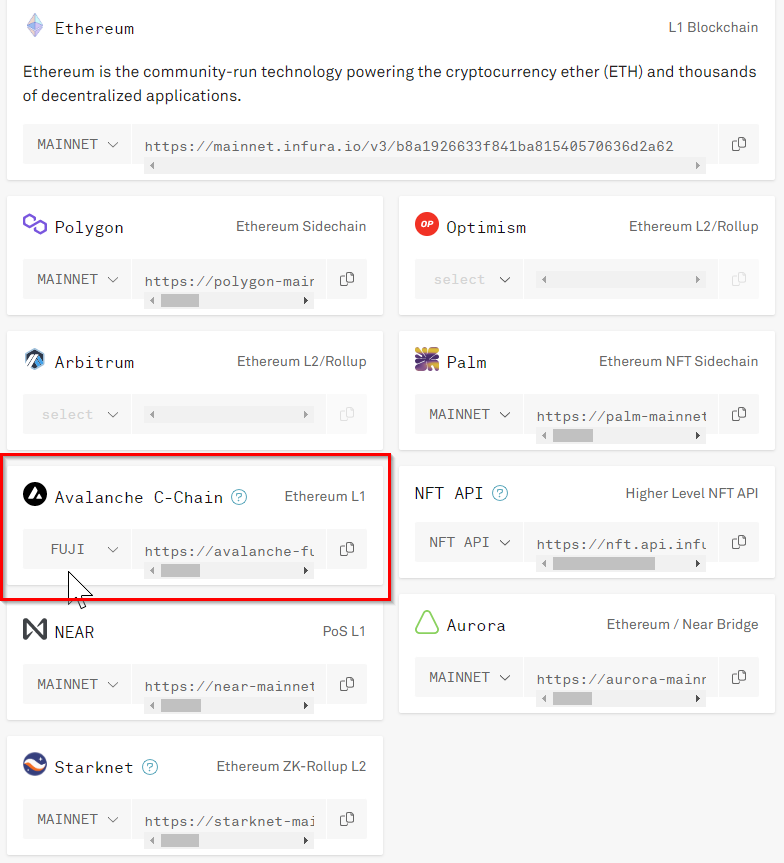
Step 4: Get Infura Avalanche/Fuji URL
Before we start building the project, let’s get the endpoint we will use. Go to infura.io and either sign up for an account or log in, then perform the following:
Click on the Create New Key button and create a new Web3 API project.
Navigate to the Endpoints tab and scroll down to Avalanche C-Chain.
Switch the endpoint from MAINNET to FUJI.
Copy the endpoint for future use in this project.
Step 5: Install NPM and Node
We will build our project using node and npm. In case you don't have these installed on your local machine, you can do so here.
To ensure everything is working correctly, run the following command:
$ node -vIf all goes well, you should see a version number for node.
Step 6: Create a Node Project and Install Dependencies
Let's set up an empty project repository by running the following commands:
$ mkdir my-crypto && cd my-crypto
$ npm init -y
We will be using Truffle, a world-class development environment and testing framework for EVM smart contracts, to build and deploy our smart contract. Install Truffle by running:
$ npm install -g truffleWe can now create a barebones Truffle project by running the following command:
$ npx truffle initTo check if everything works properly, run:
$ npx truffle testWe now have Truffle successfully configured. Let us next install the OpenZeppelin contracts package. This package will give us access to ERC-20 implementations (the standard for fungible tokens and cryptocurrencies), on top of which we will build our contract.
$ npm install @openzeppelin/contractsFinally, let us install the hdwallet-provider package that will allow Infura to sign transactions on our behalf using addresses derived from a 12- or 24-word mnemonic. We will use the mnemonic from our MetaMask wallet in step 1 for this purpose.
$ npm install @truffle/hdwallet-providerStep 7: Writing the ERC-20 Smart Contract
Open the repository in your favorite code editor (e.g. VS Code). In the contracts folder, create a new file called MyCrypto.sol.
We are going to write a very simple ERC-20 contract that creates a token with uncapped supply. We will also mint 100 tokens to our wallet. Add the following code to the file:
// SPDX-License-Identifier: MIT
pragma solidity ^0.8.4;

import "@openzeppelin/contracts/token/ERC20/ERC20.sol";

contract MyCrypto is ERC20 {

    constructor() ERC20("My Custom Token", "MCT") {
        _mint(msg.sender, 100 * 10 ** ERC20.decimals());
    }
}
Step 8: Deploy the Smart Contract to Ganache and Fuji
In order to deploy the contract to the Fuji testnet, we will require an RPC endpoint. Fortunately, Infura offers access to free, blazing-fast Avalanche C-Chain endpoints. Here’s where the endpoint URL we obtained in Step 4 will come in.
Next, in the truffle-config.js file, replace the contents of the file with the following:
const HDWalletProvider = require('@truffle/hdwallet-provider');
const INFURA_API_KEY = "<-- Fuji Infura API Key -->";
const MNEMONIC = "<-- MetaMask Wallet Mnemonic or Private Key -->";

module.exports = {
  networks: {
    development: {
      host: "127.0.0.1",
      port: 8545,
      network_id: "*"
    },
    fuji: {
      provider: () => new HDWalletProvider(MNEMONIC, INFURA_API_KEY),
      network_id: '43113',
      gas: 4465030
    }
  },
  compilers: {
    solc: {
      version: "0.8.13",
    }
  }
};
Replace the placeholders in lines 2 and 3 with your Infura Fuji API key and MetaMask wallet's mnemonic respectively. (The latter is the string of 12 words given to you when you first set up your wallet.) Take care to never share this key or mnemonic publicly.
Alternatively, you can use your wallet’s private key instead of the mnemonic. This is found in your MetaMask wallet’s Account Details tab when you click on Export private key.
Let us ensure that the contract is compiling correctly by running:
npx truffle compileIf there are no errors, we are clear to deploy the contract. With our smart contract in place, we can now write a simple deployment script. In the migrations directory, create a file called 1_deploy_contract.js and add the following code:
const myCryptoContract = artifacts.require("MyCrypto");

module.exports = function(deployer) {
   deployer.deploy(myCryptoContract);
};
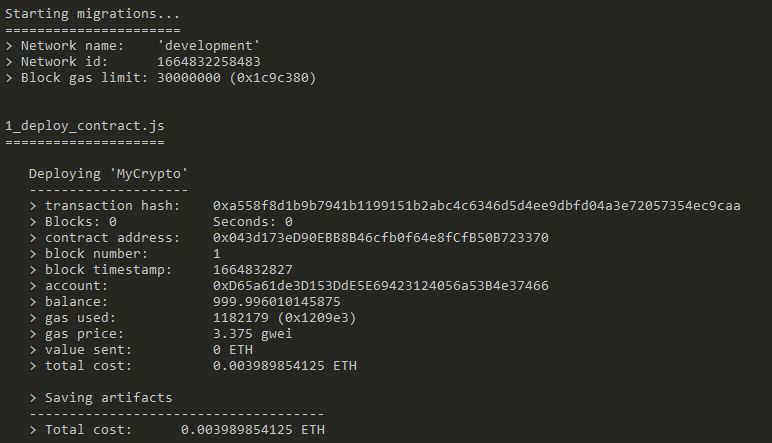
Now, before we deploy to the Fuji network, we should ensure it will deploy without any problems. We can do this by first deploying our contract to a local Ganache blockchain instance. To get Ganache running, open up a new terminal and type the following command:
ganache Now we can test deployment to Ganache by typing:
npx truffle migrate --network developmentThat should produce an output in our console similar to this one:
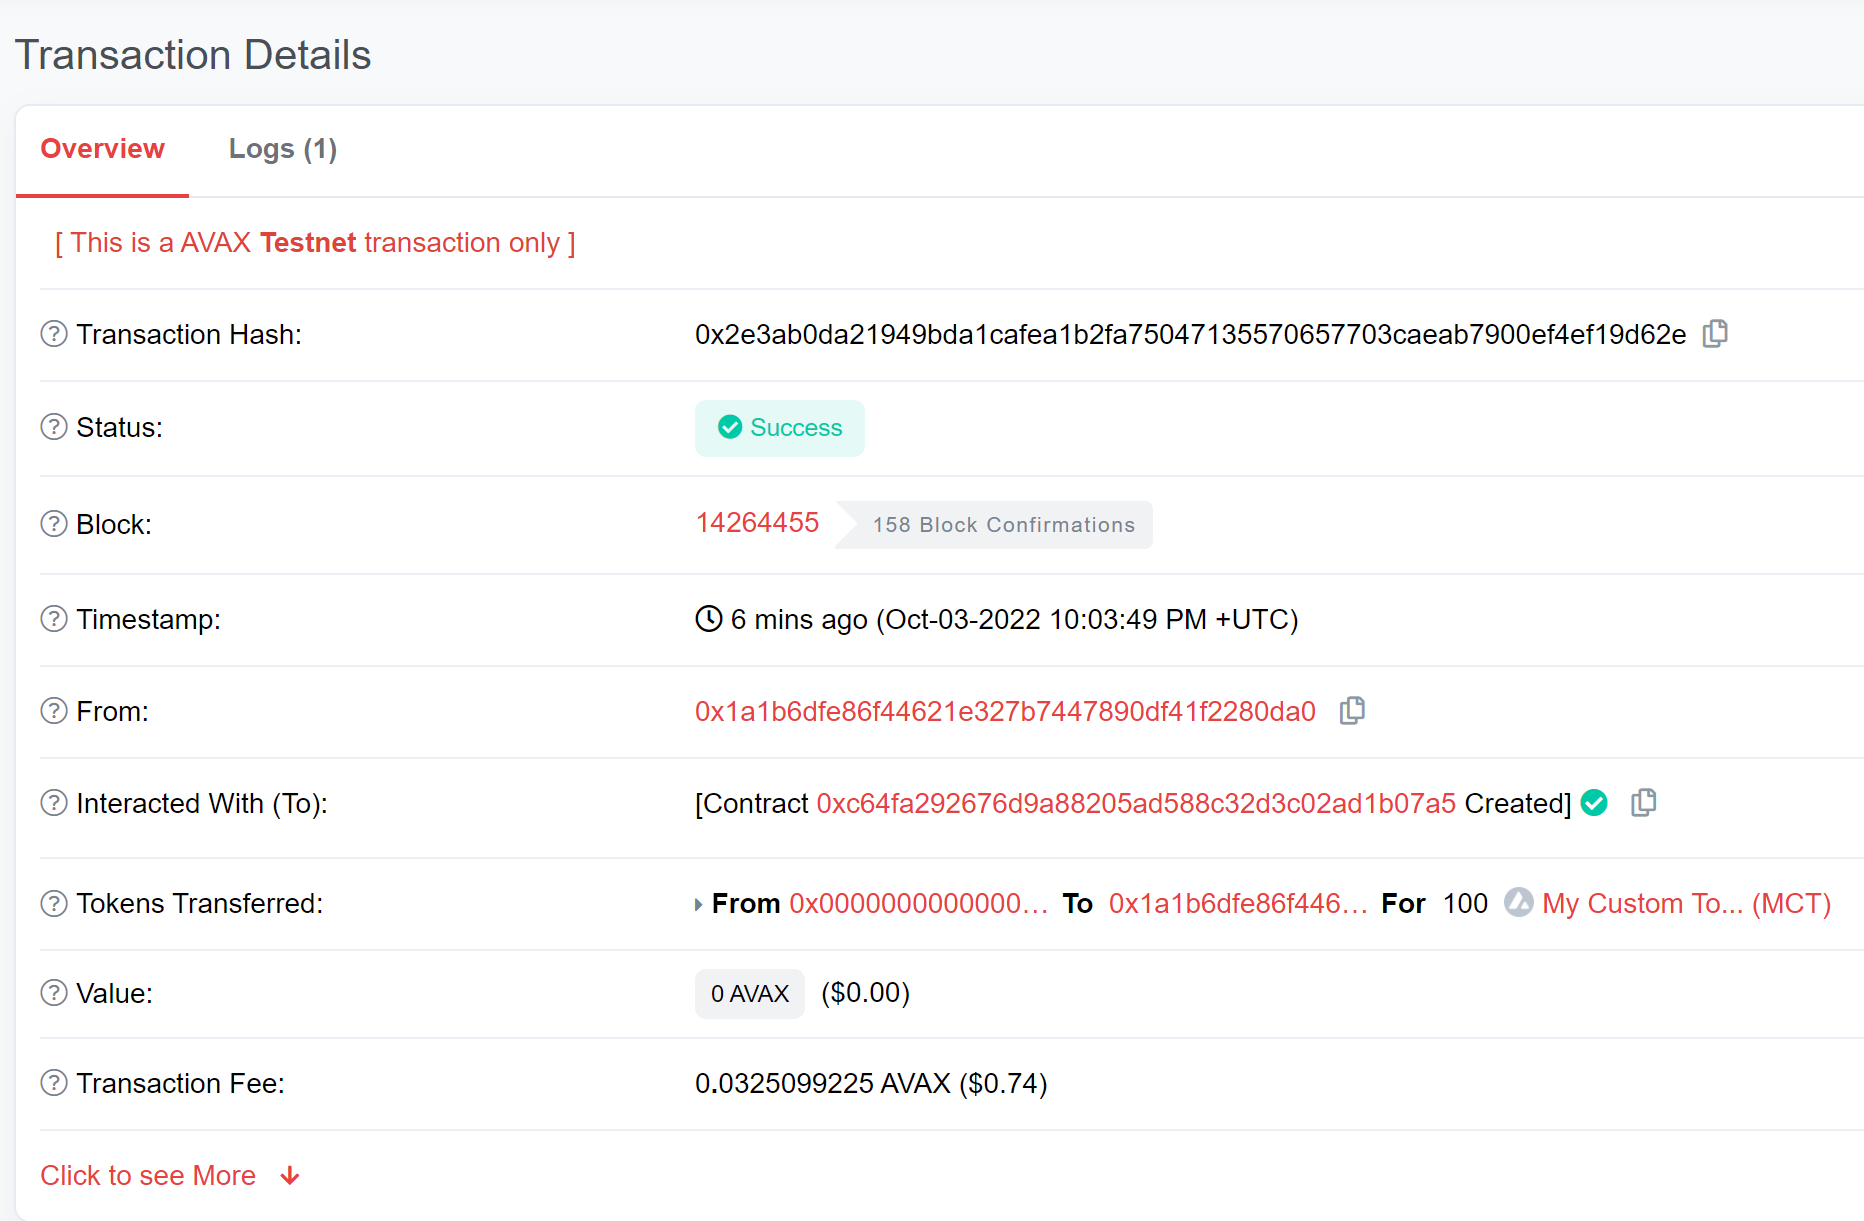
Now that we know our contract will deploy successfully, we are all set to deploy our contract to Fuji. From the terminal, run the following command:
npx truffle migrate --network fujiIf all goes well, your terminal will display the transaction hash and the address of the deployed contract on the Fuji network. Head over to the Avalanche C-Chain Testnet Explorer and search for your contract address to view your contract.
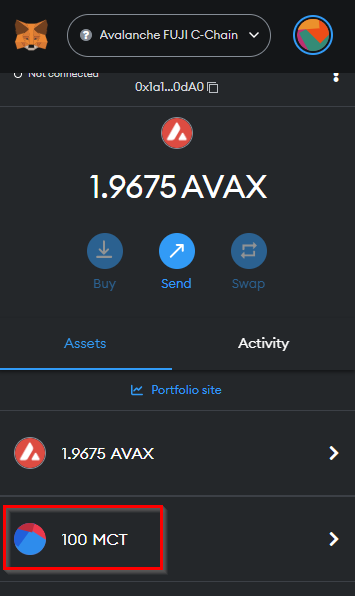
Step 9: Add Your Token to MetaMask
Now that our token exists on a real blockchain, we can add it to our MetaMask wallet. Switch the network on MetaMask to Fuji, and choose Import Token on the Assets tab. Here, you can import a custom token by entering the contract address of your token, the name, and the symbol.
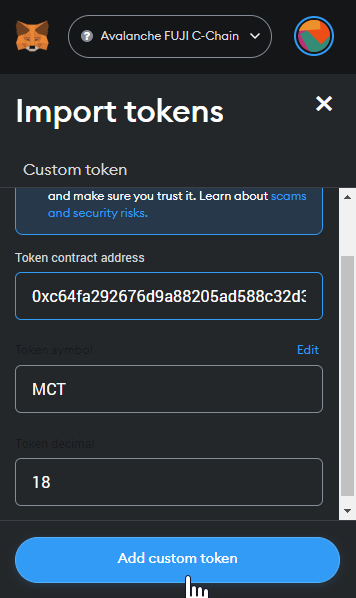
If all goes well, you should be able to see your token and a balance of 100 under the Assets tab.
Conclusion
In an extremely short amount of time, Avalanche has emerged as one of the most formidable alternatives to Ethereum and its ecosystem. Its network of subnets promises faster transactions and low costs at the same time.
As evidenced by the token we created in this article, Avalanche uses the same tools Ethereum uses. Therefore, if you are an Ethereum developer, you are also an Avalanche developer by default.
To start building on Avalanche using Infura, check out the documentation here.
Have a really great day!
Opinions expressed by DZone contributors are their own.
Comments