How to Install Jenkins on the Apache Tomcat Server
Want to learn more about how to install Jenkins on the Apache Tomcat Server? Check out this tutorial on how to install Jenkins in this powerful Java container.
Join the DZone community and get the full member experience.
Join For FreeJenkins is a powerful open source tool that enables you to automate tests and deployment. Apache Tomcat is a powerful servlet Java container for running web applications. If you are running your apps in Tomcat, or wish to do so, you might also want to run Jenkins in it. This blog post will explain how to do it.
If you are looking to install Jenkins in other ways, read how to install Jenkins on Windows, Ubuntu and with a WAR file.
Let’s get started!
First, install JDK. Jenkins supports Java 8. If you need help installing Java, go to this link.
Installing the Tomcat Server
If you don’t have Tomcat, start here. If you do, skip to the next section “Installing Jenkins.”
1. Go to the official Tomcat website and choose the Tomcat version to download. Here, I chose version 9.
2. Choose the appropriate binary for your machine. In this case, I chose the binary for Windows 64-bit.
3. Copy the downloaded zip file to the location of your choice and unzip it. In this example, I copied it to the folder C:\Tomcat.
4. Go to subfolder bin and click on the startup Windows bat file.
The Tomcat server will start.
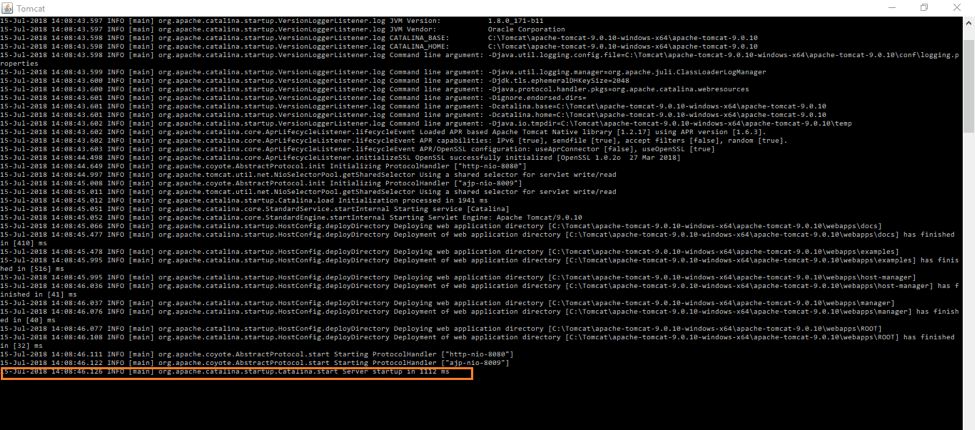
5. Browse to the url http://localhost:8080 to launch the Tomcat server.
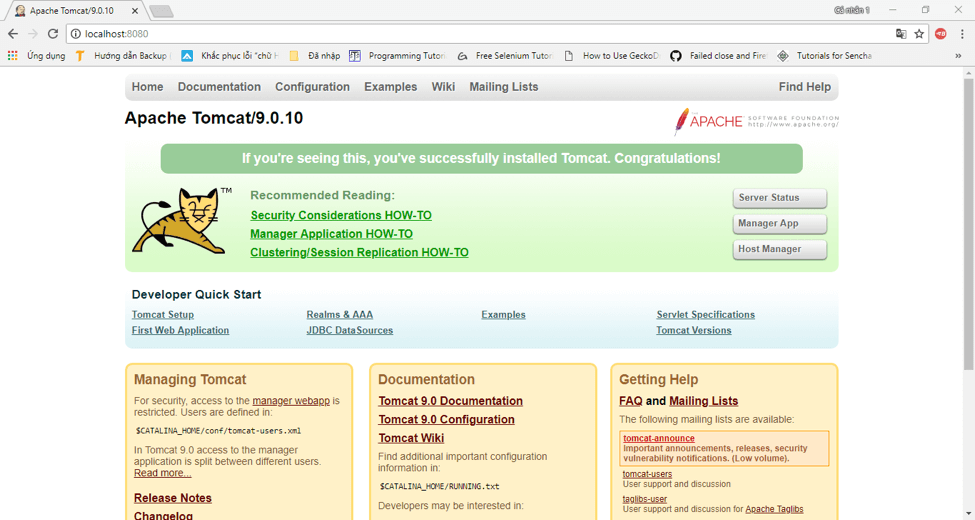
Now, we can install Jenkins.
Installing Jenkins
1. Click here to download the latest Jenkins WAR file.
2. Copy the jenkins.war file to the subfolder webapps in the Tomcat installation. It will auto-generate a jenkins folder.

3. Go to the url http://localhost:8080/jenkins to launch the initial Jenkins page.
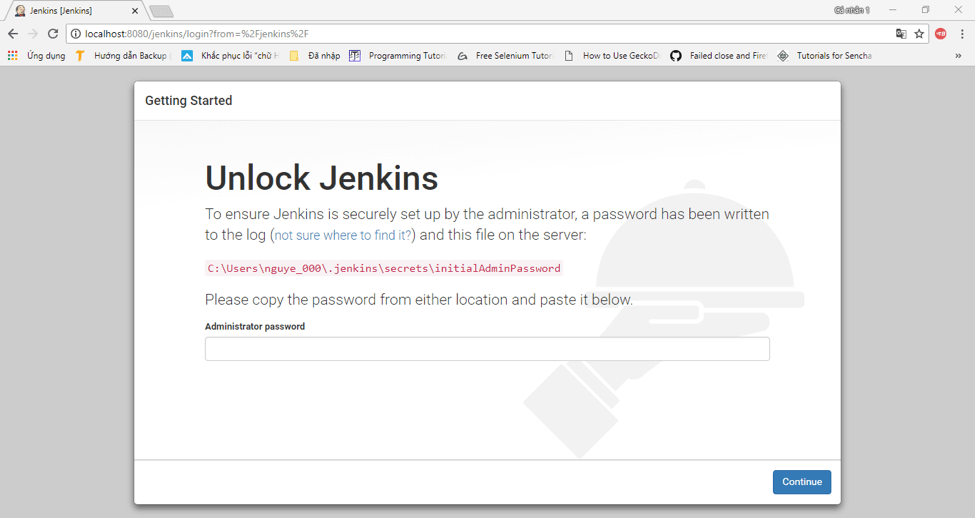
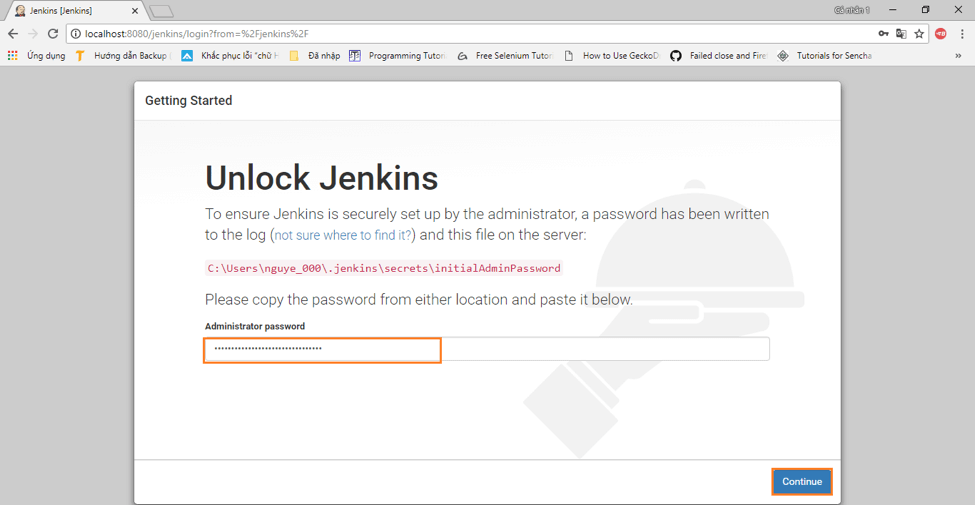
4. To unlock Jenkins, paste the random password copied from the file C:\Users\<your_user_account_folder_name>\.jenkins\secrets\initialAdminPassword. Paste it in the Administrator password field and then click on the “Continue” button
5. Either click on “Install suggested plugins” to install the default plugins or “Select plugins to install” to install the plugins you want. In this case, we will install the default suggested plugins
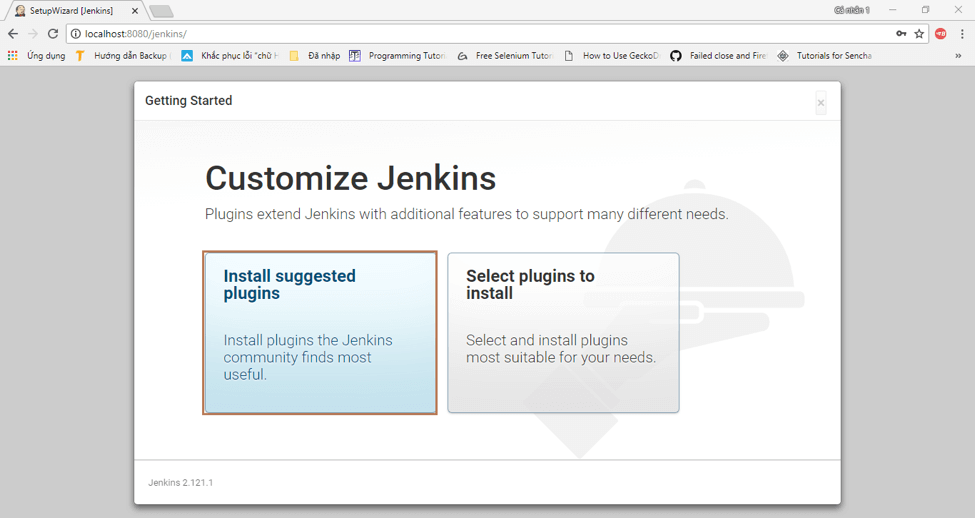
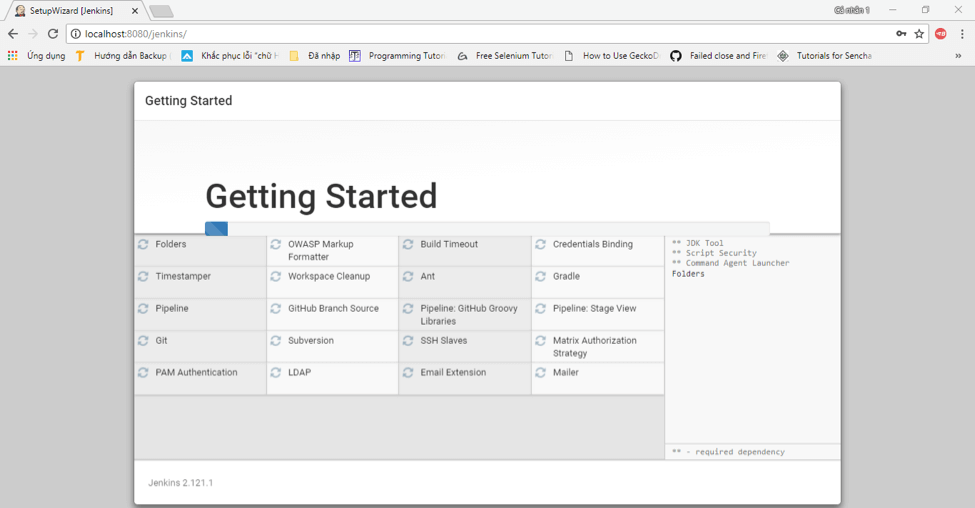
6. The plugins will install. Wait until this process is completed.
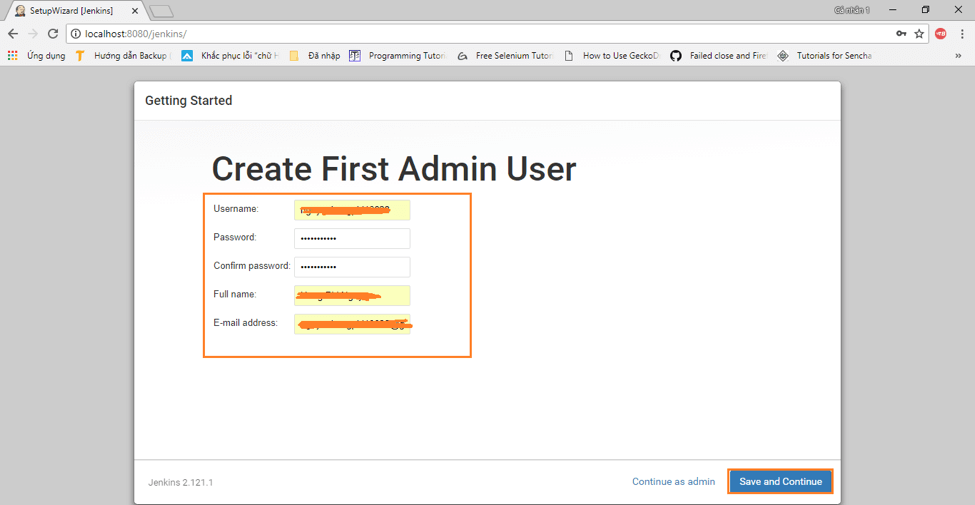
7. Create your first admin user for Jenkins and click “Save and Continue.”
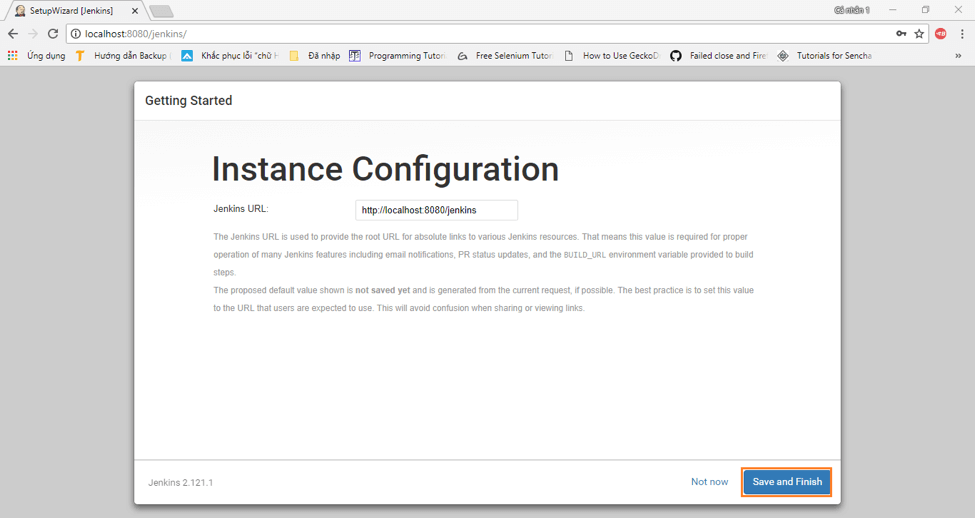
8. Click “Save and Finish” to complete the installation!
9. This is the last step! Click on “Start using Jenkins” to open the default Jenkins page.
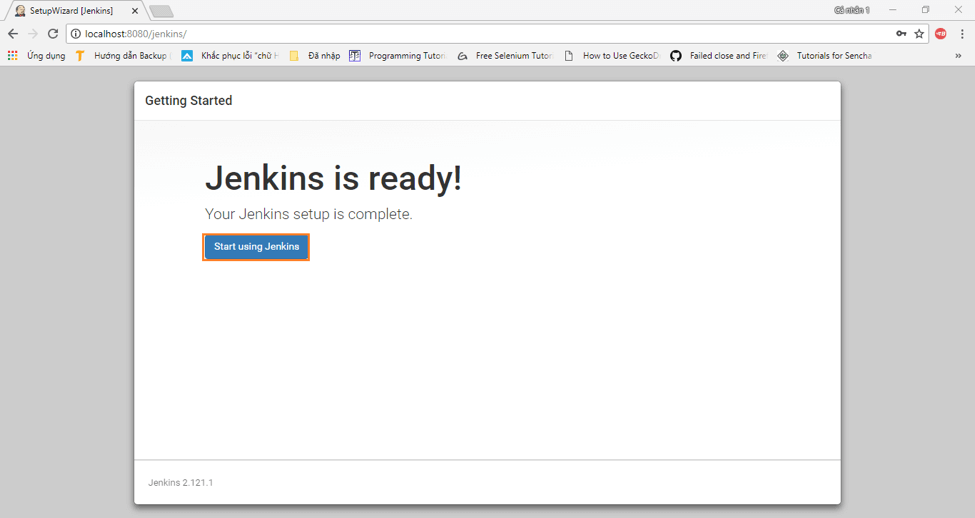
10. You can now start your job with Jenkins!
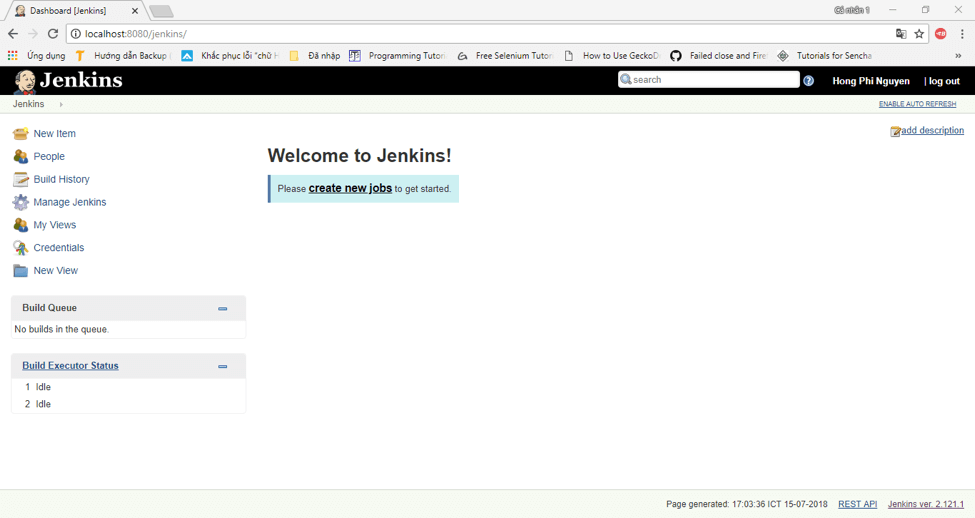
To learn how to use Jenkins, check out these resources:
- The Continuous Testing academy
- 2 Ways to Integrate JMeter Tests into Jenkins
- How to Include Load Testing in your Continuous Integration Environment
- Are You Using Jenkins the Right Way?
- Running a JMeter Test via Jenkins Pipeline - A Tutorial
- BlazeMeter’s Jenkins Plugin
- Top Jenkins Plugins You Can’t Miss
Published at DZone with permission of Phi Nguyen, DZone MVB. See the original article here.
Opinions expressed by DZone contributors are their own.

Comments