How To Install TestNG in Eclipse: Step-By-Step Guide
In this step-by-step guide, we will walk you through the TestNG framework and also the process of installing TestNG in Eclipse
Join the DZone community and get the full member experience.
Join For FreeTest automation involves the use of specialized tools and frameworks to enhance the quality of the application by writing and executing tests to verify the functionality of the application.
By automating the regression tests that help in checking the stability of the application, plenty of time can be saved, and overall efficiency, accuracy, and speed in the testing process can be improved. TestNG is one such powerful testing framework that helps to write and execute automated tests.
In this step-by-step guide, we will walk you through the TestNG framework and also the process of installing TestNG in Eclipse, which is one of the most popular Integrated Development Environments (IDE) for Java.
What Is TestNG?
TestNG, also known as the “Next Generation Testing Framework,” is an open-source testing framework that is designed for testing Java applications. It is a powerful framework with enhanced features that helps to simplify writing automated tests and improve the overall test automation experience.
Cedric Beust, the creator of TestNG, got inspired by JUnit and NUnit testing frameworks and created TestNG in 2004. TestNG can be used to write tests at all levels, such as Unit Testing, Integration Testing, Component Testing, Functional, and End to End automated testing. It provides a comprehensive solution for writing and executing automated tests.
Features of TestNG
The following are some of the rich features of TestNG that make it a distinguished framework.
Test Configuration
TestNG provides annotations that help in configuring the Pre-Test and Post-Test conditions. Annotations like @BeforeSuite, @BeforeTest, @BeforeMethod, etc., can be used to configure the Pre-Test conditions. Similarly, @AfterSuite, @AfterTest, @AfterMethod, etc., can be used for setting the Post-Test conditions. This helps in easily setting up the environment, initializing the resources, and performing clean-up operations.
Test Data Management
TestNG allows Data-Driven testing. It provides annotations like @DataProvider, using which multiple sets of input data can be supplied in a single test. Test Scenarios with different inputs like Negative, Positive, and passing random data can all be tested easily.
Parallel Test Execution
TestNG provides the feature to perform Parallel Testing. This helps in reducing the overall test execution time by running the tests concurrently.
Managing Test Dependencies and Groups
TestNG also offers to define the dependencies between tests. For example, in the case of an e-commerce application, the feature says that only a registered user should be allowed to login into the application. So, in the case of end-to-end automated tests, the login test is dependent on the registration test. If the registration test fails, the login test should be skipped. Grouping the tests on the basis of common attributes is allowed by TestNG. It can help in managing complex test scenarios.
Test Assertions
Assertions are basically verification methods that check that the expected results match with actual results. TestNG provides assertion methods that can help test the application easily. Methods like assertEquals(), assertTrue(), assertFalse(), etc., can be used to check the test results.
By now, you might have got a good grasp of What TestNG is by learning about its features. Let’s now move toward the next section and learn about installing TestNG in Eclipse IDE.
How To Install TestNG in Eclipse
Before we move toward the installation process, let’s learn about the prerequisites first.
There are two ways to install TestNG in Eclipse.
- Using the Eclipse MarketPlace
- Using the Install New Software menu.
Installing TestNG Using the Eclipse MarketPlace
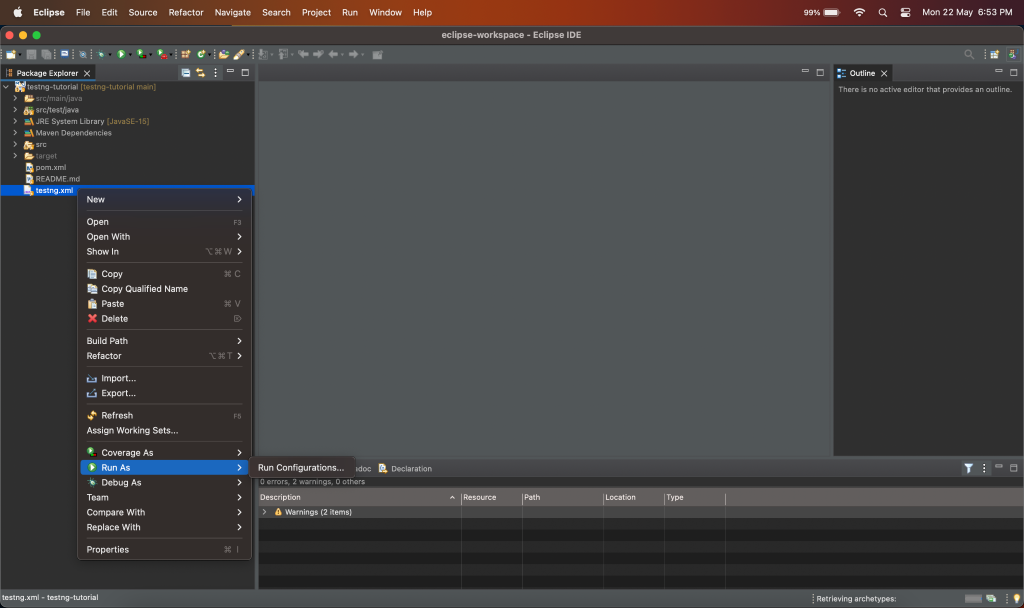
To begin, let me tell you that currently the TestNG plugin is currently not installed in Eclipse. It can be seen that the Run As menu doesn’t show any child menu for TestNG in the following screenshot:
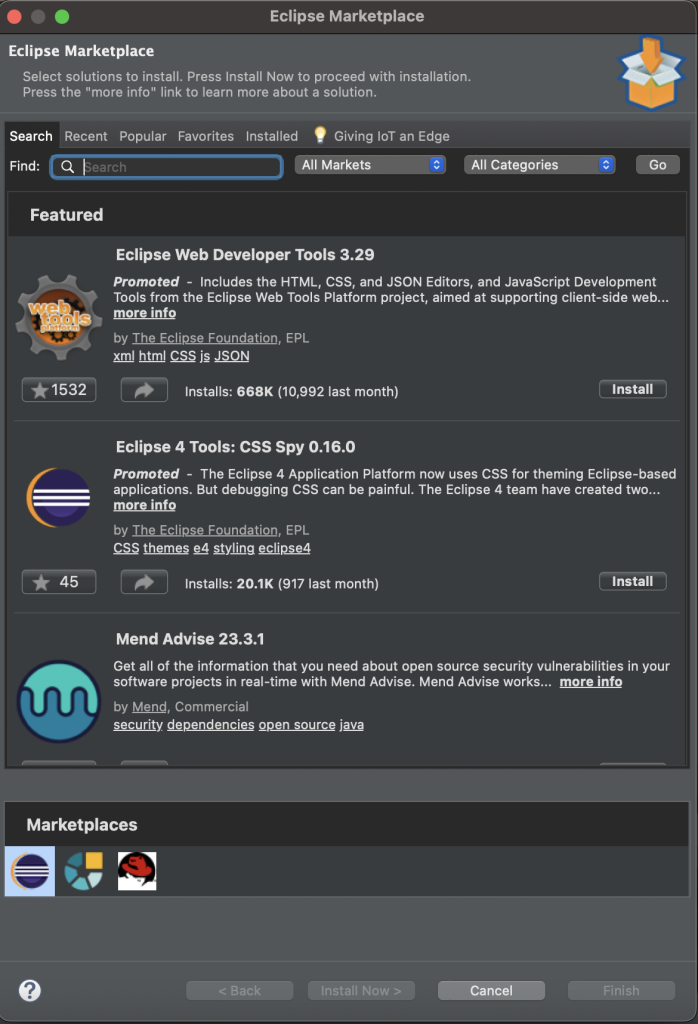
Let’s learn how to install the TestNG plugin using Eclipse MarketPlace.
Step 1
The following Eclipse MarketPlace window should get open:
Step 2
In the Search Text box, type the plugin name —TestNG and press Enter Key or click on the Go button on the right hand of the screen.
The TestNG plugin details should be displayed in the search results with the Install button.
Click on the Install button.
Step 3
Confirm Selected Features window will be displayed next. Select all the checkboxes, i.e. TestNG for Eclipse, TestNG(required) and TestNG M2E(Maven) Integration (Optional)
After selecting all the features, click on the Confirm button to move to the next step.
Step 4
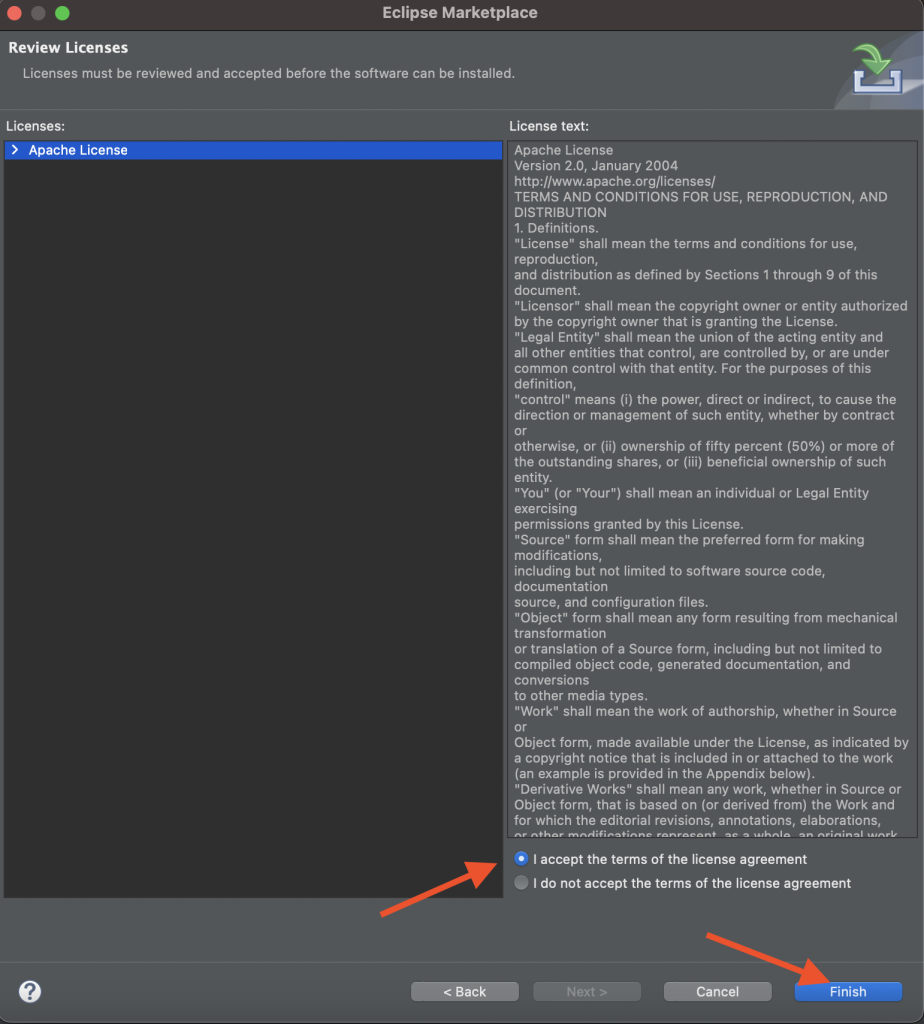
Accept the License Agreement by selecting the “I accept the terms of the license agreement” radio button.
Click on the Finish button.
On the status bar at the bottom of the window, the plugin installation progress should be displayed, displaying the percentage of installation completed.
Step 5
Next, on the Trust window that is displayed for Trusting the content.
Tick the Unsigned n/a checkbox and click on the Trust Selected button.
Step 6
Once the installation succeeds, a prompt will be displayed to Restart Eclipse IDE.
Click on the Restart Now button to restart Eclipse so the plugin installation can come into effect for use.
Congratulations, you have installed the TestNG plugin successfully Eclipse IDE.
To confirm that the installation was successful, check out the following steps:
Step 1
Import any Maven project into Eclipse IDE.
Step 2
To confirm that the installation was successful, we can import any existing Maven Project into Eclipse IDE and right-click on the testng.xml file. It should display the menu option Run As >> TestNG Suite.
That’s it! You have successfully installed TestNG in Eclipse IDE. You can now start using TestNG to write and execute your test cases.
Installing TestNG Using the Install New Software Menu
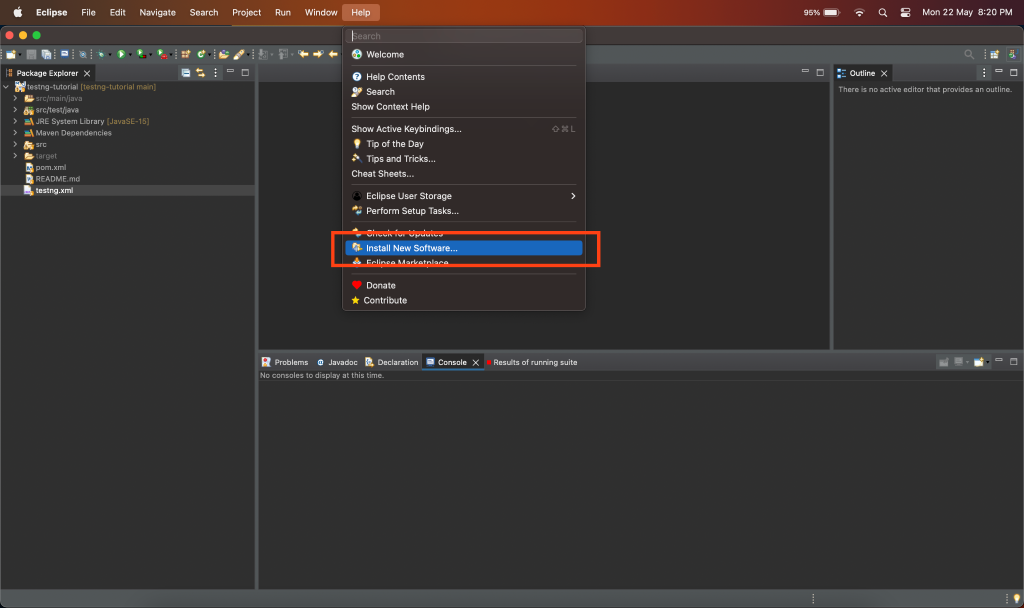
The second option to install the TestNG plugin is using the Install New Software menu that is available in the Help Menu in Eclipse.
Step 1
Navigate to the menu Help >> Install New Software and click on it. The following Installation window should open.
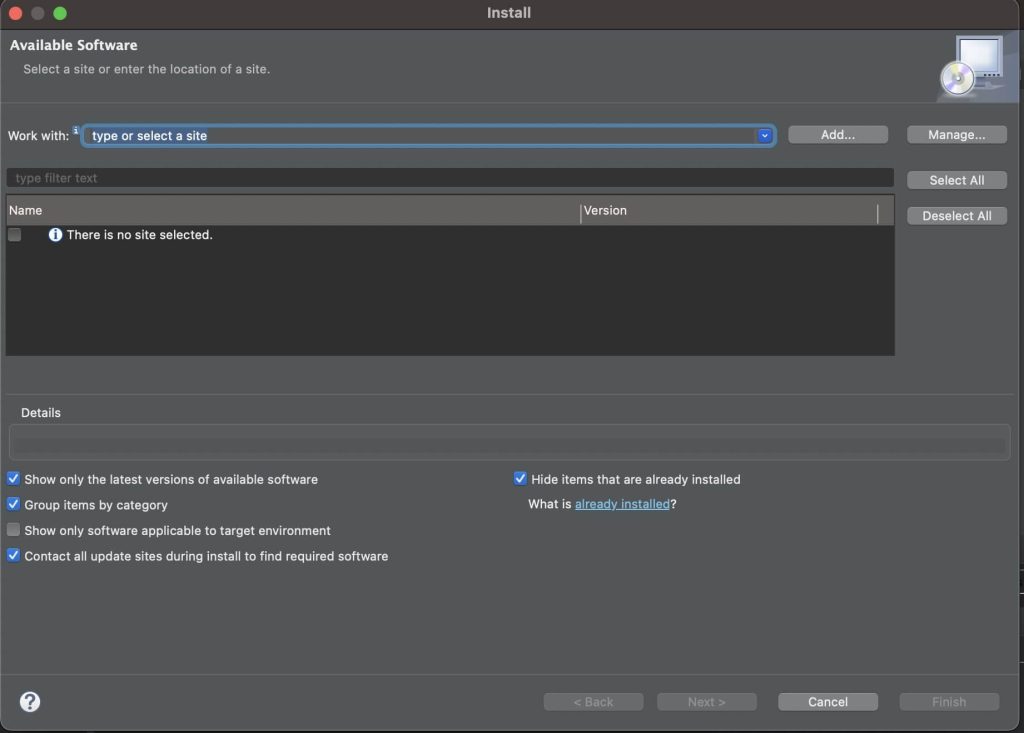
Step 2
In the Work with field, enter the URL — https://testng.org/testng-eclipse-update-site. This URL will fetch the latest TestNG plugin details from the TestNG website for installation.
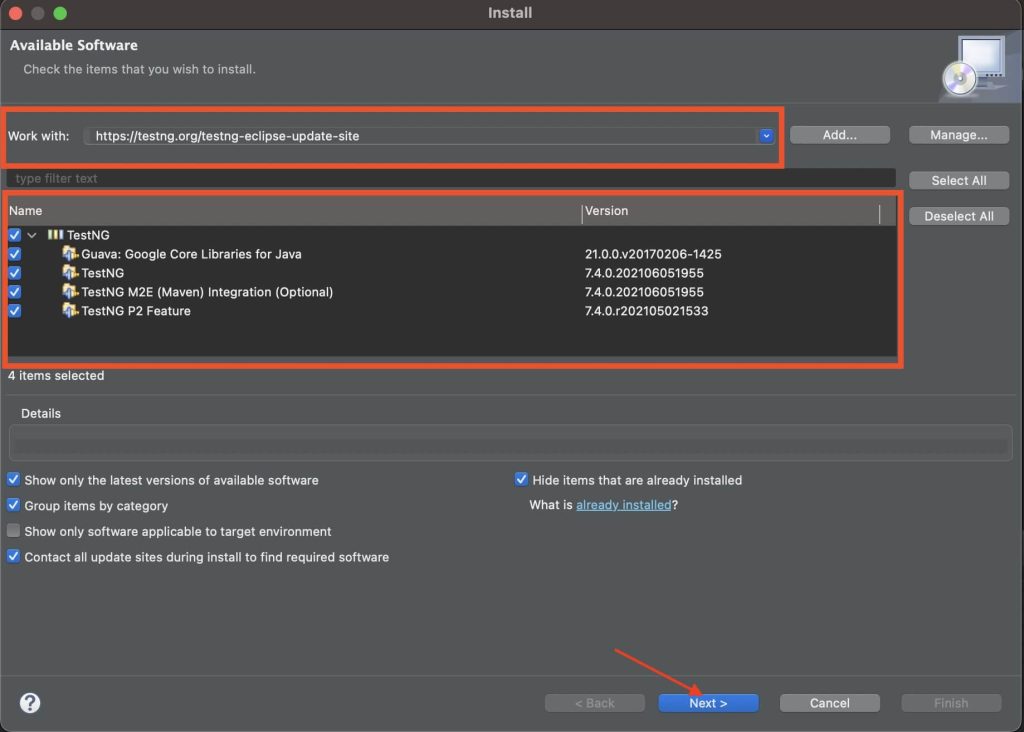
Versions, as well as the plugin details, will be displayed in the lower section of the installation window, as highlighted in the screenshot.
Make sure to select all the checkboxes and click on the Next button to proceed with the installation.
Step 3
The installation details will be displayed in the next window; click on the Finish button.
Step 4
We can check the installation progress in the status bar of Eclipse IDE at the bottom.
Step 5
Tick on the Unsigned n/a checkbox to trust the content for installation and click on the Trust Selected button to proceed.
Step 6
Once the installation is complete, a dialog box prompting to restart Eclipse IDE should be displayed. Click on the Restart Now button to restart Eclipse IDE so the plugin installation comes into effect.
Congratulations, you have installed the TestNG plugin successfully, Eclipse IDE.
To confirm that the installation was successful, check out the following Steps.
To confirm that the installation was successful, we can import any existing Maven Project into Eclipse IDE and right-click on the testng.xml file. It should display the menu option Run As >> TestNG Suite.
That’s it! You have successfully installed TestNG in Eclipse IDE. You can now start using TestNG to write and execute your test cases.
Conclusion
By installing TestNG, we have unlocked a whole new level of testing possibilities. It can help us easily organize and maintain tests, perform parallel execution, and generate detailed test reports. It can also help in exploring new ways of test automation by writing exception-handling tests as well.
By following the instructions provided in this step to step guide, TestNG can be easily integrated into Eclipse IDE and enhance the testing capabilities.
Published at DZone with permission of Baba m. See the original article here.
Opinions expressed by DZone contributors are their own.
Comments