How to Integrate Spring Boot and Apache Camel
Spring Boot and Apache Camel have both made developers' lives a lot easier. When integrated, they can be great resource.
Join the DZone community and get the full member experience.
Join For FreeSpring Boot has really made developers' lives easier. Spring Boot's starters and auto-configurators reduce a lot of burden on developers. Another nice integration framework is Apache Camel, which provided abstraction over different technologies. In this article, we'll learn how to integrate Spring Boot and Apache Camel.
Spring Boot projects can be created in two ways. One is through Spring Boot Intitializr (which we are doing here) and the other is through the STS Plugin for Eclipse.
When you enter the Spring Initializr website, you'll be greeted with the interface below.
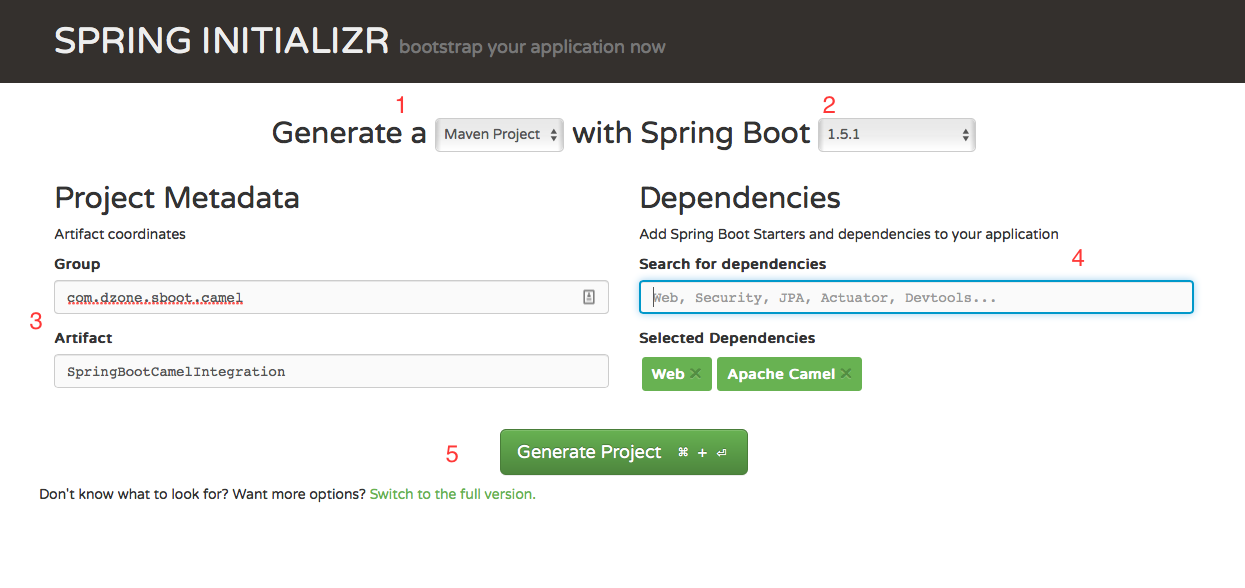
Choose the build tool. You can choose either Maven or Gradle. I'm choosing Maven.
Choose the Spring Boot version. Generally, it'll be auto-selected to stabilize the latest release.
Provide the Group ID and Artifact ID for your project.
Choose your starters. This is the most important step! Type "web" in the text box and select Web, then type "Camel select apache camel." Intializr will automatically select the required dependencies for you.
Click Generate Project, and then you'll get a ZIP file.
After the ZIP downloads, extract the ZIP file and fire up Eclipse import as a Maven project. When the import process completes, Spring starters will help Maven download all the required dependencies for Camel.
Now, let's get our hands dirty.
Create a RestController for invoking the Camel route:
package com.dzone.sboot.camel.controllers;

import org.apache.camel.CamelContext;
import org.apache.camel.ProducerTemplate;
import org.springframework.beans.factory.annotation.Autowired;
import org.springframework.web.bind.annotation.RequestMapping;
import org.springframework.web.bind.annotation.RestController;

@RestController
public class CamelController {

 @Autowired
 ProducerTemplate producerTemplate;

 @RequestMapping(value = "/")
 public void startCamel() {
  producerTemplate.sendBody("direct:firstRoute", "Calling via Spring Boot Rest Controller");
 }
}
Here, we're calling firstRoute and sending the body "Calling via Spring Boot Rest Controller" using ProducerTemplate .
Let's create a component class for placing Camel Routes:
package com.dzone.sboot.camel.routes;

import org.apache.camel.builder.RouteBuilder;
import org.springframework.stereotype.Component;

@Component
public class CamelRoutes extends RouteBuilder {

 @Override
 public void configure() throws Exception {
  from("direct:firstRoute")
   .log("Camel body: ${body}");
 }
}
The specialty of Camel starter is that it'll auto-wire the Camel context and auto-detect all of the Camel routes in our application.
You already have a main method, which was created by Intializr:
package com.dzone.sboot.camel;
import org.springframework.boot.SpringApplication;
import org.springframework.boot.autoconfigure.SpringBootApplication;
@SpringBootApplication
public class SpringBootCamelIntegrationApplication {
public static void main(String[] args) {
SpringApplication.run(SpringBootCamelIntegrationApplication.class, args);
}
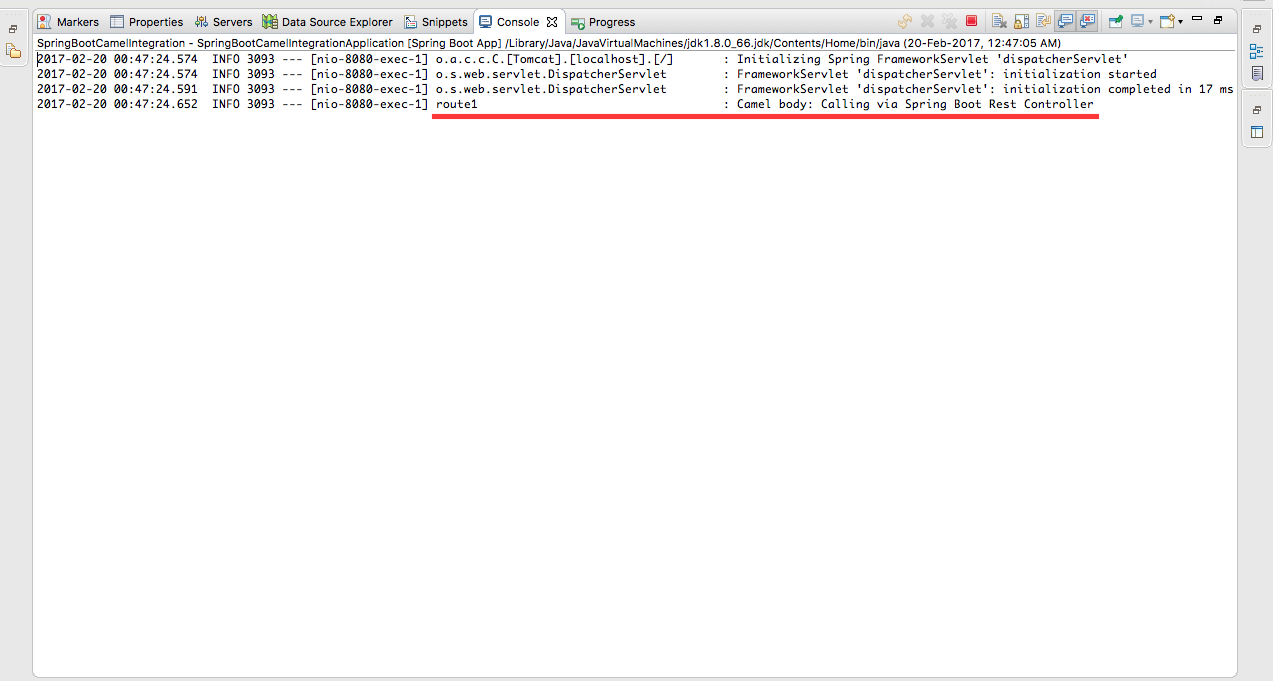
}Now, right-click on your project and then click on Run As > Spring Boot Application. When that application starts, hit http://localhost:8080/. Viola! You'll see the body that we sent from Spring Rest Controller in the console:
This is the doorstep application to Spring Boot and Camel. You can do a lot of things with both the technologies. If you have any queries, please feel free to reach out to me. Feel free to check it out on GitHub, too.
Opinions expressed by DZone contributors are their own.
Comments