How to Run Playwright Test Cases in CI/CD Pipeline Bitbucket
This blog cover how you can Integrate CI/CD BitBucket with Playwright and how you can do end-to-end testing with Bitbucket and Playwright.
Join the DZone community and get the full member experience.
Join For FreePlaywright is an open-source Node.js library started by Microsoft for automating browsers based on Chromium, Firefox, and WebKit through a single API. The primary goal of Playwright is to improve automated UI testing. In addition, playwright is made to enable cross-browser web automation.
Playwright test allows to:
- Run tests across all browsers.
- Execute tests in parallel.
- Capture videos, screenshots, and other artifacts on failure.
- Enjoy context isolation out of the box.
- Integrate your POMs as extensible fixtures.
Why Playwright?
Playwright have very rich features; a number of features are explained below:
- Easy Setup: Playwright is extremely easy to line up; in an exceedingly few minutes, we will start writing the script.
- Browser Support: Playwright supports multiple browse Chromium family browsers (Chrome, Edge), Webkit (Safari), and Firefox are all supported.
- Parallel Testing: Playwright supports parallel execution. we can run parallel tests with multiple browsers.
- Support for Multiple Tab: Playwright supports multi-tab and windows by launching a new window.
- Language Support: Playwright supports Java, C#, Python, and Javascript, Typescript, which makes him popular.
- Testing: Using Playwright, we can do End to End, Functional, API Testing, and Accessibility Testing.
- Built-in Reporters: Playwright framework support JSON, JUnit, and HTML Reporters. Playwright also supports the reporter Allure Report.
- CI/CD Support: Playwright supports CI/CD integration like Jenkins, Circle CI, Bitbucket Pipeline Bamboo, AWS CodePipeline, Travis CI, GitHub Actions, and more.
What Is Bitbucket?
Bitbucket Pipelines is an integrated CI/CD service built into Bitbucket. It allows you to automatically build, test, and even deploy your code based on a configuration file in your repository. Essentially, we create containers in the cloud for you. Inside these containers, you can run commands (like you might on a local machine) but with all the advantages of a new system, customized and configured for your needs.
Some of the features of Bitbucket include:
- Code collaboration and management: Bitbucket allows users to collaborate on code development through pull requests, code reviews, and branch permissions.
- Built-in continuous integration and deployment: Bitbucket can be integrated with popular CI/CD tools such as Jenkins, Bamboo, and Travis CI to automate the build, test, and deployment process.
- Integrated issue tracking: Bitbucket includes an integrated issue-tracking system that allows teams to track bugs, tasks, and feature requests.
- Private and public repositories: Bitbucket allows users to create both private and public repositories with varying levels of access control.
- Mobile app: Bitbucket provides a mobile app that can be used to manage repositories and collaborate with team members on the go.
- Integrations with other Atlassian tools: Bitbucket can be integrated with other Atlassian tools such as Jira, Trello, and Confluence for enhanced collaboration and workflow management.
Pre-Condition
- The user already logged into Bitbucket after Sign-up.
- Install NodeJS
- Install Visual Studio Code
Set Up Playwright
Step 1: Install and Create a Package.json File
- Create a folder, e.g., playwright_bitbuckets_2023.
- Open the folder in VS Code.
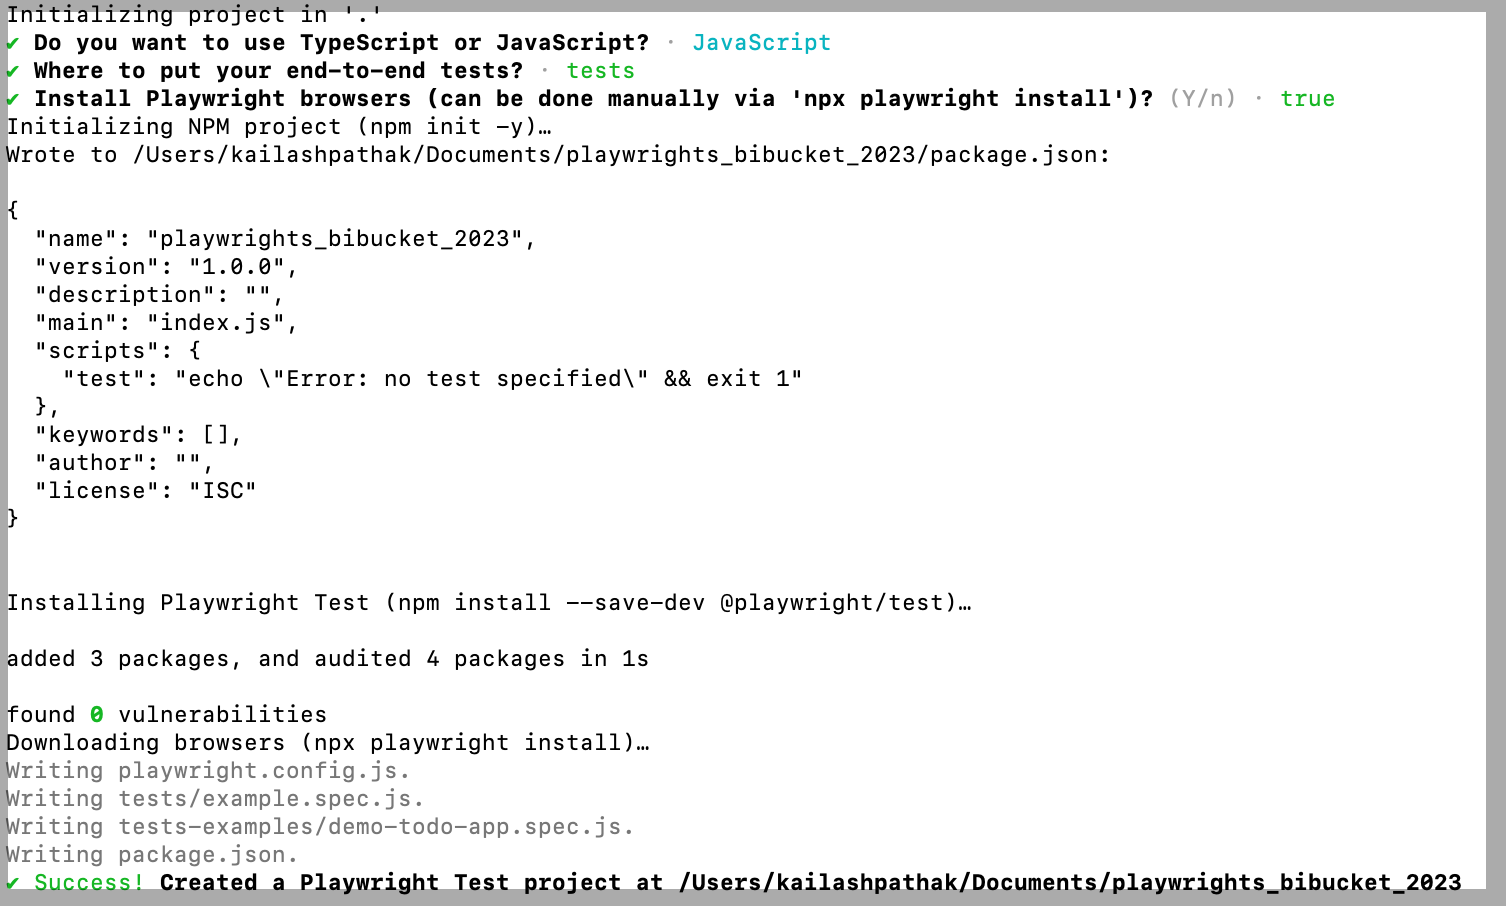
- Run from the project’s root directory npm init playwright@latest.
Run the below command in the root folder:
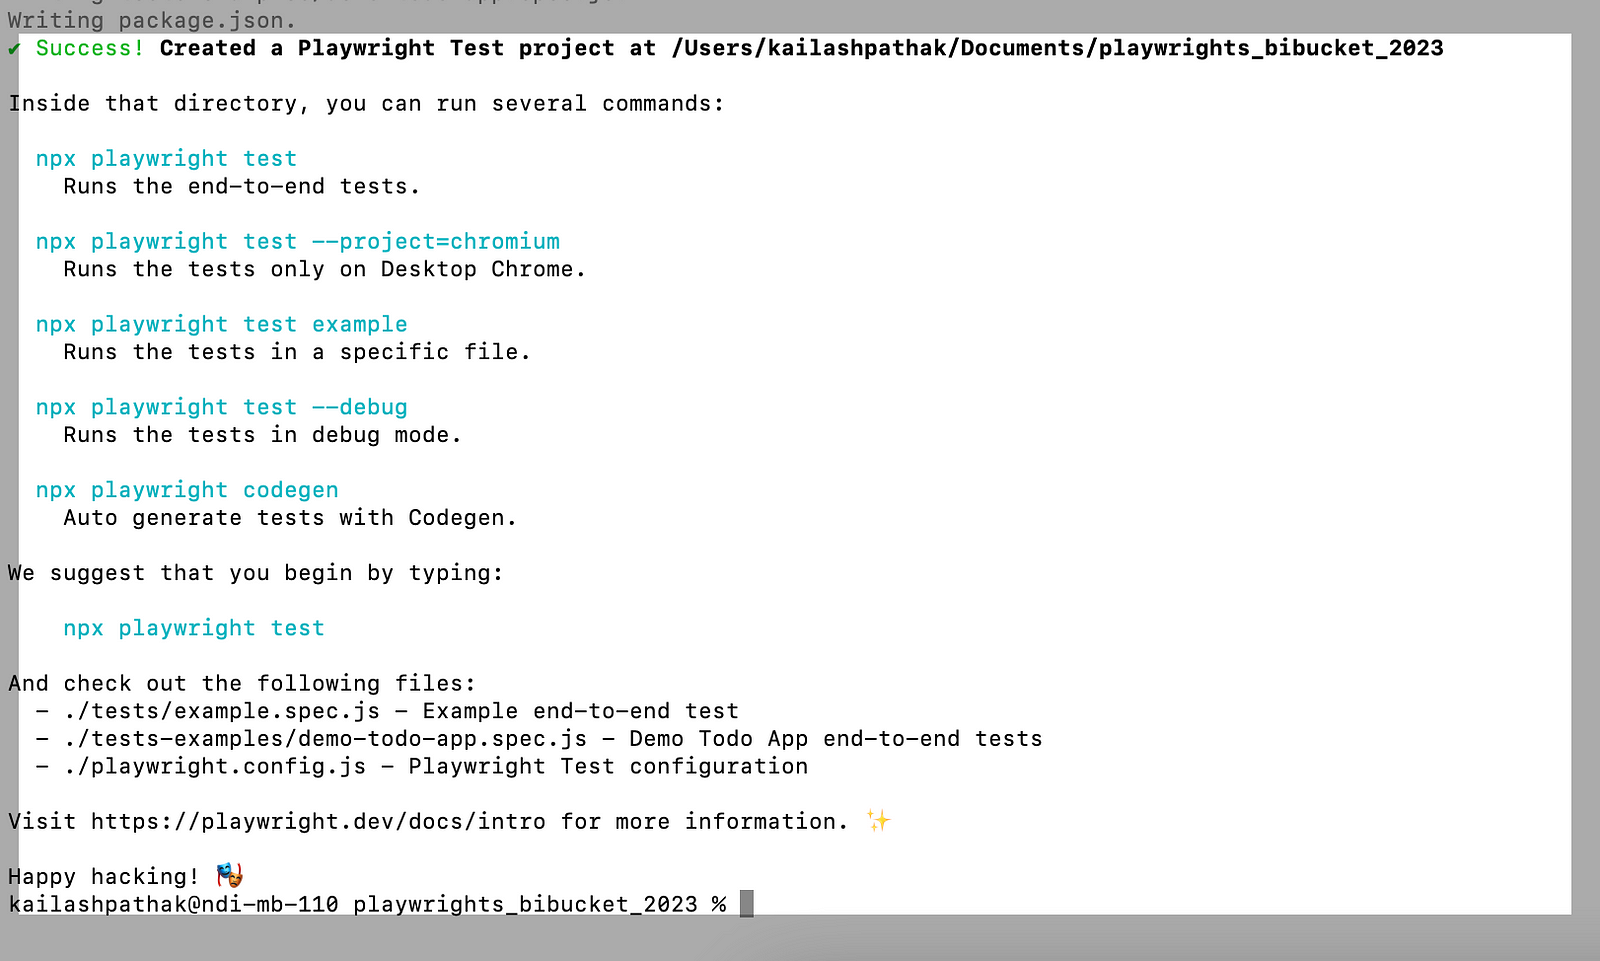
npm init playwright@latestOnce you execute the above command, it asks you a set of questions; just answer them or Press Enter until package.json gets created.
Step 2: Code Set Up
For DEMO purposes, I have taken the below two examples. First, push the code to the newly created repo. Below is a simple test case where we searched some data and verified it.
Example 1
A code snippet is below.
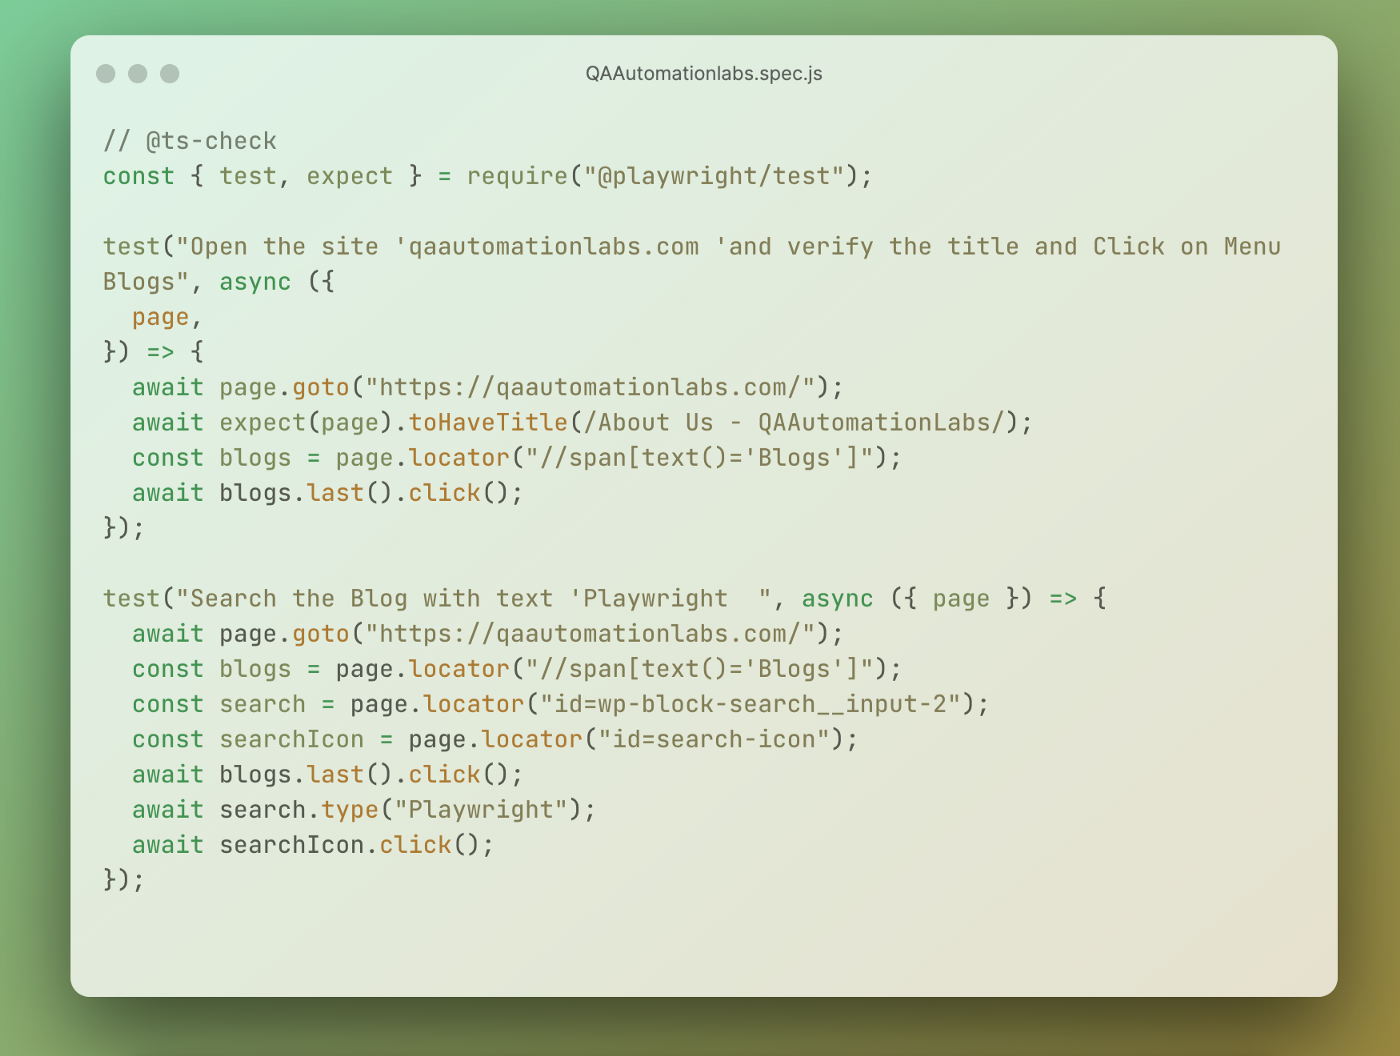
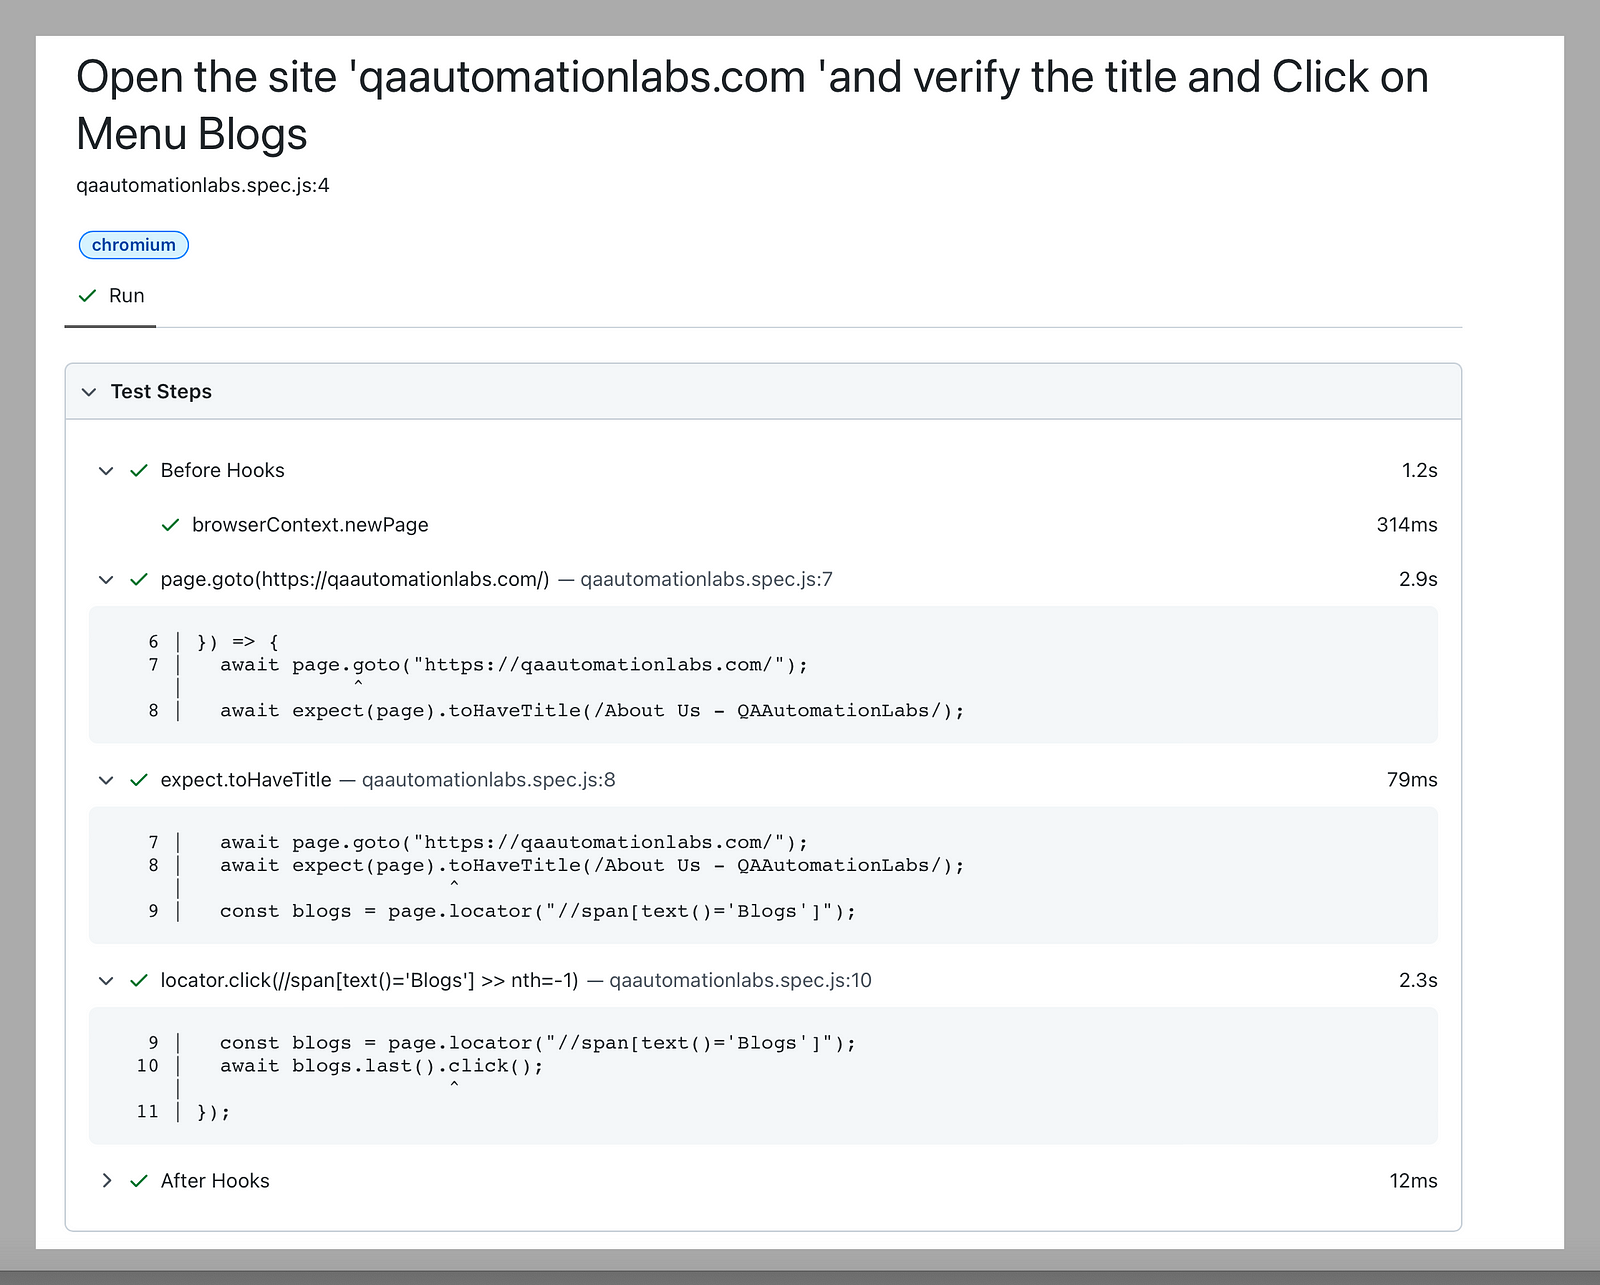
In the below code, we are:
- Opening the URL.
- Verifying the title.
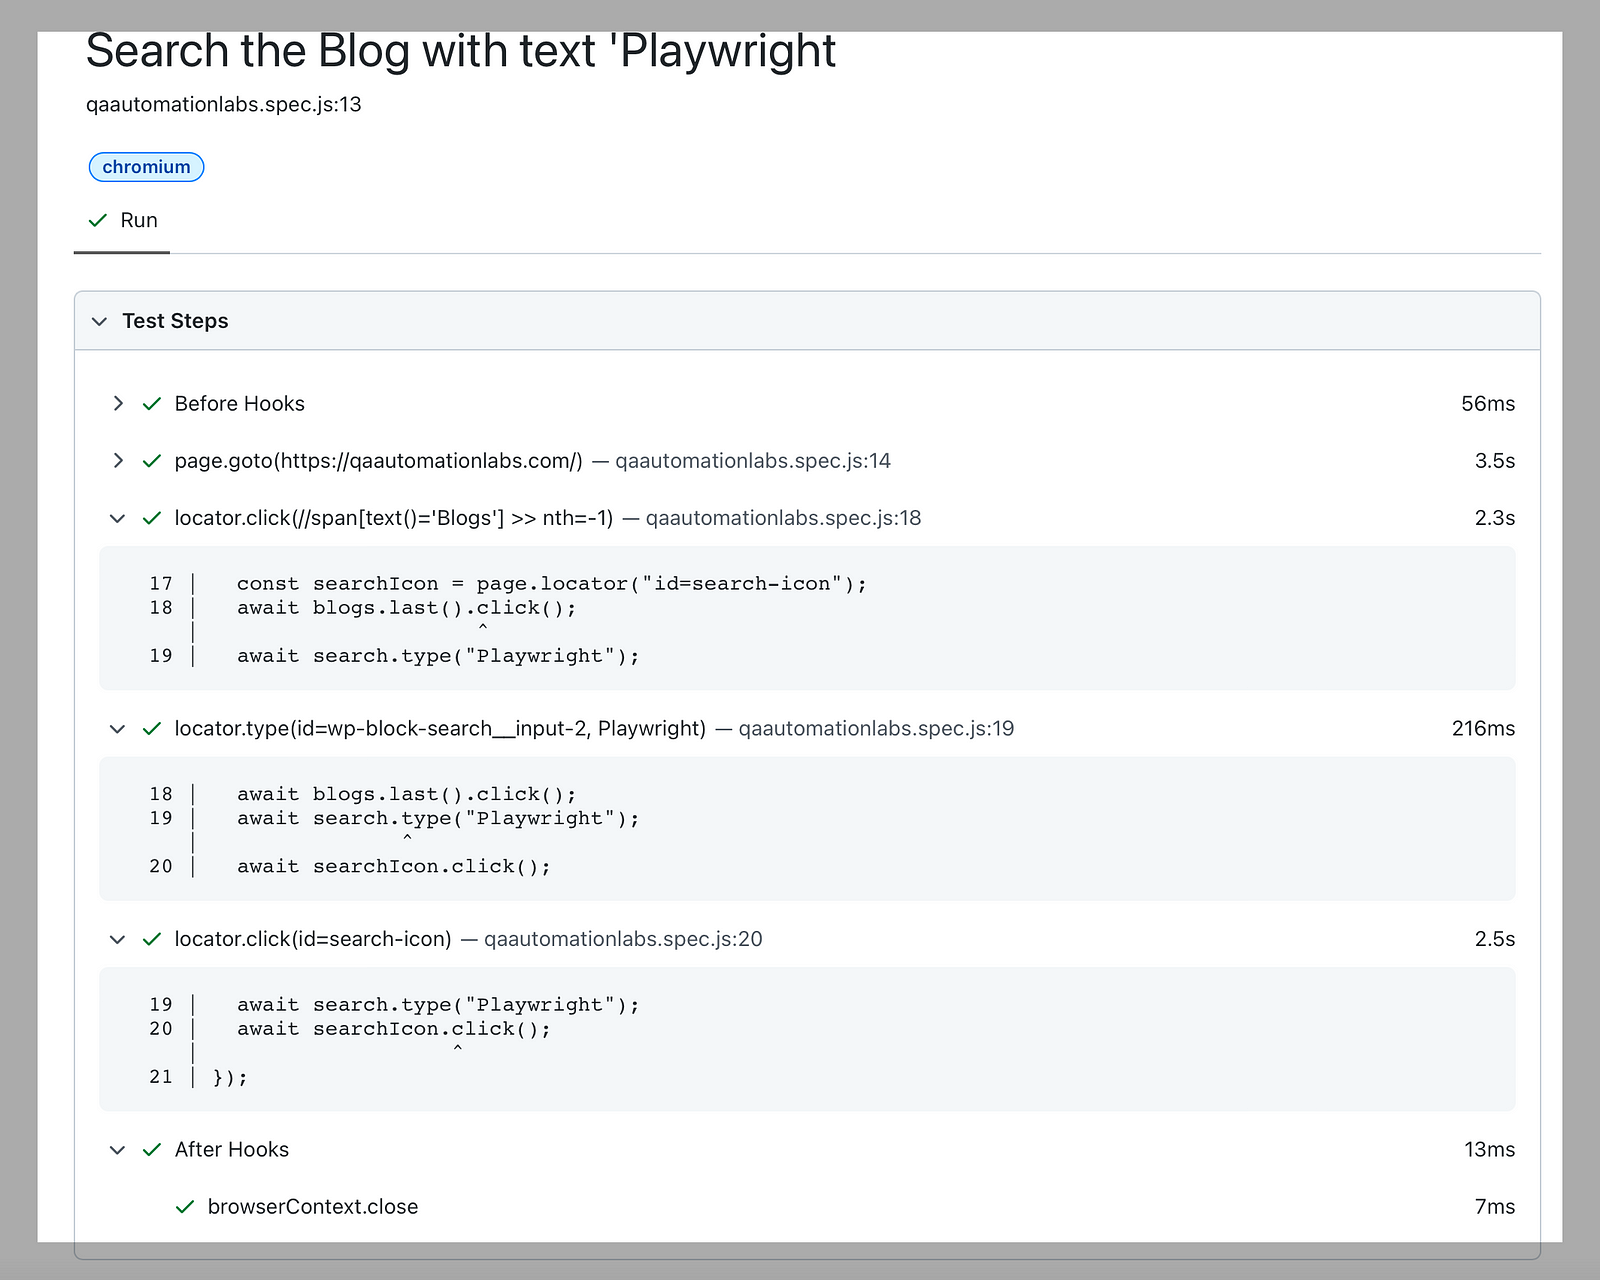
- Search the Blog with the text ‘Playwright.
// @ts-check
const { test, expect } = require("@playwright/test");
test("Open the site 'qaautomationlabs.com 'and verify the title and Click on Menu Blogs", async ({
 page,
}) => {
 await page.goto("https://qaautomationlabs.com/");
 await expect(page).toHaveTitle(/About Us - QAAutomationLabs/);
 const blogs = page.locator("//span[text()='Blogs']");
 await blogs.last().click();
});
test("Search the Blog with text 'Playwright ", async ({ page }) => {
 await page.goto("https://qaautomationlabs.com/");
 const blogs = page.locator("//span[text()='Blogs']");
 const search = page.locator("id=wp-block-search__input-2");
 const searchIcon = page.locator("id=search-icon");
 await blogs.last().click();
 await search.type("Playwright");
 await searchIcon.click();
});
Example 2
A code snippet is below.
In the below code, we are:
API testing with END Points request.
- GET request with Valid 200 Response.
- POST request with Valid 201 Response.
- PUT request with Valid 201 Response.
- DELETE request with Valid 204 Response.
- GET request after DELETE and Verify the Status 404.
- Finally, verify the user detail.
// @ts-check
const { test, expect } = require("@playwright/test");
test.describe("API Testing with Playwright", () => {
  const baseurl = "https://reqres.in/api";

  test("GET API Request with -- Valid 200 Response ", async ({ request }) => {
    const response = await request.get(`${baseurl}/users/2`);
    expect(response.status()).toBe(200);
  });
  test("POST API Request with -- Valid 201 Response ", async ({ request }) => {
    const response = await request.post(`${baseurl}/users/2`, {
      data: {
        id: 123,
      },
    });
    const responseBody = JSON.parse(await response.text());
    expect(responseBody.id).toBe(123);
    expect(response.status()).toBe(201);
  });

  test("PUT API Request with -- Valid 201 Response ", async ({ request }) => {
    const response = await request.put(`${baseurl}/users/2`, {
      data: {
        id: 245,
      },
    });
    const responseBody = JSON.parse(await response.text());
    expect(responseBody.id).toBe(245);
    expect(response.status()).toBe(200);
  });

  test("DELETE API Request with -- Valid 204 Response ", async ({
    request,
  }) => {
    const response = await request.delete(`${baseurl}/users/2`, {});
    expect(response.status()).toBe(204);
  });
  test("GET API Request with - InValid 404 Respons ", async ({
    request,
  }) => {
    const response = await request.get(`${baseurl}/usres/invalid-data`);
    expect(response.status()).toBe(404);
  });

  test("GET Request - Verify User detils  ", async ({ request }) => {
    const response = await request.get(`${baseurl}/users/2`);
    const responseBody = JSON.parse(await response.text());
    expect(response.status()).toBe(200);
    expect(responseBody.data.id).toBe(2);
    expect(responseBody.data.first_name).toBe("Janet");
    expect(responseBody.data.last_name).toBe("Weaver");
    expect(responseBody.data.email).toBeTruthy();
  });
});
Set Up Bitbucket
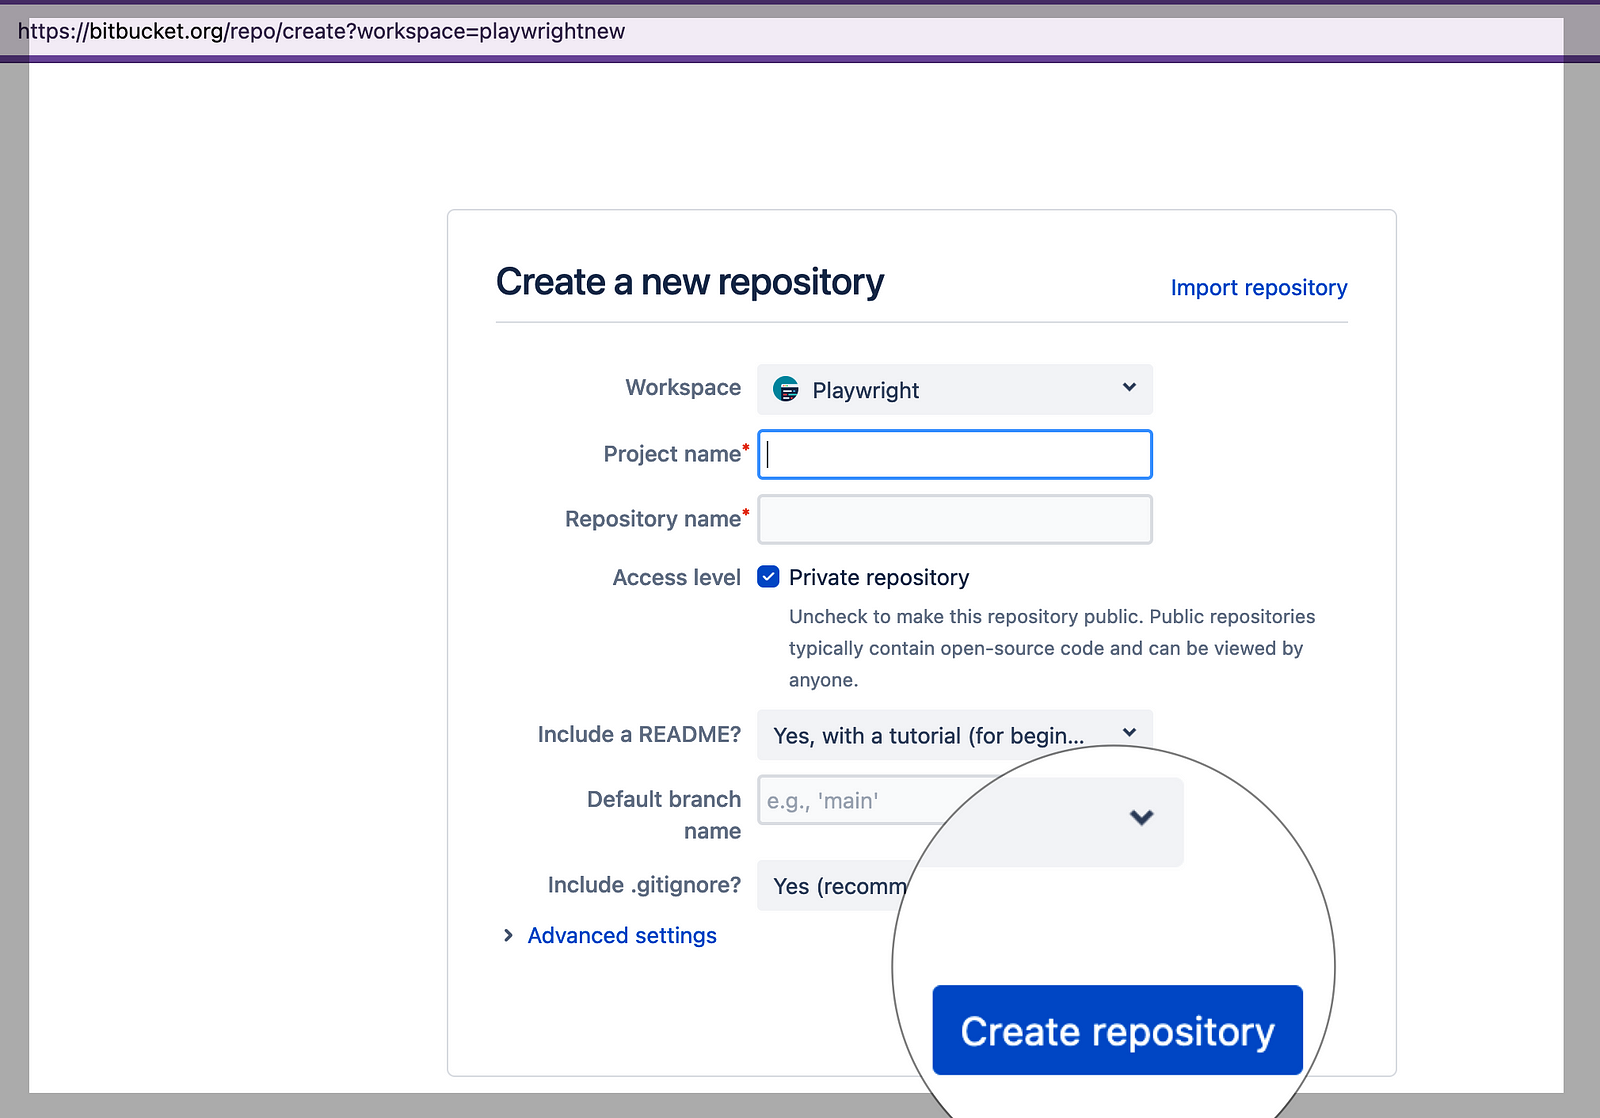
Step 1
Open the Url to create the Repository.
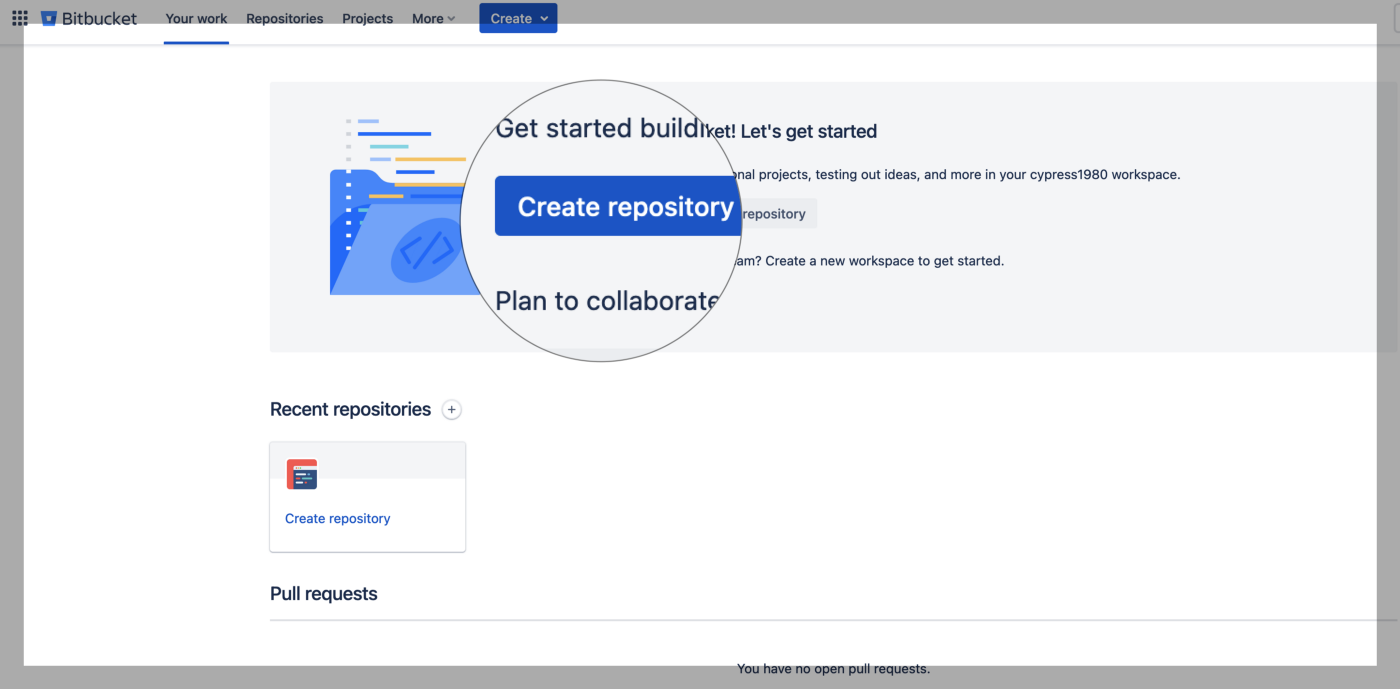
Step 2
Enter the project name and Repository name.
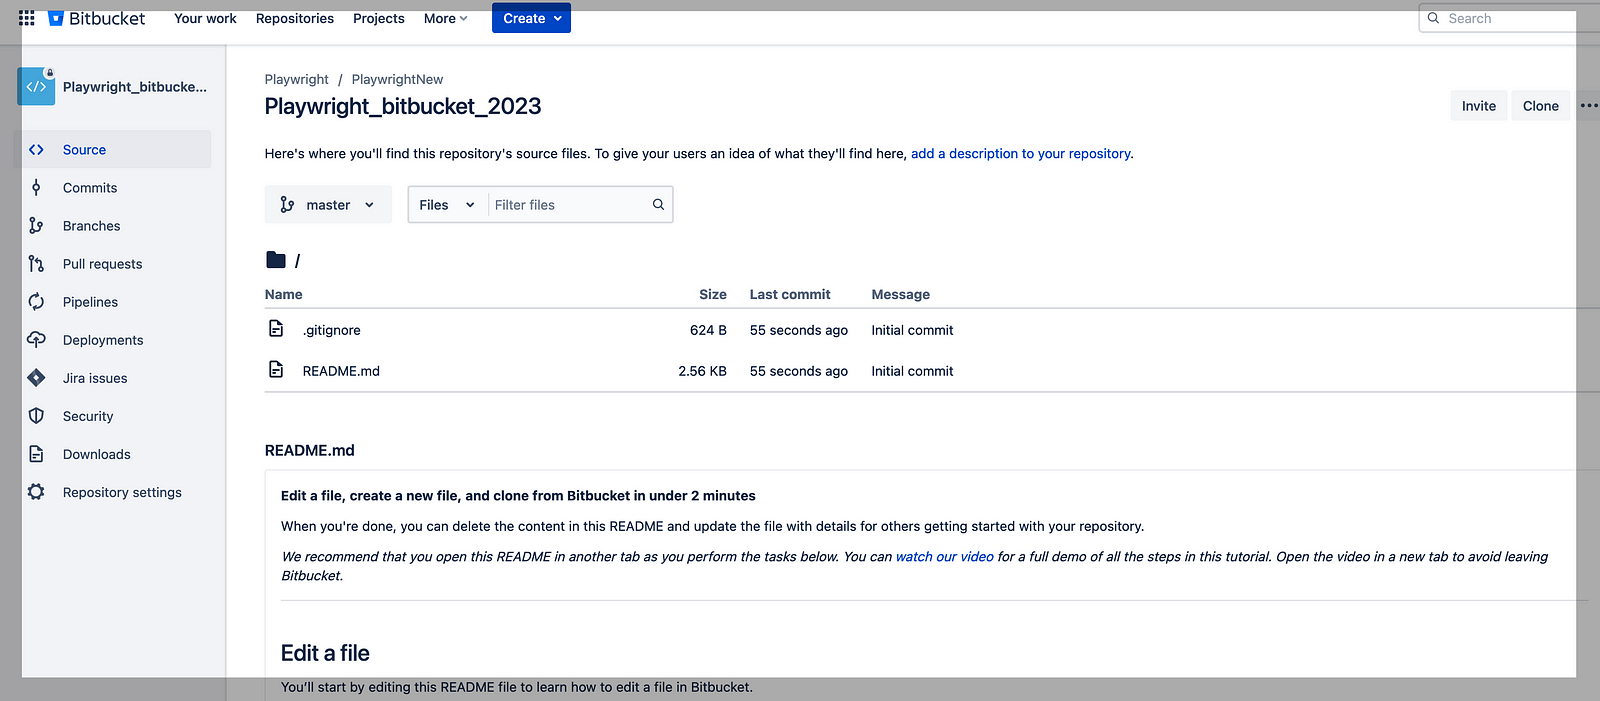
Once all detail is entered below screen is open after the final submission.
Step 3
Clone the repo using VS Code.
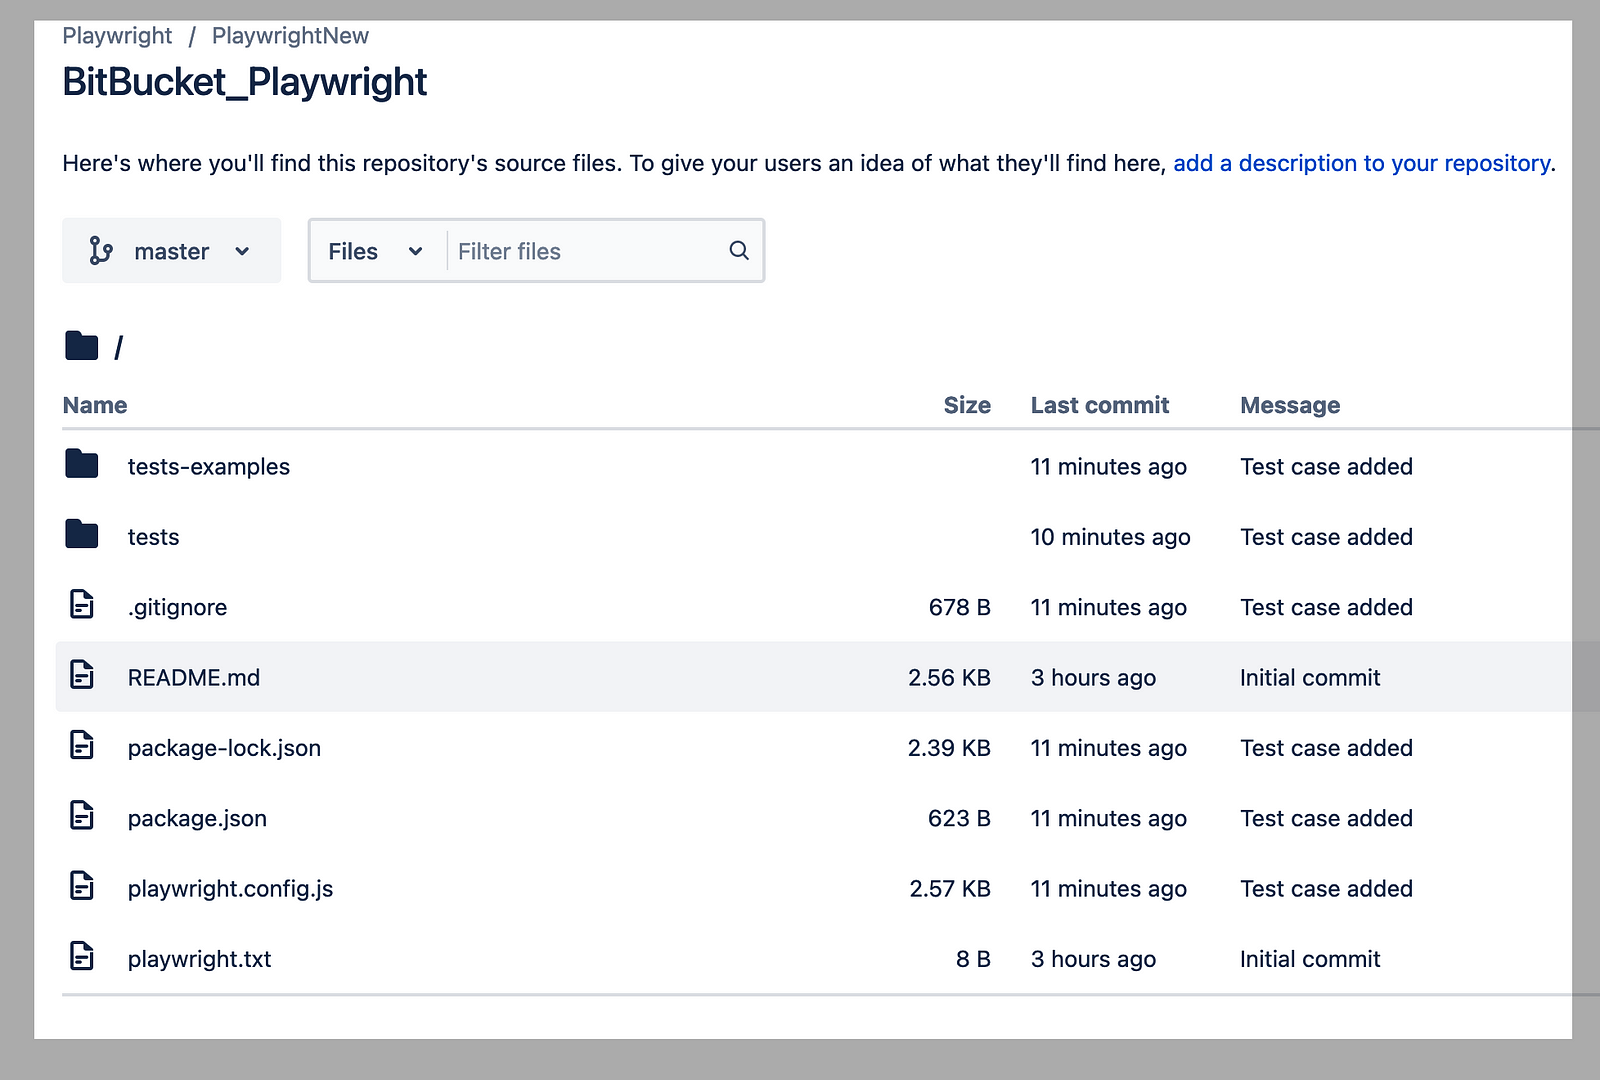
Step 4
Push the code that we have created above. After pushing, the code looks like given below.
Step 5
Configure your first pipeline.
There are two ways to configure your pipeline: you can either directly write the YAML file, or you can use the UI wizard provided by Bitbucket. The steps below will guide you through the Pipelines configuration wizard.
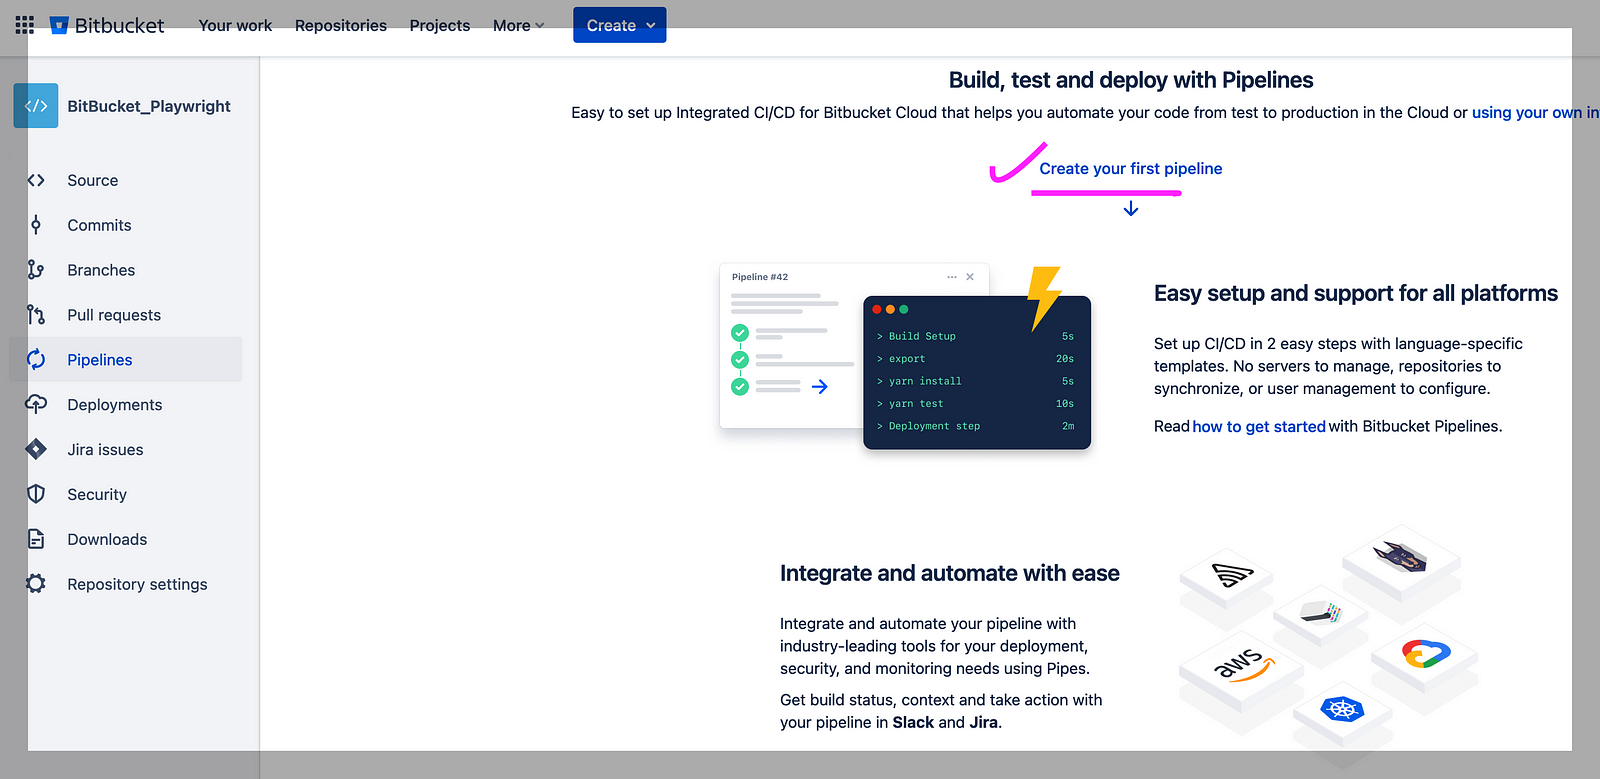
Step 5.1
In the Pipelines tab from the left, Click on “Create your first pipeline.”
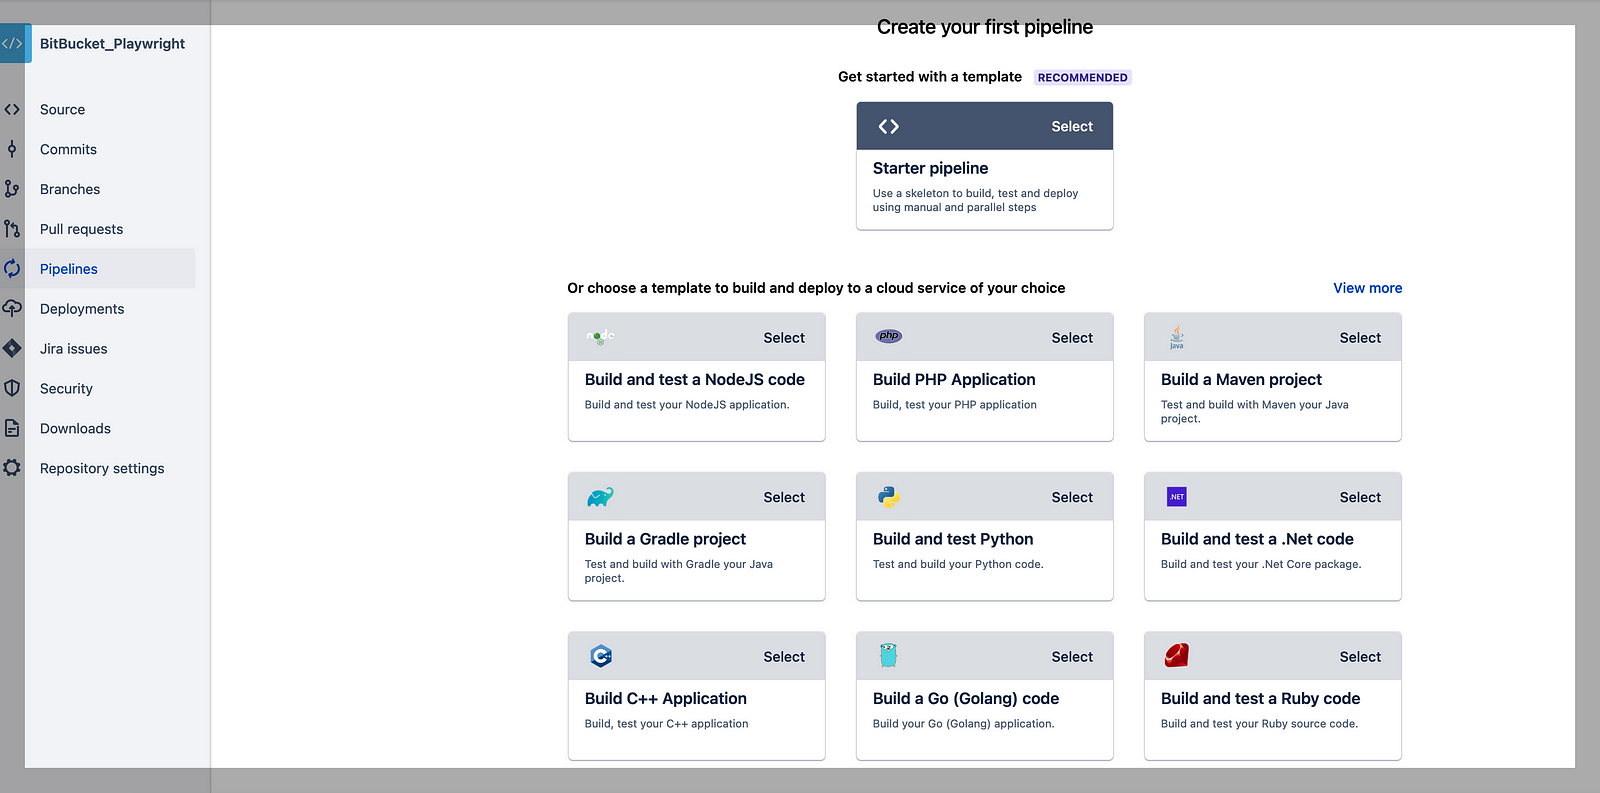
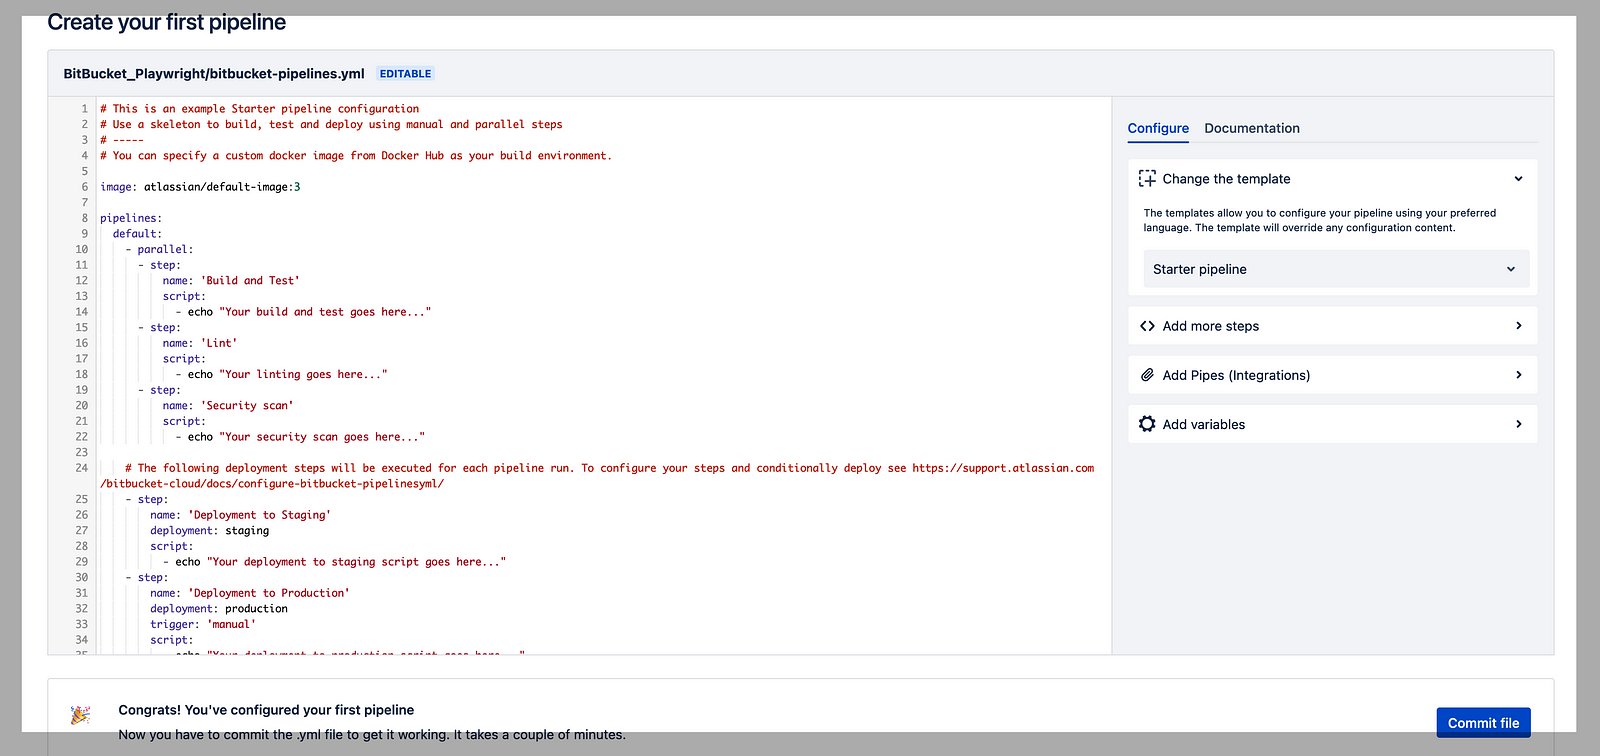
Step 5.2
Choose the default template. Once you choose a template, you will land in the YAML editor, where you can configure your pipeline. First, click on RECOMMENDED Template, i.e., “Starter pipeline,” and provide the .yml file attached below.
Update the above. Yml from the below code to run the playwright test cases and commit the code.
pipelines:
default:
- step:
name: Playwright Tests
image: mcr.microsoft.com/playwright:v1.29.2-focal
script:
- npm ci
# - Run the test cases
- npx playwright test
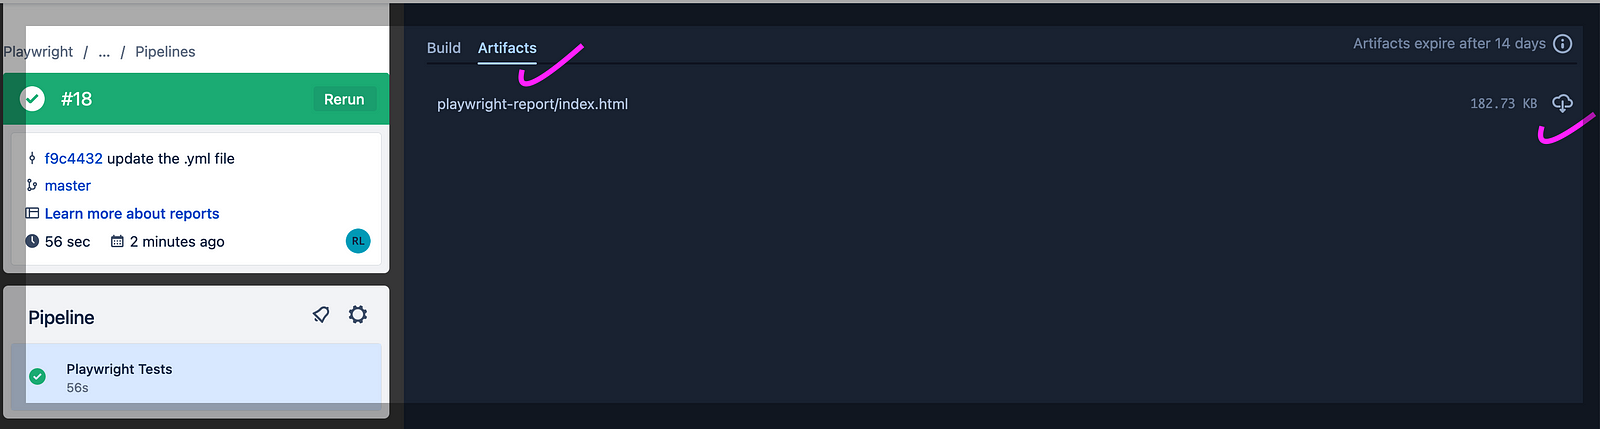
artifacts:
- playwright-report/index.html- In the above .yml file, we have used the image mcr.microsoft.com/playwright:v1.29.2-focal.
- Under Script, first we install all the dependencies, then we execute the script.
- Finally, in ‘artifacts’ report is generated after downloading the .zar file.
How This bitbucket-pipelines.yml Works:
A pipeline is defined using a YAML file called bitbucket-pipelines.yml, which is located at the root of your repository.
- On push to this repository, this job will provision and start a Bitbucket Pipelines-hosted Linux instance for running the pipelines.
- The code is checked out from the Bitbucket repository.
- Install npm dependencies.
- Run the Playwright tests within our Bitbucket repository.
Step 6
Take the pull of the code in your local directory so that the .yml file is added.
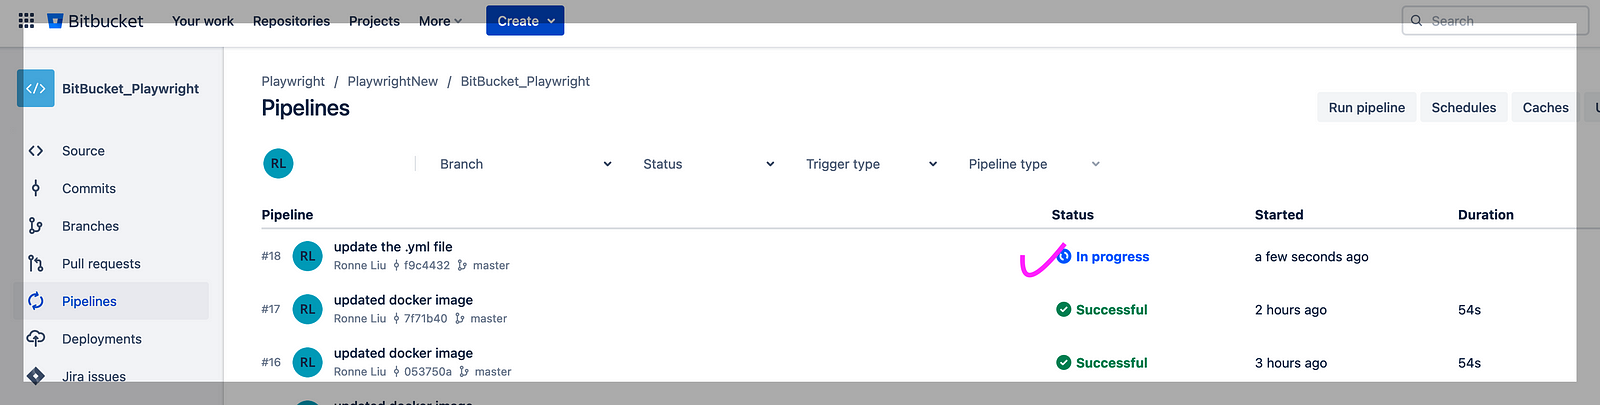
Step 7
Add some more test cases, and as the code is pushed from the local repository pipeline starts executing.
Step 8
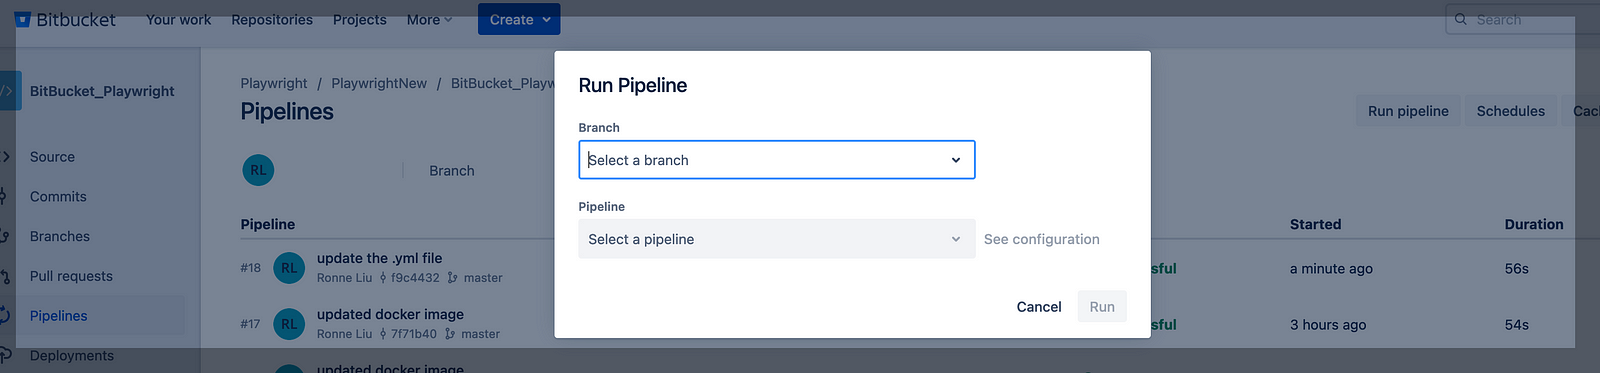
In case we want to execute a new pipeline.
Run New Pipeline: Click on Run pipeline. Select the branch and select Pipeline “default.”
As the pipeline is complete, executed test cases display as passed. See in below screenshot.
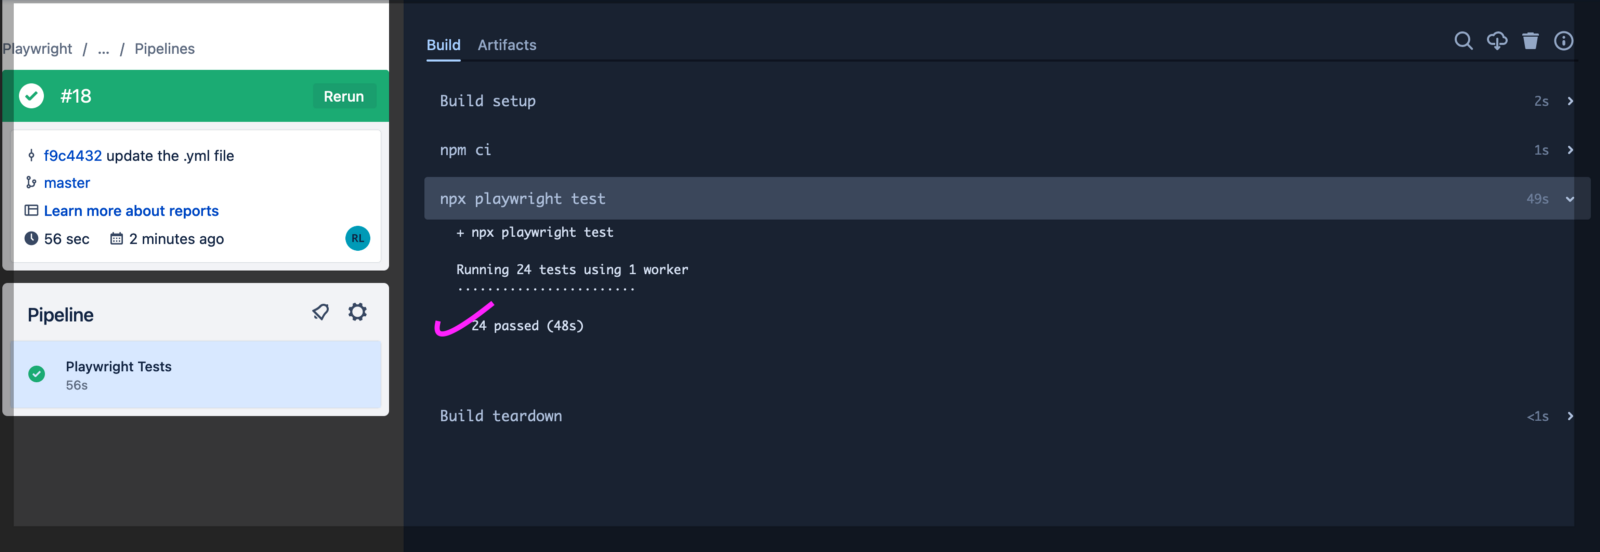
Report
Below report of the final test case execution. Here we can see all the test cases are passed.
Click on Artifacts, and you can download the report.
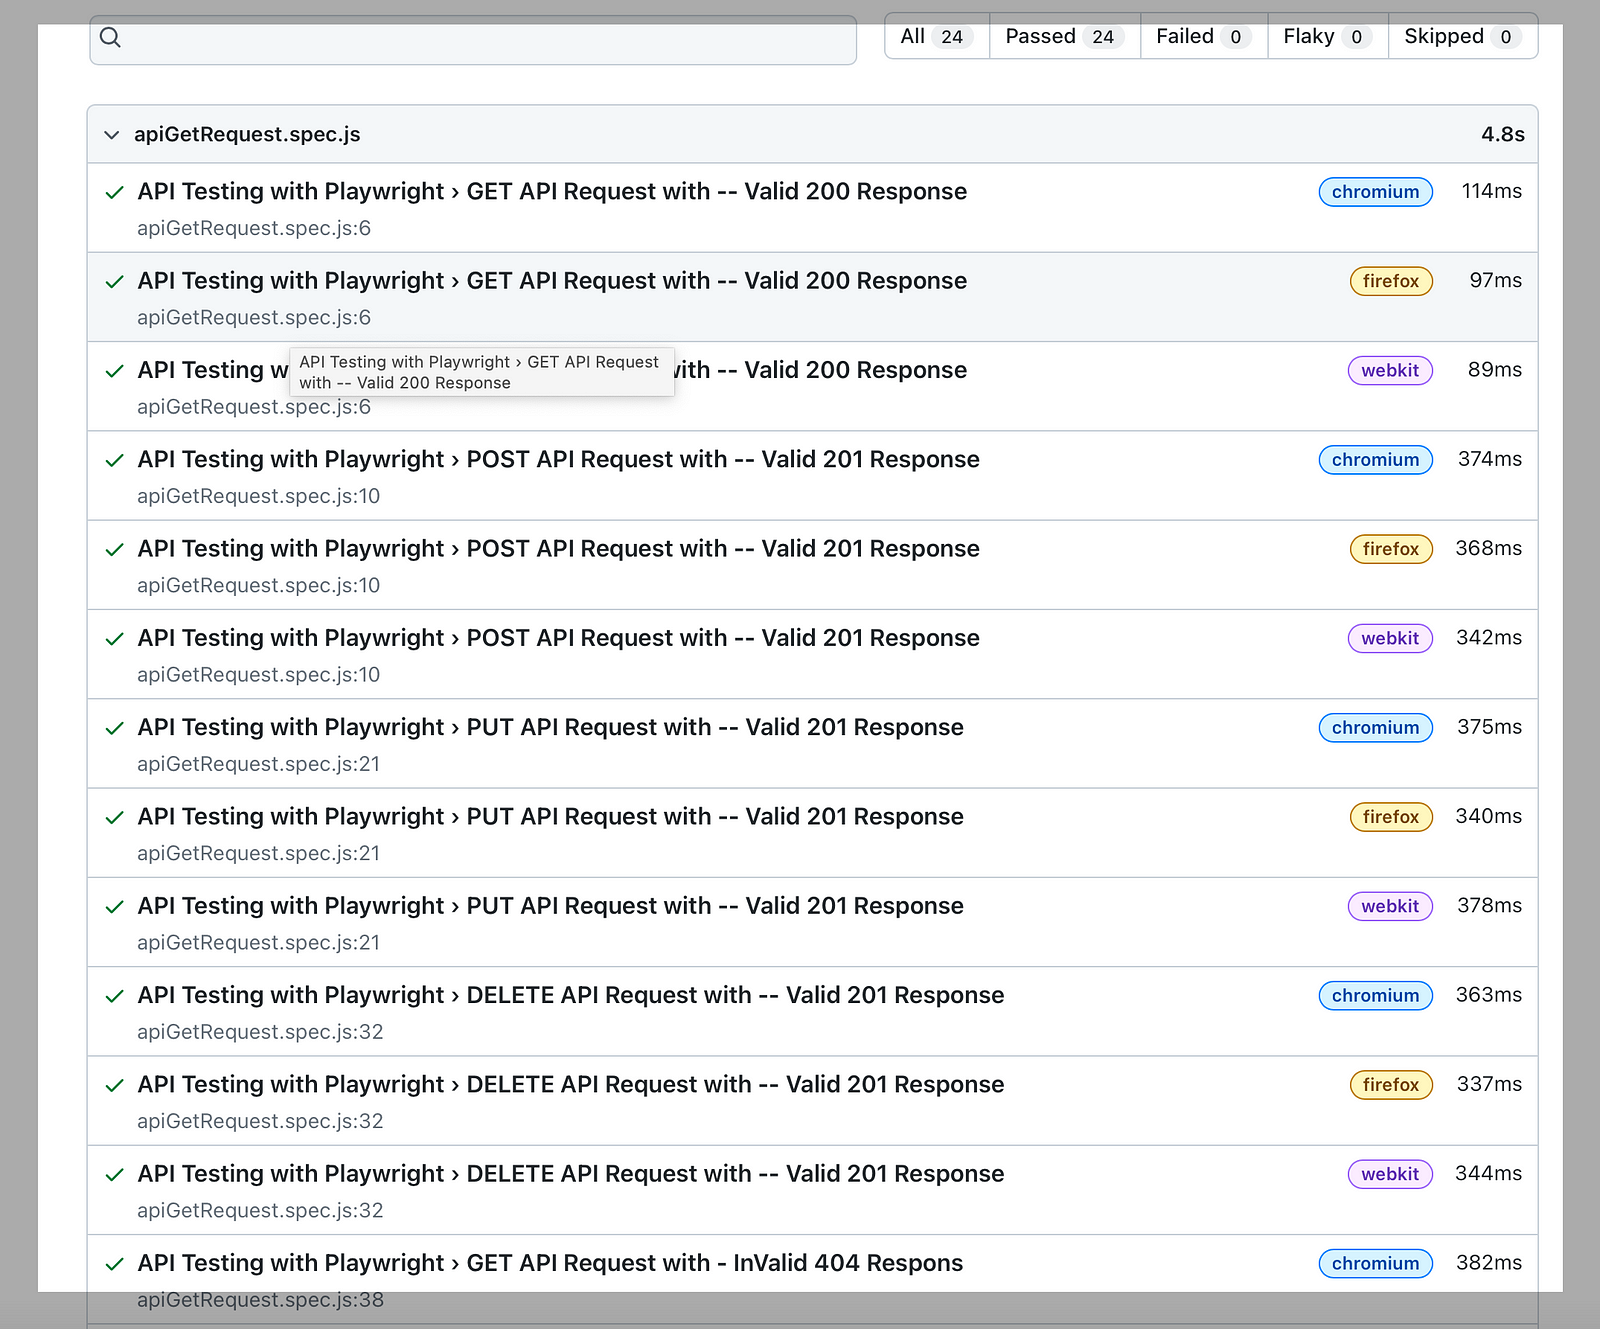
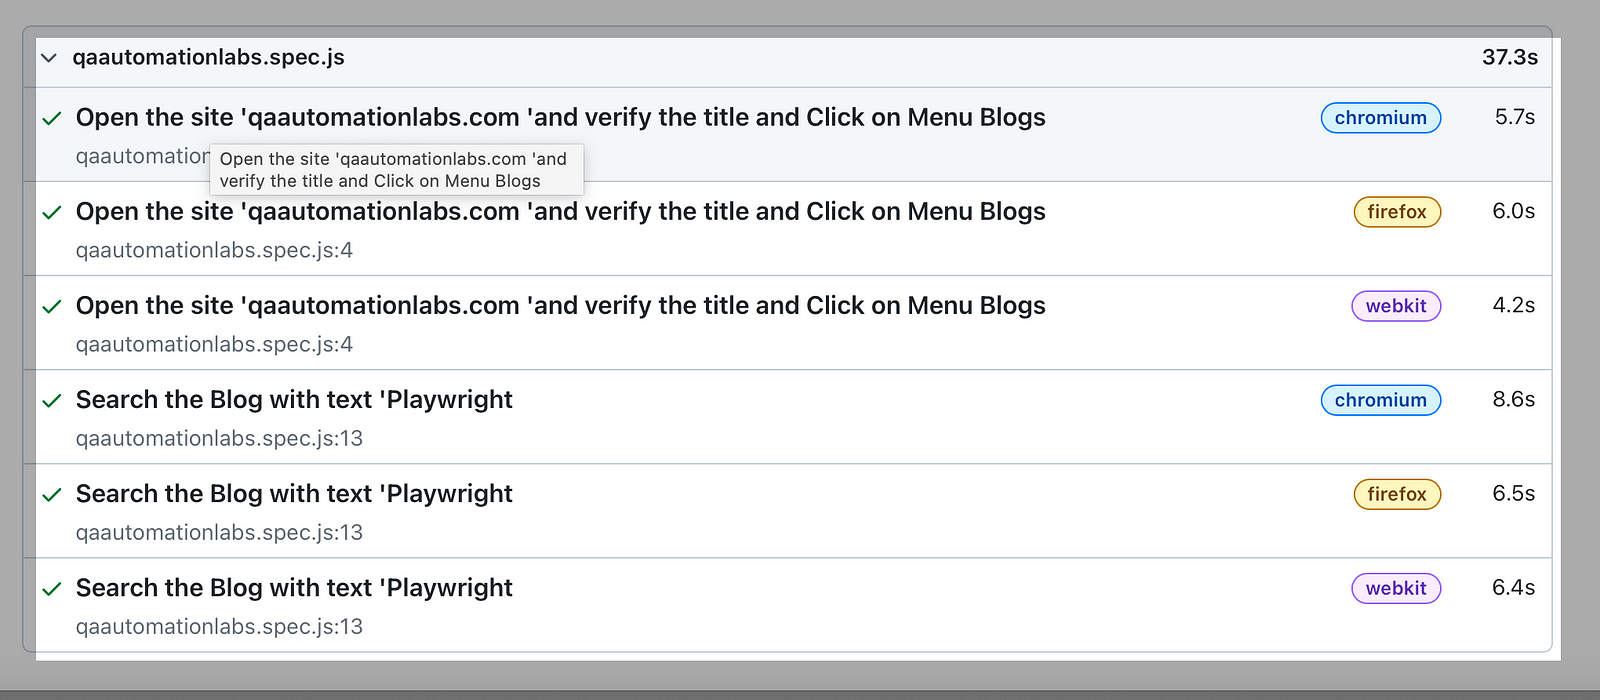
Below is the attached report of test cases executed in different browsers.
API Test Cases Execution Report
UI Cases Execution Report
Wrap Up
Overall, integrating Playwright with CI/CD in Bitbucket can help improve the quality and reliability of your code, speed up your development process and test cases execution time, and make collaboration among team members more efficient.
Published at DZone with permission of Kailash Pathak. See the original article here.
Opinions expressed by DZone contributors are their own.
Comments