JMeter's Raw Data Source PreProcessor: The Ultimate Guide
This guide explains various ways to extract data from a file to Apache JMeter variables and how to use the Raw Data Source preprocessor plugin.
Join the DZone community and get the full member experience.
Join For FreeThere are lots of ways to extract data from a file to Apache JMeter™ variables. For binary data, one of the handiest tools is the Raw Data Source preprocessor plug-in. It especially shines when you have to process a large amount of raw data, like when you need to collect data from various samples such as HTTP, TCP, and UDP, or when you have a large data file with a lot of records, and you need to distribute the values of these records across your Test Plan.
However, the Raw Data PreProcessor does not support HTTPS, and it limits your test plan to one endpoint only. We recommend using it when you want to be lean with the resources used to make requests. The Raw Data Source Preprocessor was written by BlazeMeter's Andrey Pokhilko.
How does it work? The Raw Data Source PreProcessor reads raw and binary data, prefixed by a byte-length string, from a file. The prefixes divide the data into chunks, and the preprocessor parses each chunk to a defined JMeter variable. This variable can be used in the script samplers. So now, the same variable has various values, according to the different chunks. These values can be used in your script.
File format for the Raw Data Source PreProcessor:
50
GET /page/95561
Host: localhost
Connection: close

48
GET /page/559
Host: localhost
Connection: close

49
GET /page/4032
Host: localhost
Connection: close
I will show how to create this type of file in JMeter in the next section of the blog. As you can see, a data file consists of a data chunks, and each chunk follows a number that shows the PreProcessor how many bytes of data from a followed chunk to assign to a specified variable.
Each time a sampler is invoked in the preprocessor scope, the preprocessor does the following:
1) Reads the data until the end-of-line marker (CR or LF) is located, and tries to parse it as a length-prefix value. If it fails, it repeats this step.
2) Reads the data for the calculated byte-length and assigns it to a variable in a sampler.
3) Returns to the first step and keeps going in the file.
So, for the data above, it will assign:
GET G /page/95561
Host: localhost
Connection: close
to the specified variable for the first sampler.
GET /page/559
Host: localhost
Connection: close
will be assigned to the variable in the second sampler run and so on.
To add the Raw Data PreProcessor, go to Thread Group -> Add -> Pre Processors -> jp@gc Raw Data Source PreProcessor
Make sure you have JMeter plugins in advance.
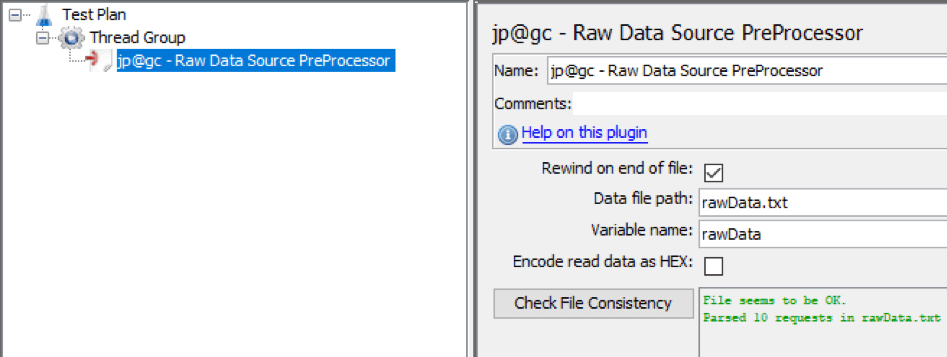
- Rewind on the end of the file: Allows the component to process a file from the beginning after the end of a file is reached.
- Data file path: The location of the data file.
- Variable name: The variable that stores the chunk of processed data. For each sampler in the thread, the preprocessor reads and parses the next chunk.
- Encode read data as HEX: When selected, it converts processed data to the HEX-encoded format.
- Checks file consistency: Checks the consistency of the file and shows you its status as well as the number of chunks of data processed. Any errors will be shown here too.
The Flexible File Writer listener JMeter plug-in allows you to form a file that will be a great source of data for the Raw Data preprocessor. In such a file, the response message for a sample follows a received bytes value, or a sent byte is followed by a sample request.
Let's collect data from samplers and write it to a file in the length-prefixed format.
1. Add a Thread Group to your Test Plan. Right-click -> Add -> Threads -> Thread Group
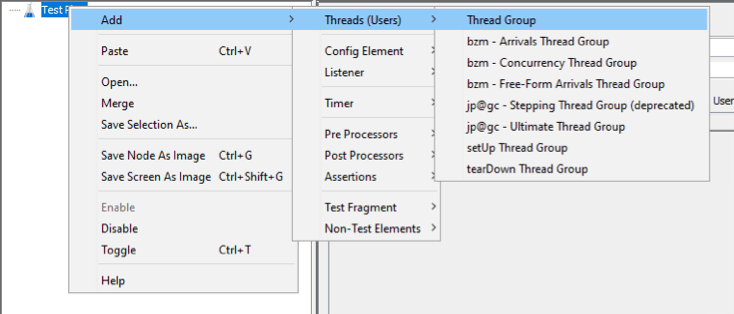
2. Set the Number of Threads (users). For our example, we will generate 10 users to collect a fair amount of data.
3. Add an HTTP Request sampler component. Right-click -> Add -> Samplers -> HTTP Request

4. Configure your sampler
5. Add the Flexible File Writer listener component to your Thread Group. Right-click -> Add -> Listener -> jp@gc - Flexible File Writer
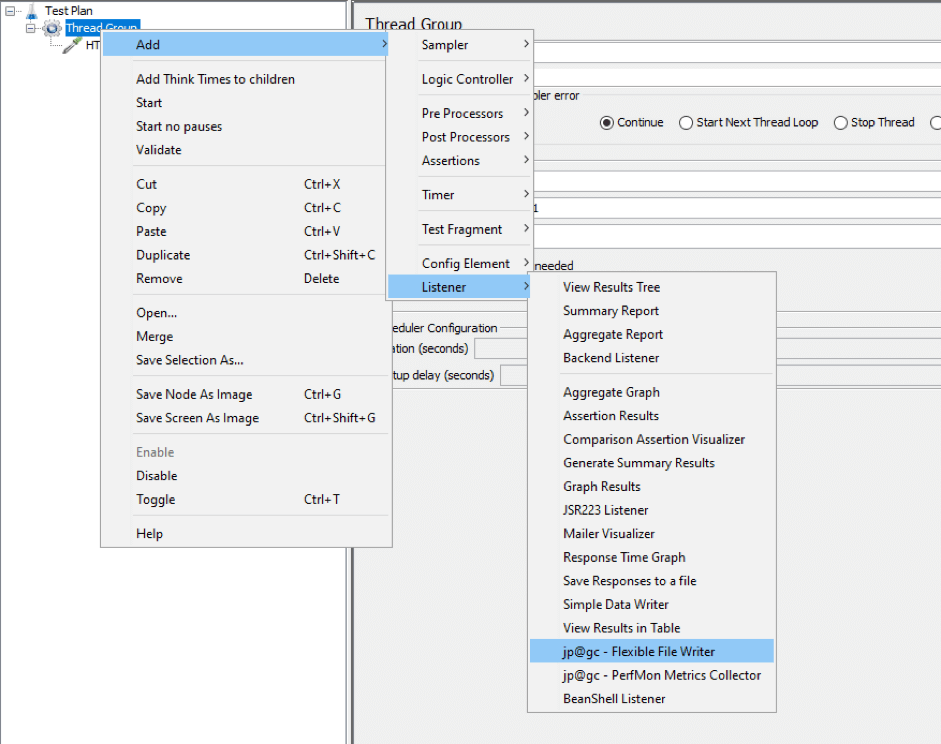
6. Clear the Write File Header field, set your desired Filename and modify "Record each sample as" field:
For request data:
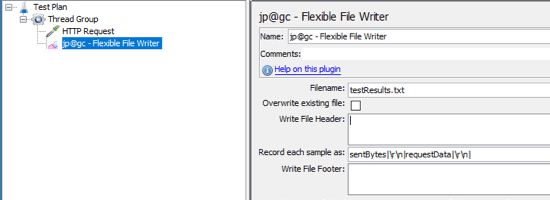
For response data:

7. Now, run your script to get a file suitable for the Raw Data preprocessor!
Data gathered in the previous example might be used by the preprocessor in a number of ways. You may treat response messages as a reference variable for regular expression extractors in future scripts, or, alternatively, you may use saved requests as a source for the HTTP Raw Request sampler plug-in.
As the name suggests, it's as if the HTTP Raw Request sampler was created for the Raw Data preprocessor. It would be a mistake to miss out on such an iconic example, so we won't. In this example I will use a data file that contains requestData from the previous example, to construct an HTTP request for the HTTP Raw Request sampler by using the Raw Data preprocessor.
1. First, we need to set the variables for the hostname and path. We will need these variables later. This has to be done in a User Defined Variable Config Element or right in the Test Plan rather than in an HTTP Request Defaults because an HTTP Raw Request sampler does not refer to an HTTP Request Defaults config element.
2. Add a Thread Group to your Test Plan. Right-click -> Add -> Threads -> Thread Group
3. Set the Number of Threads (users). As long as we check the "Rewind on end of file" property for our Raw Data Source PreProcessor, we can use any number of users, even exceeding the number of requests in our data file.
4. Add a View Results Tree listener. Right-click -> Add -> Listener -> jp@gc - View Results Tree
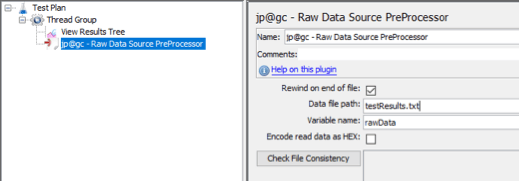
5. Add a Raw Data Source PreProcessor to the thread. Right-click -> Add -> Pre Processors -> jp@gc - Raw Data Source PreProcessor
6. Specify a source file and a variable for the processed data.
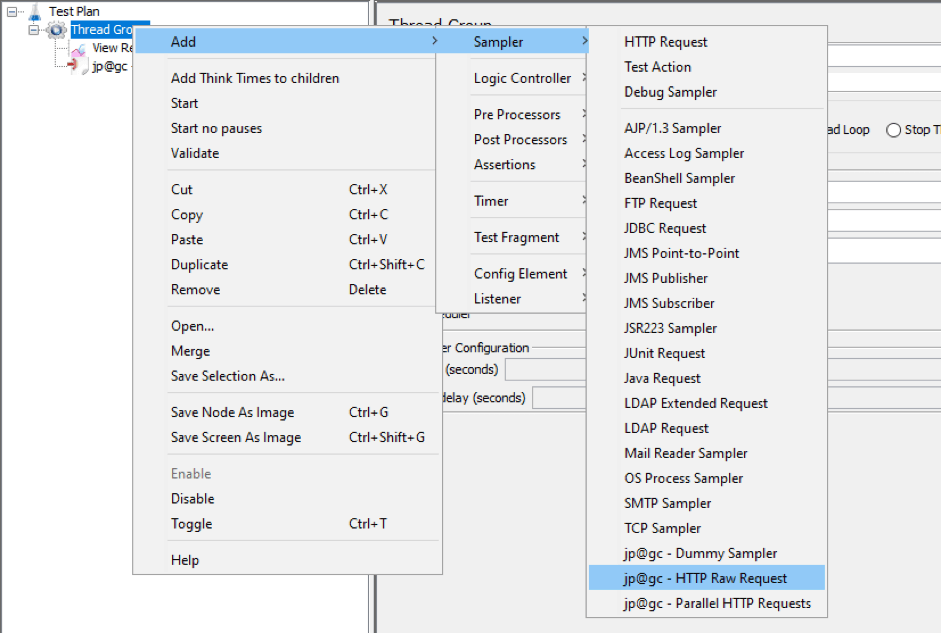
7. Add an HTTP Raw Request sampler component. Right click -> Add -> Samplers -> jp@gc - HTTP Raw Request
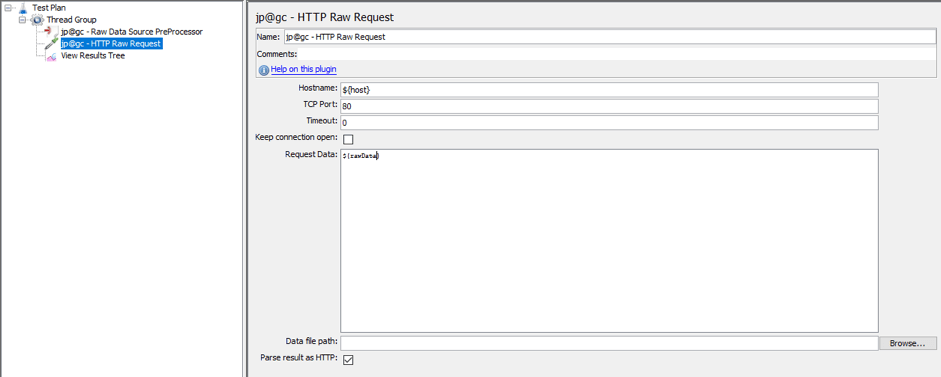
8. Set Host Name, Port, and Timeout fields. Set your Raw Data variable as the Request Data.
Are we ready to run our script? Not yet.
Remember: "requestData" of the sample is not a proper HTTP request! Do not paste requestData from a regular HTTP sampler to an HTTP raw request.
The Flexible File Writer also has a pitfall: when it writes a requestData to a file, it omits the carriage return special symbol "\r" leaving only the newline symbol "\n," making the resulting string a literally "Bad Request." Moreover, the HTTP Raw Request does not respect the Header Manager, so we have to manually add the required headers. This can be achieved via a JSR223 PreProcessor script. Here is an example for POST requests (keep in mind that the contentType variable is set as a user-defined variable in this case):
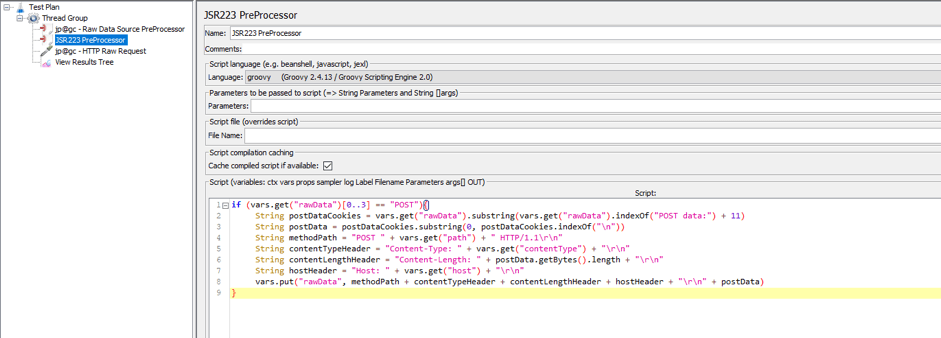
if (vars.get("rawData")[0..3] == "POST"){
String postDataCookies = vars.get("rawData").substring(vars.get("rawData").indexOf("POST data:") + 11)
String postData = postDataCookies.substring(0, postDataCookies.indexOf("\n"))
String methodPath = "POST " + vars.get("path") + " HTTP/1.1\r\n"
String contentTypeHeader = "Content-Type: " + vars.get("contentType") + "\r\n"
String contentLengthHeader = "Content-Length: " + postData.getBytes().length + "\r\n"
String hostHeader = "Host: " + vars.get("host") + "\r\n"
vars.put("rawData", methodPath + contentTypeHeader + contentLengthHeader + hostHeader + "\r\n" + postData)
}
Now it's ready! Run the script.
Check the View Results Tree listener for the results. Each sampler got its own request data from the PreProcessor and sent it exactly as it was recorded in the previous example.

The Raw Data preprocessor enables you to use any kind of external scripts for the data file generation, and you can use the processed variables in as many ways as you like. So there are many applications for this element.
After creating your JMeter file, you can upload it to BlazeMeter to run it. In BlazeMeter you can massively scale the number of users and locations, collaborate on tests and reports, share results with managers and get drilled down insightful analytics or compare results over time.
Published at DZone with permission of Konstantin Tonkov, DZone MVB. See the original article here.
Opinions expressed by DZone contributors are their own.

Comments