How to Internationalize and Localize Your Java and Spring Boot Apps
First, what even is internationalization (i18n) and localization (l10n)?
Join the DZone community and get the full member experience.
Join For FreeWhat is internationalization (i18n) and localization (l10n)? I18n is the process of making the text in your application capable of delivering in multiple languages. l10n means that your application has been coded in a way that it meets the language or cultural requirements of a particular locale such as date formats, timezones, currency, symbols, or icons.
So, why are they important? Because you want your app to be as accessible as possible so you can reach maximum users. Java apps are relatively straightforward to internationalize, thanks to built-in mechanisms. Same goes for Spring Boot — it’s there by default!
This tutorial will show you how to internationalize a simple Java app, a Spring Boot app with Thymeleaf, and a JavaScript Widget.
If you’d rather watch a video, I created a screencast of this tutorial.
Java i18n With Resource Bundles
A resource bundle is a .properties file that contains keys and values for specific languages. Using resource bundles allows you to make your code locale-independent. To see how this works, create a new directory on your hard drive for this tutorial’s exercises, for example, java-i18n-example. Navigate to this directory from the command line and create a Hello.java file.
public class Hello {

    public static void main(String[] args) {
        System.out.println("Hello, World!");
    }
}
Run java Hello.java and you should see "Hello, World!" printed to your console.
If you see any error similar to the one below, it’s because you’re using a Java version <11. JEP 330 is an enhancement in Java 11 that allows you to run a single file of Java source code, without compiling it.
$ java Hello.java
Error: Could not find or load main class Hello.java
You can install Java 11 from AdoptOpenJDK 11 or use SDKMAN!
curl -s "https://get.sdkman.io" | bashOnce you have SDKMAN installed, you can list the available Java versions with sdk list java:
$ sdk list java
================================================================================
Available Java Versions
================================================================================
     13.ea.07-open       8.0.202-zulu
     12.ea.31-open       8.0.202-amzn
   + 11.ea.26-open       8.0.202.j9-adpt
     11.0.2-sapmchn      8.0.202.hs-adpt
     11.0.2-zulu         8.0.202-zulufx
   * 11.0.2-open         8.0.201-oracle
     11.0.2.j9-adpt  > + 8.0.181-zulu
     11.0.2.hs-adpt      7.0.181-zulu
     11.0.2-zulufx       1.0.0-rc-12-grl
   + 11.0.1-open         1.0.0-rc-11-grl
   + 11.0.0-open         1.0.0-rc-10-grl
     10.0.2-zulu         1.0.0-rc-9-grl
     10.0.2-open         1.0.0-rc-8-grl
     9.0.7-zulu
     9.0.4-open

================================================================================
+ - local version
* - installed
> - currently in use
================================================================================
Set up your environment to use the latest version of OpenJDK with the command below:
sdk default java 11.0.2-openNow, you should be able to run your Hello.java as a Java program.
$ java Hello.java
Hello, World!
Look, Ma! No compiling needed!!
Create a messages_en_US.properties file in the same directory and add keys + translations for the terms hello and world.
hello=Hello
world=World
Create messages_es.properties and populate it with Spanish translations.
hello=Hola
world=Mundo
Modify Hello.java to use Locale and ResourceBundle to retrieve the translations from these files.
import java.util.Locale;
import java.util.ResourceBundle;

public class Hello {

    public static void main(String[] args) {
        String language = "en";
        String country = "US";

        if (args.length == 2) {
            language = args[0];
            country = args[1];
        }

        var locale = new Locale(language, country);
        var messages = ResourceBundle.getBundle("messages", locale);

        System.out.print(messages.getString("hello") + " ");
        System.out.println(messages.getString("world"));
    }
}
Run your Java program again, and you should see "Hello World".
$ java Hello.java
Hello World
Improve the parsing of arguments to allow only specifying the language.
if (args.length == 1) {
    language = args[0];
} else if (args.length == 2) {
    language = args[0];
    country = args[1];
}
Run the same command with an es argument and you’ll see a Spanish translation:
$ java Hello.java es
Hola Mundo
Yeehaw! It’s pretty cool that Java has i18n built-in, eh?
Internationalization With Spring Boot and Thymeleaf
Spring Boot has i18n built-in thanks to the Spring Framework and its MessageSource implementations. There’s a ResourceBundleMessageSource that builds on ResourceBundle, as well as a ReloadableResourceBundleMessageSource that should be self-explanatory.
Inject MessageSource into a Spring bean and call getMessage(key, args, locale) to your heart’s content! Using MessageSource will help you on the server, but what about in your UI? Let’s create a quick app to show you how you can add internationalization with Thymeleaf.
Go to start.spring.io and select Web and Thymeleaf as dependencies. Click Generate Project and download the resulting demo.zip file. If you’d rather do it from the command line, you can use HTTPie to do the same thing.
mkdir bootiful-i18n
cd bootiful-i18n
http https://start.spring.io/starter.zip dependencies==web,thymeleaf -d | tar xvz
Open the project in your favorite IDE and create HomeController.java in src/main/java/com/example/demo.
package com.example.demo;

import org.springframework.stereotype.Controller;
import org.springframework.web.bind.annotation.GetMapping;

@Controller
public class HomeController {

    @GetMapping("/")
    String home() {
        return "home";
    }
}
Create a Thymeleaf template at src/main/resources/templates/home.html that will render the "home" view.
<html xmlns:th="http://www.thymeleaf.org">
<body>
    <h1 th:text="#{title}"></h1>
    <p th:text="#{message}"></p>
</body>
</html>
Add a messages.properties file in src/main/resources that defines your default language (English in this case).
title=Welcome
message=Hello! I hope you're having a great day.
Add a Spanish translation in the same directory, in a messages_es.properties file.
title=Bienvenida
message=¡Hola! Espero que estés teniendo un gran día. ��
Spring Boot uses Spring’s LocaleResolver and (by default) its AcceptHeaderLocalResolverimplementation. If your browser sends an accept-language header, Spring Boot will try to find messages that match.
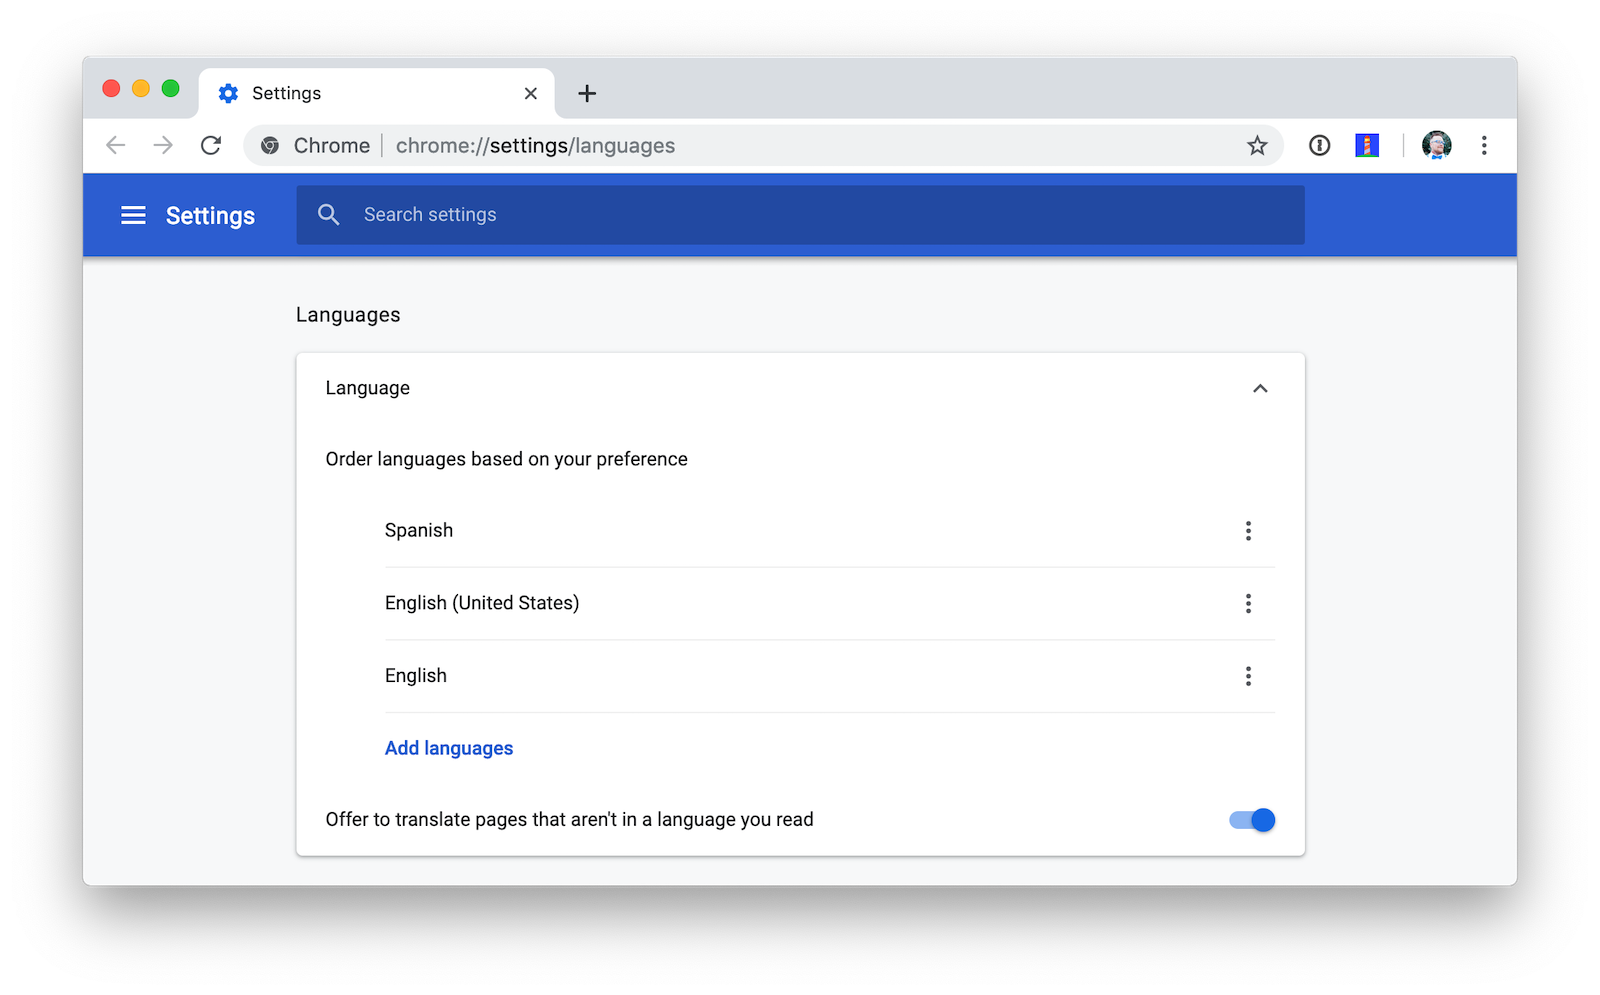
To test it out, open Chrome and enter chrome://settings/languages in the address bar. Expand the top "Language" box, click Add languages, and search for "Spanish." Add the option without a country and move it to the top language in your preferences. It should look like the screenshot below when you’re finished.
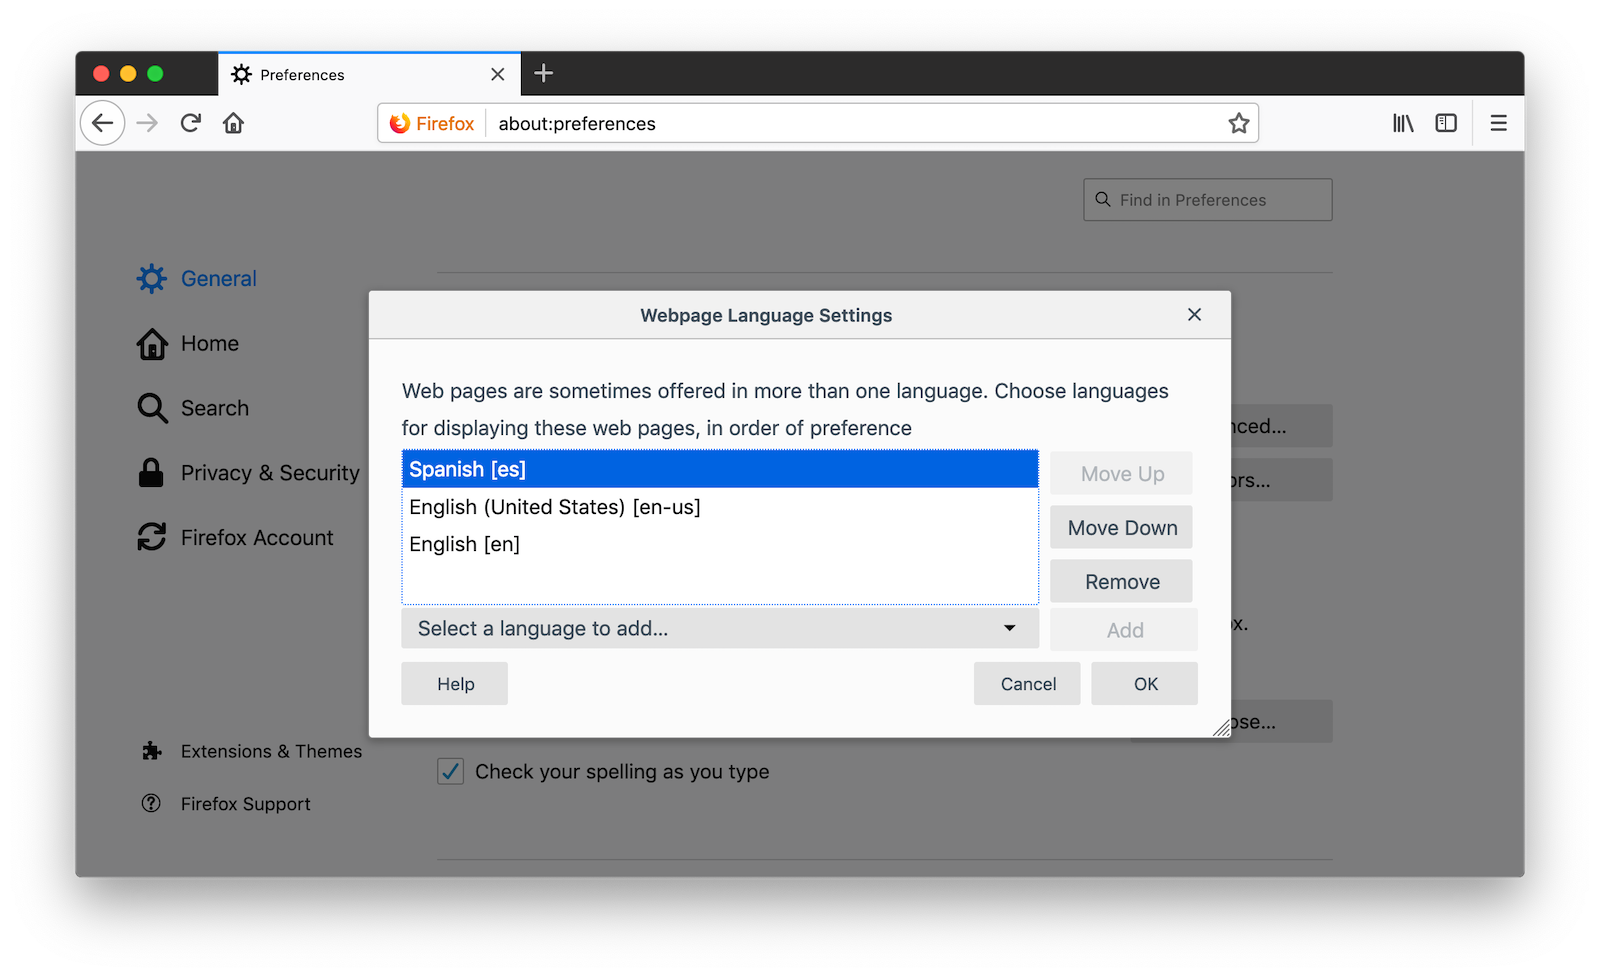
 For Firefox, navigate to
 about:preferences, scroll down to "Language and Appearance," and click the Choose button next to "Choose your preferred language for displaying pages." Select Spanish and move it to the top.
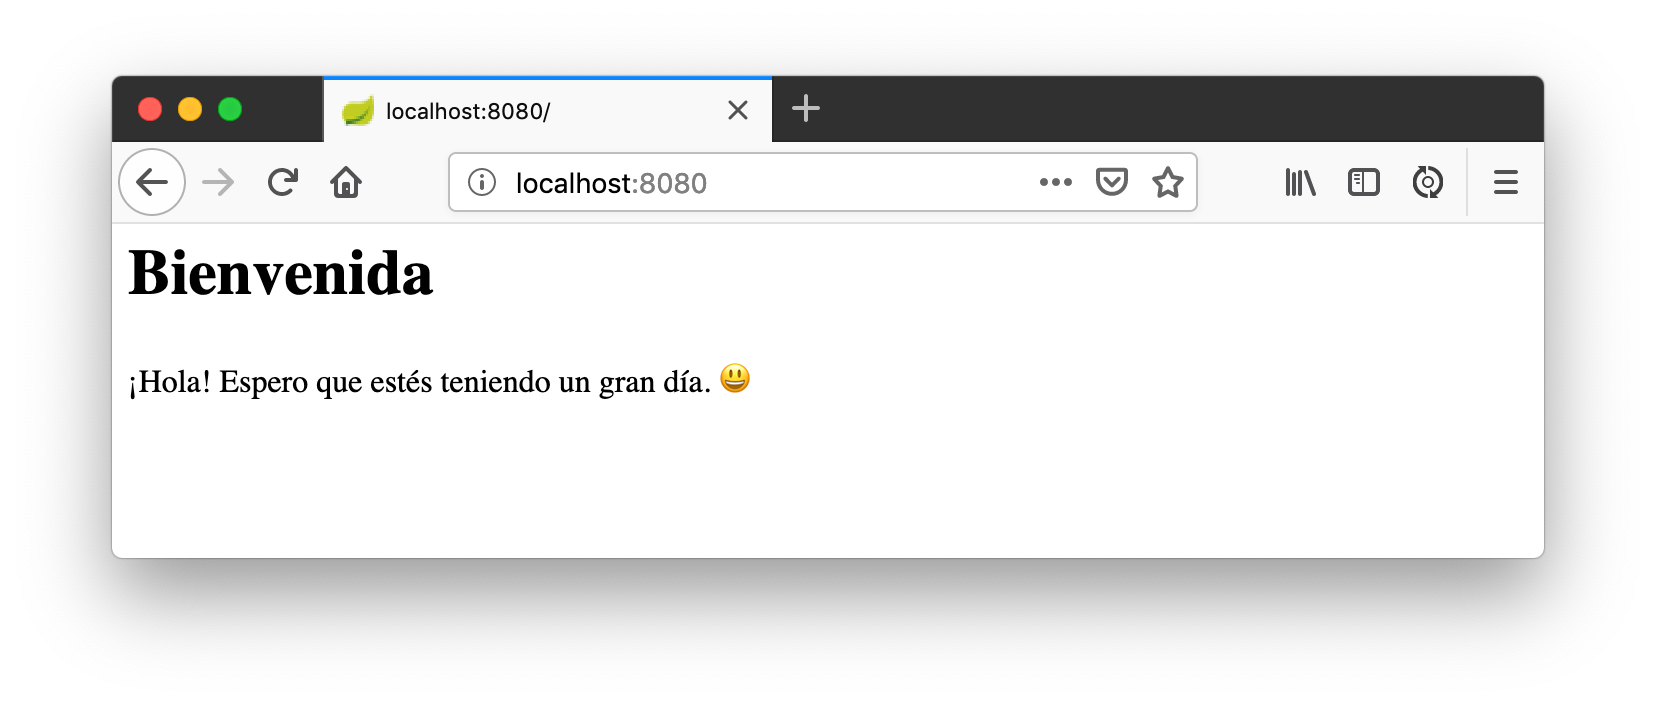
 Once you have your browser set to return Spanish, start your Spring Boot app with
 ./mvnw spring-boot:run (or mvnw spring-boot:run if you’re using Windows).
Add <defaultGoal>spring-boot:run</defaultGoal> in the <build> section of your pom.xml if you want to only type ./mvnw to start your app.
Navigate to http://localhost:8080 and you should see a page with Spanish words.
Add the Ability to Change Locales With a URL Parameter
This is a nice set-up, but you might want to allow users to set their own language. You might’ve seen this on websites in the wild, where they have a flag that you can click to change to that country’s language. To make this possible in Spring Boot, create a MvcConfigurer class alongside your HomeController.
package com.example.demo;

import org.springframework.context.annotation.Bean;
import org.springframework.context.annotation.Configuration;
import org.springframework.web.servlet.LocaleResolver;
import org.springframework.web.servlet.config.annotation.InterceptorRegistry;
import org.springframework.web.servlet.config.annotation.WebMvcConfigurer;
import org.springframework.web.servlet.i18n.CookieLocaleResolver;
import org.springframework.web.servlet.i18n.LocaleChangeInterceptor;

@Configuration
public class MvcConfigurer implements WebMvcConfigurer {

    @Bean
    public LocaleResolver localeResolver() {
        return new CookieLocaleResolver();
    }

    @Bean
    public LocaleChangeInterceptor localeInterceptor() {
        LocaleChangeInterceptor localeInterceptor = new LocaleChangeInterceptor();
        localeInterceptor.setParamName("lang");
        return localeInterceptor;
    }

    @Override
    public void addInterceptors(InterceptorRegistry registry) {
        registry.addInterceptor(localeInterceptor());
    }
}
This class uses a CookieLocaleResolver that’s useful for saving the locale preference in a cookie and defaulting to the accept-language header if none exists.
Restart your server and you should be able to override your browser’s language preference by navigating to http://localhost:8080/?lang=en.
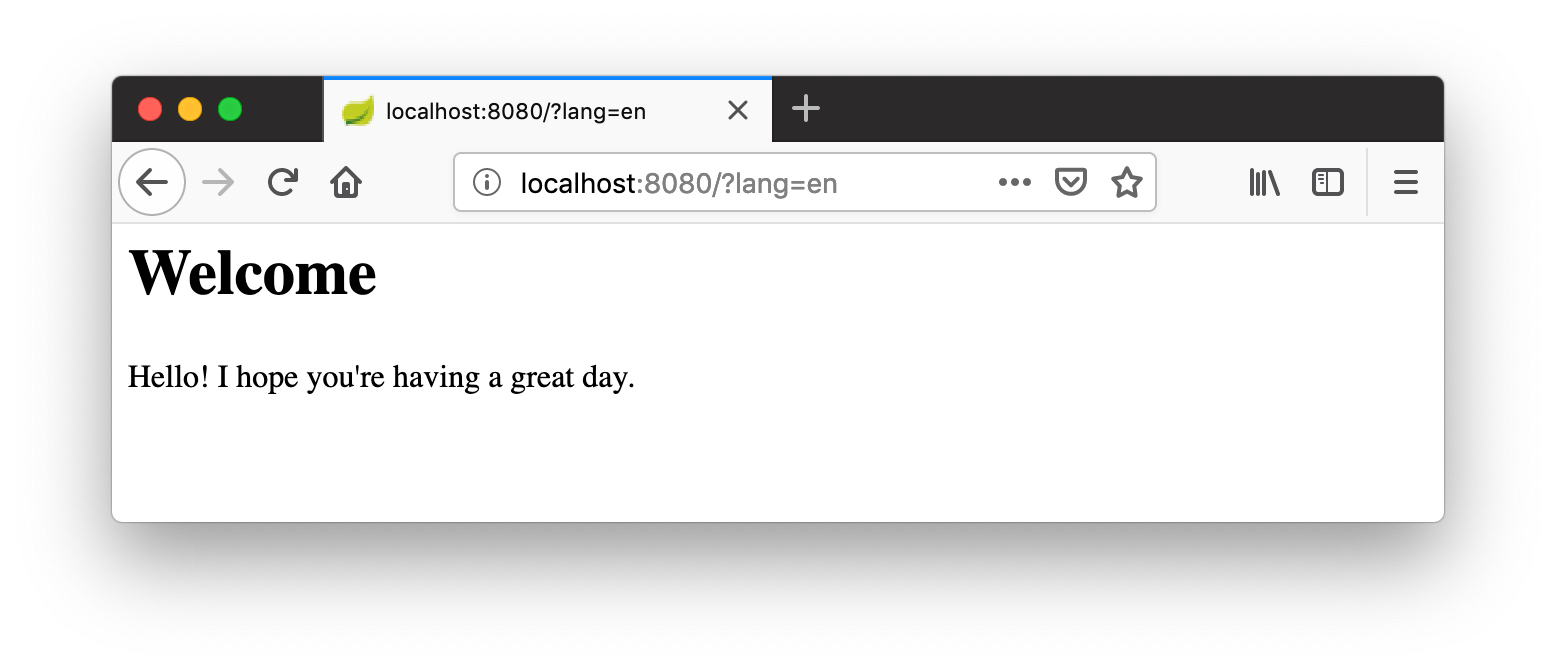 Your language preference will be saved in a cookie, so if you navigate back to
 http://localhost:8080, the page will render in English. If you quit your browser and restart, you’ll be back to using your browser’s language preference.
Hot Reloading Thymeleaf Templates and Resource Bundles in Spring Boot 2.1
If you’d like to modify your Thymeleaf templates and see those changes immediately when you refresh your browser, you can add Spring Boot’s Developer Tools to your pom.xml.
<dependency>
    <groupId>org.springframework.boot</groupId>
    <artifactId>spring-boot-devtools</artifactId>
</dependency>
This is all you need to do if you have your IDE set up to copy resources when you save a file. If you’re not using an IDE, you’ll need to define a property in your application.properties:
spring.thymeleaf.prefix=file:src/main/resources/templates/To hot-reload changes to your i18n bundles, you’ll need to rebuild your project (for example, by running ./mvnw compile). If you’re using Eclipse, a rebuild and restart should happen automatically for you. If you’re using IntelliJ IDEA, you’ll need to go to your run configuration and change "On frame deactivation" to be Update resources.
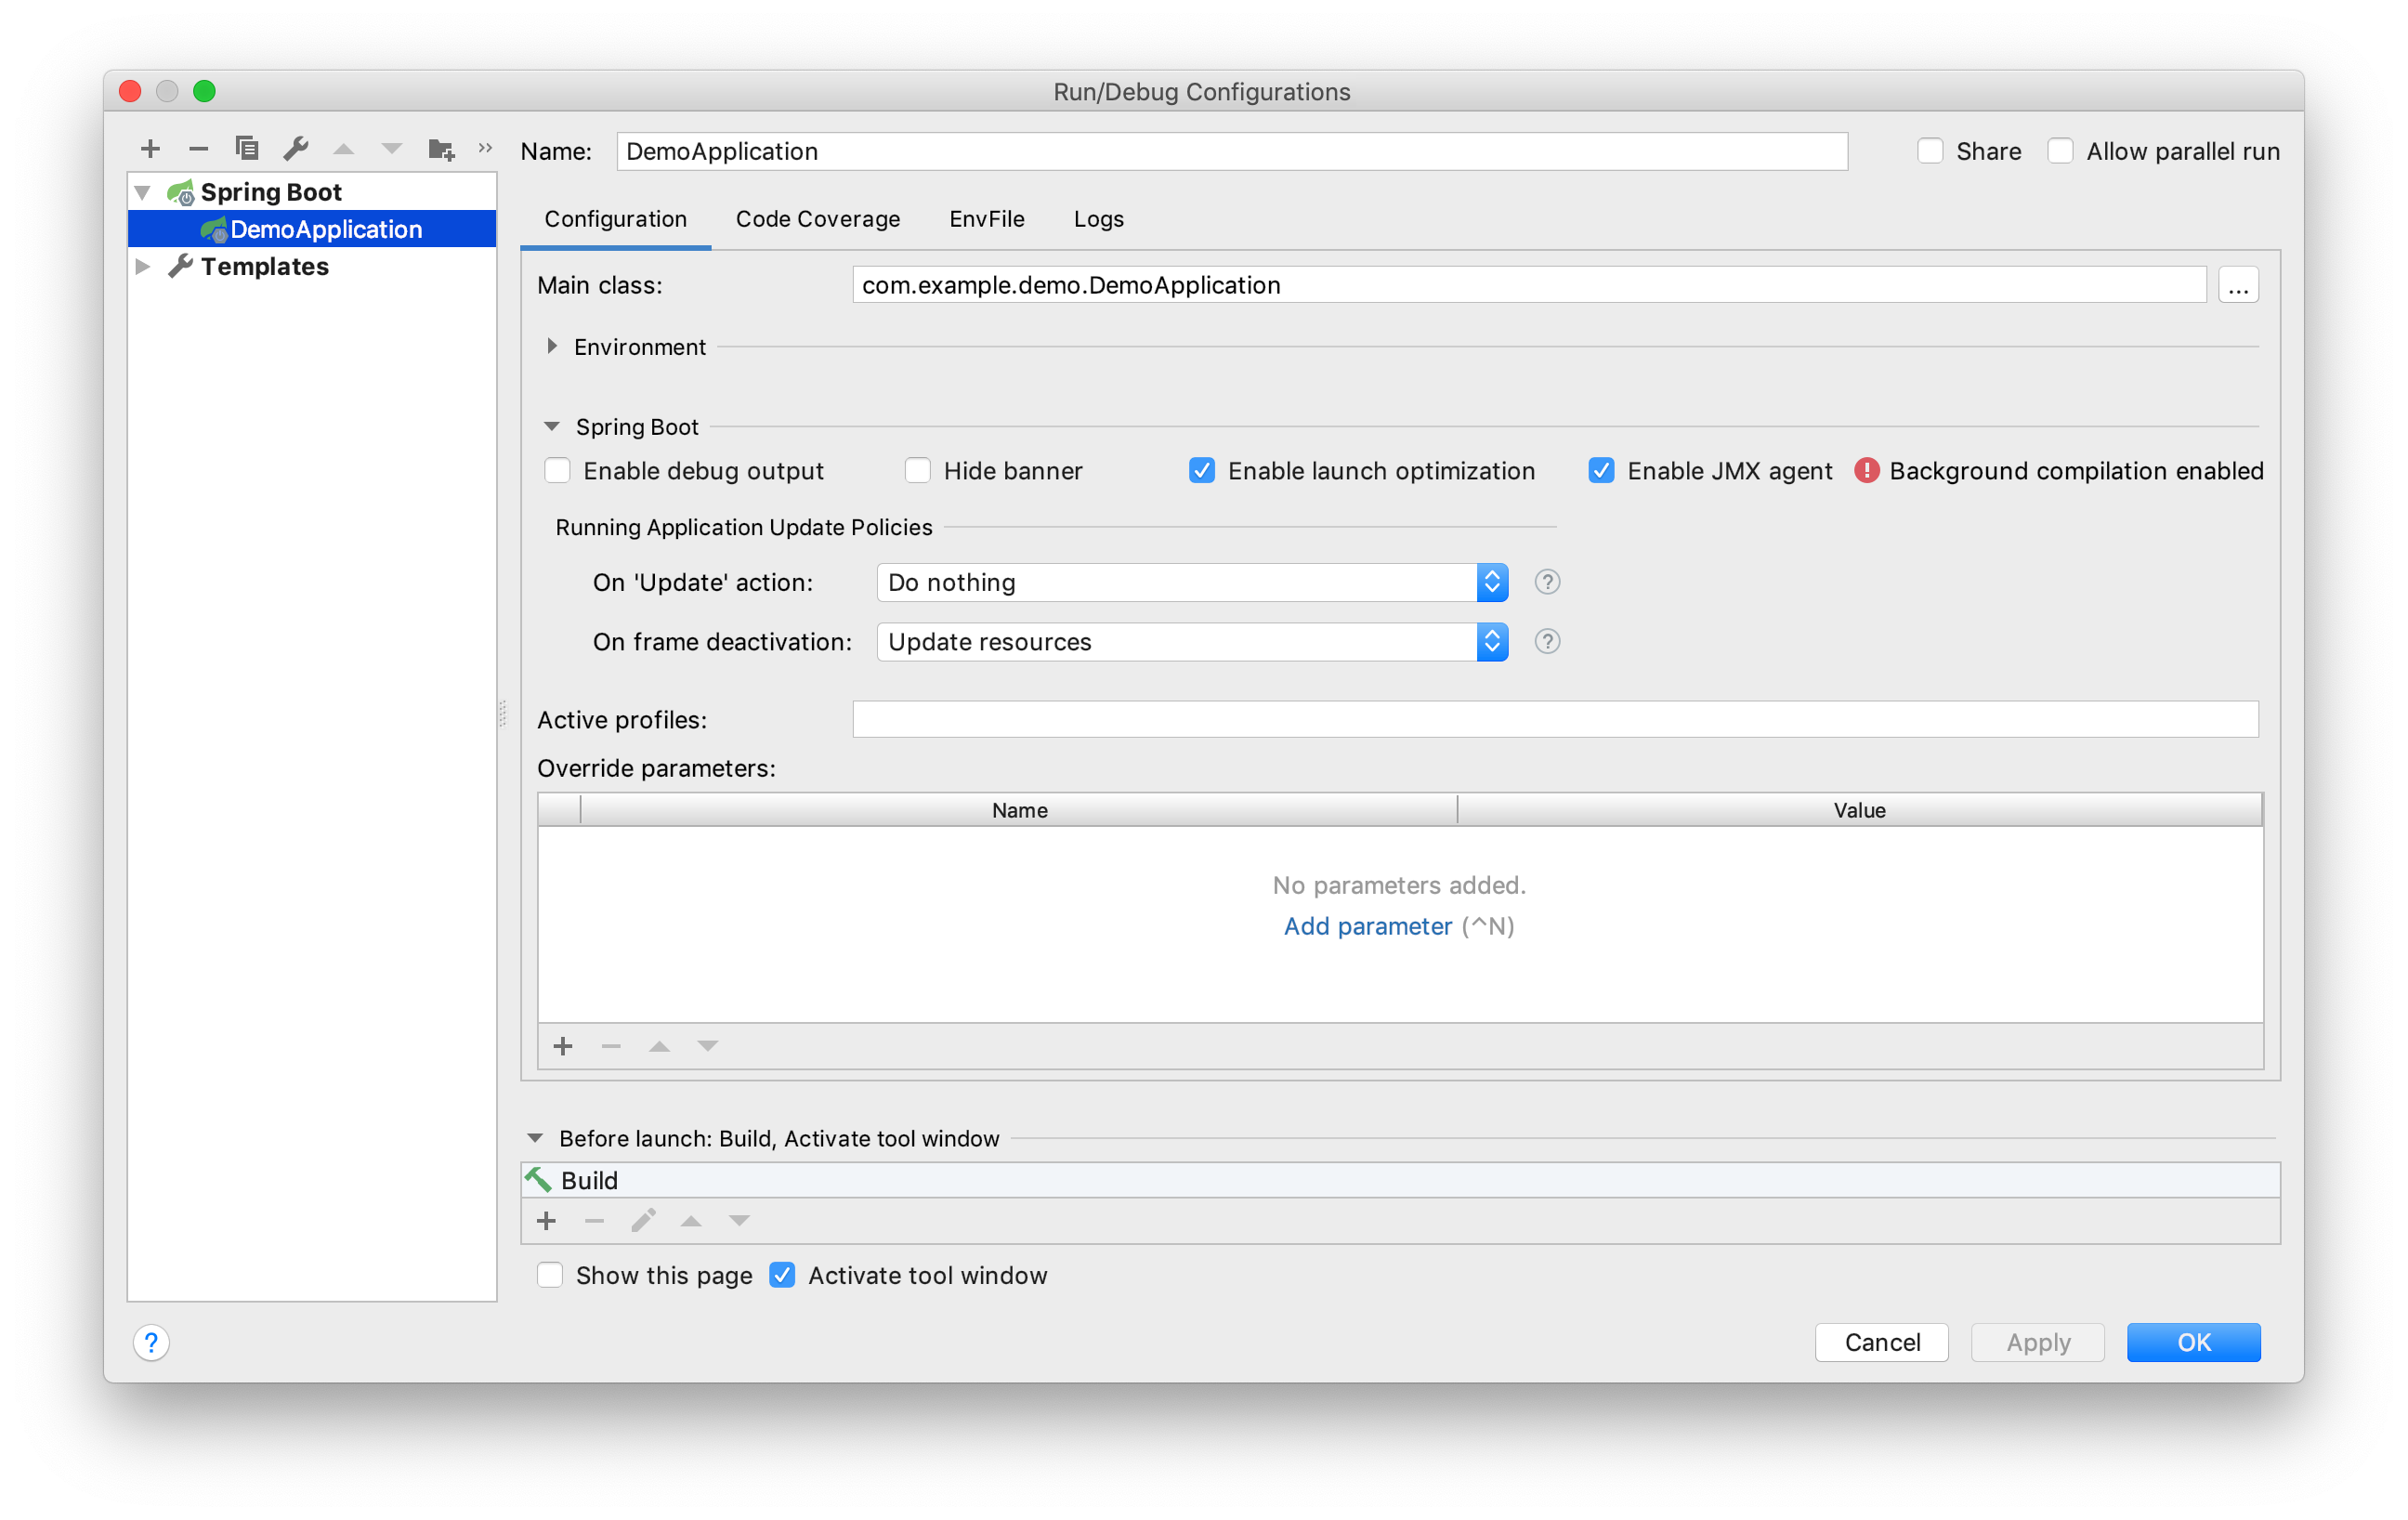 See this Stack Overflow answer for more information.
Customize the Language Used by Okta’s Sign-In Widget
The last example I’d like to show you is a Spring Boot app with Okta’s embedded Sign-In Widget. The Sign-In Widget is smart enough to render the language based on your browser’s accept-language header.
However, if you want to sync it up with your Spring app’s LocalResolver, you need to do a bit more configuration. Furthermore, you can customize things so it sets the locale from the user’s locale setting in Okta.
To begin, export the custom login example for Spring Boot:
svn export https://github.com/okta/samples-java-spring/trunk/custom-loginIf you don’t have svn installed, go here and click the Download button.
Create an OIDC App on Okta
If you already have an Okta Developer account, log in to it. If you don’t, create one at developer.okta.com/signup. After you’re logged in to your Okta dashboard, complete the following steps:
- From the Applications page, choose Add Application.
- On the Create New Application page, select Web.
- Give your app a memorable name, then click Done.
Your settings should look similar to the ones below.

You can specify your issuer (found under API > Authorization Servers), client ID, and client secret in custom-login/src/main/resources/application.yml as follows:
okta:
  oauth2:
    issuer: https://okta.okta.com/oauth2/default
    client-id: {yourClientID}
    client-secret: {yourClientSecret}
However, it’s more secure if you store these values in environment variables and keep them out of source control (especially if your code is public).
export OKTA_OAUTH2_ISSUER=https://{yourOktaDomain}/oauth2/default
export OKTA_OAUTH2_CLIENT_ID={yourClientID}
export OKTA_OAUTH2_CLIENT_SECRET={yourClientSecret}
I recommend adding the above exports to a .okta.env file in the root of your project and adding *.env to .gitignore. Then run source .okta.env before you start your app.
After making these changes, you can start the app using ./mvnw. Open your browser to http://localhost:8080, click Login and you should be able to authenticate. If you still have your browser set to use Spanish first, you’ll see that the Sign-In Widget automatically renders in Spanish.
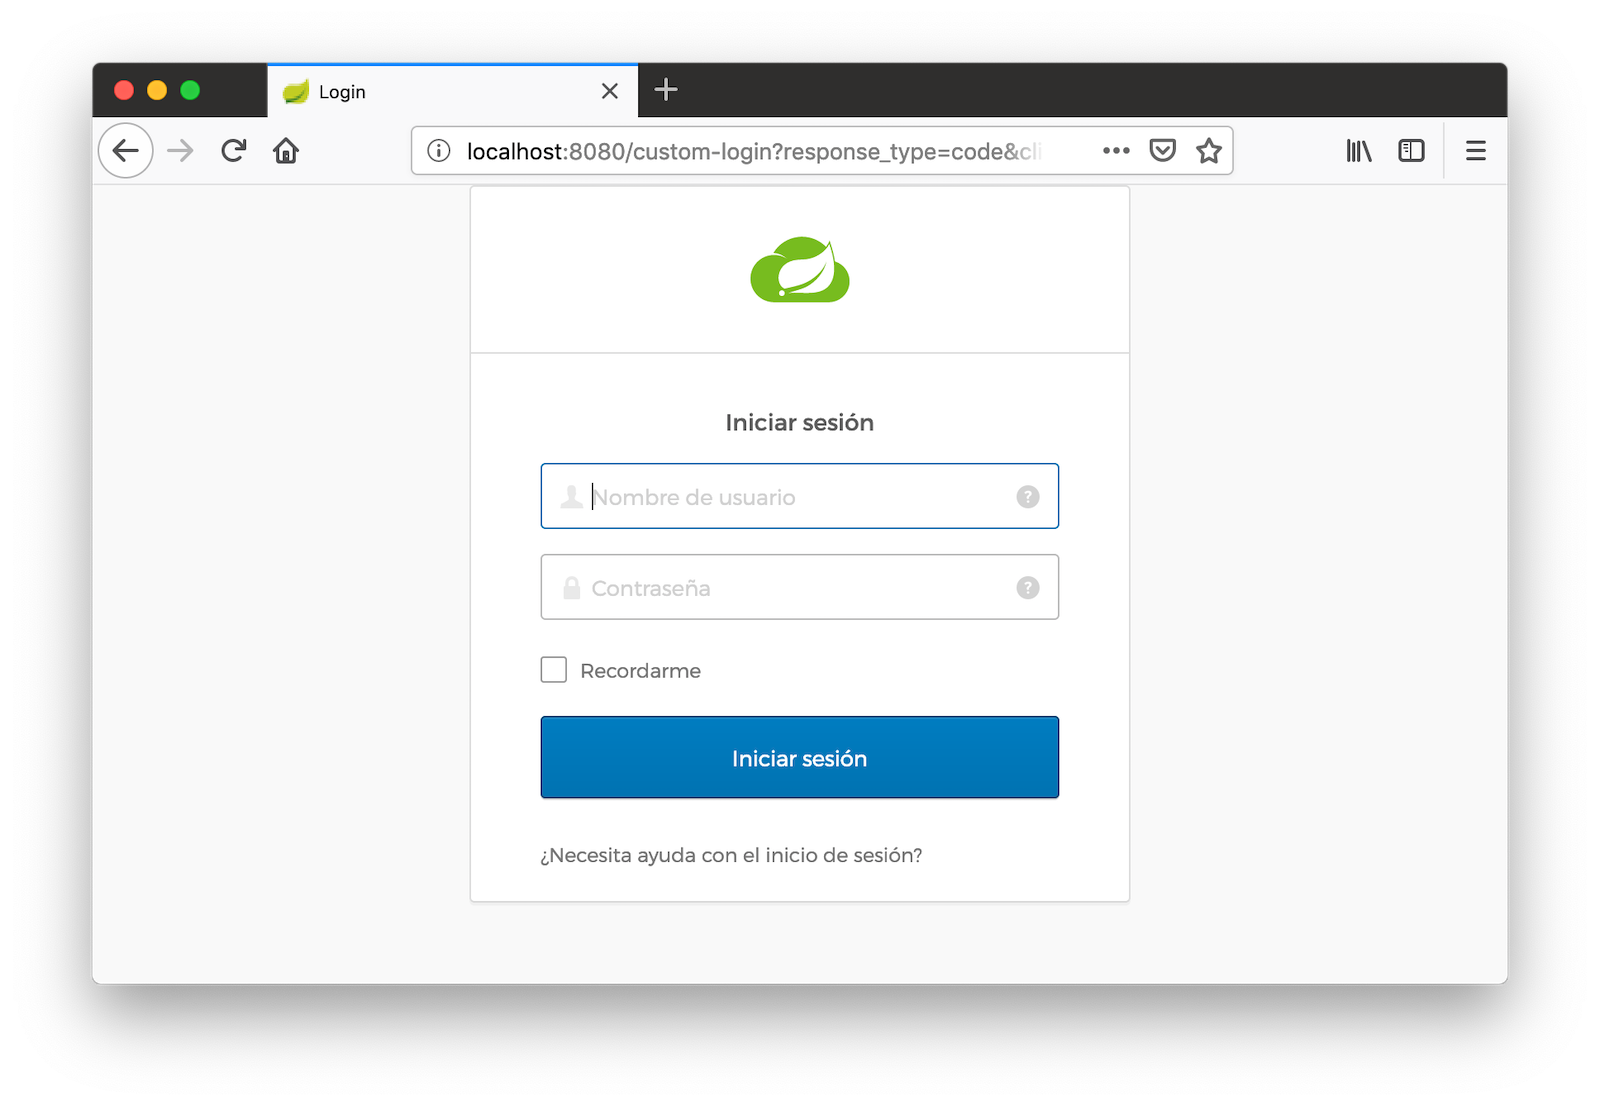
This works because Spring auto-enables AcceptHeaderLocaleResolver.
Add i18n Messages and Sync Locales
It seems like things are working smoothly at this point. However, if you add a LocaleChangeInterceptor, you’ll see that changing the language doesn’t change the widget’s language. To see this in action, create an MvcConfigurer class in custom-login/src/main/java/com/okta/spring/example.
package com.okta.spring.example;
import org.springframework.context.annotation.Bean;
import org.springframework.context.annotation.Configuration;
import org.springframework.web.servlet.LocaleResolver;
import org.springframework.web.servlet.config.annotation.InterceptorRegistry;
import org.springframework.web.servlet.config.annotation.WebMvcConfigurer;
import org.springframework.web.servlet.i18n.CookieLocaleResolver;
import org.springframework.web.servlet.i18n.LocaleChangeInterceptor;
@Configuration
public class MvcConfigurer implements WebMvcConfigurer {
@Bean
public LocaleResolver localeResolver() {
return new CookieLocaleResolver();
}
@Bean
public LocaleChangeInterceptor localeInterceptor() {
LocaleChangeInterceptor localeInterceptor = new LocaleChangeInterceptor();
localeInterceptor.setParamName("lang");
return localeInterceptor;
}
@Override
public void addInterceptors(InterceptorRegistry registry) {
registry.addInterceptor(localeInterceptor());
}
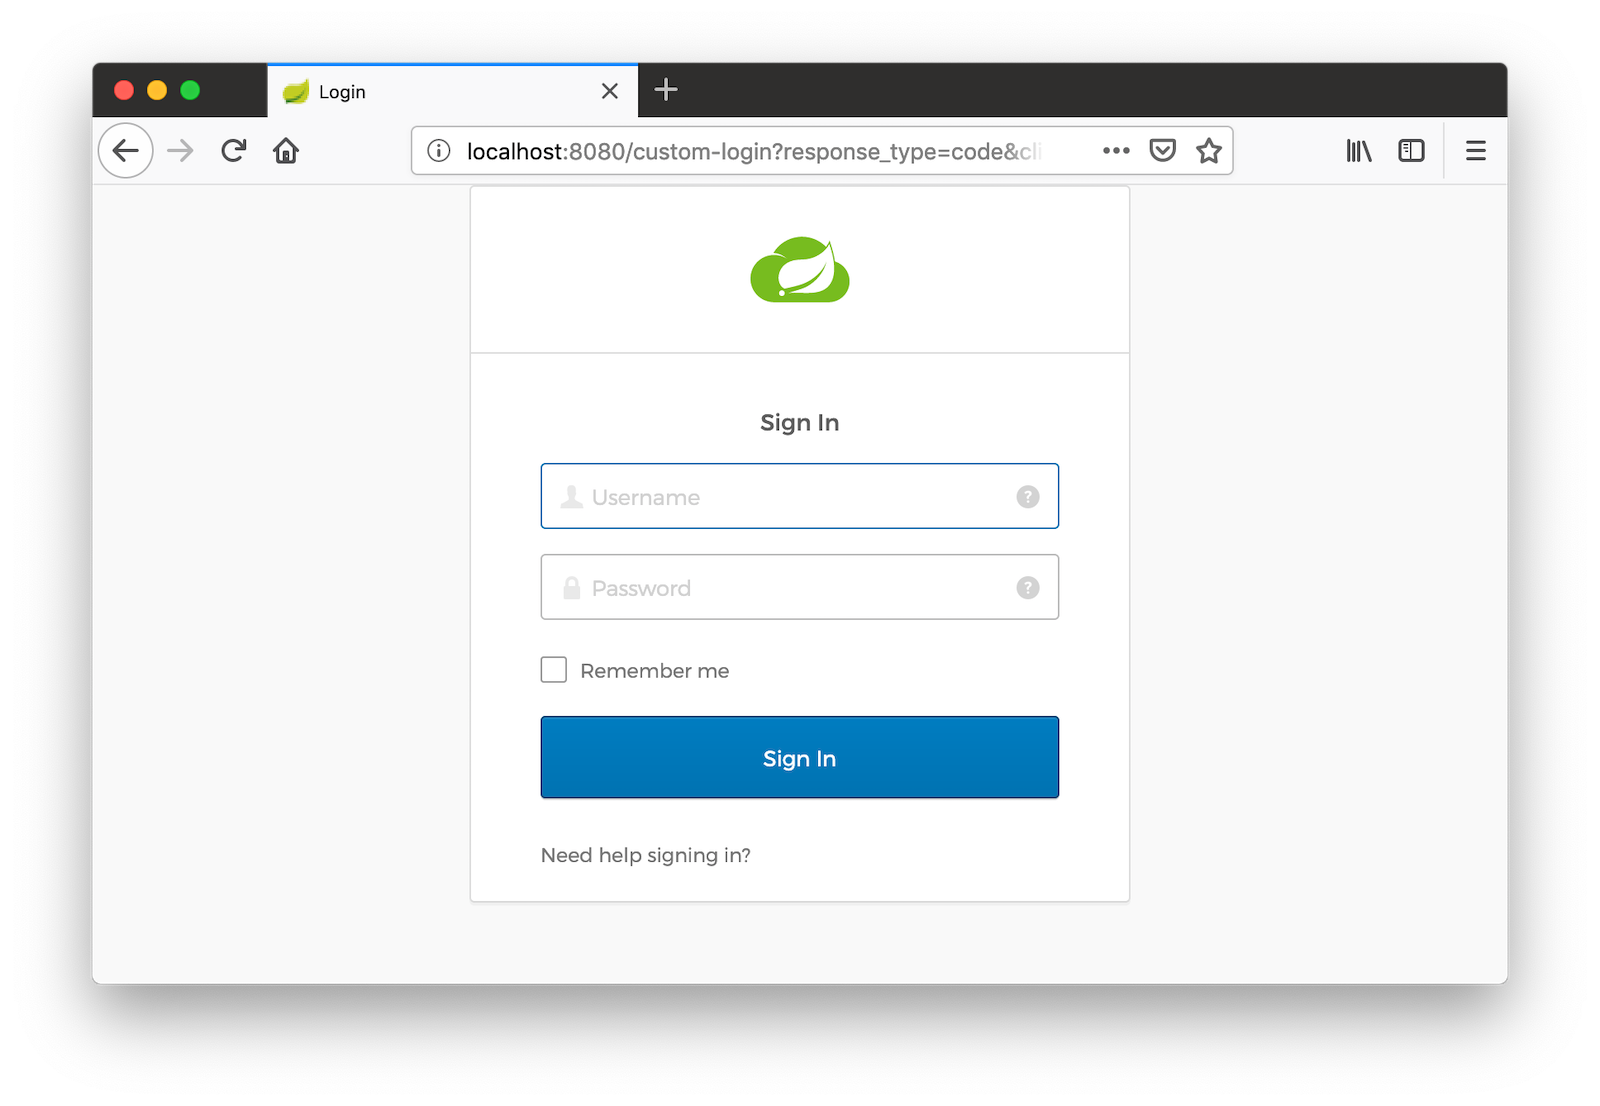
}Restart the custom-login app and navigate to http://localhost:8080/?lang=en. If you click the login button, you’ll see that the widget is still rendered in Spanish. To fix this, crack open LoginController, add language as a model attribute, and add a Locale parameter to the login() method. Spring MVC will resolve the Locale automatically with ServletRequestMethodArgumentResolver.
package com.okta.spring.example.controllers;

...
import java.util.Locale;

@Controller
public class LoginController {

    ...
    private static final String LANGUAGE = "language";

    @GetMapping(value = "/custom-login")
    public ModelAndView login(HttpServletRequest request,
                              @RequestParam(name = "state", required = false) String state,
                              Locale locale)
                              throws MalformedURLException {

        ...
        mav.addObject(LANGUAGE, locale);

        return mav;
    }

    ...
}
Then, modify custom-login/src/main/resources/templates/login.html and add a config.language setting that reads this value.
config.redirectUri = /*[[${redirectUri}]]*/ '{redirectUri}';
config.language = /*[[${language}]]*/ '{language}';
Restart everything, go to http://localhost:8080/?lang=en, click the login button, and it should now render in English.
Add Internationalization Bundles for Thymeleaf
To make it a bit more obvious that changing locales is working, create messages.properties in custom-login/src/main/resources, and specify English translations for keys.
hello=Hello
welcome=Welcome home, {0}!
Create messages_es.properties in the same directory, and provide translations.
hello=Hola
welcome=¡Bienvenido a casa {0}!
Open custom-login/src/main/resources/templates/home.html and change <p>Hello!</p> to the following:
<p th:text="#{hello}">Hello!</p>Change the welcome message when the user is authenticated too. The {0} value will be replaced by the arguments passed into the key name.
<p th:text="#{welcome(${#authentication.name})}">Welcome home,
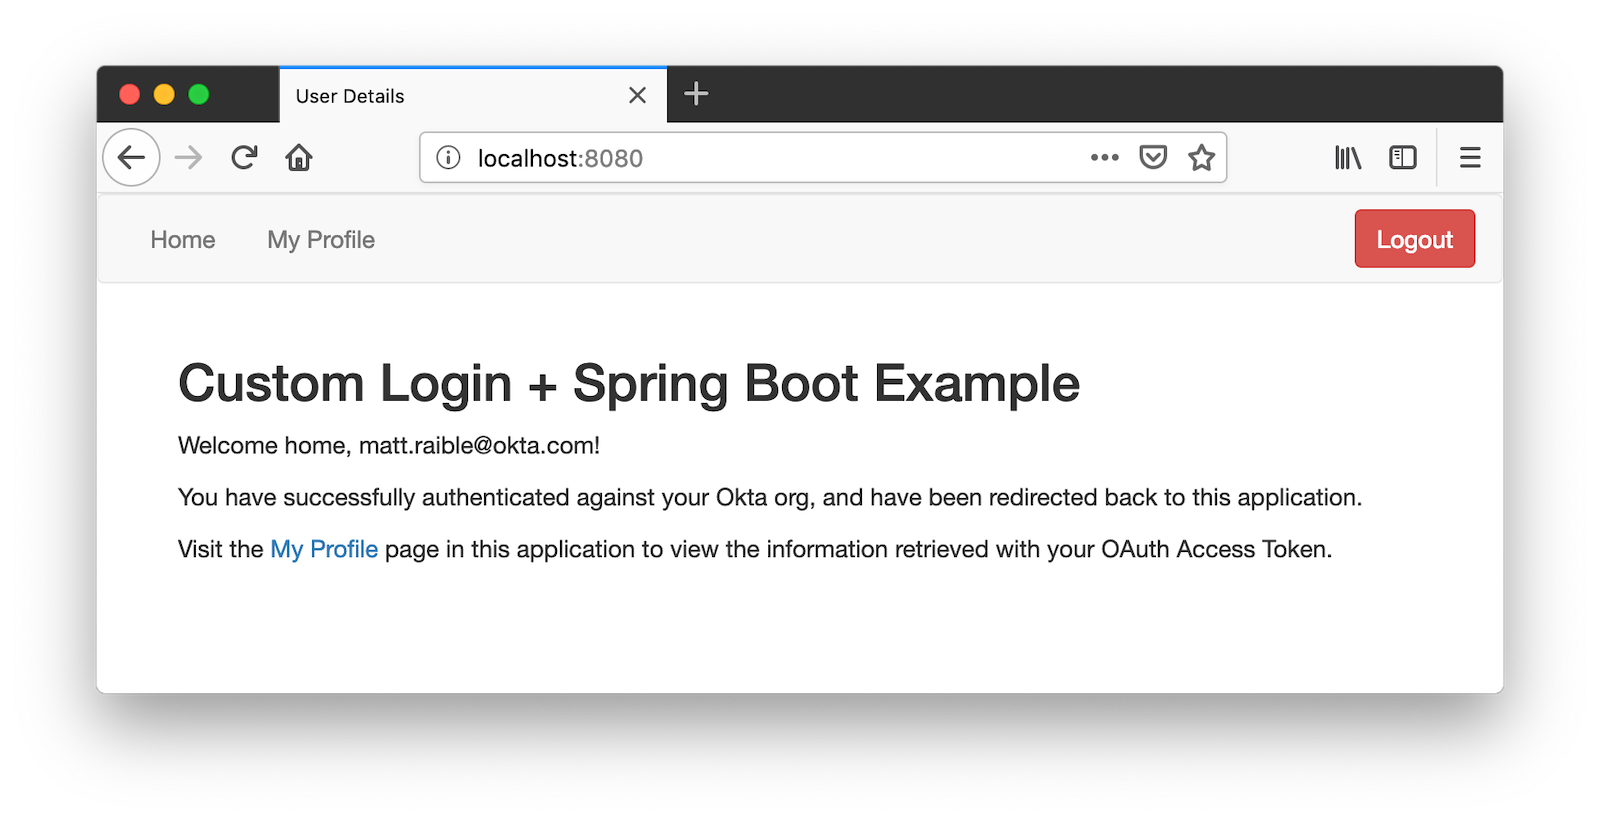
<span th:text="${#authentication.name}">Joe Coder</span>!</p>Restart Spring Boot, log in, and you should see a welcome message in your chosen locale.
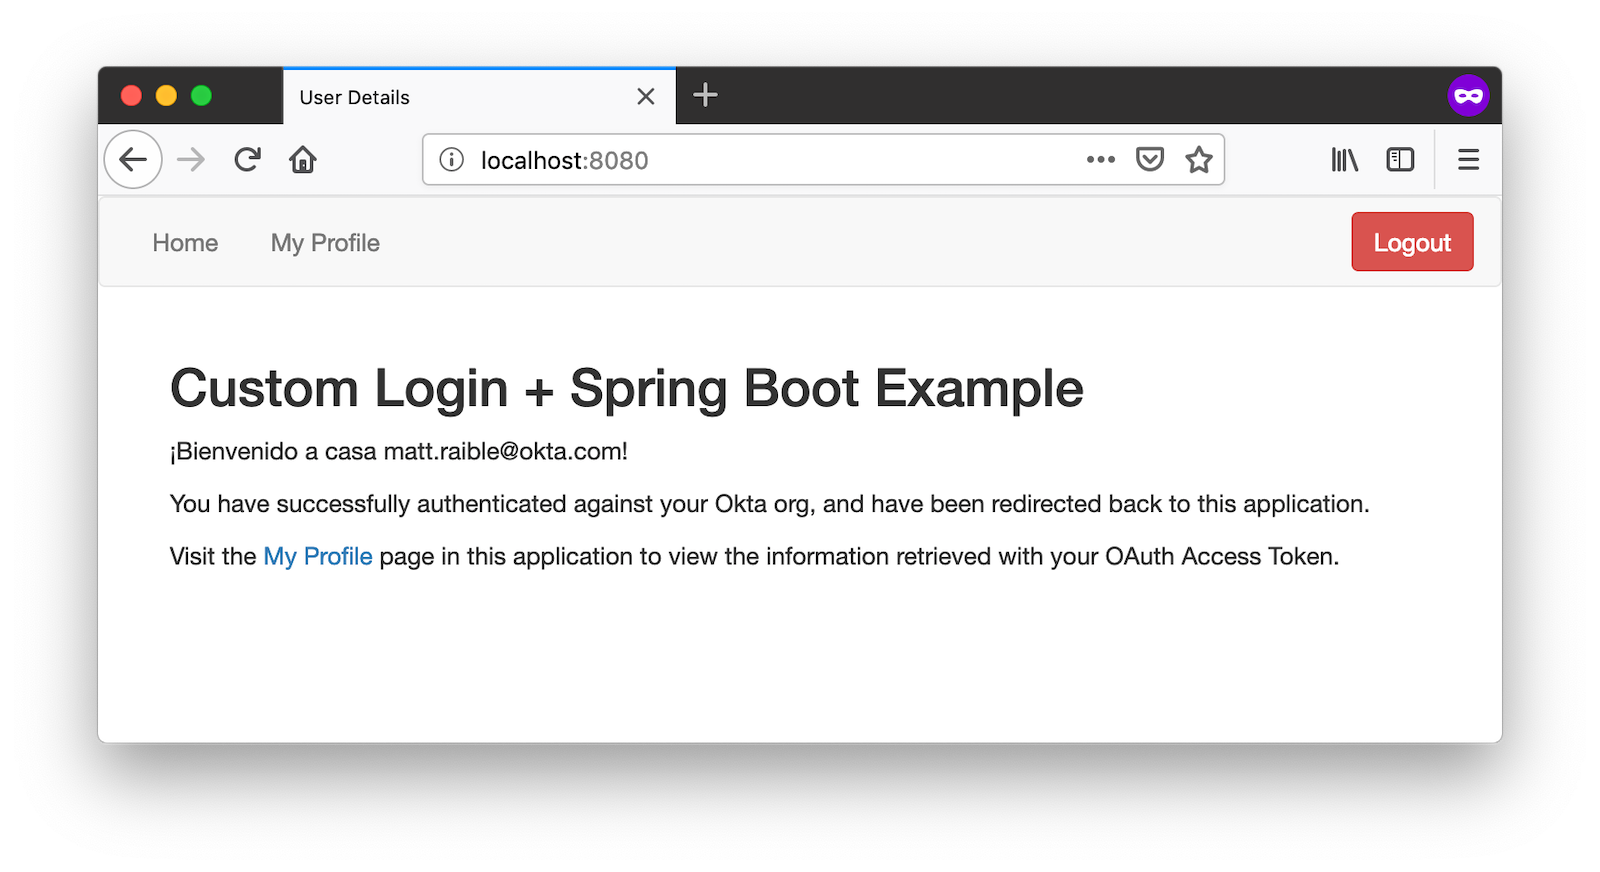 You gotta admit, this is sah-weet! There’s something that tells me it’d be even better if the locale is set from your user attributes in Okta. Let’s make that happen!
Use the User’s Locale from Okta
To set the locale from the user’s information in Okta, create an OidcLocaleResolver class in the same directory as MvcConfigurer.
package com.okta.spring.example;

import org.slf4j.Logger;
import org.slf4j.LoggerFactory;
import org.springframework.context.annotation.Configuration;
import org.springframework.security.core.context.SecurityContext;
import org.springframework.security.core.context.SecurityContextHolder;
import org.springframework.security.oauth2.core.oidc.user.OidcUser;
import org.springframework.web.servlet.i18n.CookieLocaleResolver;

import javax.servlet.http.HttpServletRequest;
import java.util.Locale;

@Configuration
public class OidcLocaleResolver extends CookieLocaleResolver {
    private final Logger logger = LoggerFactory.getLogger(OidcLocaleResolver.class);

    @Override
    public Locale resolveLocale(HttpServletRequest request) {
        SecurityContext securityContext = SecurityContextHolder.getContext();
        if (securityContext.getAuthentication().getPrincipal() instanceof OidcUser) {
            OidcUser user = (OidcUser) securityContext.getAuthentication().getPrincipal();
            logger.info("Setting locale from OidcUser: {}", user.getLocale());
            return Locale.forLanguageTag(user.getLocale());
        } else {
            return request.getLocale();
        }
    }
}
Then update MvcConfigurer to use this class:
@Bean
public LocaleResolver localeResolver() {
   return new OidcLocaleResolver();
}
Try it out by restarting, navigating to http://localhost:8080/?lang=es, and authenticating. You should land back on your app’s homepage with English (or whatever your user’s locale is) as the language.
Yeehaw! Feels like Friday, doesn’t it?!
i18n in JavaScript with Angular, React, and Vue
In this post, you saw how to internationalize a basic Java program and a Spring Boot app. We barely scratched the service on how to do i18n in JavaScript. The good news is I have an excellent example of i18n for JavaScript apps.
JHipster is powered by Spring Boot and includes localization for many languages on the server and the client. It supports three awesome front-end frameworks: Angular, React, and Vue. It uses the following libraries to lazy-load JSON files with translations on the client. I invite you to check them out if you’re interested in doing i18n in JavaScript (or TypeScript).
- Angular: ngx-translate
- React: a Translate component based off react-translate
- Vue: Vue I18n
Internationalize Your Java Apps Today!
I hope you’ve enjoyed this whirlwind tour of how to internationalize and localize your Java and Spring Boot applications. If you’d like to see the completed source code, you can find it on GitHub.
Baeldung’s Guide to Internationalization in Spring Boot was a useful resource when writing this post.
We like to write about Java and Spring Boot on this here blog. Here are a few of my favorites:
- Build a Java REST API with Java EE and OIDC
- Spring Boot 2.1: Outstanding OIDC, OAuth 2.0, and Reactive API Support
- Add Social Login to Your JHipster App
- Build and Secure Microservices with Spring Boot 2.0 and OAuth 2.0
- Develop a Microservices Architecture with OAuth 2.0 and JHipster
Follow us on your favorite social network { Twitter, LinkedIn, Facebook, YouTube } to be notified when we publish awesome content in the future.
i18n in Java 11, Spring Boot, and JavaScript was originally published to the Okta developer blog on February 25, 2019.
Published at DZone with permission of Matt Raible. See the original article here.
Opinions expressed by DZone contributors are their own.
Comments