

MUnit Testing With Mulesoft: Part I
In this walkthrough, learn how to build automated tests for your Mule integrations and APIs with MUnit, integrated with Anypoint Studio.
Join the DZone community and get the full member experience.
Join For FreeMUnit is a Mule application testing framework which allows you to build automated tests for your Mule integrations and API's. MUnit is very well integrated with Anypoint Studio.
Various features available with Mule MUnit:
Create and build Mule tests by writing Mule code.
Create and build Mule tests by writing Java code.
Verify Message Processor calls.
Mock Message Processor.
Mock outbound endpoints.
Disable outbound endpoints.
Disable flow inbound connectors.
Disable inbound endpoints.
Debug the tests.
View coverage reports.
Various asserts available like Assert Equals, Assert Not Equals, Assert Payload, Assert False, Assert True, Assert Null Payload, Assert Not Null Payload.
Spy Message Processor.
In this article, we will see how to create and run the MUnit tests.
First, you want to make sure MUnit is installed in your Anypoint Studio. In case it is not installed, follow below steps.
Go to Help > Install New Software...
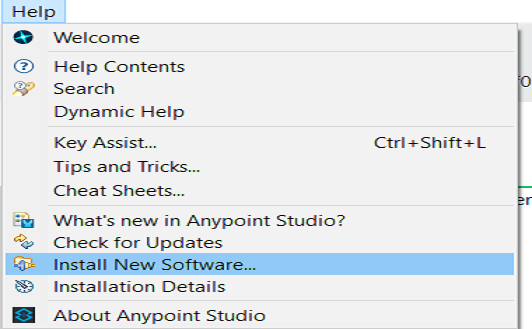
Now, it will open new pop-up windows. Select MUnit Update Site from drop down list. Check MUnit and MUnit Tools for Mule.
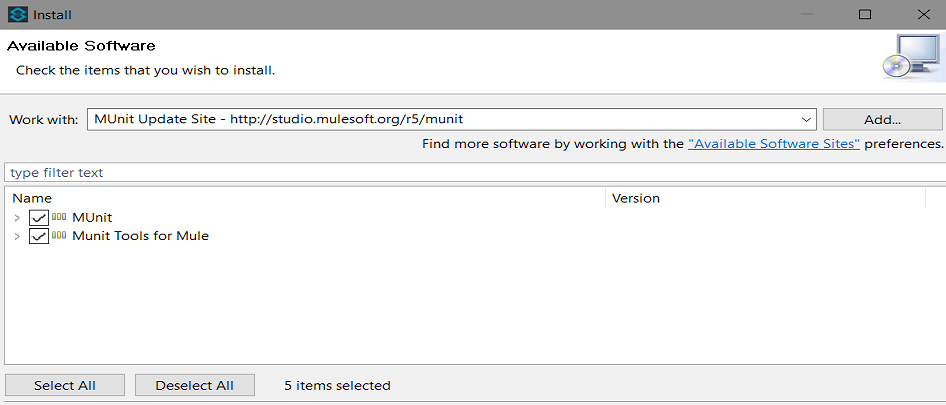
Finally, just click Next and accept the license terms and conditions. Click Finish and it will install MUnit tools in your Anypoint Studio.
How To Create the MUnit Tests for Mule Flow
For creating MUnit tests for your application, right click on the flow select MUnit > Create New MUnit.
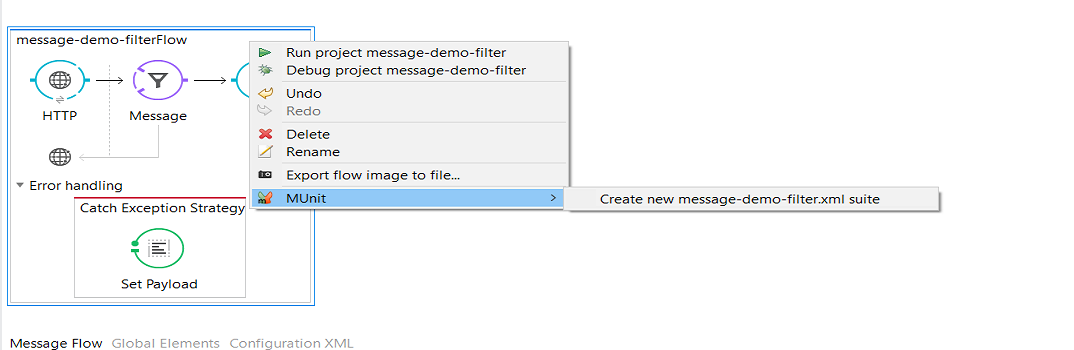
It will create MUnit tests for the flow and it will be available in folder src/test/unit.
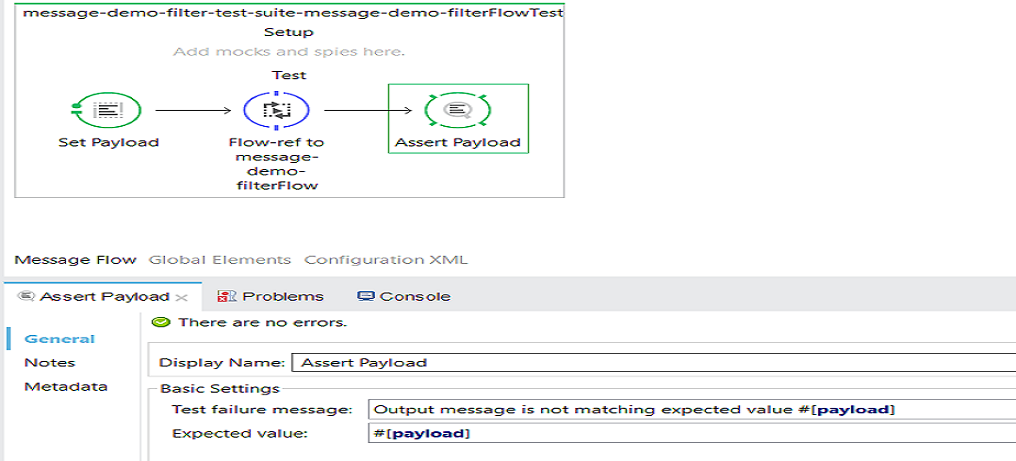
In Assert Payload, you need to define Expected Value and in this case, it will be payload. Also, provide Test Failure Message, in case the value doesn't message the expected value then it will provide the failure message you have defined.
<?xml version="1.0" encoding="UTF-8"?>

<mule xmlns="http://www.mulesoft.org/schema/mule/core" xmlns:doc="http://www.mulesoft.org/schema/mule/documentation" xmlns:munit="http://www.mulesoft.org/schema/mule/munit" xmlns:spring="http://www.springframework.org/schema/beans" xmlns:core="http://www.mulesoft.org/schema/mule/core" xmlns:xsi="http://www.w3.org/2001/XMLSchema-instance" xsi:schemaLocation="http://www.mulesoft.org/schema/mule/munit http://www.mulesoft.org/schema/mule/munit/current/mule-munit.xsd
http://www.springframework.org/schema/beans http://www.springframework.org/schema/beans/spring-beans-current.xsd
http://www.mulesoft.org/schema/mule/core http://www.mulesoft.org/schema/mule/core/current/mule.xsd">
    <munit:config name="munit" doc:name="MUnit configuration"/>
    <spring:beans>
        <spring:import resource="classpath:message-demo-filter.xml"/>
    </spring:beans>

    <munit:test name="message-demo-filter-test-suite-message-demo-filterFlowTest" description="Test">
        <set-payload value="#['The cat is brown and clever']" doc:name="Set Payload"/>
        <flow-ref name="message-demo-filterFlow" doc:name="Flow-ref to message-demo-filterFlow"/>
        <munit:assert-payload-equals message="Output message is not matching expected value #[payload]" expectedValue="#[payload]" doc:name="Assert Payload"/>
    </munit:test>
</mule>
Run MUnit Tests
For running the MUnit tests, right click in the canvas region of the MUnit test flow and select Run MUnit suite.
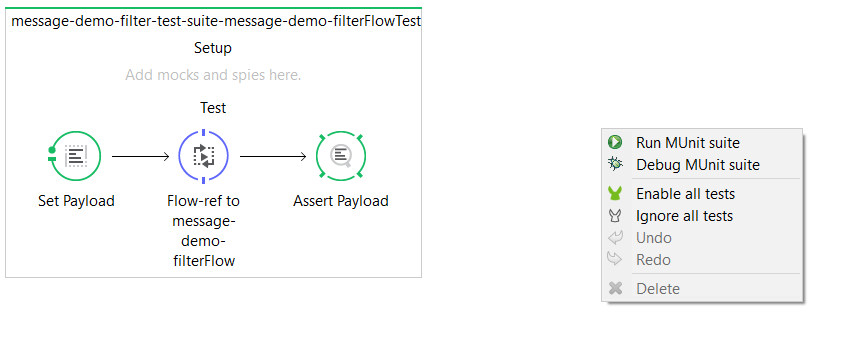 After running the MUnit suite, it will provide details like errors, failures (if any), coverage report, and test status.
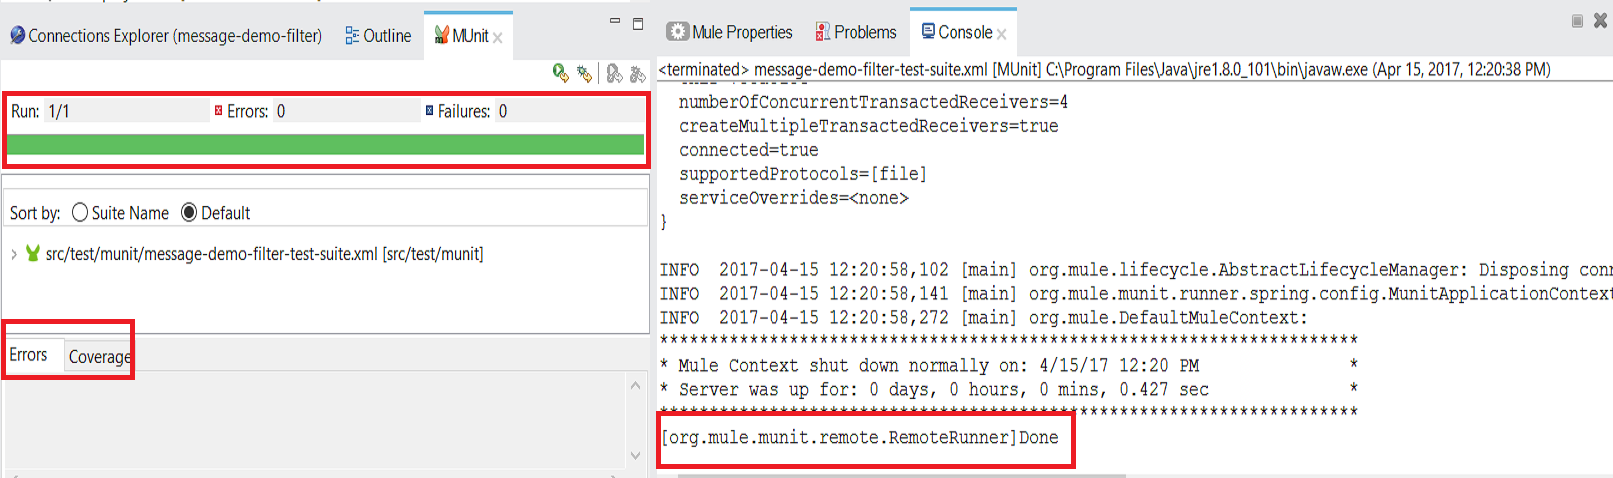
In above image, the green color means that your test case has been successfully executed and passed.
Now, you know how to create MUnit tests for your flow.
Below is the video tutorial:
Opinions expressed by DZone contributors are their own.
Comments