My Dive into Local LLMs, Part 1: From Alexa Curiosity to Homegrown AI
I set up Ollama on Ubuntu to run LLMs locally. CPU performance was a drag, but when GPU acceleration kicked in, it was a total "whoa" moment.
Join the DZone community and get the full member experience.
Join For FreeSo, I'm a software dev manager over at the Alexa team, and being around the Alexa journey, you kinda get a front-row seat to some seriously cool AI. It got me thinking, "Hey, I wanna poke at these LLMs on my own machine, see what makes 'em tick without needing a massive server farm." This is basically my log of figuring out how to get a personal LLM setup going.
In this article:
- Setting up Ollama on Ubuntu with GPU acceleration
- Understanding CPU vs GPU performance impact
- Choosing the right model for your hardware
- First steps toward building local AI applications
The Why
Honestly, it was pure curiosity at first. Working with Alexa, you see the potential, but I wanted that hands-on feel. The idea of having a model running locally, something I could tinker with, feed my own stuff, and just play – that was the goal. No big corporate project, just me, my laptop, and some AI.
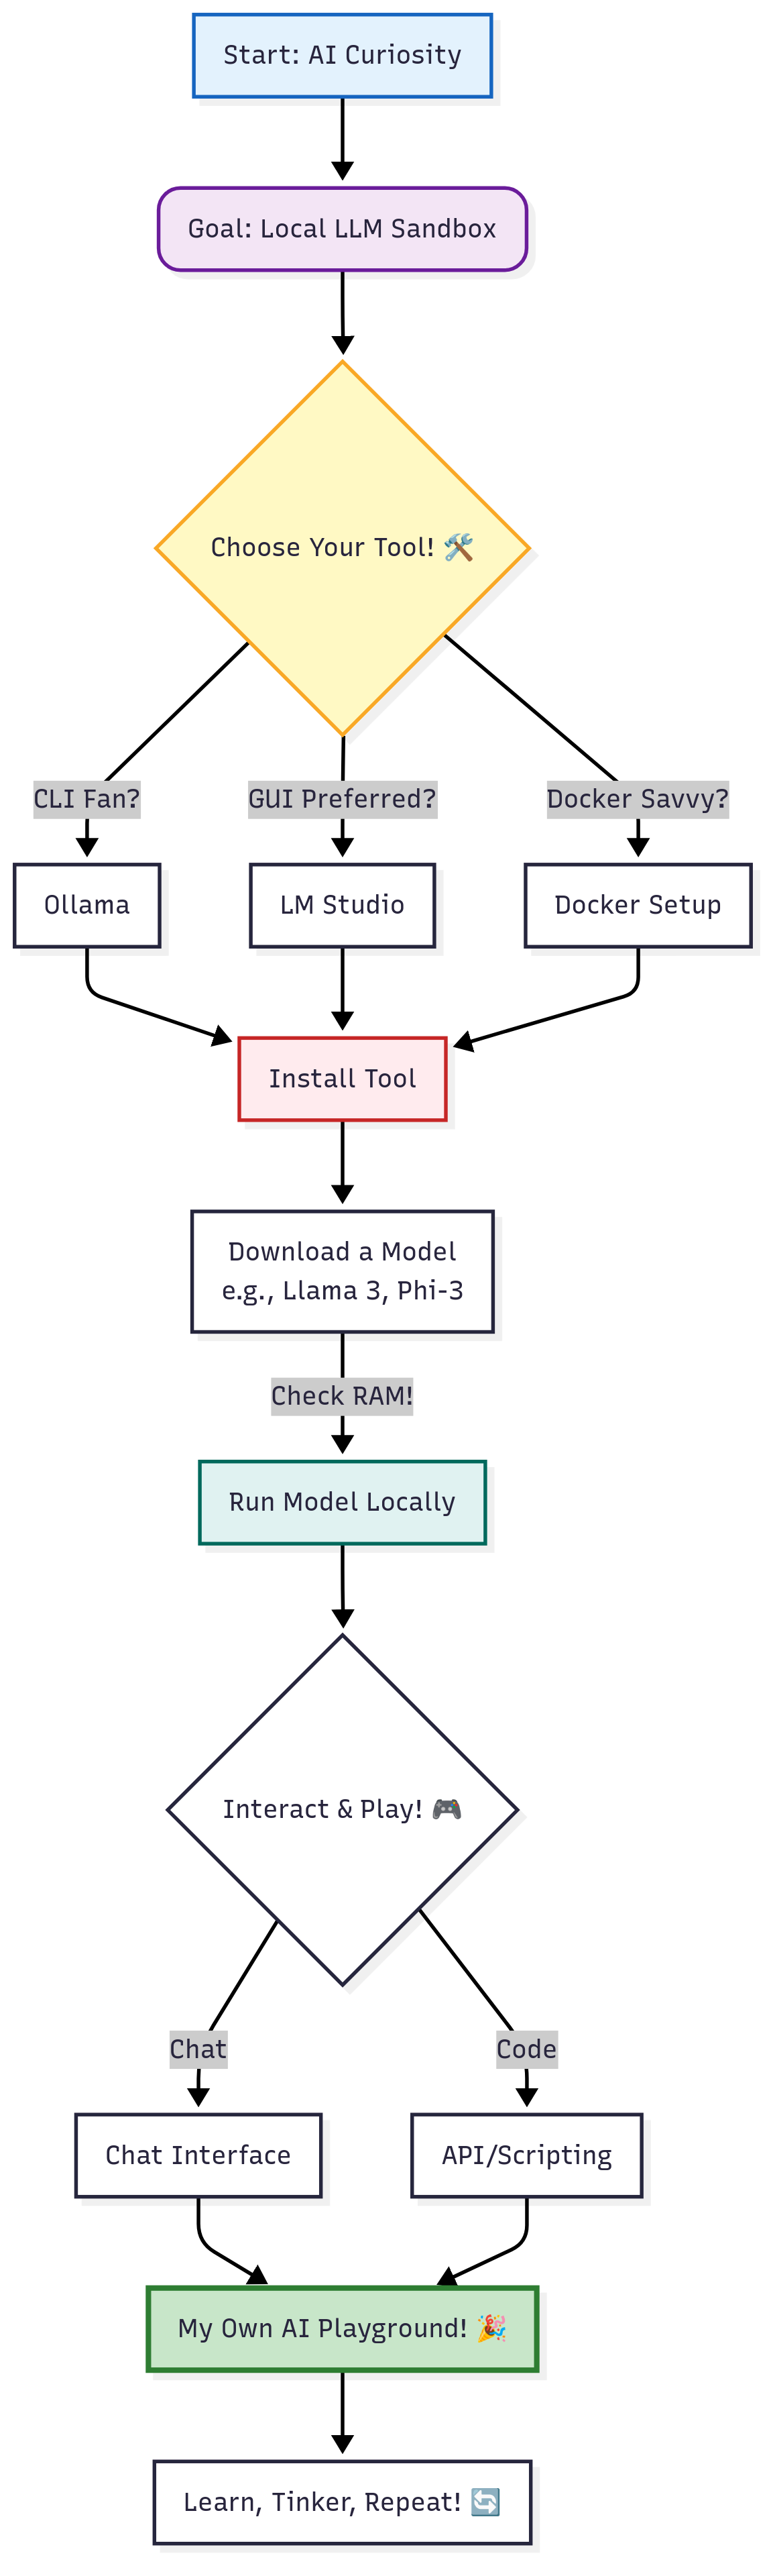
Getting Started: The Overwhelming Options
First off, wow, there's a LOT out there. You got your Ollama, LM Studio, GPT4All, Docker setups... it's a bit of a jungle. My main thing was, I wanted something fairly straightforward for a first go. I wasn't trying to build Rome in a day, y'know?
I ended up leaning towards Ollama for my initial experiments because it seemed pretty popular for command-line folks and had a simple ollama pull llama3 kind of vibe to get models. LM Studio also looked cool with its GUI, especially for just downloading and chatting.
My Ubuntu Setup: The Nitty-Gritty
My daily driver is an Ubuntu machine (22.04 LTS with an AMD Ryzen 7 5800X), so that's where I decided to build my little AI playground. This is where the rubber really met the road, moving from theory to a running process in my own terminal.
First thing's first: resources. You can't run a V8 engine on a lawnmower's gas tank. I popped open htop to get a feel for my RAM and CPU situation. With 32GB of RAM and 8 cores/16 threads, I felt pretty good about starting, but I knew the real bottleneck could be the GPU.
Installing Ollama on Ubuntu was a breeze, which I really appreciated. It's a single command, which you love to see:
# Installs Ollama on Linux
curl -fsSL https://ollama.ai/install.sh | sh
After running that, a quick ollama --version confirmed it was ready to go. My initial test was to pull a smaller model to see how it ran on the CPU alone.
ollama pull phi3Then, ollama run phi3. And... it worked! But let's be honest, the performance was, let's say, deliberate. You could practically feel the CPU cores churning away, and the tokens trickled out onto the screen. It was cool to see it running, but not exactly a "conversational" speed. This confirmed my suspicion: to do this right, I needed to get my NVIDIA GPU in the game.
Performance Reality Check
Here's what I was seeing:
| Model | Hardware | Tokens/Second | User Experience |
|---|---|---|---|
| Phi-3 | CPU only | 2-3 | "Deliberate" - watching paint dry |
| Phi-3 | RTX 3080 | 45-50 | Snappy responses |
| Llama 3 | CPU only | 0.5-1 | Time for coffee... or three |
| Llama 3 | RTX 3080 | 25-30 | Natural conversation flow |
This is where the real fun began. For Ollama to leverage the GPU on Ubuntu, it's not always automatic. You have to make sure the whole stack is in place.
GPU Setup: The Missing Pieces
NVIDIA Drivers: I had them installed, but if you don't, nvidia-smi is your moment of truth. If that command fails, you've got your first mission. The sudo ubuntu-drivers autoinstall command is usually a good, low-fuss way to handle it.
$ nvidia-smi
+-----------------------------------------------------------------------------+
| NVIDIA-SMI 535.129.03   Driver Version: 535.129.03   CUDA Version: 12.2   |
|-------------------------------+----------------------+----------------------+
| GPU  Name        Persistence-M| Bus-Id        Disp.A | Volatile Uncorr. ECC |
| Fan  Temp  Perf  Pwr:Usage/Cap|         Memory-Usage | GPU-Util  Compute M. |
+===============================+======================+======================+
| 0  NVIDIA RTX 3080     Off  | 00000000:2B:00.0 Off |                  N/A |
| 30%   45C    P8    20W / 320W |    364MiB / 10240MiB |      0%      Default |
+-------------------------------+----------------------+----------------------+
NVIDIA Container Toolkit: This was the key. Since Ollama uses containers under the hood to manage environments, you need to install the NVIDIA Container Toolkit so that the container can actually see and use the GPU. This involves adding their repository and installing a few packages.
# Add NVIDIA Container Toolkit repository
distribution=$(. /etc/os-release;echo $ID$VERSION_ID)
curl -s -L https://nvidia.github.io/nvidia-docker/gpgkey | sudo apt-key add -
curl -s -L https://nvidia.github.io/nvidia-docker/$distribution/nvidia-docker.list | sudo tee /etc/apt/sources.list.d/nvidia-docker.list

# Install the toolkit
sudo apt-get update
sudo apt-get install -y nvidia-container-toolkit
sudo systemctl restart docker
After getting that set up and restarting the Docker daemon, I ran nvidia-smi again. Everything looked good. Now for the real test. I decided to pull a more powerful model this time.
ollama pull llama3Then, the magic command:
ollama run llama3The difference was night and day. Suddenly, responses were snappy. The text flowed. The model felt alive. This wasn't just a technical demo anymore; it was a genuinely usable tool running entirely on the hardware under my desk. That was the "whoa" moment I was looking for.
My Basic "Get it Running" Flow
Here's kinda how it went down in a nutshell, and how you could probably do it too. Total setup time: about 30-45 minutes if everything goes smoothly.
Model Recommendations by Use Case
Based on my experiments, here's what I'd recommend:
Limited RAM (8-16GB)
- Phi-3: Fast and capable for basic tasks
- Mistral 7B: Good balance of performance and capability
- Llama 2 7B: Solid all-rounder
Good GPU (8GB+ VRAM)
- Llama 3 8B: My current favorite - great performance
- Mistral 7B: Runs beautifully with room to spare
- CodeLlama 7B: If you're focusing on coding tasks
Powerful Setup (24GB+ VRAM)
- Llama 3 70B: The full experience
- Mixtral 8x7B: Impressive mixture-of-experts model
- Yi 34B: Great for longer contexts
Challenges and What I Bumped Into
Model Sizes: These things can be chunky! Some models need a good bit of RAM. My setup is decent, but you've got to pay attention to those model requirements. A good habit is to run ollama list to see what you've got downloaded and their sizes.
Prompting is an Art: Just like with the big guys, getting the right answer means asking the right way. It's a skill in itself, and I'm still figuring that bit out.
Which Model When?: So many models, each good at different things (coding, chat, summarization). It's a bit of trial and error to find your favorites for different tasks. Phi-3 is great for quick tasks on low-spec hardware, while Llama 3 is a fantastic all-rounder if you have the GPU power.
Quick Troubleshooting Tips
- nvidia-smi not found? Run
sudo ubuntu-drivers autoinstalland reboot - Ollama using CPU instead of GPU? Check
docker run --gpus allsupport with:docker run --rm --gpus all nvidia/cuda:11.0-base nvidia-smi - Out of memory errors? Try smaller models or quantized versions:
ollama pull llama3:7b-q4_0 - Model won't download? Check disk space - some models need 20GB+ free space
What I Used (Mostly)
- Ollama: For running the models locally on my Ubuntu box
- Llama 3 / Phi-3: Seemed like good starting points, not too massive but very capable
- Python & LangChain (a little bit): Started looking into how LangChain can talk to these local models because that opens up building actual little apps
Was it Worth It? Heck Yeah
Even though it's just a personal sandbox, understanding what it takes to run these LLMs locally has been super insightful. It's one thing to use an API, but it's quite another to configure the drivers, manage the models, and see the performance difference firsthand. It definitely gives me a different perspective on the tech we work with every day.
Next Steps for Me
Probably dive deeper into using LangChain with a local model for a simple RAG (Retrieval Augmented Generation) setup with my own documents. That seems like the next fun challenge. Now that the environment is stable, I might try out a more visual tool like LM Studio or GPT4All to compare the experience.
Actually, I'm already working on something practical - using this setup for personal finance analysis. Imagine having an AI that can categorize your expenses and give you insights, all while keeping your financial data completely private on your own machine. Stay tuned for Part 2!
Getting Started Yourself
If you're in dev and curious about LLMs, I'd say give it a shot. It's easier than you might think to get something basic running, and it's a cool learning curve. Just pick a tool, grab a model, and see what happens!
- Minimum specs: 16GB RAM, 6GB+ VRAM GPU (or patience for CPU-only)
- Install Ollama: That one-liner command above
- Start small: Try Phi-3 first, then work up to larger models
- Join the community: The Ollama Discord is super helpful
Helpful Resources
- Ollama Model Library - Browse available models and their requirements
- NVIDIA Container Toolkit Docs - Official installation guide
- LangChain Local LLM Guide - For when you're ready to build apps
Opinions expressed by DZone contributors are their own.
Comments