Packaging Spring Boot Apps With External Dependencies Using Maven
Incorporate external dependencies for your Spring Boot app with a helping hand from Maven. You can package everything together, making it attractive for microservices.
Join the DZone community and get the full member experience.
Join For FreeSpring Boot has simplified the deployment of Java-based web/API applications drastically. It has eliminated the process of deploying a WAR file into the web container provided by Tomcat or any other application servers. It has brought in a new paradigm shift where the container libraries (like Tomcat/Ubuntu/Jetty) are themselves embedded along with application classes/JAR within the fat Spring Boot JAR — thus making it a truly standalone application and a candidate for microservice development.
But, there are few minor challenges, which a spring boot developer would face, when deploying the Spring boot application.
How do we ship the external configuration files like application.properties, configuration XML files, etc. along with the Spring Boot JAR?
How can we copy the start-up script with VMs and other parameters to start the application to deployment environments?
Should we manually create log directories in the new environment and make the changes in the log4j.xml/log4j.properties of the application to point to the log directory?
All the above would need manual configuration changes. Once we address the above concerns, the following questions would be addressed, automatically
Deploying the application to DEV/SIT/UAT/PROD environments via Continuous Integration/Continuous Deployment (CI/CD) infrastructure like Jenkins without any additional configuration in the deployment nodes.
Ship microservices with external configurations or dependencies, packed into one deployable artifact to any new developer, who can just run it by using a startup script.
The Solution
Maven has the ability to bundle all the artifacts into a directory and create a .zip or a .tar file for easy shipment using the maven-assembly-plugin. We will have to leverage this feature to programmatically organize the dependent artifacts to support the Spring Boot JAR to run seamlessly.
I will be walking through a Sample Spring Boot application to demonstrate how it can be packaged.
The following diagram depicts how the application-related artifacts are structured to be packaged.

Spring Boot Application Packaging Steps
The following steps would illustrate the Spring Boot application packaging using the sample spring boot application downloaded from spring.io.
Step 1: Download the Sample Spring Boot Project
a) Download the sample Spring Boot Application from spring.io.
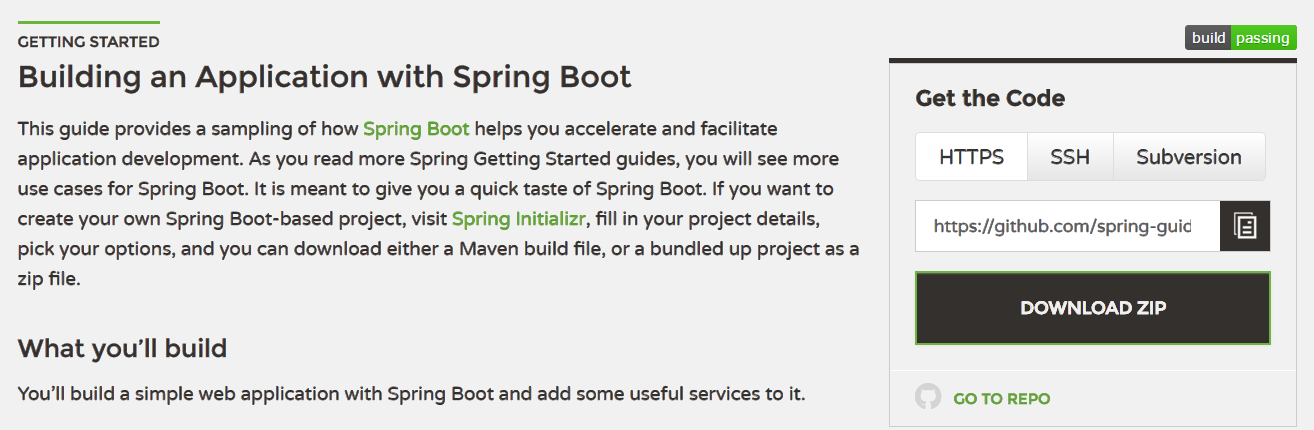
Next, extract the ZIP file and consider the directory “complete.”
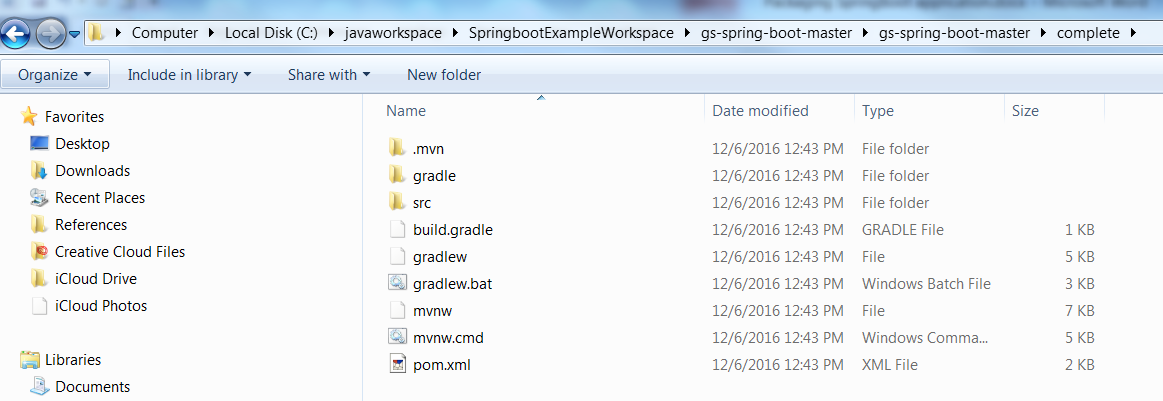
Retain only the “src” directory and pom.xml and delete the other files from the “complete” directory to eliminate unnecessary noise.
Rename “complete” directory to “gs-spring-boot” to be more meaningful and to be consistent with the artifact id of the pom.xml file.
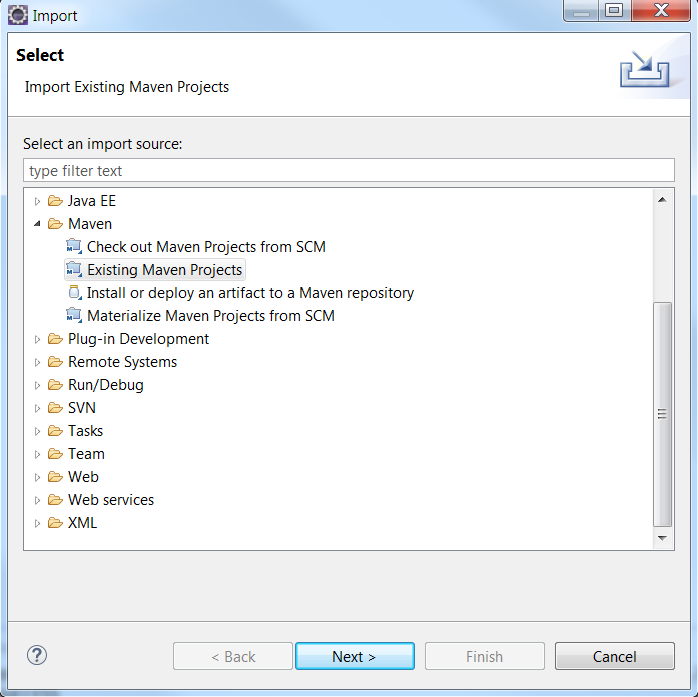
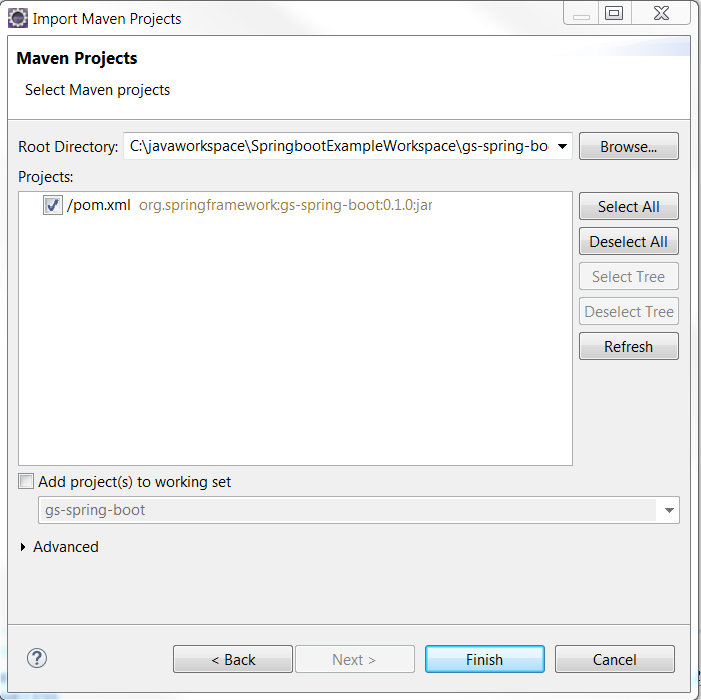
Step 2: Import the Project Into Eclipse
Create a new Java workspace and import the project as “Existing Maven Project.”
Step 3: Add Configuration Files to the Project
We will add additional configuration files and modify code to demonstrate the usage of configuration files and later externalize them from the gs-spring-boot project.
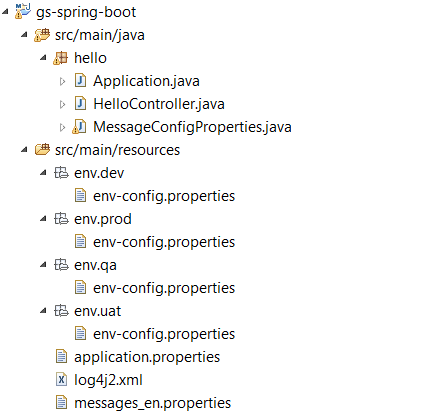
a) Add common configuration files under src/main/resources
i) application.properties [redefine server ports and other configurations].
ii) log4j2.xml [logging configurations].
iii) messages_en.properties [greetings message of the sample application externalized].
b) Add environment specific configurations. E.g. Database connection details. Create an env directory under src/main/resources. Create the directories dev, qa, uat, and prod inside env. Place environment-specific files in each of the directories. In our example, it's env-config.properties, this has database connection pool details.
Setting the environment specific file in startup script will be illustrated, later.
Files and directory structure is shown below.
c) Configuration file contents
Configuration file contents are shown below.
i) application.properties
# Server Port Configuration
server.port=8090

#Management Configuration
management.port=9001
management.context-path=/management


# Logging Configuration
logging.config=classpath:log4j2.xml
logging.level.org.springframework.web=ERROR

#Access log configuration
server.tomcat.accessLogEnabled=true
server.tomcat.basedir=../logs
server.tomcat.accessLogPattern=%t %s %a %D "%r" %b
ii) messages_en.properties
#Spring boot greeting message
message.greetings=Greetings from Spring Boot!
iii) log4j2.xml
<?xml version="1.0" encoding="UTF-8"?>
 <Configuration status="DEBUG">
<Properties>
      <Property name="log-path">../logs</Property>
</Properties>
<Appenders>
 <RollingFile name="SpringBootRollingFile" fileName="${log-path}/gs-spring-boot-app.log"
        filePattern="${log-path}/gs-spring-boot-app.log-%i.gz" >
      <PatternLayout>
    <pattern>%d{yyyy-MM-dd HH:mm:ss,SS} %-5p [%t] %-17c{2} (%13F:%L) %3x  -%X{uniqueIdentifier} %m%n</pattern>
      </PatternLayout>
      <Policies>
   <SizeBasedTriggeringPolicy size="10 MB" />
      </Policies>
       <DefaultRolloverStrategy max="10"/>
   </RollingFile>
</Appenders>
<Loggers>
   <Root level="debug" additivity="false">
  <AppenderRef ref="SpringBootRollingFile"/>
   </Root>
   <Logger name="hello" level="DEBUG" additivity="false">
     <appender-ref ref="SpringBootRollingFile" level="DEBUG"/>
   </Logger>
</Loggers>
</Configuration>
Modify the pom.xml in the gs-spring-boot package to add a dependency to log4j2 and exclude the default logging dependency.
<dependency>
  <groupId>org.springframework.boot</groupId>
  <artifactId>spring-boot-starter-web</artifactId>
  <exclusions>
    <exclusion>
      <groupId>org.springframework.boot</groupId>
      <artifactId>spring-boot-starter-logging</artifactId>
    </exclusion>
  </exclusions>
</dependency>
<dependency>
  <groupId>org.springframework.boot</groupId>
  <artifactId>spring-boot-starter-log4j2</artifactId>
</dependency>
iv) env-config.properties [there will be multiple files, pertaining to each environment].
#Database Configuration

spring.datasource.url=jdbc:oracle:thin:@server1:9000:SERVICE1
spring.datasource.username=user1
spring.datasource.password=password

spring.datasource.maxActive=100
spring.datasource.minIdle=10
spring.datasource.maxIdle=10
spring.datasource.initialSize=50
spring.datasource.validationQuery=select 1 from dual
spring.datasource.testOnBorrow=true
Step 4: Modify the Code to Leverage Externalized Configuration Properties
a) Add a class MessageConfigProperties.java, which encapsulates the properties of messages_en.properties.
package hello;

import org.springframework.boot.context.properties.ConfigurationProperties;
import org.springframework.context.annotation.ComponentScan;
import org.springframework.context.annotation.Configuration;

@Configuration
@ConfigurationProperties(prefix="message",locations="classpath:messages_en.properties")
public class MessageConfigProperties {

private String greetings;

public String getGreetings() {
return greetings;
}

public void setGreetings(String greetings) {
this.greetings = greetings;
}

}
b) Modify HelloController.java to Autowire MessageConfigProperties and set the greeting message from the externalized file, messages_en.properties. Also log the message at Log level, INFO.
package hello;

import org.apache.logging.log4j.LogManager;
import org.apache.logging.log4j.Logger;
import org.springframework.beans.factory.annotation.Autowired;
import org.springframework.web.bind.annotation.RequestMapping;
import org.springframework.web.bind.annotation.RestController;

@RestController
public class HelloController {


private static final Logger logger = LogManager.getLogger(HelloController.class);

@Autowired
MessageConfigProperties messageProperties;

    @RequestMapping("/")
    public String index() {

    String greetingsMessage = messageProperties.getGreetings();

    logger.info("Inside index() method, returning :"+greetingsMessage);

    //return "Greetings from Spring Boot!";
        return greetingsMessage;
    }

}
Step 5: Create Startup Scripts
Create a directory bin under src/main/resources and add the startup scripts.
a) start.bat
echo off
set ENV=%1
IF [%1]==[] (
set ENV=dev
)
java -Xms256m -Xmx512m -server -Xloggc:../logs/gc.log -verbose:gc -XX:+PrintGCDetails -XX:+HeapDumpOnOutOfMemoryError -XX:HeapDumpPath=../logs -Dcom.sun.management.jmxremote -Dcom.sun.management.jmxremote.port=9888 -Dcom.sun.management.jmxremote.ssl=FALSE -Dcom.sun.management.jmxremote.authenticate=FALSE -Dlogging.config=../config/log4j2.xml -Dspring.config.location=../config/application.properties,../config/messages_en.properties,../config/env/%ENV%/env-config.properties -jar ../lib/gs-spring-boot-0.1.0.jar
b) start.sh
ENV=$1
if [ $ENV == '' ]
then
$ENV = "dev";
fi
java -Xms256m -Xmx512m -server -Xloggc:../logs/gc.log -verbose:gc -XX:+PrintGCDetails -XX:+HeapDumpOnOutOfMemoryError -XX:HeapDumpPath=../logs -Dcom.sun.management.jmxremote -Dcom.sun.management.jmxremote.port=9888 -Dcom.sun.management.jmxremote.ssl=FALSE -Dcom.sun.management.jmxremote.authenticate=FALSE -Dlogging.config=../config/log4j2.xml -Dspring.config.location=../config/application.properties,../config/messages_en.properties,../config/env/$ENV/env-config.properties -jar ../lib/gs-spring-boot-0.1.0.jar
You will see that the configurations are now being fetched from the config directory. The environment specific file is loaded from the /config/env/<ENV> directory. ENV is passed from command line. If nothing is passed, then dev is considered as the default environment.
Passing the right environment can be done using -Dspring.profiles.active too.
The application JAR is loaded from lib directory. Logs are being written to logs directory
Step 6: Package the Application Using the Maven-Assembly-Plugin
a) Create the distribution, assembly file.
Create a distribution directory under src/main/resources. Place the assembly xml, gs-spring-boot- distribution.xml in it.
<assembly>
  <formats>
    <format>tar</format>
    <format>zip</format>
  </formats>
   <fileSets>
 <fileSet>
      <directory>src/main/resources/bin</directory>
      <outputDirectory>bin</outputDirectory>
      <includes>
        <include>start.sh</include>
         <include>start.bat</include>
      </includes>
      <fileMode>0755</fileMode>
    </fileSet>
     <fileSet>
      <directory>src/main/resources</directory>
      <outputDirectory>config</outputDirectory>
      <includes>
        <include>*.properties</include>
        <include>*.xml</include>
        <include>env/dev/*</include>
        <include>env/qa/*</include>
        <include>env/uat/*</include>
        <include>env/prod/*</include>
      </includes>
     </fileSet>
       <fileSet>
        <directory>target</directory>
        <outputDirectory>lib</outputDirectory>
        <includes>
          <include>*.jar</include>
    </includes>
   </fileSet>
   <fileSet>
<directory>src/main/resources</directory>
<outputDirectory>logs</outputDirectory>
<fileMode>0755</fileMode>
<excludes>
          <exclude>**/*</exclude>
        </excludes>
  </fileSet>
  </fileSets>
</assembly>
The gs-spring-boot-distribution.xml has the instructions to assemble the Application by creating dependent directories (config, lib, bin and logs) and copying respective files into them. It finally creates a tar and a zip file for distribution.
b) Modify pom.xml to configure the assembly plugin.
<plugin>
    <groupId>org.apache.maven.plugins</groupId>
    <artifactId>maven-assembly-plugin</artifactId>
    <version>2.2-beta-1</version>
    <configuration>
    <descriptor>src/main/resources/distribution/gs-spring-boot-distribution.xml</descriptor>
<finalName>gs-spring-boot-distribution</finalName>
    </configuration>
    <executions>
      <execution>
  <phase>package</phase>
  <goals>
       <goal>single</goal>
  </goals>
      </execution>
    </executions>
</plugin>
Step 7: Build the Maven Project
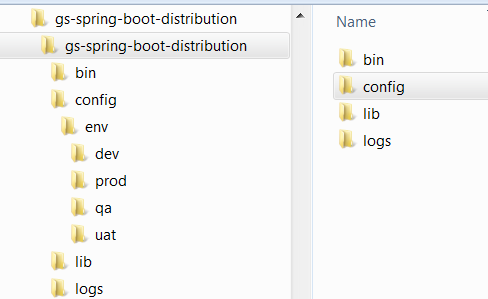
Build the Maven project and you will see the distributions files (gs-spring-boot-distribution.tar and gs-spring-boot-distribution.zip) under target directory. The following image shows the extracted ZIP/TAR file
Step 8: Running the Application
Developers can run the self-contained application by performing three simple steps in any environment.
1) Copy the TAR/ZIP file to the deployable node instance (DEV/SIT/UAT/PROD).
2) Untar the TAR file by issuing the following command.
tar –xvf gs-spring-boot-distribution.tar
For windows, unzip the gs-spring-boot-distribution.zip file
3) Go to the bin directory and invoke the start.sh file to run the application, bypassing the right environment as command line parameter.
The above steps can be automated through CI (Jenkins/Hudson).
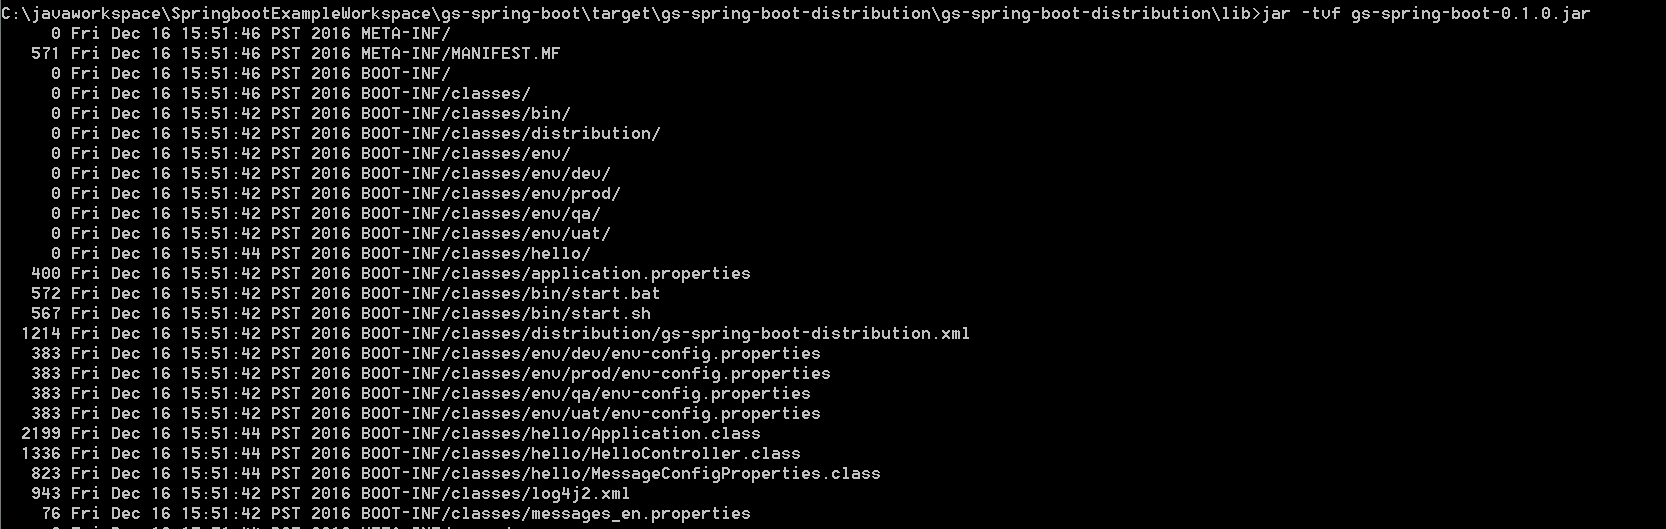
Side note: All the external configuration files will be packaged in the JAR file, too. But the configuration files in the externalized config directory are always considered by the ClassLoader as they are passed as the system parameter in the startup script, using the system parameter, -Dspring.config.location.
But, you can exclude them by adding the following under the build element in pom.xml
<resources>
  <resource>
    <directory>src/main/resources</directory>
    <excludes>
      <exclude>**/*</exclude>
    </excludes>
    <filtering>false</filtering>
  </resource>
</resources>
On the downside, you will not be able to run the application from Eclipse, just by running “Application.java” because the configuration files will not be copied to the target/classes directory. However, exclusion of files can be ignored.
Step 9: Testing the Application
Open the web browser and hit.
http://localhost:8090
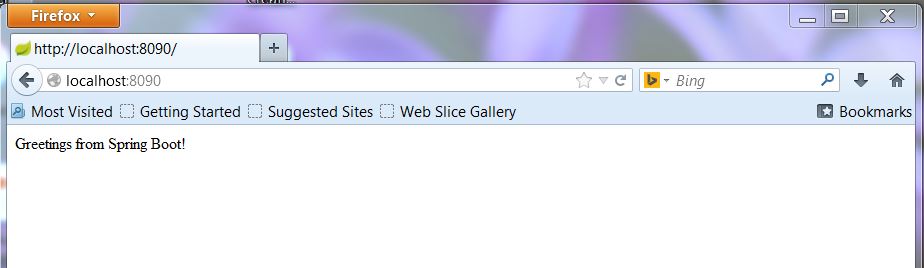
The app returns “Greetings from Spring Boot!”
Note: The server port was set as 8090 in application.properties, overriding the default port 8080.
Happy programming!
Opinions expressed by DZone contributors are their own.
Comments