Publish/Subscribe Architecture Design Pattern With RabbitMQ Using Mule Application
In this article, we will demonstrate how to implement Mule applications with Pub/Sub design patterns using RabbitMQ as a message queuing broker.
Join the DZone community and get the full member experience.
Join For FreeIn this article, we will demonstrate how to implement Mule applications with pub-sub design patterns. Here we will be using RabbitMQ as a message queuing broker.
- Pub/Sub architecture: The publish-subscribe pattern, also known as Pub/Sub, is an architectural design pattern that provides a framework for exchanging messages between publishers and subscribers. This pattern involves the publisher and the subscriber relying on a message broker that relays messages from the publisher to the subscribers.
- RabbitMQ: It is an open-source and platform-independent message-broker software that originally implemented the Advanced Message Queuing Protocol. It has since been extended with a plug-in architecture to support Streaming Text Oriented Messaging Protocol and MQ Telemetry Transport. In MuleSoft, we will use an AMQP connector for the integration.
Prerequisites
We will be using the tools below to achieve this integration scenario. This is limited to Windows 64-bit version operating system. Erlang is dependency software to be installed before RabbitMQ.
- Erlang 24.3.4
- RabbitMQ 3.10.5
- Mule Anypoint Studio 7.11 or the latest
- Mule Anypoint platform account
Installation/Setup
We will be performing the installation and configuration of RabbitMQ from the beginning, along with the dependency.
Erlang Installation
Once Erlang software is downloaded, install it by following the steps below.
- Double click on otp_win64_24.3.4.exe and click on "Next."
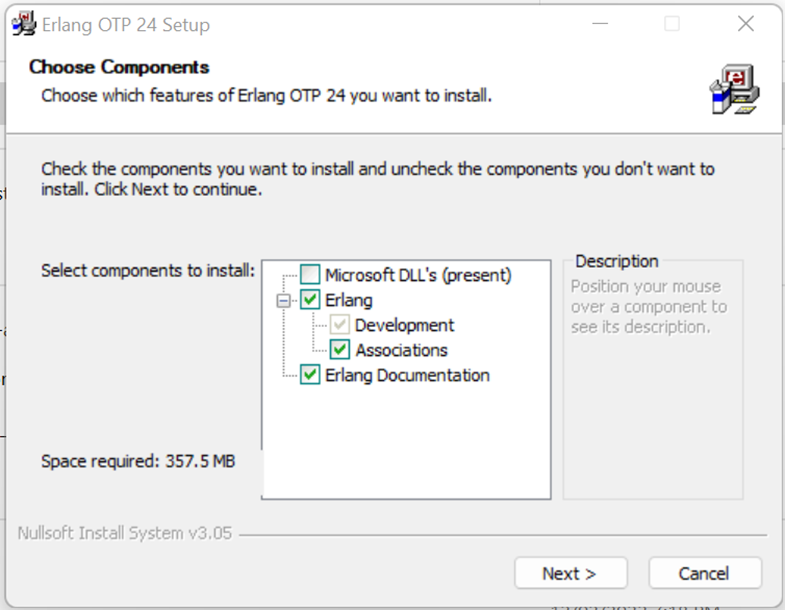
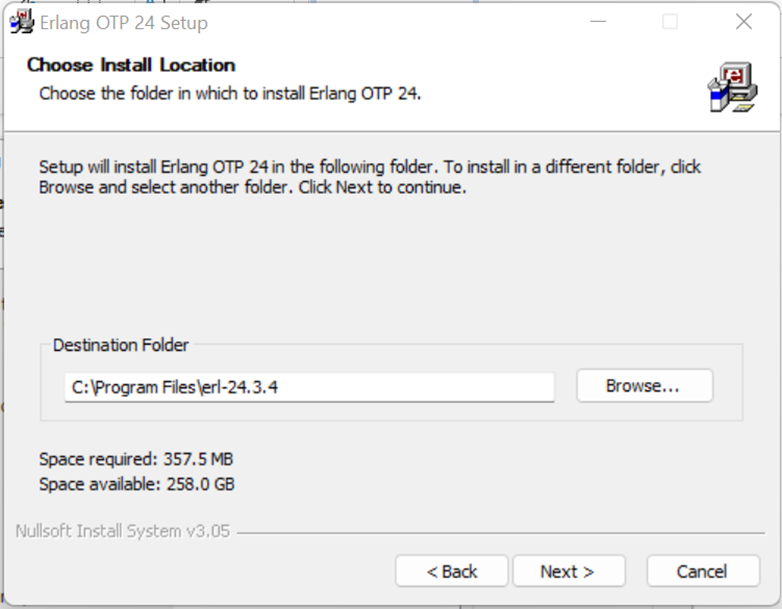
- Choose the path to install and click on "Install."
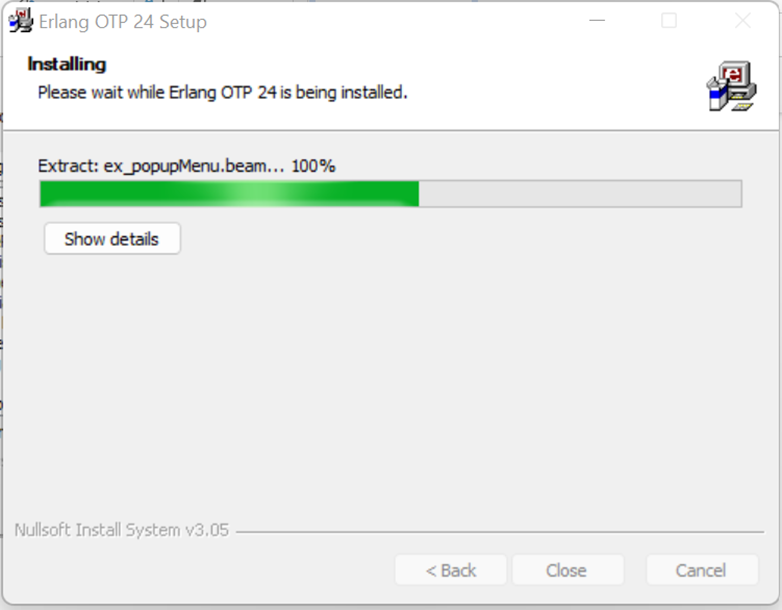
- Click on "Next & Install." Then you should see a window as below. Once it completes 100% then we can click on the close button.
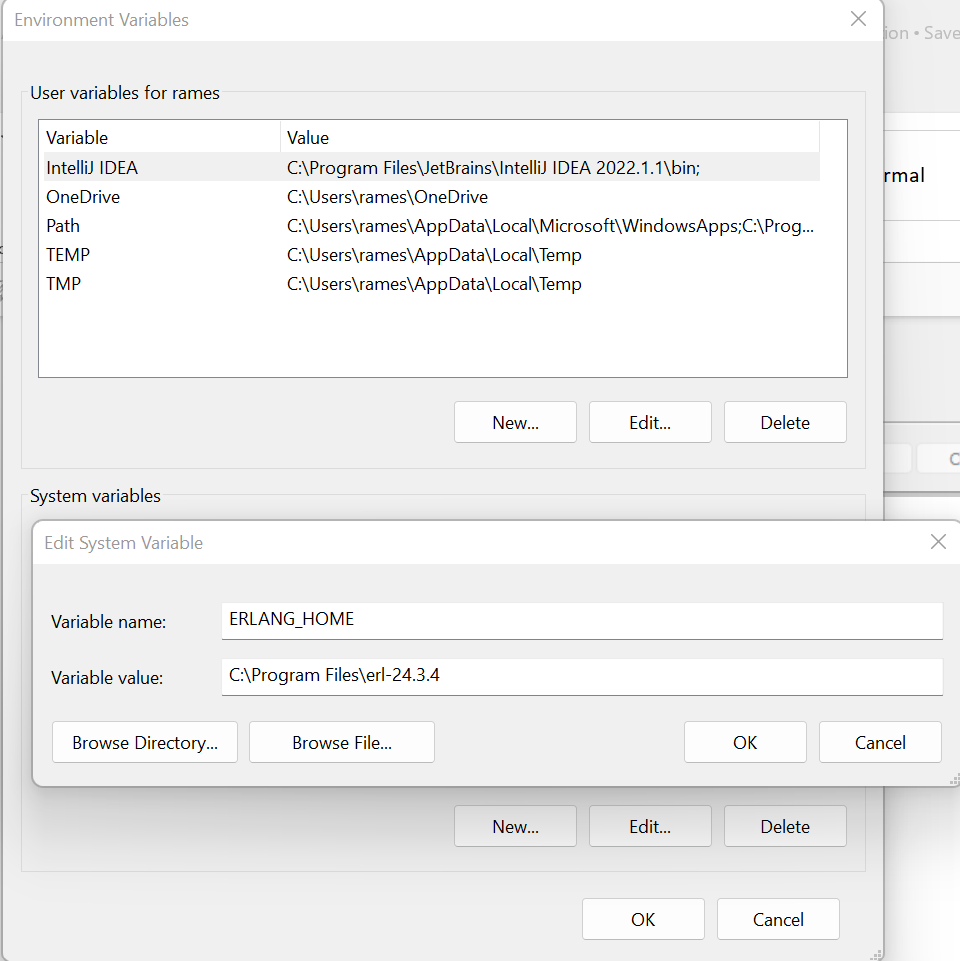
- Once the installation is successful, then set the environment variable for the Erlang installed directory as below. This completes the installation of Erlang.
RabbitMQ Installation
Once RabbitMQ software is downloaded, install it by following these steps.
- Double click on rabbitmq-server-3.10.5.exe and click on "Next."
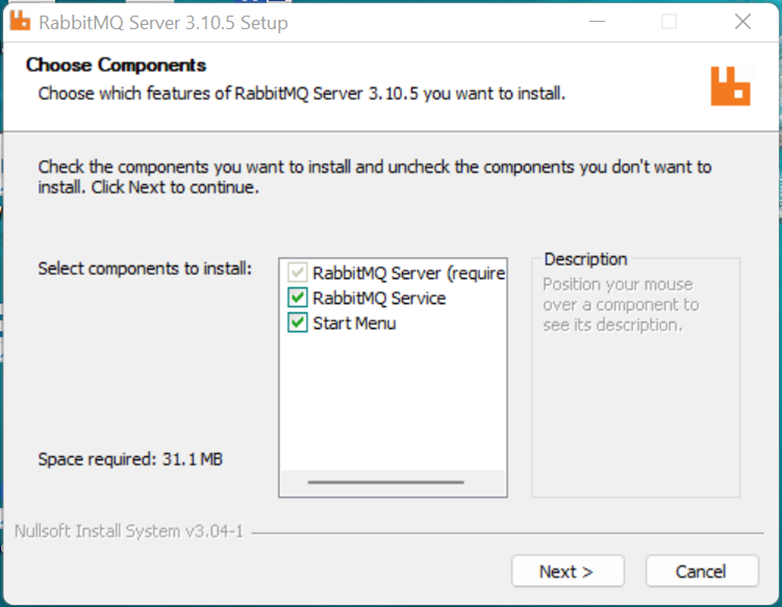
- Choose the path to install and click on "Install."
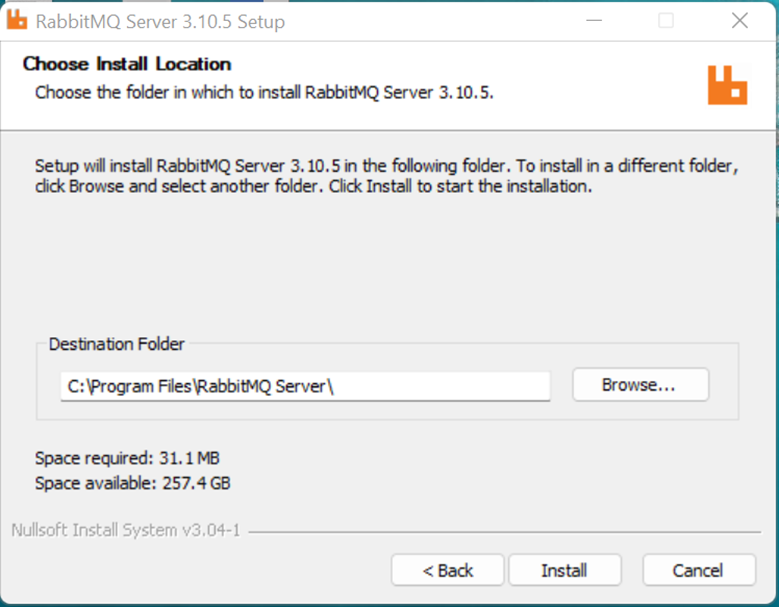
- Click on "Next" and finish.
- Once the installation is completed, open the command prompt and go to "C:\Program Files\RabbitMQ Server\rabbitmq_server-3.10.5\sbin." Execute the below command.
rabbitmq-plugins.bat enable rabbitmq_management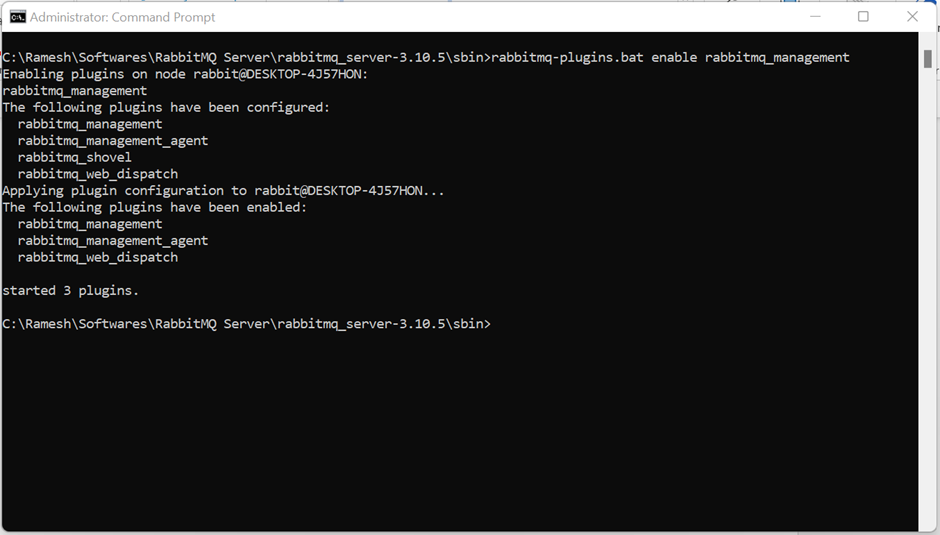
- After the above, execute the command
rabbitmq-plugins enable rabbitmq_shovel rabbitmq_shovel_management. You should then see this:

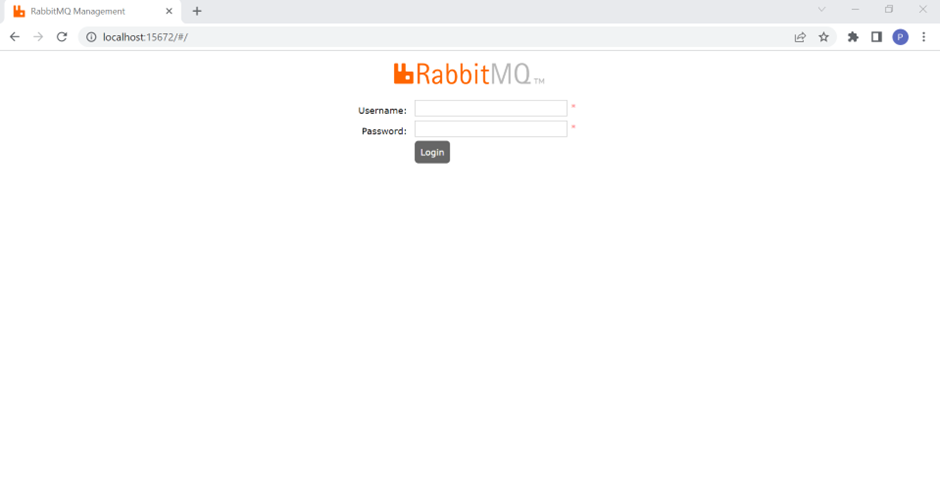
We are finished with the installation and setup. This can be verified by clicking on http://localhost:15672 (default credentials: guest/guest).
After a successful login, for the integration purpose, a new user (admin/admin) is created with a dedicated virtual host as "MuleIntDev."
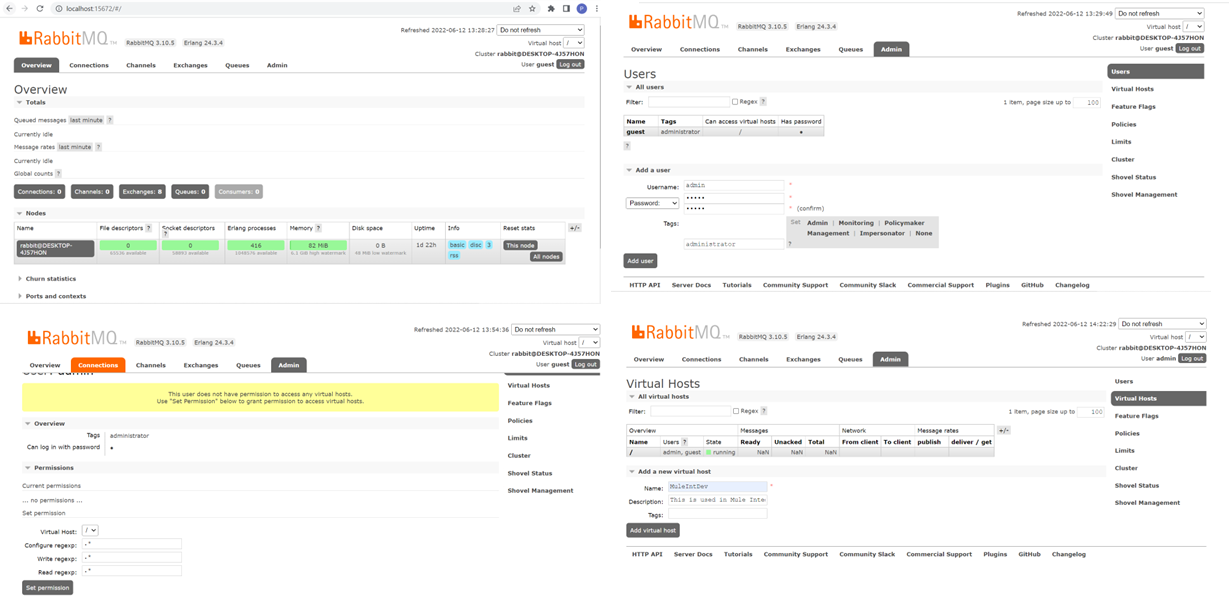
We are finished with the installation and configuration of RabbitMQ.
Mule Application Implementation
In this application, we will use an AMQP connector to publish and subscribe messages from RabbitMQ. One flow will publish a message into the exchange and another flow will consume the message from the queue.
AMQP Operations
It has different operations and a short description of each of them is below.
- Publish: This is used to publish the message.
- Consume: This is used to subscribe to the message, but it will not create any active consumer automatically upon application deployment. This can't be used as the source in a flow. The flow can only be executed using Flow Reference, etc.
- Listener: This is used to subscribe to the message. It will create an active consumer automatically upon application deployment.
- Publish consume: Send a message to an AMQP Exchange and wait for a response either to the provided replyTo destination or to a temporary destination created dynamically.
- Ack: This is used to ACK a delivered AMQP message.
- Reject: This is used to reject a delivered AMQP message.
After creating a new Mule application, drag and drop HTTP listener, and then add module "AMQP" as below.
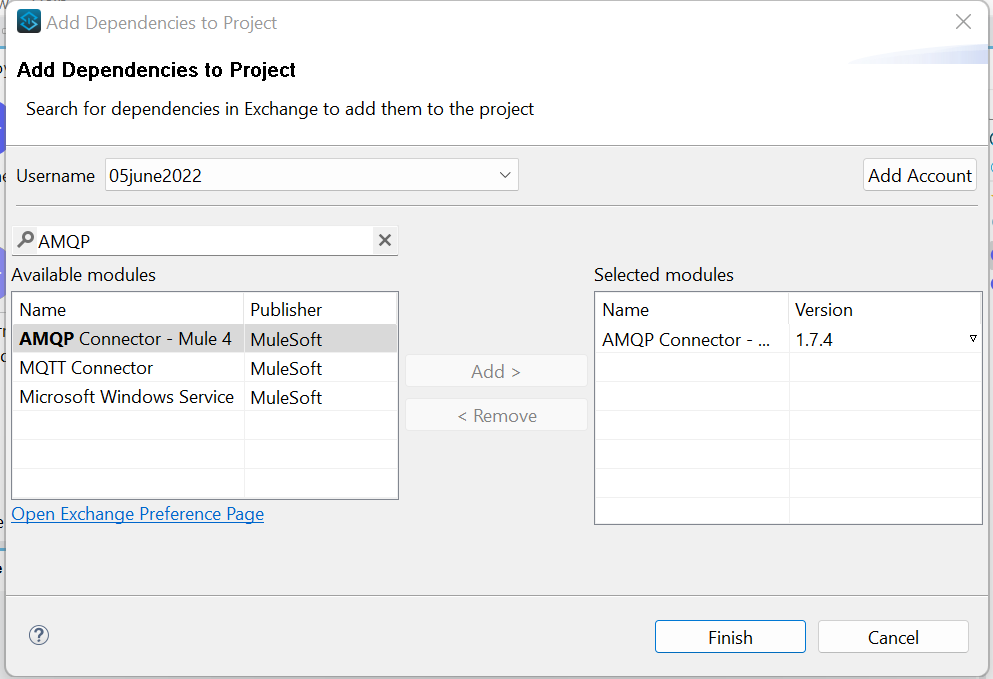
Out of the previous list of AMQP connector operations, for this article, we will use the Publish and Listener operations.
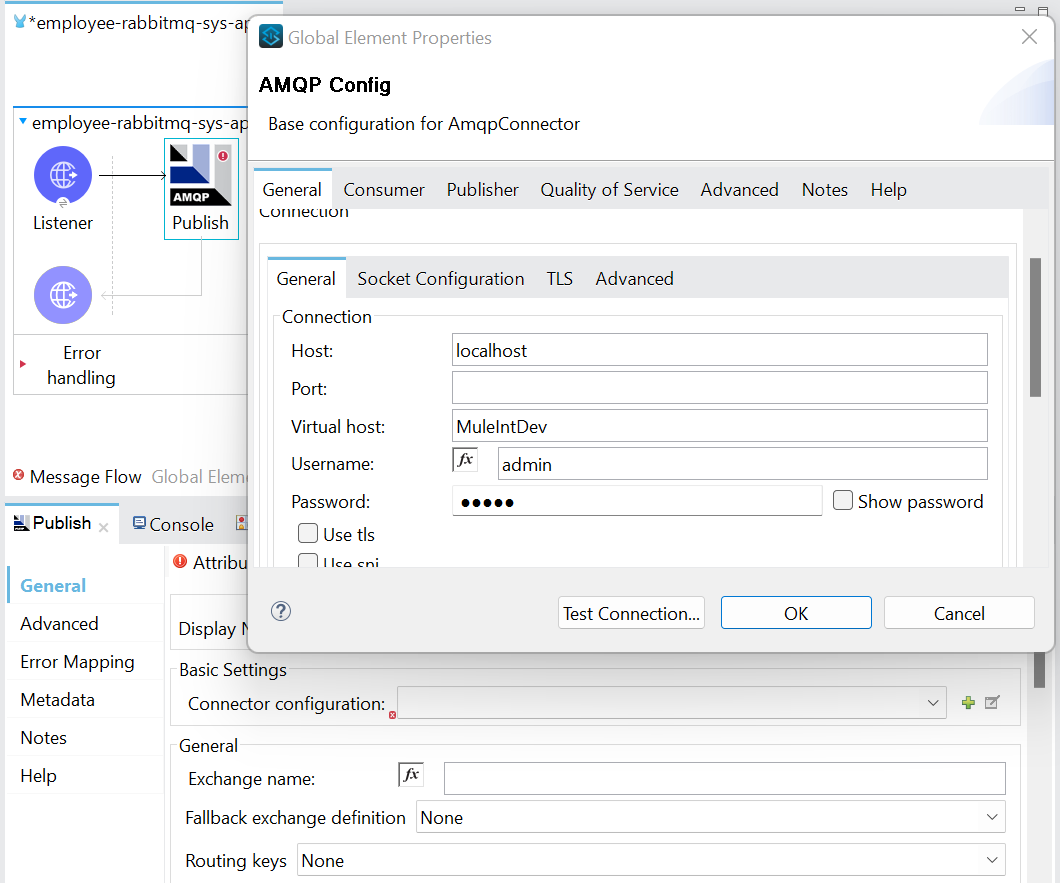
Now drag and drop the Publish operation into the Message Flow surface. Then configure the AMQP as below.
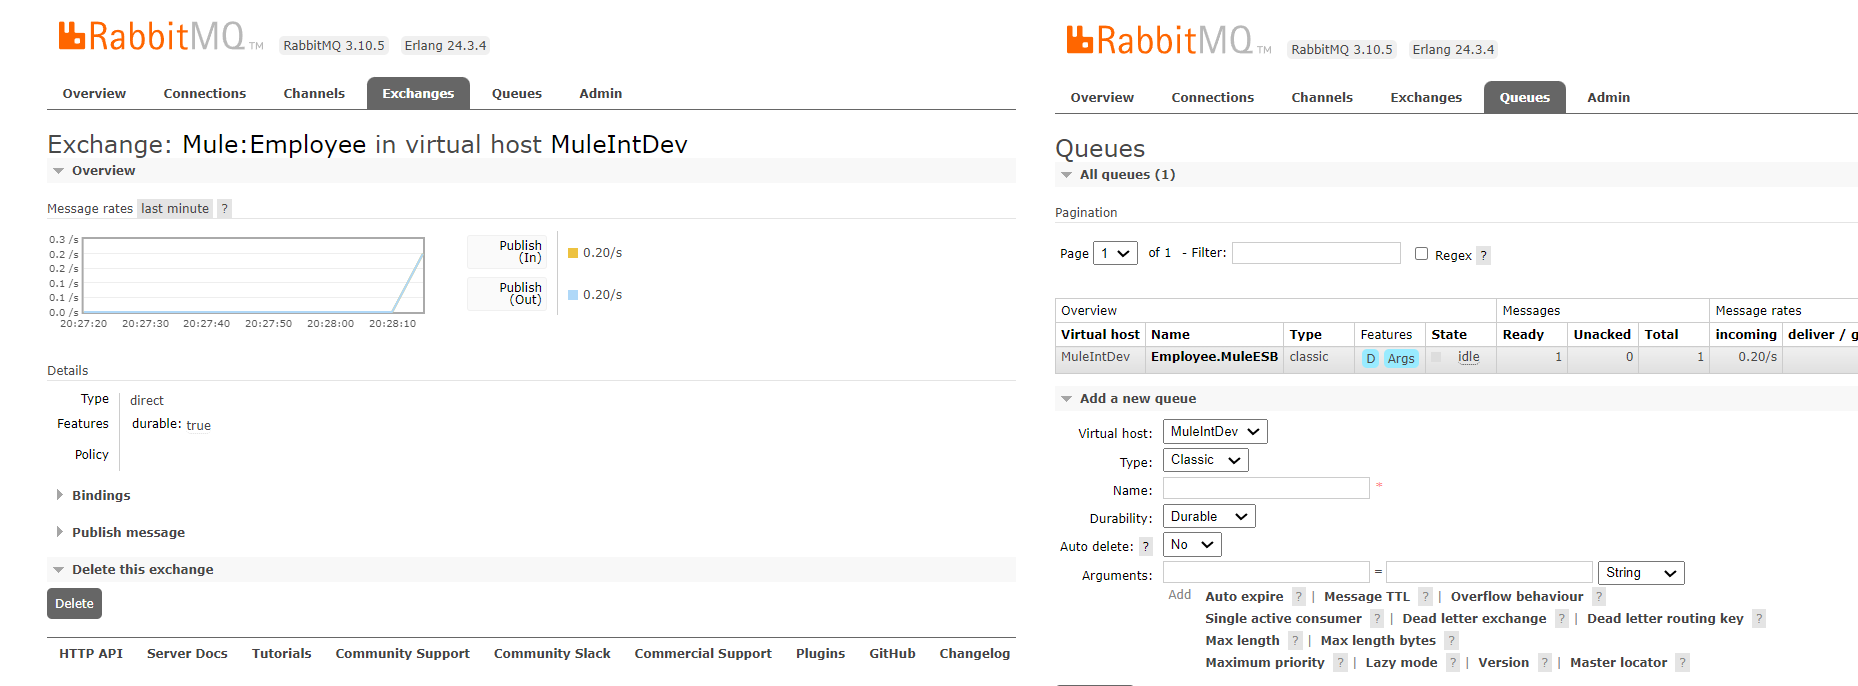
Create an Exchange in the RabbitMQ portal as below.
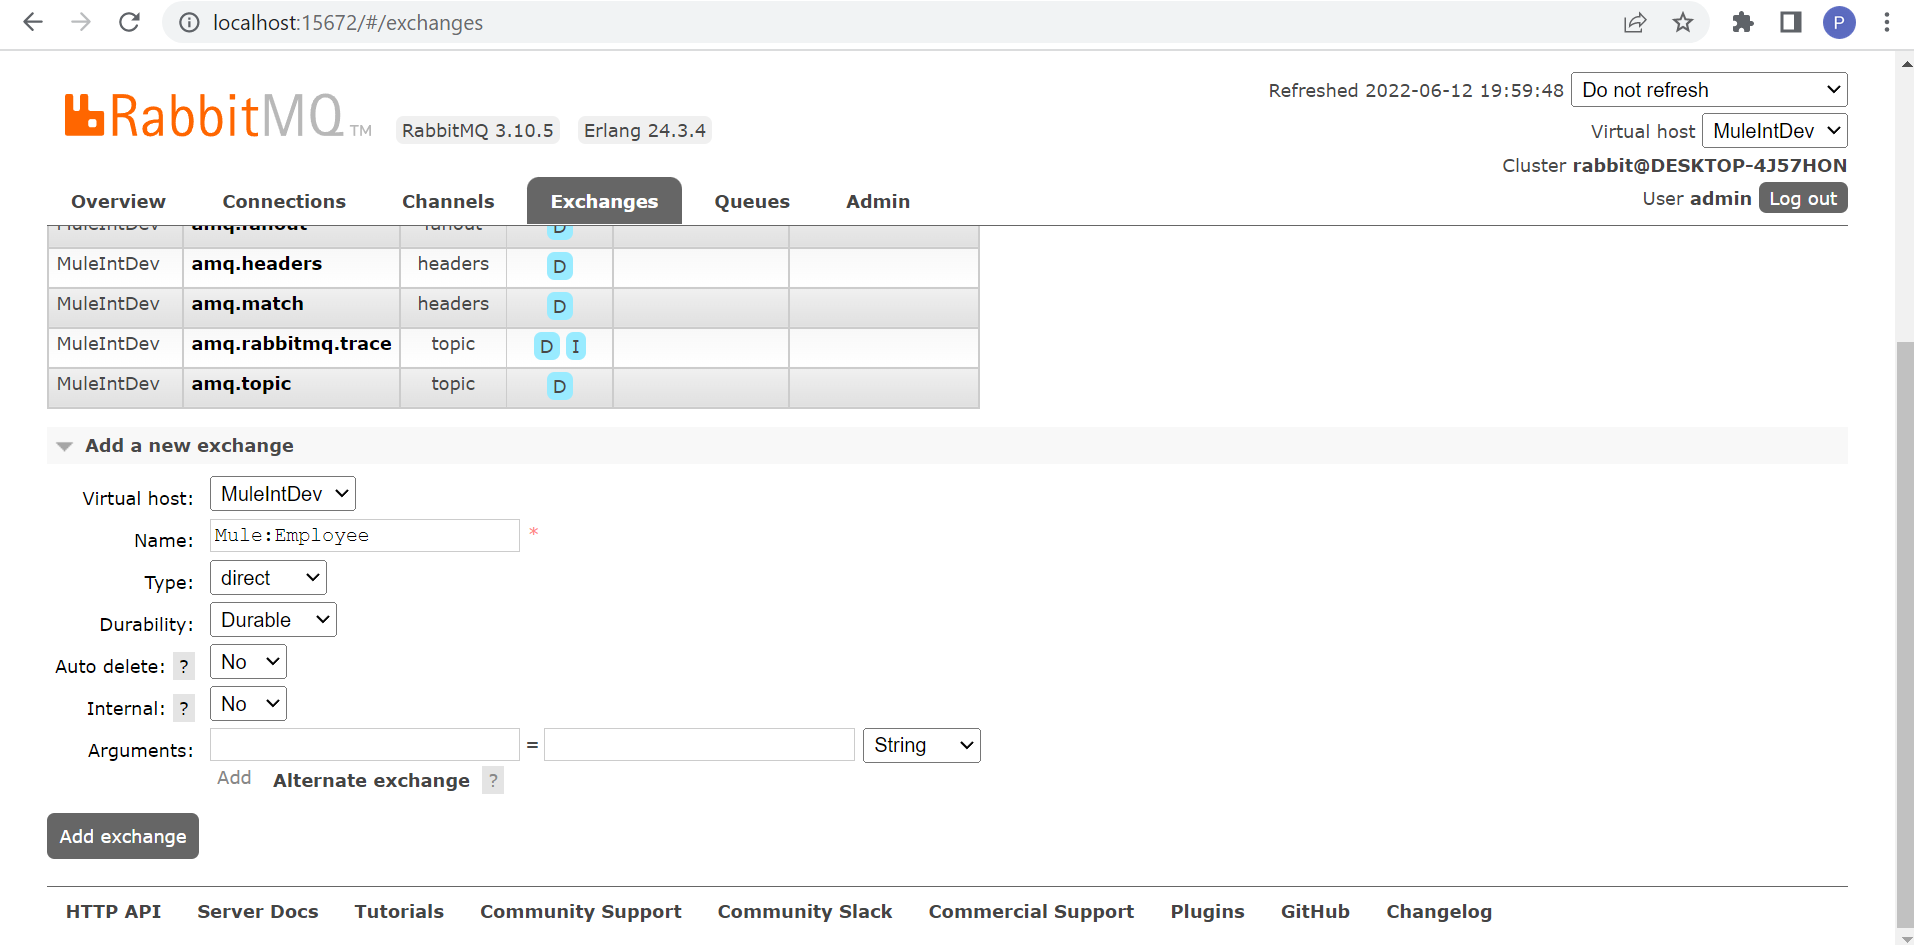
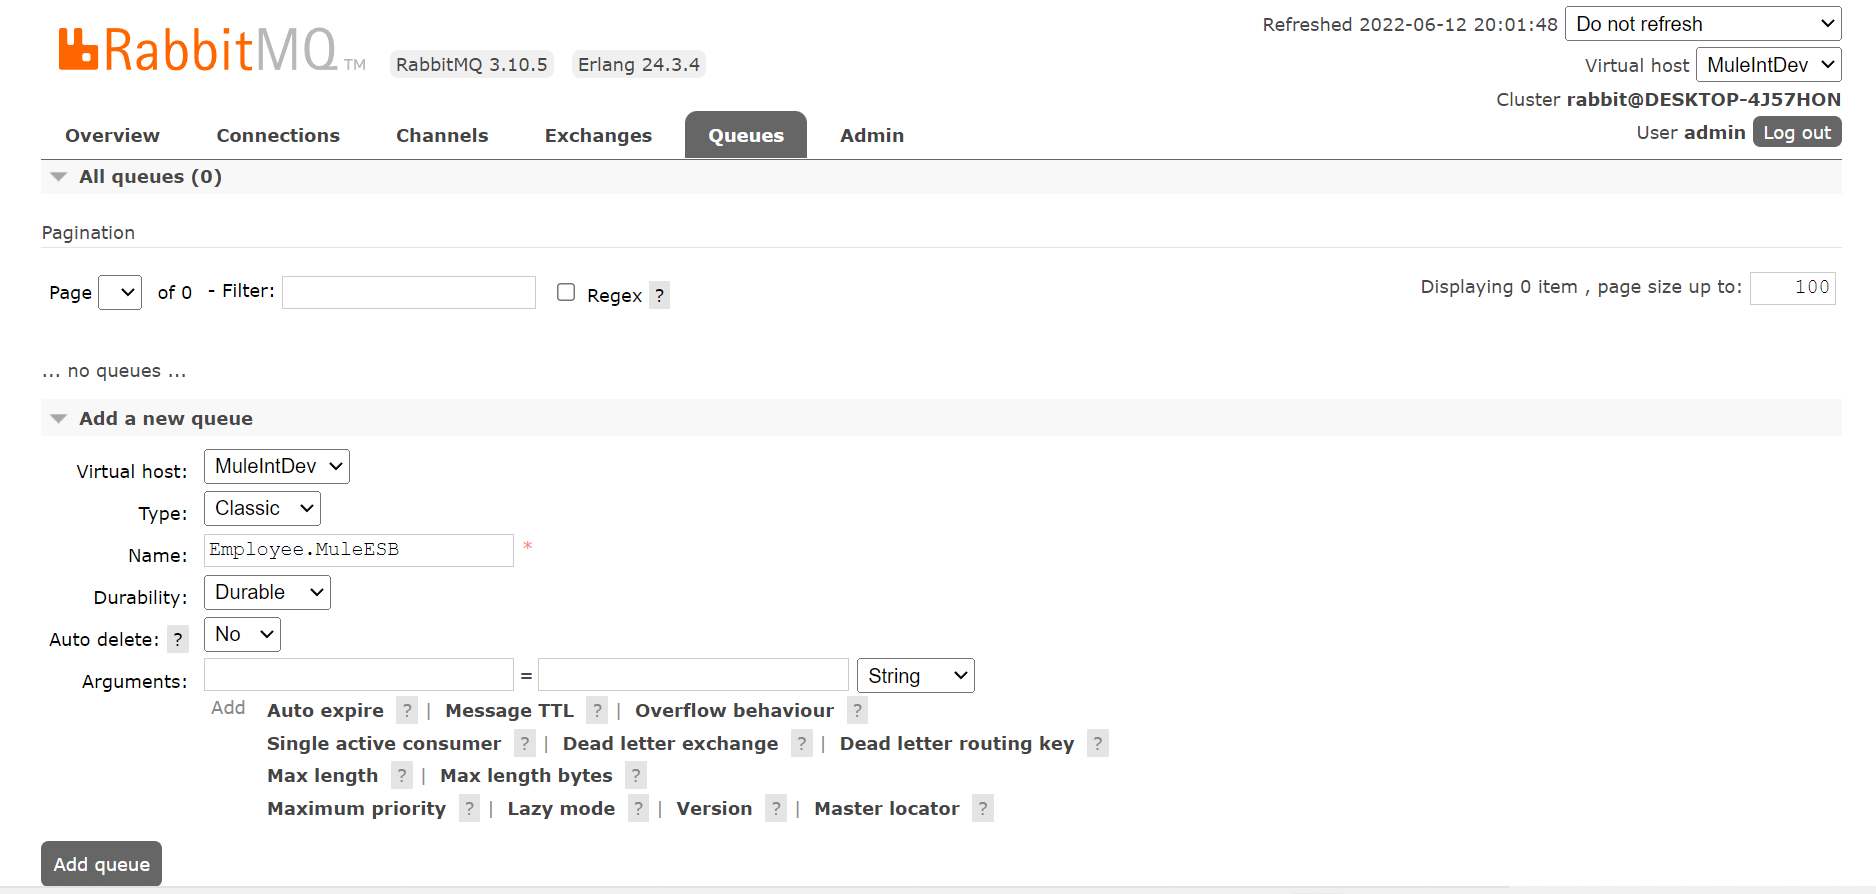
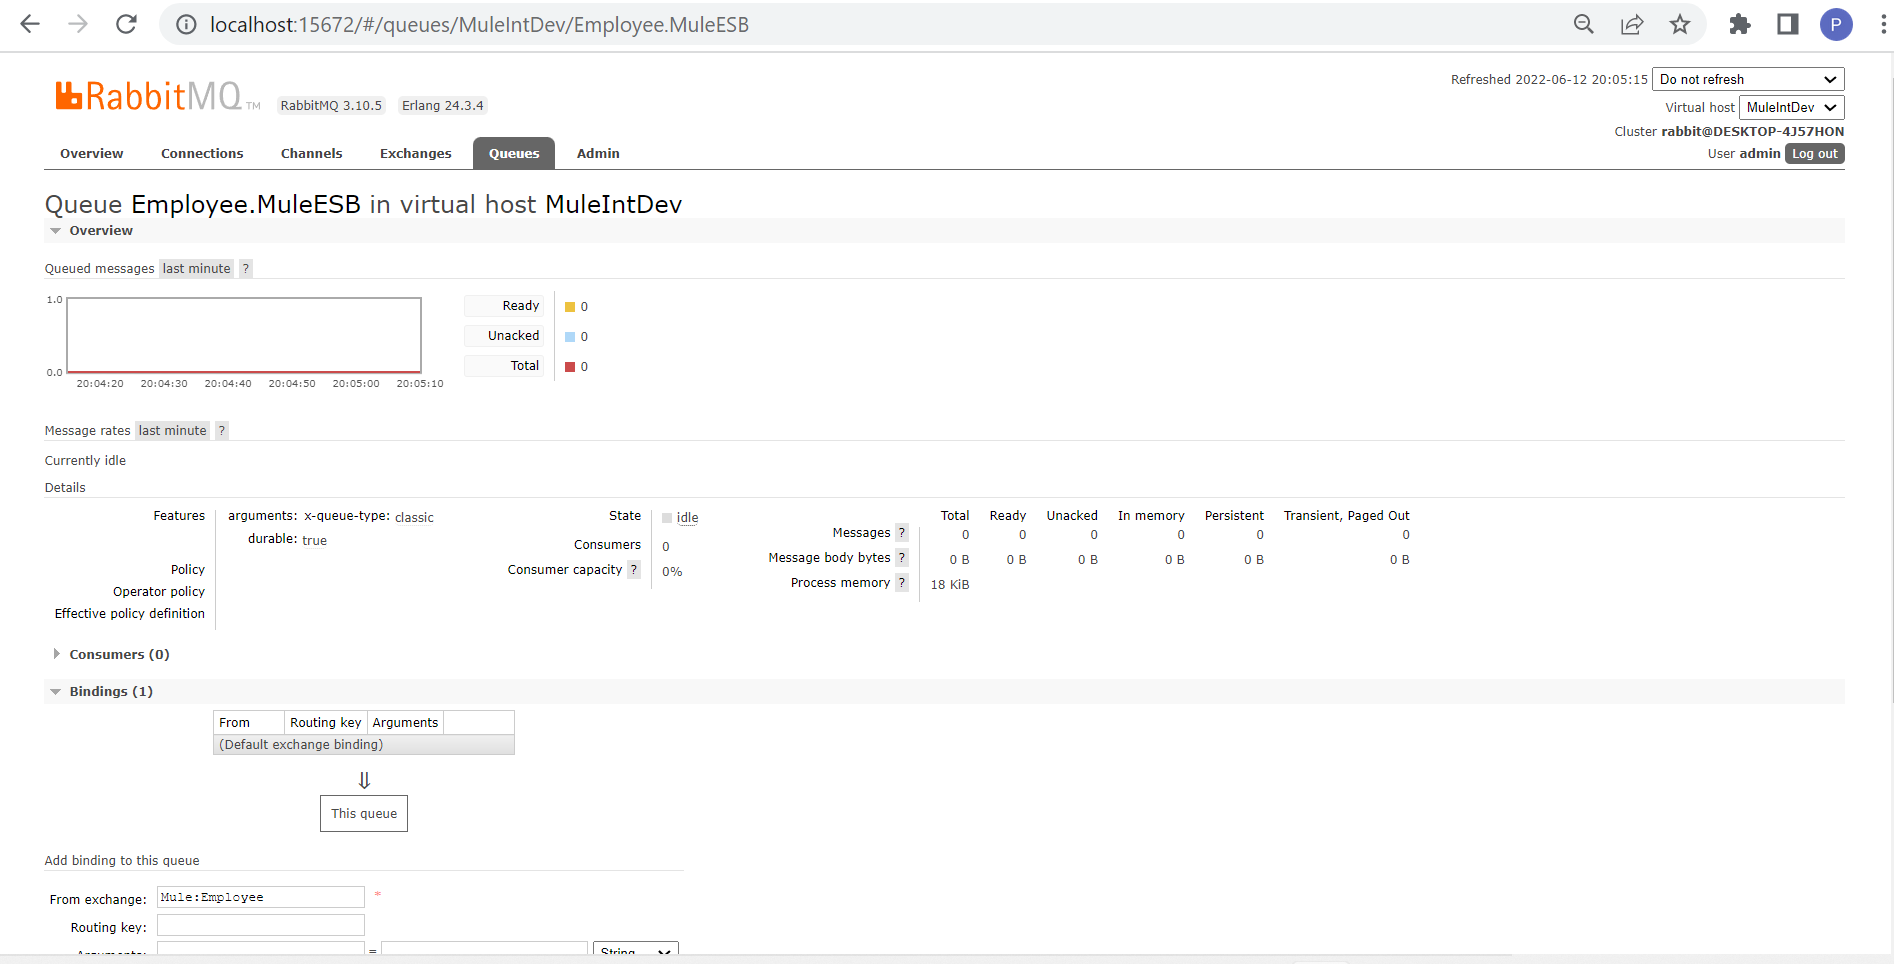
After this, create a queue with the name "Employee.MuleESB" and bind this queue with "Mule:Employee." Once Publisher publishes a message into the exchange, then the same message will be routed to this queue for subscription by the subscribers.
Now enter the exchange name as "Mule:Employee" in the Publish operation connector configuration as below.
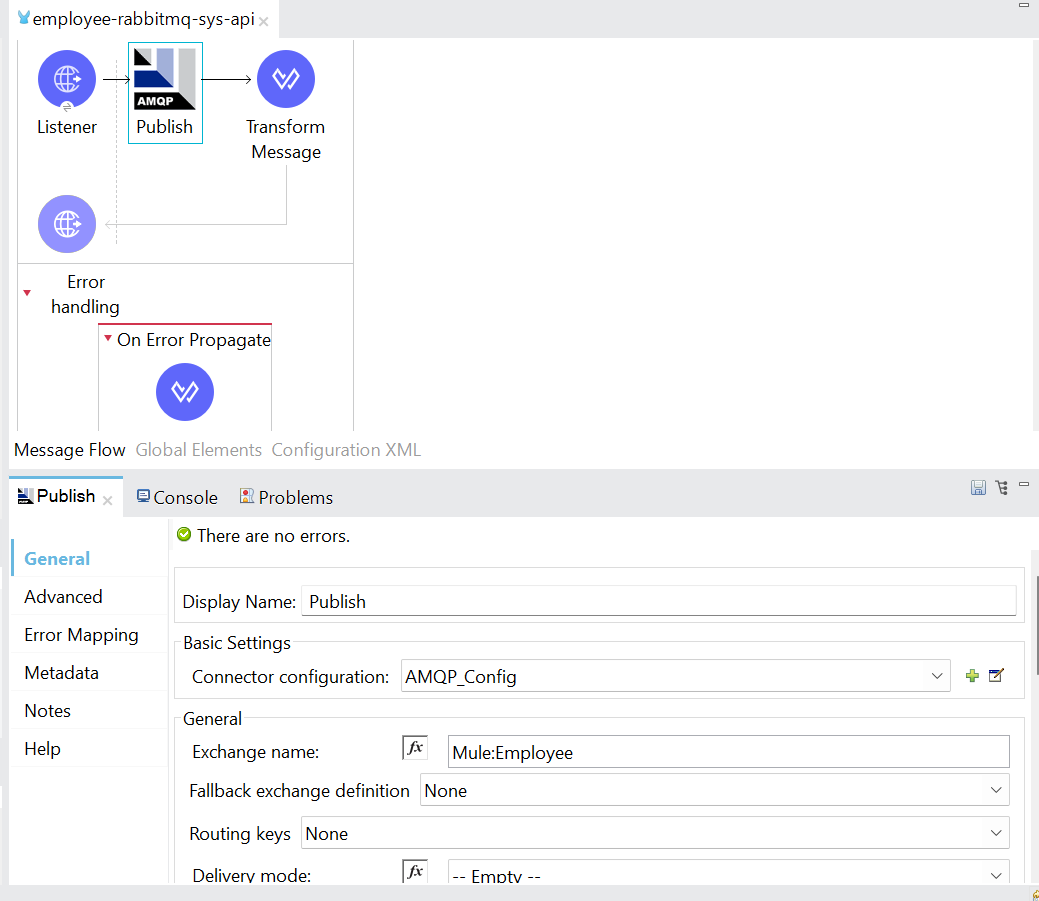
The final implementation of publishing a message into RabbitMQ using AQMP protocol is as below.
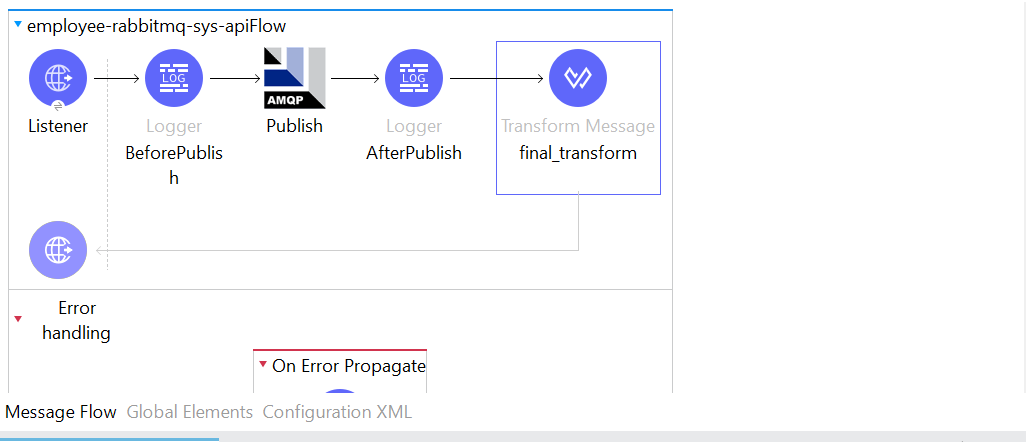
Now deploy the application and test with the payload below as an employee sample payload.
Request:
{

  "Employees": [

    {

      "userId": "Test rirani",

      "jobTitleName": "Developer",

      "firstName": "Romin",

      "lastName": "Irani",

      "preferredFullName": "Test Romin Irani",

      "employeeCode": "E1",

      "region": "CA",

      "phoneNumber": "408-1299967",

      "emailAddress": "[email protected]"

    }

  ]

}
Now, we can monitor the RabbitMQ exchange that states as a message is published into the exchange, the queue states that a message arrived into the queue automatically.
Now, drag and drop the Listener operation into the Message Flow surface area to implement the Consume operation. The Listener will listen to the source that is configured. In this case, active consumers will be automatically created in RabbitMQ as soon as the application gets deployed. Below is the high-level overview of the implementation.
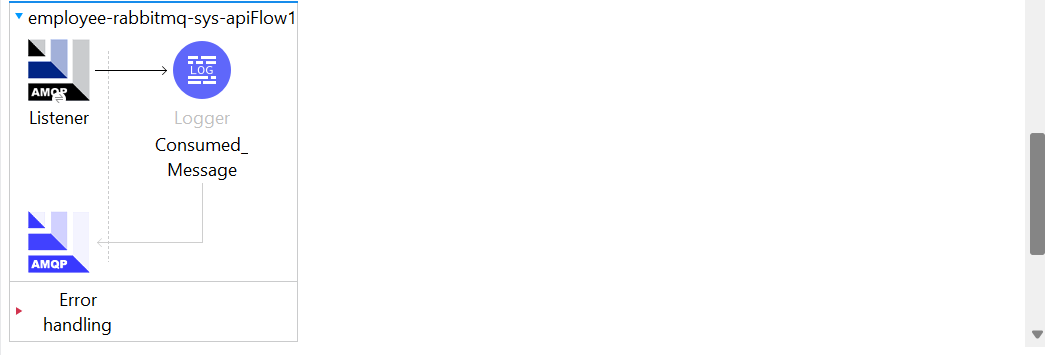
Once the application deploys, consumers get created automatically, and if any message arrives into the queue, then the same will be subscribed.
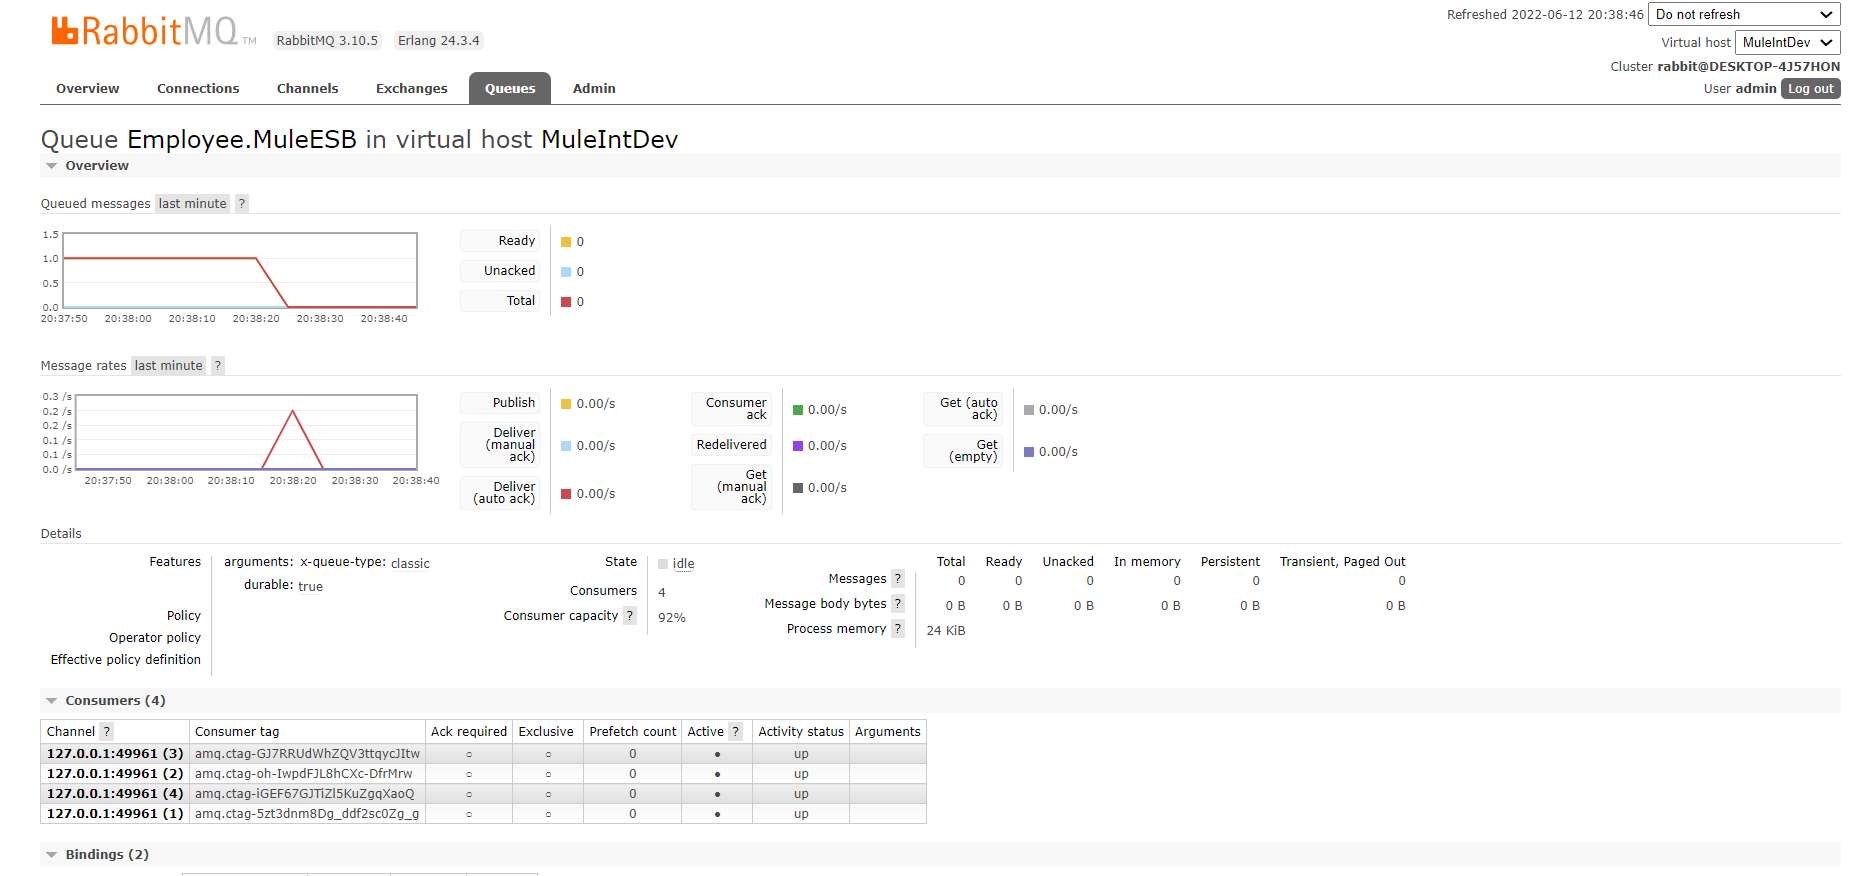
As there was a message that existed earlier, the same was picked and processed. Hence, the queue becomes empty as above.
Here is the full implementation of the Mule configuration file.
<?xml version="1.0" encoding="UTF-8"?>

<mule xmlns:ee="http://www.mulesoft.org/schema/mule/ee/core" xmlns:amqp="http://www.mulesoft.org/schema/mule/amqp"

    xmlns:http="http://www.mulesoft.org/schema/mule/http"

    xmlns="http://www.mulesoft.org/schema/mule/core" xmlns:doc="http://www.mulesoft.org/schema/mule/documentation" xmlns:xsi="http://www.w3.org/2001/XMLSchema-instance" xsi:schemaLocation="http://www.mulesoft.org/schema/mule/core http://www.mulesoft.org/schema/mule/core/current/mule.xsd

http://www.mulesoft.org/schema/mule/http http://www.mulesoft.org/schema/mule/http/current/mule-http.xsd

http://www.mulesoft.org/schema/mule/amqp http://www.mulesoft.org/schema/mule/amqp/current/mule-amqp.xsd

http://www.mulesoft.org/schema/mule/ee/core http://www.mulesoft.org/schema/mule/ee/core/current/mule-ee.xsd">

    <http:listener-config name="HTTP_Listener_config" doc:name="HTTP Listener config" doc:id="5f227be9-f9f0-4b70-9177-c065634a9a5d" >

        <http:listener-connection host="0.0.0.0" port="8081" />

    </http:listener-config>

    <amqp:config name="AMQP_Config" doc:name="AMQP Config" doc:id="a65f4585-2300-42a3-9aac-0e8cdebdc8a6" >

        <amqp:connection host="localhost" virtualHost="MuleIntDev" username="admin" password="admin" />

    </amqp:config>

    <flow name="employee-rabbitmq-sys-apiFlow" doc:id="6e50b2b8-69a2-47db-9cd9-965076a8a927" >

        <http:listener doc:name="Listener" doc:id="309df0b7-e8c1-4fe0-a2f4-764f1ba87eef" config-ref="HTTP_Listener_config" path="/api/v1/rabbitmq-demo"/>

        <logger level="INFO" doc:name="BeforePublish" doc:id="b2316c6f-a0e6-473b-8939-bc3af693e73c" message="**Before Publish Into RabbitMQ**" category="**RabbitMQ**"/>

        <amqp:publish doc:name="Publish" doc:id="00f1b4c1-1177-4dc9-a843-bbc37a0ab85f" config-ref="AMQP_Config" exchangeName="Mule:Employee"/>

        <logger level="INFO" doc:name="AfterPublish" doc:id="706ce978-557c-4ba3-ad47-745c24537392" message="**After Publish Into RabbitMQ**" category="**RabbitMQ**"/>

        <ee:transform doc:name="final_transform" doc:id="52ae715d-ab9c-4cd2-9bde-eb17175e8620" >

            <ee:message >

                <ee:set-payload ><![CDATA[%dw 2.0

output application/json

---

{

    "status": "Message published successfully"

}]]></ee:set-payload>

            </ee:message>

        </ee:transform>

        <error-handler >

            <on-error-propagate enableNotifications="true" logException="true" doc:name="On Error Propagate" doc:id="567ef1e9-37ec-4215-8640-19b6a51d809f" >

                <ee:transform doc:name="Transform Message" doc:id="e65e9317-e315-46dd-b4ab-36367a300be8" >

                    <ee:message >

                        <ee:set-payload ><![CDATA[%dw 2.0

output application/json

---

error]]></ee:set-payload>

                    </ee:message>

                </ee:transform>

            </on-error-propagate>

        </error-handler>

    </flow>

    <flow name="employee-rabbitmq-sys-apiFlow1" doc:id="52121737-50f5-4def-8a04-3611c6a5f3f1" initialState="stopped">

        <amqp:listener doc:name="Listener" doc:id="29358f30-ac13-4c2a-8998-cb0c10ac7c49" config-ref="AMQP_Config" queueName="Employee.MuleESB"/>

        <logger level="INFO" doc:name="Consumed_Message" doc:id="1c123130-b666-4519-a68a-1c53bfd40ac2" message="#[payload]" category="**RabbitMQ**"/>

    </flow>

    <flow name="employee-rabbitmq-sys-apiFlow2" doc:id="c350d2aa-cb56-4252-b1db-8597a846874a" >

        <amqp:consume doc:name="Consume" doc:id="a8745777-d895-4b7f-98d3-574737d8fb44" config-ref="AMQP_Config" queueName="Employee:MuleESB"/>

    </flow>

</mule>
We are finished with Pub/Sub design patterns implementation. Happy learning!
Opinions expressed by DZone contributors are their own.
Comments