Selenium With Python Tutorial: Adding Extensions in Firefox for Testing
In this Selenium Python tutorial, we dive deep into how you can add extensions in Firefox using the Selenium automation framework.
Join the DZone community and get the full member experience.
Join For FreeModern browsers are equipped with all sorts of functionalities, i.e., from bookmarks to GPS location tracking, developer tools, and more. Almost all modern web browsers have immense capabilities – Firefox has built-in screenshot capabilities, Opera has a free VPN, and Edge comes with built-in support for displaying ebooks with the EPUB extension. Though browsers like Firefox, Chrome, and others are majorly used for web browsing, the fact is that Add Ons (or extensions) in Firefox provide additional power to the web browser! The same rule of thumb applies to other browsers like Chrome, Edge, etc.
Additional add-ons, plugins, and extensions are required to extend or customize browser functionalities, boost productivity, and suit the specific requirements of users and developers. Test automation engineers that use test automation can also benefit from browser extensions like normal end-users. In fact, testers often need to automate the testing of these extensions itself :slightly_smiling_face:
The catch is that the extensions installed on the Firefox browser present on the local machine will not be available when you fire up a Firefox instance using Gecko Driver and Selenium WebDriver. In this part of the Selenium Python tutorial, we deep dive into adding extensions in Firefox using Selenium with Python.
What Is Firefox WebExtensions API?
In Sept 2015, Mozilla started signing and validating every extension to ensure that the third-party extensions enable Firefox customization without sacrificing security or exposing users vulnerable to malware. Mozilla deprecated XPCOM and XUL-based add-ons and adapted a new extensions API (i.e., WebExtensions API).
New extensions API is compatible with the model used by Opera, Chrome, and other latest browsers. Thus, a Firefox extension developer can easily develop and manage cross-browser extensions.
What Is XPI?
XPI is a cross-platform installer module file. It’s the same as zip files and can be accessed using any archive/compression program. XPI installation files are in use by Firefox, SeaMonkey, and Thunderbird. It is used for installing a web browser plugin, addons, extensions, etc.
XPI add-ons can be installed by simply dragging and dropping them into any open Firefox browser window. Mozilla uses XPInstall to read the installation instructions contained in the XPI file, which are later executed for the installation.

Chromium-based browsers like Chrome, Opera, and Edge use CRX files as extension installers. Safari uses SAFARIEXTZ. CRX files can’t be used to install extensions in Mozilla. XPIs can’t be used in Chromium-based browsers. However, the underlying API is the same for all these browsers, due to which maintenance of extensions is pretty easy.
How to Add Extensions in Firefox Using Selenium With Python?
Now that we have covered the fundamentals of extensions in Firefox let’s look at how to add Firefox extensions using Selenium WebDriver and Python. Let’s look at the various approaches available to leverage Selenium and Firefox extensions for Selenium.
Using install_addon API of Selenium WebDriver to Add Firefox Extensions Using Python
The install_addon method of the Selenium WebDriver takes two input arguments – a path to the desired Firefox extension and a Boolean value, which indicates whether the installation of the extension is temporary (or not).
Step 1: Let’s download the XPIs of the target Firefox extensions.
You can point your cursor to the “ADD to Firefox button,” right-click and copy the XPI link. Then, open it in a new tab.

Alternatively, you can find a dedicated XPI download link by opening the extension’s landing page in a different browser than Firefox.

For demonstration, we’re downloading the following Firefox extensions – “VPN Master” and “Ghostery Privacy Ad Blocker.” The XPI downloader link for VPN Master is available below the green-colored button (visible in the below image) if opened using Chrome.
Step 2: Here’s how the web driver's install_addon function is implemented for installing install the add-on in Mozilla:
def install_addon(self, path, temporary=None):
    # Usage: driver.install_addon('/path/to/firebug.xpi')
    # ‘self’ refers to the “Webdriver” class
    # 'path' is absolute path to the addon that will be installed
    payload = {"path": path}
    if temporary:
        payload["temporary"] = temporary
    # The function returns an identifier of the installed addon.
    # This identifier can later be used to uninstall installed addon.
    return self.execute("INSTALL_ADDON", payload)["value"]
Now, let’s use this install_addon method to install the Ghostery Firefox extension temporarily.
Shown below is the Python implementation that uses Selenium WebDriver and the install_addon method to install the Ghoserty plugin. The first two lines import the dependent libraries. I have added sufficient comments in the try, except, and finally python code block for easing the code walkthrough process.
Filename: FFExt.py
from selenium import webdriver
import time

try:
    # Fire a remote Firefox instance using geckodriver.
    # You need to have Geckodriver in the same directory as the automation testing script OR
    # you need to add it in the "path" environment variable OR
    # you need to know the full path to the geckodriver executable file and use it as:
    # driver = webdriver.Firefox(executable_path=r'your\path\geckodriver.exe')

    driver = webdriver.Firefox()

    # path to your downloaded Firefox addon extension XPI file

    extension_path = "G:\\jsalert\\vpnxpi\\ghostery_privacy_ad_blocker-8.5.5-an+fx.xpi"

    # using webdriver's install_addon API to install the downloaded Firefox extension

    driver.install_addon(extension_path, temporary=True)

    # Opening the Firefox support page to verify that addon is installed

    driver.get("about:support")

    # xpath to the section on the support page that lists installed extension

    addons = driver.find_element_by_xpath('//*[contains(text(),"Add-ons") and not(contains(text(),"with"))]')
    # scrolling to the section on the support page that lists installed extension

    driver.execute_script("arguments[0].scrollIntoView();", addons)

    # introducing program halt time to view things, ideally remove this when performing test automation in the cloud using LambdaTest

    print("Success. Yayy!!")

    time.sleep(20)

except Exception as E:

    print(E)

finally:

    # exiting the fired Mozilla Firefox selenium webdriver instance

    driver.quit()

    # End Of Script
Test Execution
Run the test by triggering the following command on the terminal:
python FFExt.pyHere is the execution output of the Firefox extension example that used Selenium WebDriver:
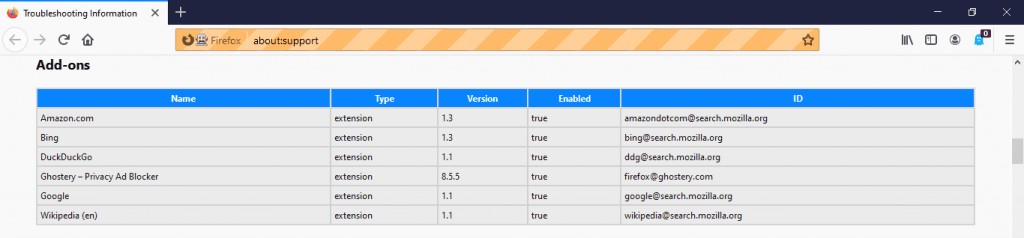
As seen from the execution snapshot, the Ghostery plugin icon appears at the top right corner. The Firefox extension installed using the install_addon method (of Selenium WebDriver) is enabled by default.
Let’s try this: Comment out the following line.
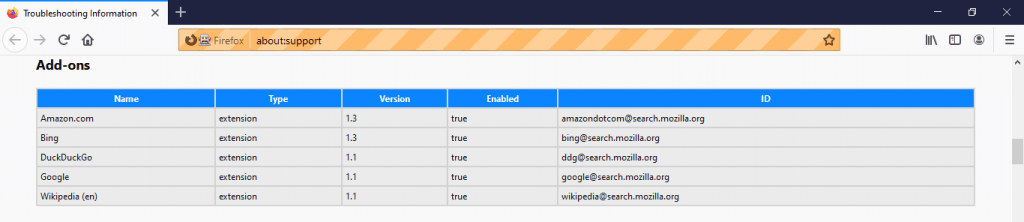
driver.install_addon(extension_path, temporary=True)As seen in the below snapshot, the Ghostery extension is no longer a part of the installed extensions since it was installed temporarily.
Using PyTest to Add Firefox Extensions Using Selenium and Python
PyTest is an open-source Python testing framework that is more extensively in place of the PyUnit framework. You can use PyTest for writing small tests and complex functional tests for python-based applications/libraries. On Github, PyTest clocks 7.4k+ stars. You can check out our existing blog for a quick recap on Selenium web automation in Python using PyTest.
File Name: FFExt.py
from selenium import webdriver
import time
import pytest

# Pytest fixture is used when before running the test you need to execute some code

@pytest.fixture
def FFExt():
        driver = webdriver.Firefox()
        extension_path = "G:\\jsalert\\vpnxpi\\ghostery_privacy_ad_blocker-8.5.5-an+fx.xpi"
        driver.install_addon(extension_path, temporary=True)
        driver.get("about:support")
        addons = driver.find_element_by_xpath('//*[contains(text(),"Add-ons") and not(contains(text(),"with"))]')
        driver.execute_script("arguments[0].scrollIntoView();", addons)
        time.sleep(10)
        addons1 = driver.find_elements_by_xpath('//*[contains(text(),"Add-ons") and not(contains(text(),"with"))]/following-sibling::*[1]/*[2]/*/*[1]')

# a list is created to return names of all the installed addons
        addonsList = []
        for addon in addons1:
            addonsList.append(addon.text)
        time.sleep(10)
        driver.quit()
        return addonsList

# This is the test function that will ASSERT whether addon is present in the list of installed add-ons returned by the FFExt function.

def test_addon(FFExt):
    ghostery = "Ghostery – Privacy Ad Blocker"
    assert ghostery in FFExt
Run the test by triggering the following command on the terminal:
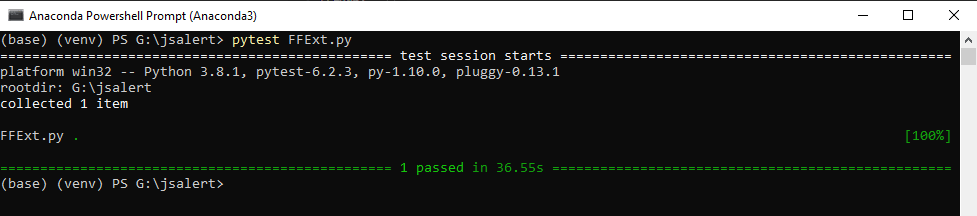
pytest FFExt.pyHere is the execution snapshot, which indicates that one test was successful.
Using Pre-loaded Firefox Extensions and FirefoxProfile in Selenium WebDriver
FirefoxProfile is a collection of settings, extensions, and customizations done on top of the Firefox browser. You can create several Firefox profiles to tailor-make the look & feel of the browser as per your preferences.
To add Firefox extensions in Selenium using FirefoxProfile, please follow the below-mentioned steps:
Step 1: Create a Firefox profile. Before doing so, you need to close all the active Firefox windows.
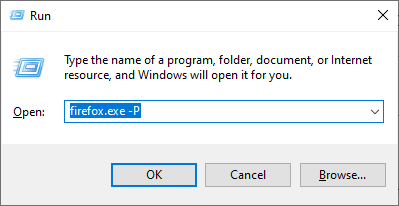
Step 2: Press “win + R” to open the Run dialog window. Type “firefox.exe -P” and press OK.
Step 3: Now, click on the Create Profile button.

Step 4: Click Next.

Step 5: Enter a name for your new Firefox profile. Copy the path to the destination folder (this will be required later). Click Finish to create the profile.

Step 6: Launch Firefox with your newly created profile.

Step 7: Add Ghostery Addon to this profile.

Now, let’s write a PyTest script to check if the Ghostery extension is installed when we launch the created Firefox profile in a remotely-controlled Firefox instance using Selenium Python.
Existing Firefox profile can be loaded in Selenium web driver using:
webdriver.FirefoxProfile("\\path to the new Firefox profile’s folder")Filename: FFExt_method_2.py
from selenium import webdriver
import time
import pytest
@pytest.fixture
def FFExt2():
# the value you pass to parameter should be the name of folder which represents your target Firefox profile, you created earlier
profile = webdriver.FirefoxProfile("G:\\7m1dwmtw.FFExt")
driver = webdriver.Firefox(profile)
time.sleep(5)
driver.get("about:support")
addons = driver.find_element_by_xpath('//*[contains(text(),"Add-ons") and not(contains(text(),"with"))]')
driver.execute_script("arguments[0].scrollIntoView();", addons)
addons1 = driver.find_elements_by_xpath('//*[contains(text(),"Add-ons") and not(contains(text(),"with"))]/following-sibling::*[1]/*[2]/*/*[1]')
addonsList = []
for addon in addons1:
addonsList.append(addon.text)
time.sleep(10)
driver.quit()
return addonsList
# this is the test function that will assert whether addon is present in the list of installed addons returned by FFExt function.
def test_addon(FFExt2):
ghostery = "Ghostery – Privacy Ad Blocker"
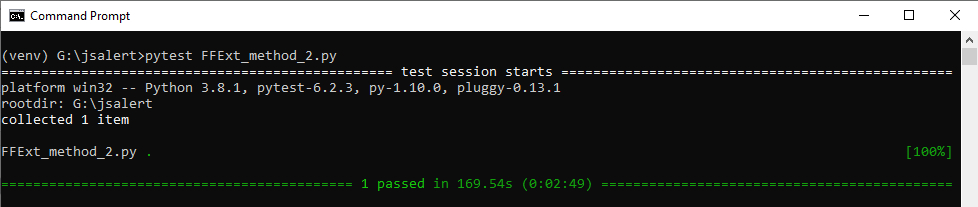
assert ghostery in FFExt2Run the following command on the terminal to trigger the test:
pytest FFExt_method_2.pyHere is the execution snapshot:
Conclusion
Extensions, especially VPN extensions, are often required to test how your application would perform across different geographies. Also, if you’ve implemented an adBlocker detection technology in your web application, you need to install adBlocker extensions to check if your adBlocker detection technology is effective.
In this part of the Selenium Python tutorial, we looked at two different mechanisms to install addons in Selenium-controlled Firefox instances.
Happy Testing!
Published at DZone with permission of . See the original article here.
Opinions expressed by DZone contributors are their own.
Comments