Tutorial: Deploy a Spring Boot Application to the Cloud
Spring Boot makes it easy to create stand-alone applications that are ready to use and run. Learn how to deploy to the cloud in this short post.
Join the DZone community and get the full member experience.
Join For Free
Spring Boot makes it easy to create stand-alone applications that are ready to use and run. It’s also a great alternative if you are looking to accelerate the development cycle of your app. There are many ways to deploy your Spring Boot app. In this tutorial, I’ll show you three different ways:
- Azure
- Amazon Web Services
- Self-hosted
We will use a simple application to demonstrate deployment for each of the options.
Build Your Spring Boot Sample App
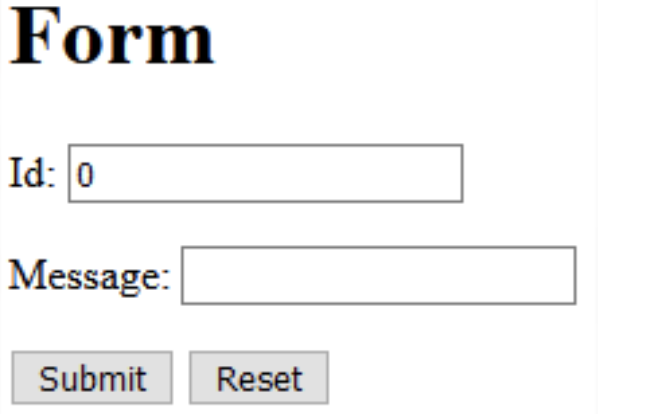
I’ve created a very simple Spring Boot application you can download from GitHub. The app consists of a single controller and a small form to submit. So, clone the repository, build, and run it:
$ git clone https://github.com/oktadeveloper/okta-spring-boot-deploy.git
$ cd okta-spring-boot-deploy
$ ./mvnw spring-boot:run
A small functional form will be available at http://localhost:8080/greeting.
Before we continue to deployment options, let’s make sure our app is secure.
Secure Your Spring Boot App With Okta
Okta has a specific library for Spring Boot to make it easy to add OAuth 2.0 authentication to your app.
First, register for a forever-free developer account today! When you’re finished, complete the steps below to create an app.
- Log in to your developer account at developer.okta.com
- Navigate to Applications and click on Add Application
- Select Web and click Next
- Give the application a name (e.g.
Spring Boot Awesome App) - Add the following as Login redirect URI:
http://localhost:8080/login/oauth2/code/okta
- Click Done
First, include Okta as a dependency in the pom.xml:
<dependency>
<groupId>org.springframework.boot</groupId>
<artifactId>spring-boot-starter-security</artifactId>
</dependency>
<dependency>
<groupId>com.okta.spring</groupId>
<artifactId>okta-spring-boot-starter</artifactId>
<version>1.3.0</version>
</dependency>
Now, create the file src/main/resources/application.properties with your app settings:
xxxxxxxxxx
okta.oauth2.issuer=<your_org_url>/oauth2/default
okta.oauth2.clientId=<app_client_id>
okta.oauth2.clientSecret=<app_client_secret>
You can find your Client ID and Client Secret in the Okta dashboard, on the General tab of the app you just created. Your Org URL is displayed at the top left of the Dashboard.
And we are done! Simple as that, your app is now secured with OAuth 2.0.
Deploy Your Spring Boot App to Azure

Microsoft has been invested in Java lately; a partnership with Azul, and acquisition of jClarity, naturally deploying to Azure is not hard.
Make sure you have an active account by registering on Azure’s website. The first step is to install the Azure CLI on your computer. We will use it to log in to Azure from a command-line terminal.
On the project, add the Azure plugin as part of the build on the pom.xml file. Try the example configuration below, and make sure you replace the appName with a unique name for your app. Also configure the region, to define where geographically your app will be deployed. The list of available regions is available in Azure Region Availability. Finally, the pricingTier determines what type of instances you will use and how much that will cost. The list of available pricing tiers is available in Azure App Service Pricing. The configured pricing tier on the example below is “F1”, which stands for their free tier, so don’t worry if you just want to try Azure out; you won’t get billed if you deploy to F1 tier.
xxxxxxxxxx
<plugin>
<groupId>com.microsoft.azure</groupId>
<artifactId>azure-webapp-maven-plugin</artifactId>
<version>1.7.0</version>
<configuration>
<schemaVersion>v2</schemaVersion>
<resourceGroup>maven-plugin</resourceGroup>
<appName>Spring-App</appName>
<region>East US</region>
<runtime>
<os>linux</os>
<javaVersion>jre8</javaVersion>
<webContainer></webContainer>
</runtime>
<deployment>
<resources>
<resource>
<directory>${project.basedir}/target</directory>
<includes>
<include>*.jar</include>
</includes>
</resource>
</resources>
</deployment>
<pricingTier>F1</pricingTier>
</configuration>
</plugin>
Since Azure handles HTTPS for us and we will run behind their proxy, we also need to update our Spring settings to pick up the standard HTTP headers and correctly build redirect URLs. Just add this line to application.properties file:
xxxxxxxxxx
server.forward-headers-strategy=FRAMEWORK
After you have configured the pom.xml and the application.properties file, the deployment consists of opening a command line terminal, logging into Azure, and running the Maven goal to do the deployment. To login into Azure, use the command az login. This will open your web browser for the login process, and then print your account information to the console. Next, run mvn package to make sure your app is built. After logging in, use the command mvn azure-webapp:deploy to deploy your app to the Azure cloud. So, the entire deployment process looks like this:
xxxxxxxxxx
$ az login
$ mvn package
$ mvn azure-webapp:deploy
After that, your app will be deployed to Azure.
Now, add your app login endpoint to the app you created in Okta, so you can log in to it. To do that, go to your org panel, click Applications on the top bar, select the app you created, click General tab, click Edit of General Settings, and the following URI to “Login redirect URIs” as follows (your app name is what you defined in pom.xml file for the tag appName):
xxxxxxxxxx
https://<your_app_name>.azurewebsites.net/login/oauth2/code/okta
Head over to https://<your_app_name>.azurewebsites.net/greeting to see your app in action, deployed to Azure’s cloud.
Deploy Your Spring Boot App to Amazon Web Services
Amazon AWS is still the de-facto choice for public clouds with about half the market share. Java applications can be deployed to AWS Elastic Beanstalk with a few clicks of a button.
Since AWS will handle the app traffic for us and we will run behind their proxy, we need to update Spring to accept the standard HTTP headers and correctly build redirect URLs. Just add this line to application.properties file:
xxxxxxxxxx
server.forward-headers-strategy=FRAMEWORK
After configuring the application.properties file, make sure your app is built by doing an mvn package. We will also need the generated JAR file. To deploy to Amazon Web Services, we will go to AWS Management Console and follow the deployment guide step-by-step:
- Search for and click on Elastic Beanstalk.
- This will take you to a step-by-step wizard to deploy the app.
- Click Get Started.
- Enter your application name.
- Select Java as the platform.
- Select Upload your code.
- Click Upload.
- Select Local file.
- Browse and select your app’s JAR file, located at
<your_app_path>/target/demo-0.0.1-SNAPSHOT.jar - You may leave the Version label as it is, but you will need to use unique labels every time you deploy a newer version of your app.
- Click Upload.
- Click Configure more options
- Under Software Click Modify
- Under Environment properties, create a new property with Name
SERVER_PORTand Value5000. - Click Save.
- Click Create app.
You will land on a page that shows the progress of creating the app. Wait until it finishes. When it’s complete, the URL of your app should show at the top bar of the screen. Now add the login endpoint to your Okta app (same as we did for Azure, detailed above):
xxxxxxxxxx
http://<your_app_name>-env.<app_id>.<region>.elasticbeanstalk.com/login/oauth2/code/okta
Browse to your app at http://<your_app_name>-env.<app_id>.<region>.elasticbeanstalk.com/greeting. There you have your app deployed to Amazon Web Services.
AWS does not provide a default certificate, so your app is not running on HTTPS. You should definitely move it to HTTPS before going into production. This is covered in their documentation on Configuring HTTPS for Your Elastic Beanstalk Environment.
NOTE: Once you get this working, you can automate it with the Beanstalk Maven Plugin.
Self-Host Your Spring Boot App
If you decide to host the app yourself, first, you should decide whether you want to run your app by itself as a JAR or deploy it in an application server like Tomcat as a WAR. I would recommend a JAR, so the versions of your application and the application server are managed together, which simplifies your deployment.
To run as a standalone JAR, simply build your app via mvn package to generate a JAR file in the target folder. Then, you can run it with java -jar <your_app_name>-<your_app_version>.jar.
If you want to use an existing Tomcat installation or prefer to use an application server, your build process should generate a WAR instead of a JAR and also hook into the application server. For that, you should remove the spring-boot-maven-plugin from your pom.xml file. Then, add the following line to it:
xxxxxxxxxx
<packaging>war</packaging>
Make sure Tomcat is not embedded into your application, as you are going to run it within an external Tomcat. Add these lines to the dependencies section of your pom.xml file:
xxxxxxxxxx
<dependency>
<groupId>org.springframework.boot</groupId>
<artifactId>spring-boot-starter-tomcat</artifactId>
<scope>provided</scope>
</dependency>
Now, change the DemoApplication class to make it register the application in the server, make it extend SpringBootServletInitializer and override the configure method as follows:
xxxxxxxxxx
package com.oktadeveloper.demo;
import org.springframework.boot.SpringApplication;
import org.springframework.boot.autoconfigure.SpringBootApplication;
import org.springframework.boot.builder.SpringApplicationBuilder;
import org.springframework.boot.web.servlet.support.SpringBootServletInitializer;
public class DemoApplication extends SpringBootServletInitializer {
public static void main(String[] args) {
SpringApplication.run(DemoApplication.class, args);
}
protected SpringApplicationBuilder configure(SpringApplicationBuilder builder) {
return builder.sources(DemoApplication.class);
}
}
Now if you run mvn clean package you should get a WAR file in the target folder. Copy that WAR file into your Tomcat installation webapps/ROOT.war and remove the existing webapps/ROOT directory. Tomcat will pick it up automatically and deploy it. After deployment completes, your app should be available at an address like http://localhost:8080/greeting.
There are some new challenges when self-hosting. For example, if you want to run your app on multiple servers, you need to make sure each server is running the same version of the app, and you will want another server to handle the load balancing. You may use NGINX as a load balancer, just make sure to always update its configuration as you scale your servers. One way to make sure all of your servers are set up the same way is to use some automation solutions like Chef. Self-hosting means you have to do everything by yourself, like TLS certificate management, to make sure your servers listen on HTTPS. Azure and Amazon have specific offerings to manage the certificate for you.
Learn More About Spring Deployment
We covered Azure, AWS, and self-hosted Tomcat deployment on this article. You can also run your app as a Docker container, which is covered in Get Jibby With Java, Docker, and Spring Boot.
If you want to learn more about Java, Spring, and User Auth using Okta, check out these awesome articles:
- Simple Authentication with Spring Security
- Which Java SDK Should You Use?
- Build a Web App with Spring Boot and Spring Security in 15 Minutes
- Learning Java as a First Language
Questions? Requests for a future post? Drop them in the comments! And don’t forget to follow @oktadev on Twitter and subscribe on Youtube.
Deploy Your Spring Boot App the Right Way was originally published on the Okta Developer Blog on December 3, 2019.
Published at DZone with permission of Thiago Negri. See the original article here.
Opinions expressed by DZone contributors are their own.
Comments