Updating SwiftUI Views From Objective-C Using MVVM
This article takes you through experimenting with a non-standard situation when you need to update SwiftUI component from Objective-C implementation.
Join the DZone community and get the full member experience.
Join For FreeOn the internet, in the Apple documentation, and on Medium, there is a ton of information about SwiftUI, how to use it from UIKit, and vice versa. But today, let’s consider a not-so-common case in real life that’s useful to reflect on non-standard situations in iOS development.
Task: Show SwiftUI view from Objective-C codebase. Moreover, when an Objective-C model should be observable, the respective SwiftUI should be updated.
Result: When you press the Sign In button from Home, View Controller should be pushed a SwiftUI View with a Title, Text Field, and a button Sign In. On editing TextView and on pressing the Sign In button, the title label should be updated.
![SwiftUI]() Start-Up MVVM+C Project
Start-Up MVVM+C Project
 Start-Up MVVM+C Project
Clone the project from the link above. The repository has the start folder, which has an initial project that we are going to use.
This iOS App was developed using MVVM + Coordinator. I agree it’s already a bit complicated to use this architecture to explain how to show SwitUI views and update them from Objective-C, but I would say it’s more like a real situation where we need to stick to a particular pattern. No worries, we have only one screen at this point.

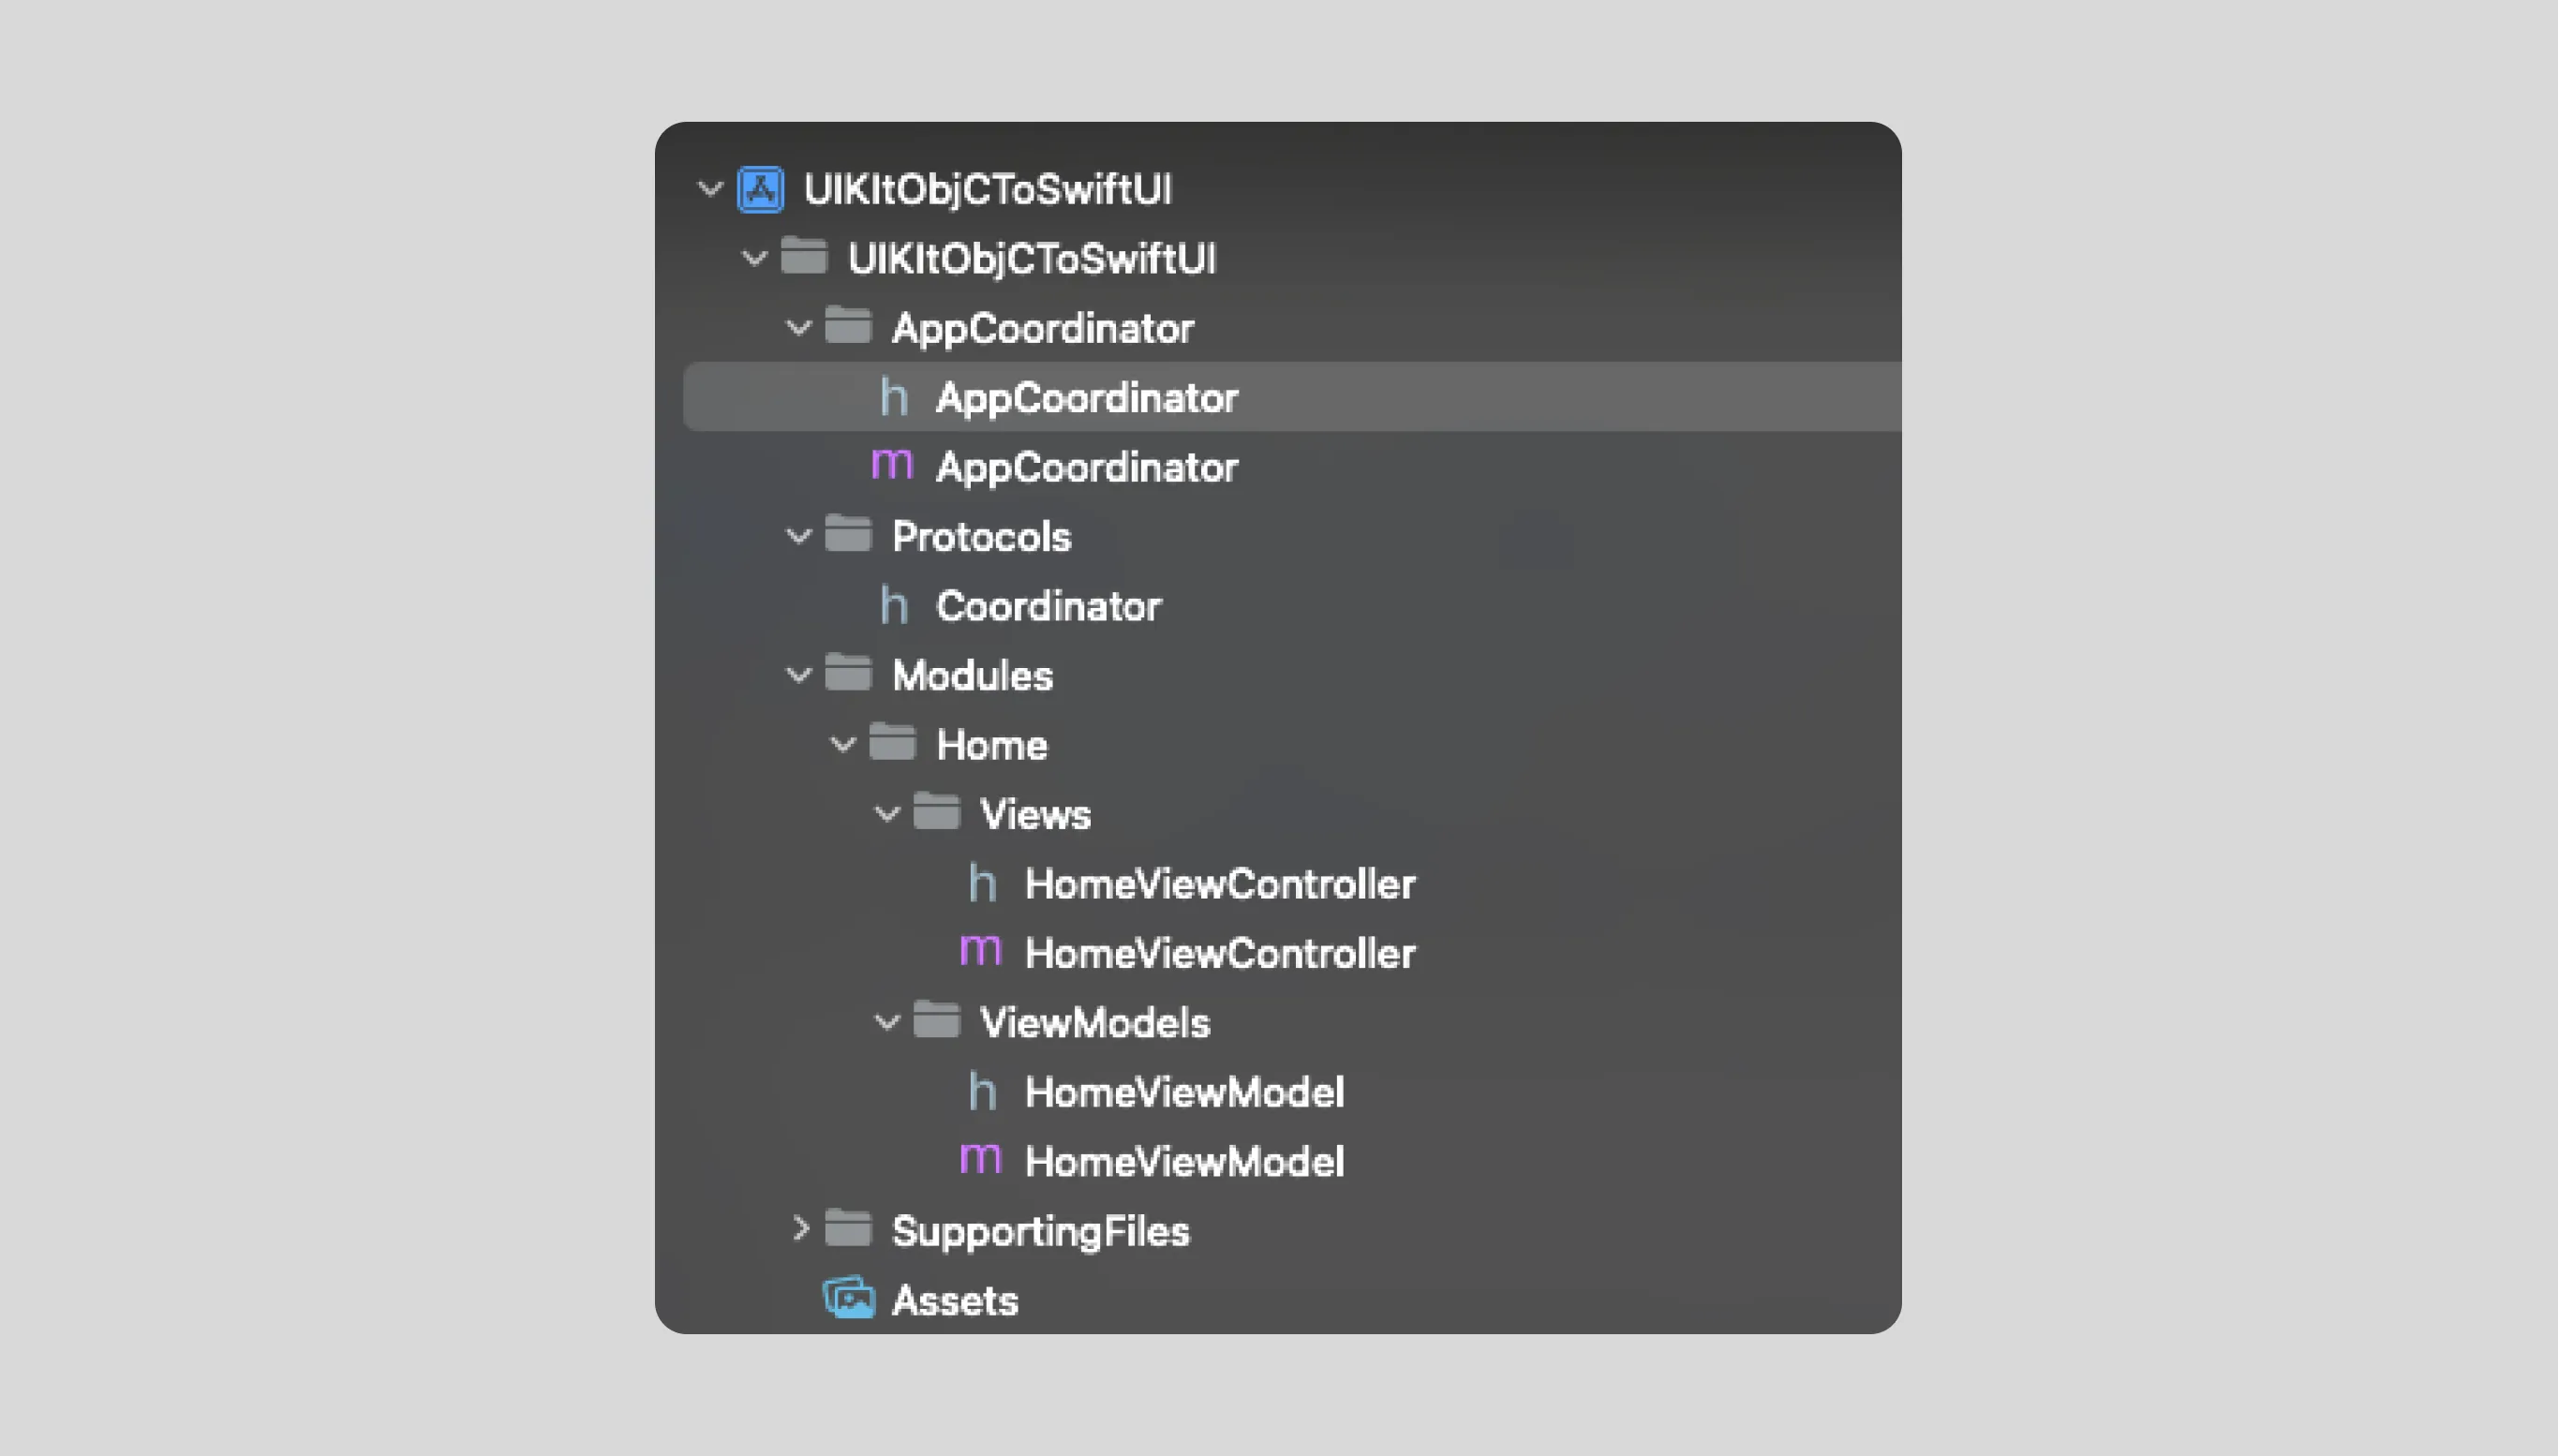
The structure of the project consists of several entities: AppCoordinator, Protocols, and MVVM Modules. AppCoordinator has only a general App Coordinator. For the protocols, I decided to store there all protocols we will use across the project. And the Modules group has the screens; for now, it’s only one home screen with a black Sign In button.
The Sign In button uses a typical coordinator delegate where from the coordinator, we have to prepare our solution of showing SwiftUI Login View. But before implementing SwiftUI View, let’s complicate our task a little bit more. Let’s assume we already have LoginViewModel implemented it in Objective-C as well, and we are not allowed to refactor it into Swift. Only LoginView should be implemented in SwiftUI.
Okay. Let’s take a look at LoginViewModel. We have three NSString properties.
#import <Foundation/Foundation.h>

NS_ASSUME_NONNULL_BEGIN

@interface LoginViewModel : NSObject

@property (nonatomic, strong) NSString *name;
@property (nonatomic, strong) NSString *title;
@property (nonatomic, strong) NSString *buttonTitle;

- (void) buttonTapped;

@end

NS_ASSUME_NONNULL_END
The name property should store from SwiftUI TextView. The title should be changed on TextView edit. The buttonTitle will be “Sign In,” and the method buttonTap should change the title value. Nothing crazy.
#import "LoginViewModel.h"

@implementation LoginViewModel

- (instancetype) init {
    self = [super init];
    if (!self) return nil;

    [self prepareViewModel];

    return self;
}

- (void) prepareViewModel {
    self.title = @"Hello!";
    self.buttonTitle = @"Sign In";
}

- (void)buttonTapped {
    // update title with value "Signed In"
}

@end
Bridging Swift Files
It’s time to start adding Swift files to our Objective-C project.
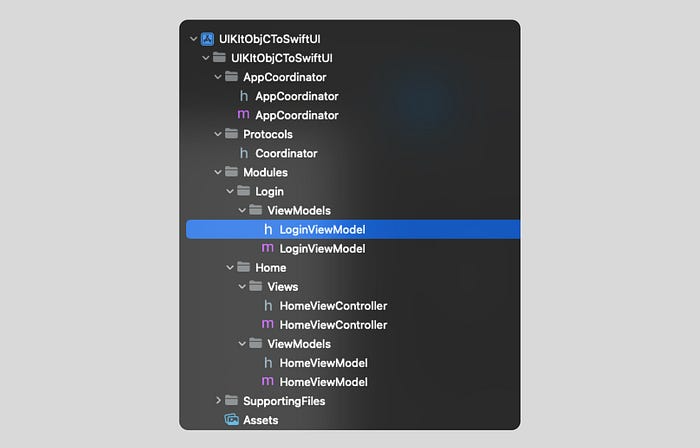
Go to File ➝ New ➝ File… ➝ SwiftUI View. This will keep the project structure better when saving this file to the Modules/Login/Views/ folder.
After this, you will be asked about creating Bridging Header, and yes, we need this. Press create.

You will see two files: LoginViewModel.swift and UIKitObjCToSwiftUI-Bridging-Header.h in the Views group.

Initially bridging header after creation will be empty. But we already know that we are going to use LoginViewModel.h. So we need to import this header.

The last step of bridging is to make our Objective-C files see Swift files. So, we need another import for that, and we will do this in AppCoordinator.m. But a bit later.
SwiftUI View and Coordinator Interface
At this moment, we don’t use any view models. We just need to show a pure SwiftUI view with dummy data.
struct LoginView: View {

    var body: some View {
        VStack {
            Text("Title")
            TextField("Enter your name", text: .constant("name"))
                .multilineTextAlignment(.center)
                .padding(.horizontal, 40)
            Button {
                // button tap action
            } label: {
                Text("Sign In")
                    .font(.system(size: 17, weight: .bold))
                    .foregroundColor(Color.white)
                    .padding()
            }
            .background(Color.green)
            .cornerRadius(10)
            .padding(.top, 20)
        }
    }
}
To show the SwiftUI view, we need to use UIHostingController which will play the role of UIViewController in Objective-C world, so for that, we need to create an “interface” to wire up AppCoordinator and SwiftUI views.
@objc
class SwiftUICoordinatorInterface: NSObject {

    @objc
    func loginView() -> UIViewController {
        let view = LoginView()
        return UIHostingController(rootView: view)
    }
}
It’s time to bridge to make Objective-C see Swift. Let’s import our Bridge header right in the AppCoordinator.m.

By the way, don’t be scared. You will notice that autocomplete is not working for this header. The last part of this file should be -Swift.h. If you are not sure about that, check:
Build Settings ➝ Swift Compiler ➝ General ➝ Objective-C Generated Interface Header Name

Let’s use all these pieces in the AppCoordinator so the (void)showLogin method will be updated:
- (void)showLogin {
    UIViewController *viewController = [[[SwiftUICoordinatorInterface alloc] init] loginView];
    [self.navigationController pushViewController: viewController animated: YES];
}
Run build. If you have done it all correctly, you will see a SwiftUI view after tapping on the Sign In button from the Home View Controller.
Objective-C ViewModel and ViewModel Interface
We need to make our view model visible in the SwiftUI view, and the title of the Login View should be updated. An Implementation will be a little bit similar to Coordinator interface but with some additional enhancements.
To unify our “observable” solution, we need a couple of protocols: ObservableNSObject and ObservableNSObjectDelegate. Here’s the code:
#import <Foundation/Foundation.h>

NS_ASSUME_NONNULL_BEGIN

#pragma mark - ObservableNSObjectDelegate

@protocol ObservableNSObject;
@protocol ObservableNSObjectDelegate <NSObject>

@required
- (void)viewModelDidUpdate:(id<ObservableNSObject>)viewModel;

@end

#pragma mark - ObservableNSObject

@protocol ObservableNSObject <NSObject>

@required
@property (nonatomic, weak) id <ObservableNSObjectDelegate> observedViewModelDelegate;

@end

NS_ASSUME_NONNULL_END
The trick is to use these protocols for conformance of all Objective-C modules, which will be used in SwiftUI and the viewModelDidUpdate method. They will do this for each update of properties or methods in the view model.
@interface LoginViewModel : NSObject <ObservableNSObject>In LoginViewModel.m, update these methods:
- (void)prepareTitleWithName:(NSString *)name {
    if ([name length] != 0) {
        self.title = [NSString stringWithFormat:@"Hello, %@!", name];
    } else {
        self.title = @"Hello!";
    }
}

-(void)setName:(NSString *)name {
    if (_name != name) {
        _name = name;
        [self prepareTitleWithName:name];
        [self.observedViewModelDelegate viewModelDidUpdate:self];
    }
}

- (void)buttonTapped {
    [self setTitle:@"Signed in"];

    // Update view model
    [self.observedViewModelDelegate viewModelDidUpdate:self];
}
Since we prepared the view model to be updated, let’s create our view model interface, as shown below:
class SwiftUIViewModelInterface<ViewModel: ObservableNSObject>: NSObject, ObservableObject, ObservableNSObjectDelegate {

    @Published var viewModel: ViewModel

    init(viewModel: ViewModel) {
        self.viewModel = viewModel
        super.init()
        viewModel.observedViewModelDelegate = self
    }

    func viewModelDidUpdate(_ viewModel: ObservableNSObject) {
        guard let viewModel = viewModel as? ViewModel else { return }
        self.viewModel = viewModel
    }
}
The main trick is to update the published viewModel using ObservableNSObjectDelegate. Let’s update our LoginView using this view model interface. I called it observable.
struct LoginView: View {

    typealias ViewModel = SwiftUIViewModelInterface<LoginViewModel>
    @ObservedObject var observed: ViewModel

    init(viewModelInterface: ViewModel) {
        self.observed = viewModelInterface
    }

    var body: some View {
        VStack {
            Text(observed.viewModel.title)
            TextField("Enter your name", text: $observed.viewModel.name)
                .multilineTextAlignment(.center)
                .padding(.horizontal, 40)
            Button {
                self.observed.viewModel.buttonTapped()
            } label: {
                Text(self.observed.viewModel.buttonTitle)
                    .font(.system(size: 17, weight: .bold))
                    .foregroundColor(Color.white)
                    .padding()
            }
            .background(Color.green)
            .cornerRadius(10)
            .padding(.top, 20)
        }
    }
}
Certainly, we need to update Coordinator interface. As you can see, the SwiftUIViewModelInterface is like middleware between the Objective-C view model and SiwftUI View.
@objc func loginView(viewModel: LoginViewModel) -> UIViewController {
  let viewModelInterface = SwiftUIViewModelInterface(viewModel: viewModel)
  let view = LoginView(viewModelInterface: viewModelInterface)
  return UIHostingController(rootView: view)
}
The AppCoordinator showLogin also should be updated with the LoginViewModel. Of course, ideally, it will be cool to see the SwiftUI object, but Objective-C sees only the UIKit stuff.
- (void)showLogin {
    LoginViewModel *viewModel = [[LoginViewModel alloc] init];
    UIViewController *viewController = [[[SwiftUICoordinatorInterface alloc] init] loginViewWithViewModel:viewModel];
    [self.navigationController pushViewController: viewController animated: YES];
}
That’s it. Run build, and you can see how it works. You can find the result in final folder of the project repository: https://github.com/maxkalik/uikit-objc-to-swiftui
Wrapping Up
In my opinion, the best part of this task is the non-standard situation, and I’m sure you most likely won’t be encountered this. But the question of using SwiftUI in Objective-C exists, and why wouldn’t you try to answer it?
I call it — an uncomfortable task. It means this kind of task confuses you, and you don’t know exactly how to make this at the beginning. They force you to think out of the box, which will make you more professional.
Published at DZone with permission of Max Kalik. See the original article here.
Opinions expressed by DZone contributors are their own.
Comments