Using Open Source for Data Integration and Automated Synchronizations
This tutorial provides step-by-step instructions to set up and run open-source Airbyte for moving data between hundreds of sources and destinations with Apache Airflow.
Join the DZone community and get the full member experience.
Join For FreeApache Airflow and Airbyte are complementary tools that can be used together to meet your data integration requirements. Airbyte can be used to extract data from hundreds of sources and load it to any of its supported destinations. Airflow can be used for scheduling and orchestration of tasks, including triggering Airbyte synchronizations. The combination of Airflow and Airbyte provides a flexible, scalable, and maintainable solution for managing your data integration and data processing requirements.
In this tutorial, you will install Airbyte Open Source and Apache Airflow running in a local Docker Desktop environment. After installation, you will configure a simple Airbyte connection. Next, you will create an Airflow-directed acyclic graph (DAG), which triggers a data synchronization over the newly created Airbyte connection and then triggers (orchestrates) some additional tasks that depend on the completion of the Airbyte data synchronization.
What Is Apache Airflow?
Apache Airflow is an open-source orchestrator tool that is used for programmatically scheduling and monitoring workflows. It is often used to manage a sequence of tasks performed by a data integration pipeline.
With Airflow, users can define workflows as directed acyclic graphs (DAGs), where each task in the DAG represents an individual operation. Tasks can be executed in parallel or sequentially and can be scheduled to run at specific times or in response to certain events.
Airbyte and Apache Airflow Together
Airflow can execute tasks that are required as a prerequisite to triggering an Airbyte sync run and/or can be used for scheduling tasks that depend on the completion of an Airbyte sync run.
In this tutorial, you will create a simple Airflow DAG that executes tasks on your local environment and that does the following:
- Triggers an Airbyte ELT pipeline that loads data from the faker source and writes the data to the local filesystem.
- Waits for the ELT pipeline’s synchronization to complete.
- Verifies that the expected local file exists.
- Renames a local file that was created by the synchronization.
ℹ️ The purpose of this tutorial is to show how easy it is to set up an Airflow DAG to interact with Airbyte, as well as to give a small taste of the power of Airflow DAGs. This is demonstrated with a simple example, which may be used as a starting point for implementing a more complex real-world use case.
Versions
There may be future modifications to the API and/or Airflow that could render some of the instructions given in this tutorial obsolete. The instructions presented in this tutorial were created in February 2023, and the following tools were used:
- Airbyte OSS 0.40.32
- Docker Desktop v4.10.1
- macOS Monterey Version 12.5.1
- MacBook Pro with the Apple M1 Pro Chip
- Airflow v2.5.1 Git Version: .release:2.5.1+49867b660b6231c1319969217bc61917f7cf9829
Install Airbyte
If you already have a local copy of Airbyte running, then you may skip this section. Otherwise, follow the instructions to deploy Airbyte.
[Optional] Modify BASIC_AUTH_USERNAME and BASIC_AUTH_PASSWORD in the (hidden) .env file. For this tutorial, I use the following default values:
Once Airbyte is running, in your browser, type in localhost:8000, which should prompt you for a username and password as follows:
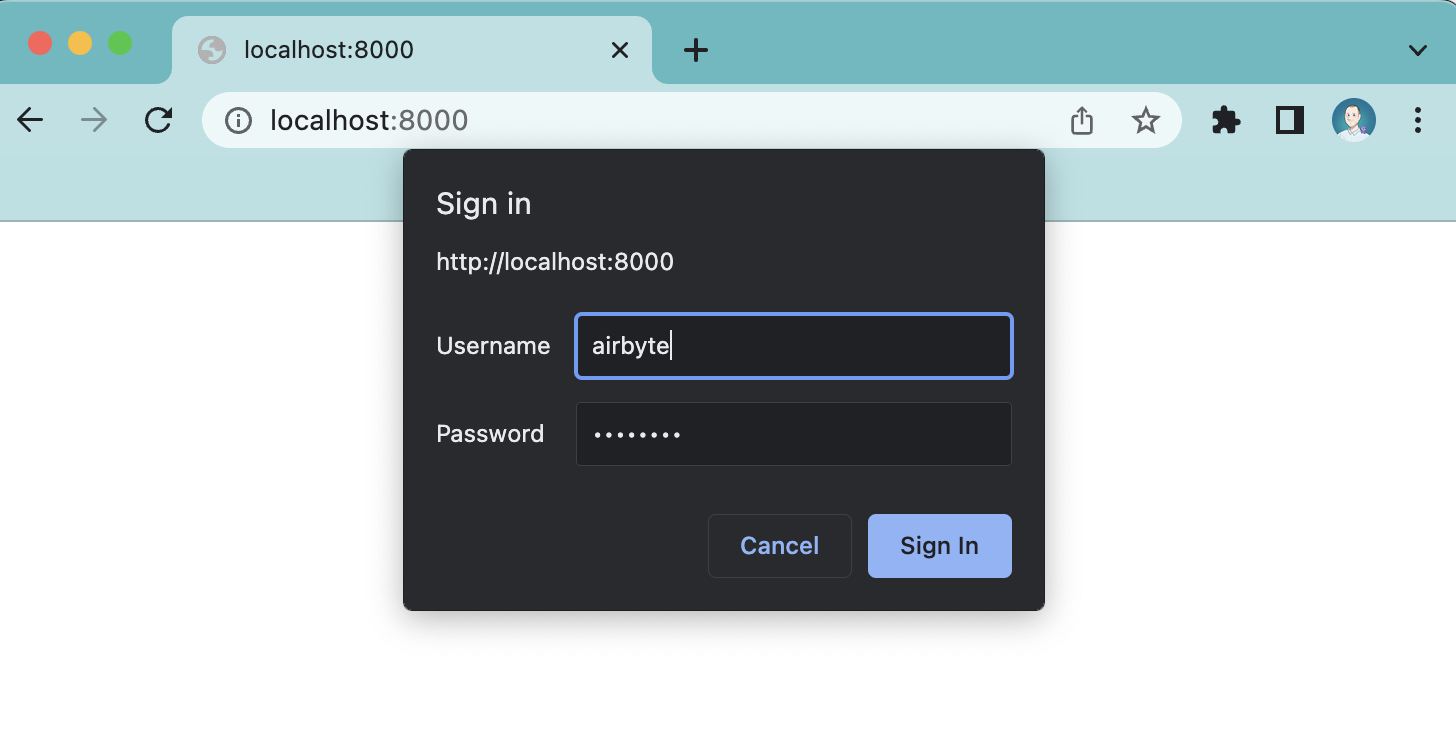 Airbyte OSS login prompt
Create a Connection
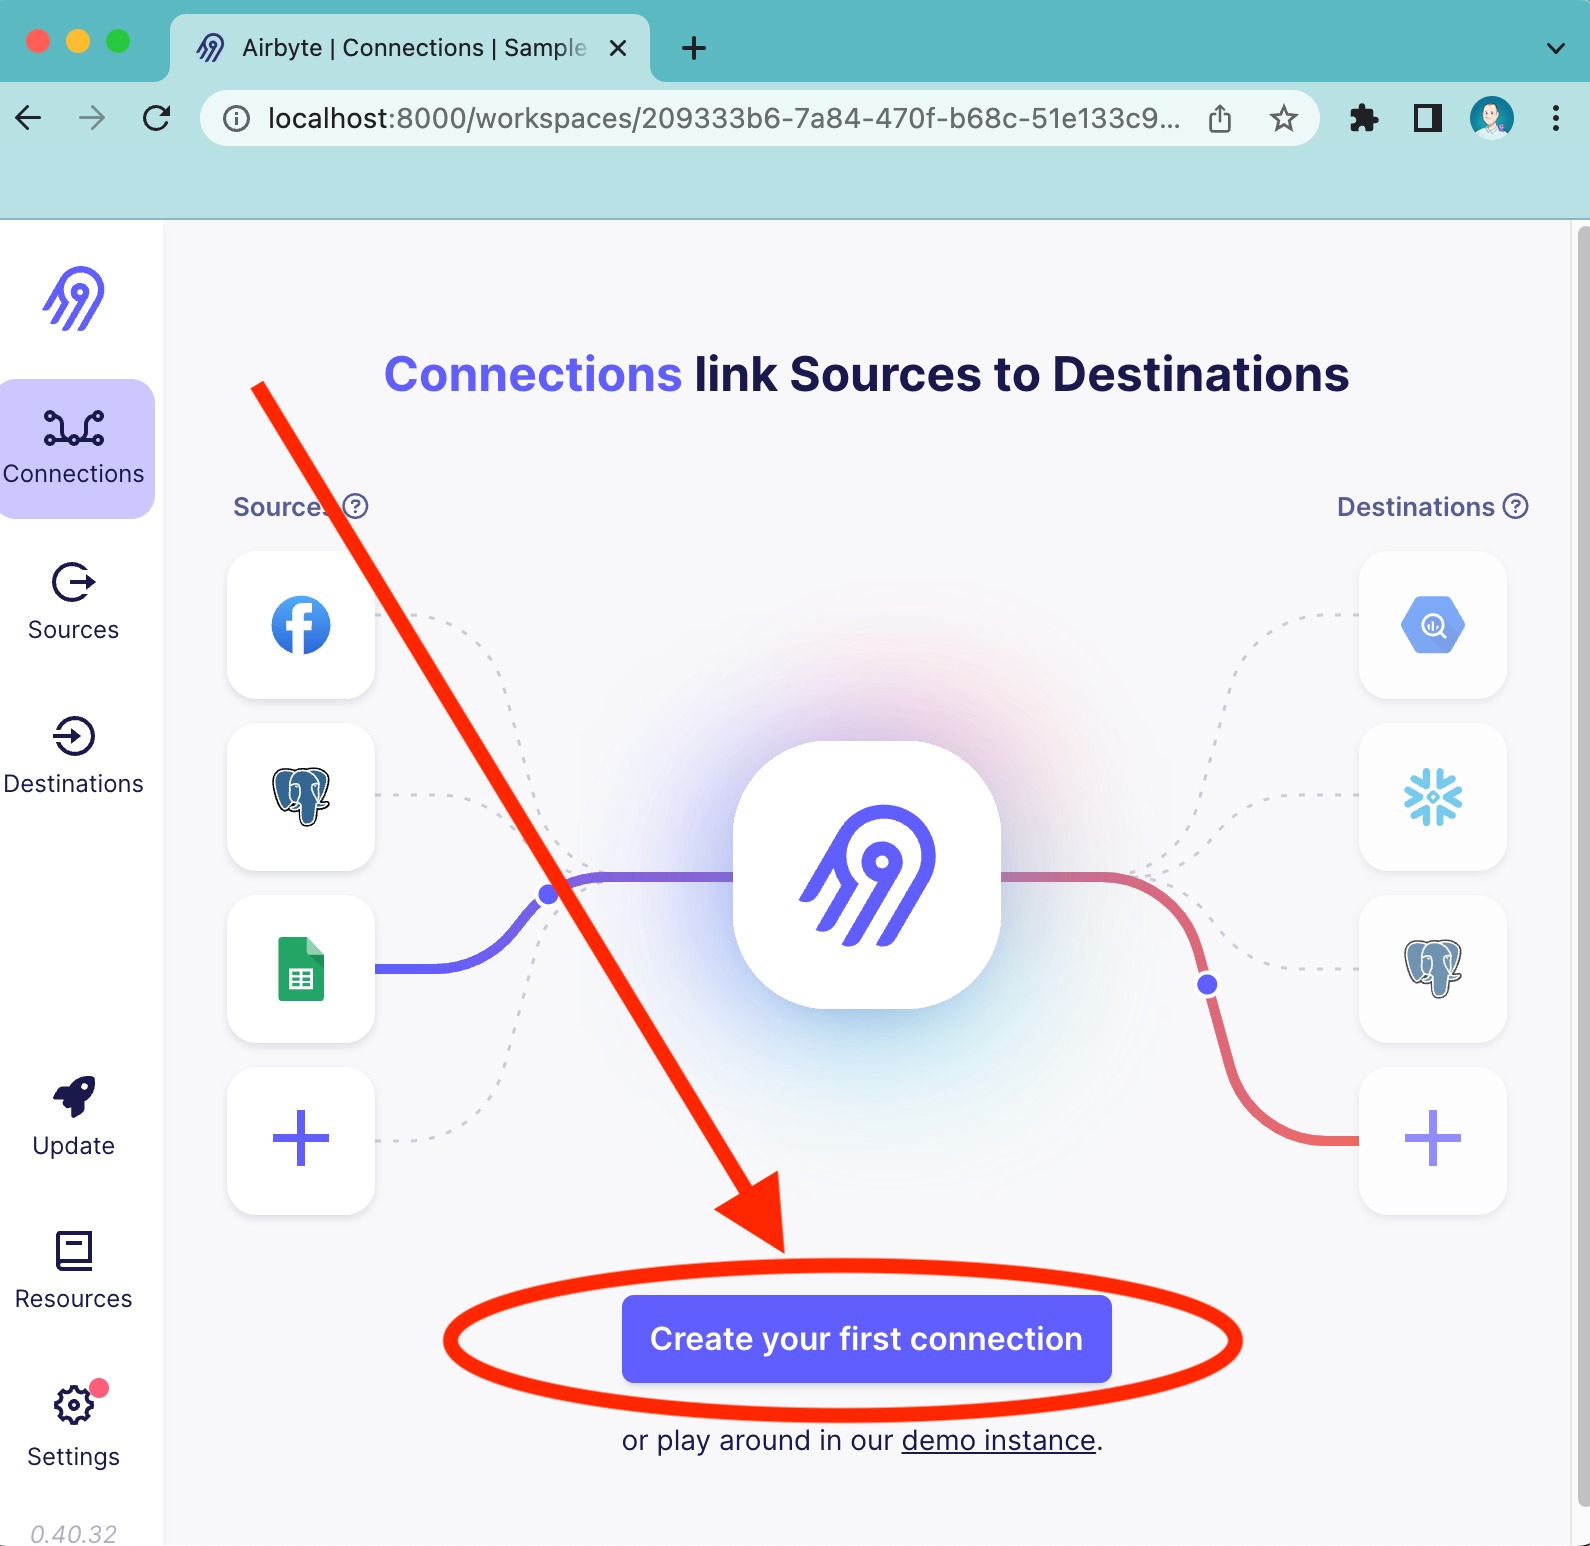
Create a connection that sends data from the Sample Data (Faker) source to the Local JSON (file system) output. Click on “Create your first connection” as shown below:
You should then see an option to set up a source connection. Select the Faker source from the dropdown as shown below.

After selecting Sample Data as the source, you will see a screen that should look as follows. Click on Set up source as shown below.
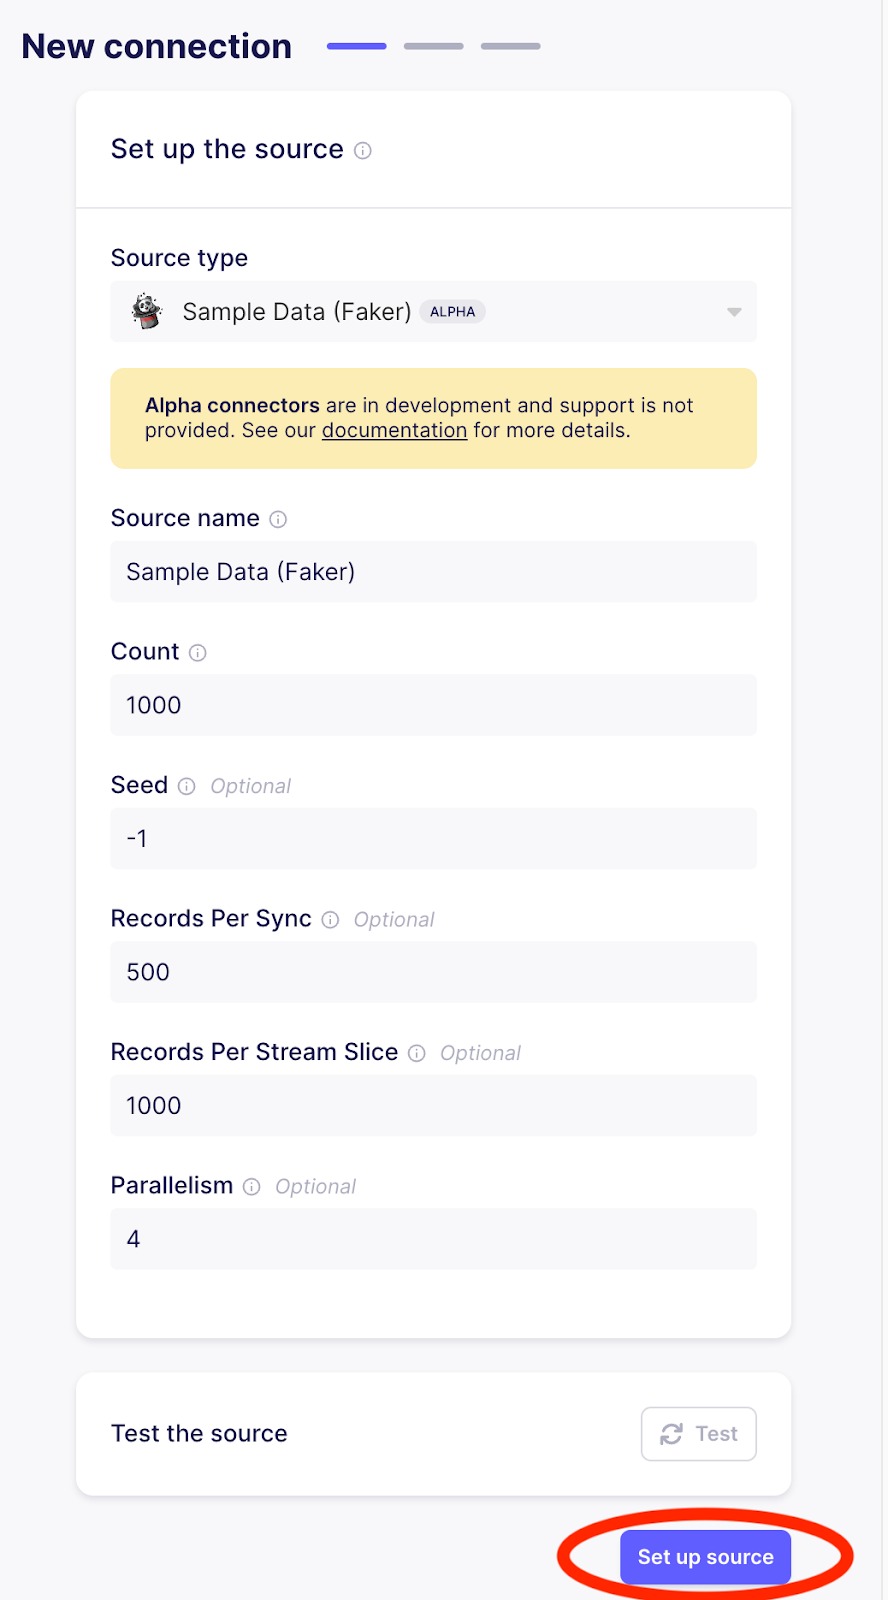
Configure Sample Data (Faker) as a source
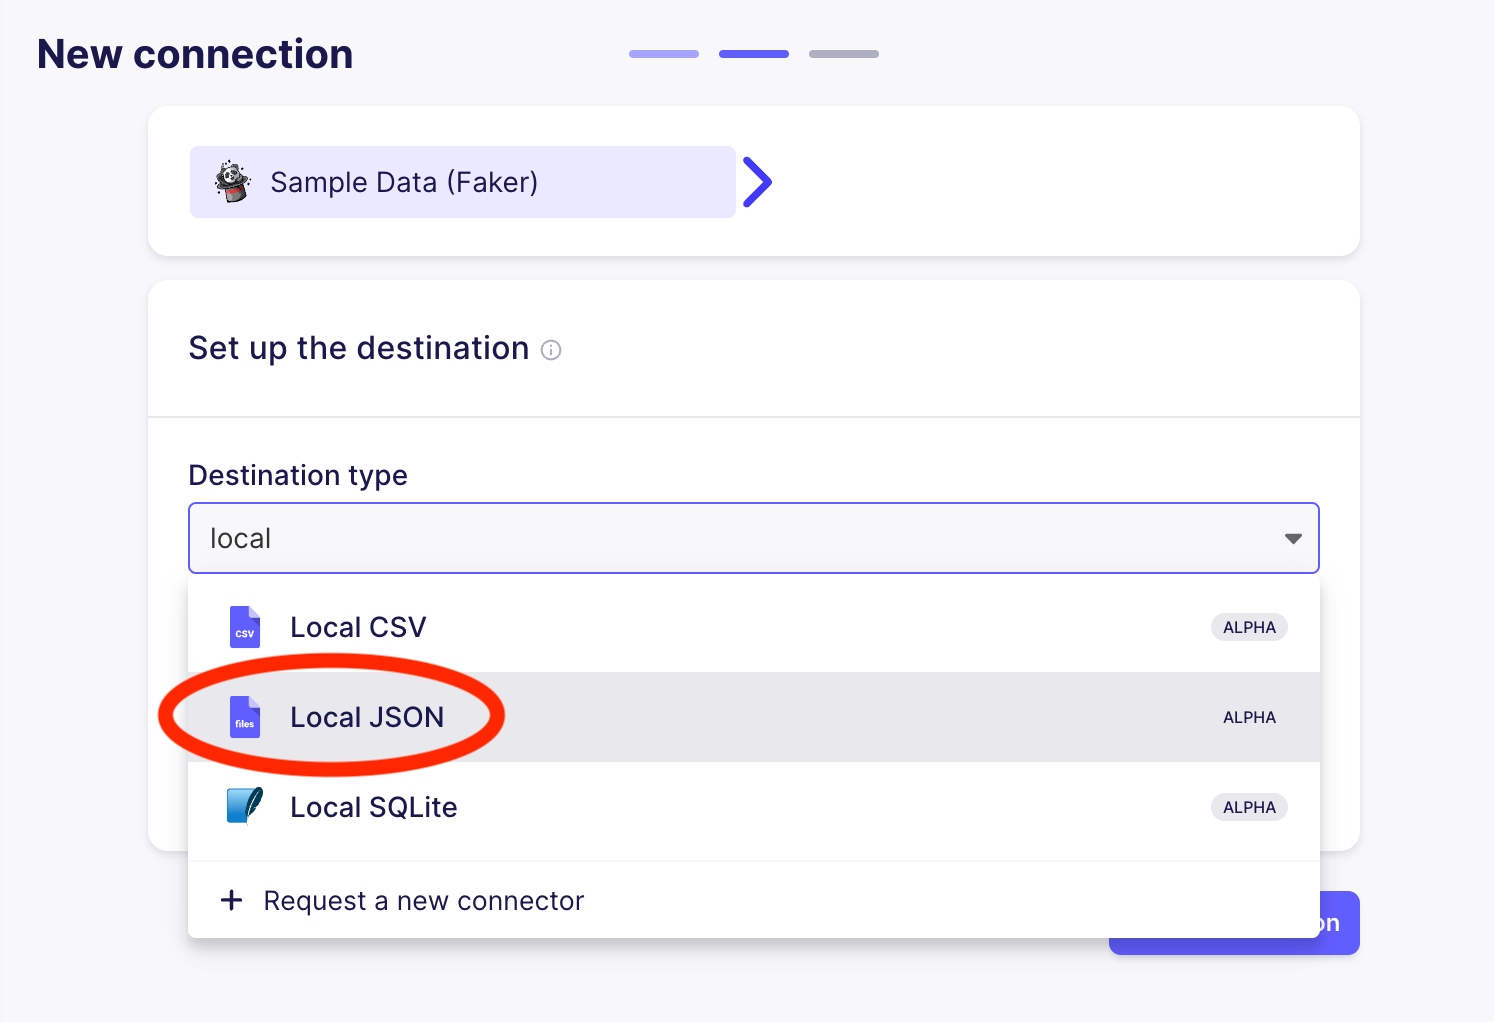
You will then wait a few seconds for the Sample Data source to be verified, at which point you will be prompted to configure the destination that will be used for the connection. Select Local JSON as shown below:
After selecting Local JSON as the output, you will need to specify where the JSON files should be written. By default, the path that you specify will be located inside /tmp/airbyte_local. In this tutorial, I set the destination to /json_from_faker, which means that the data will be copied to /tmp/airbyte_local/json_from_faker on the localhost where Airbyte is running. After specifying the Destination Path, click on Set up Destination.
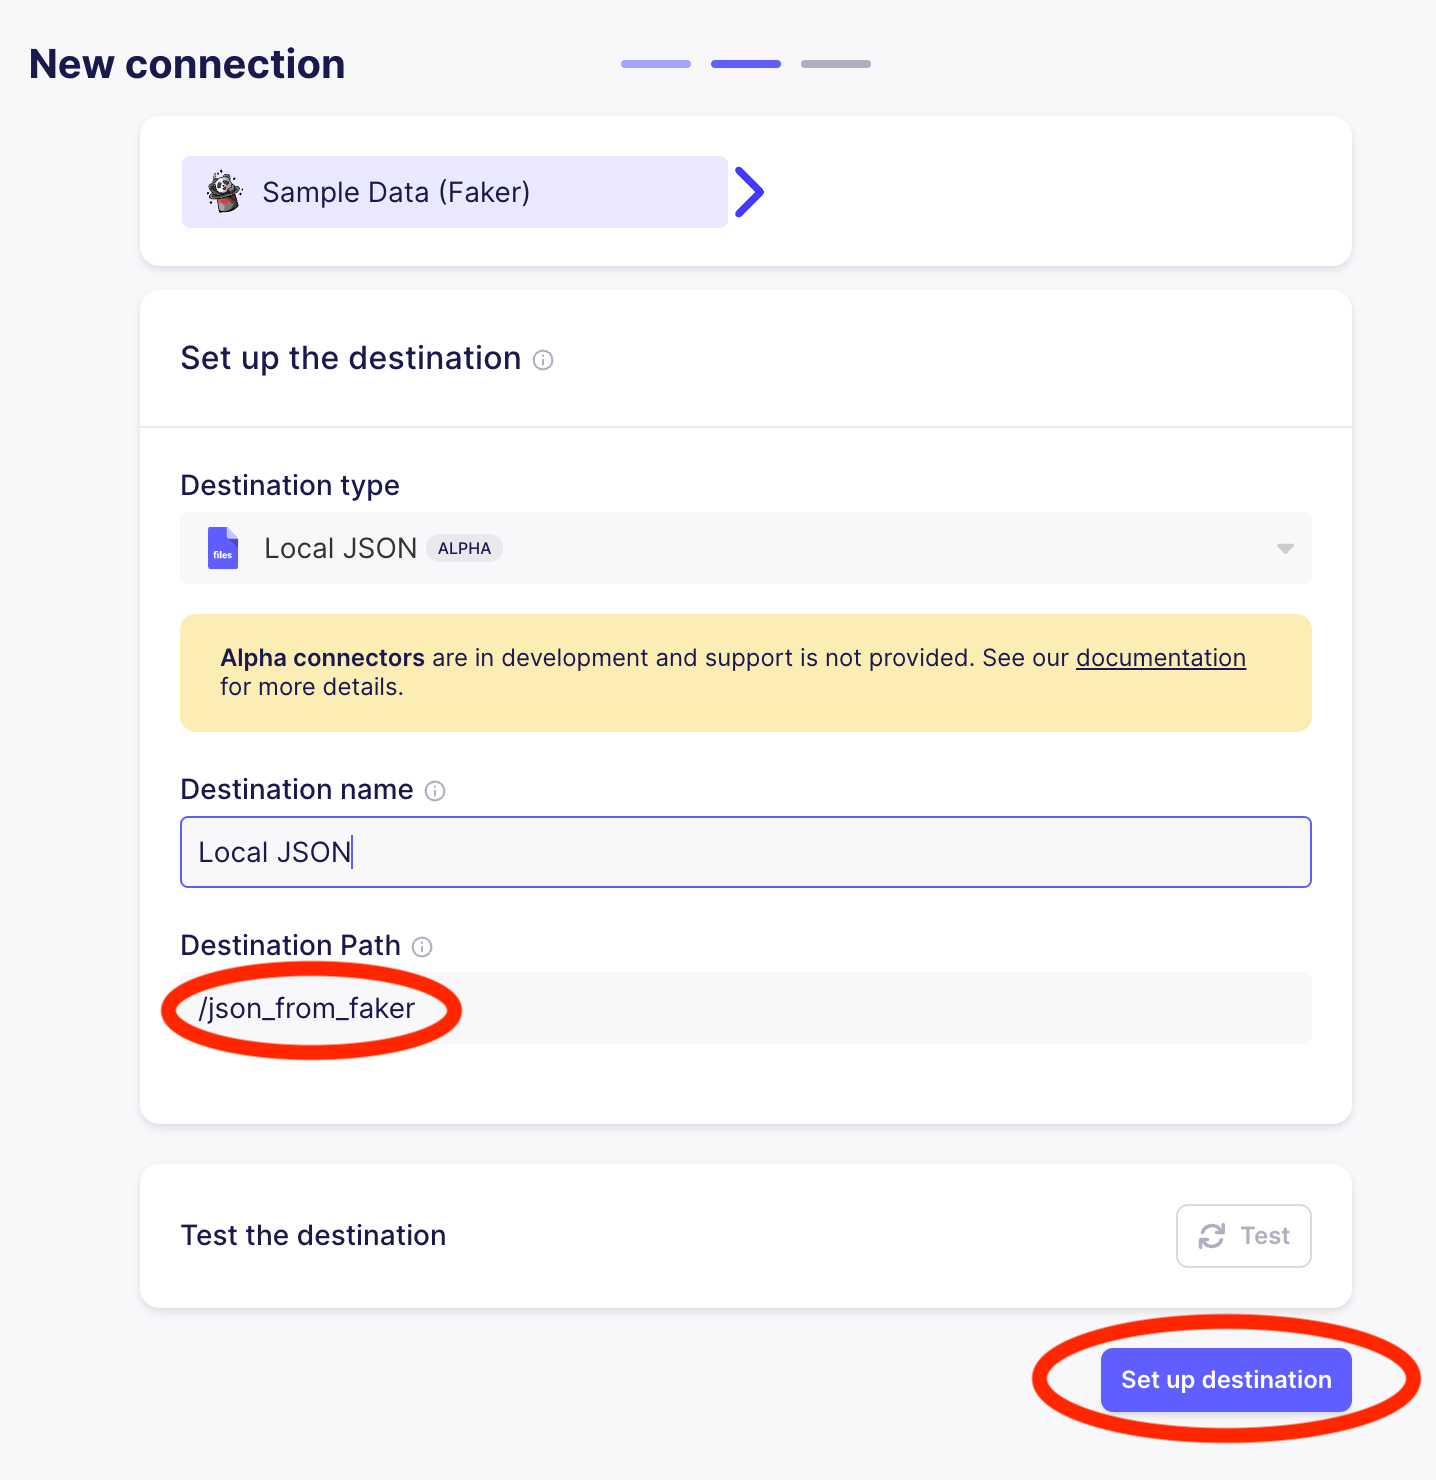
Configure the Local JSON destination
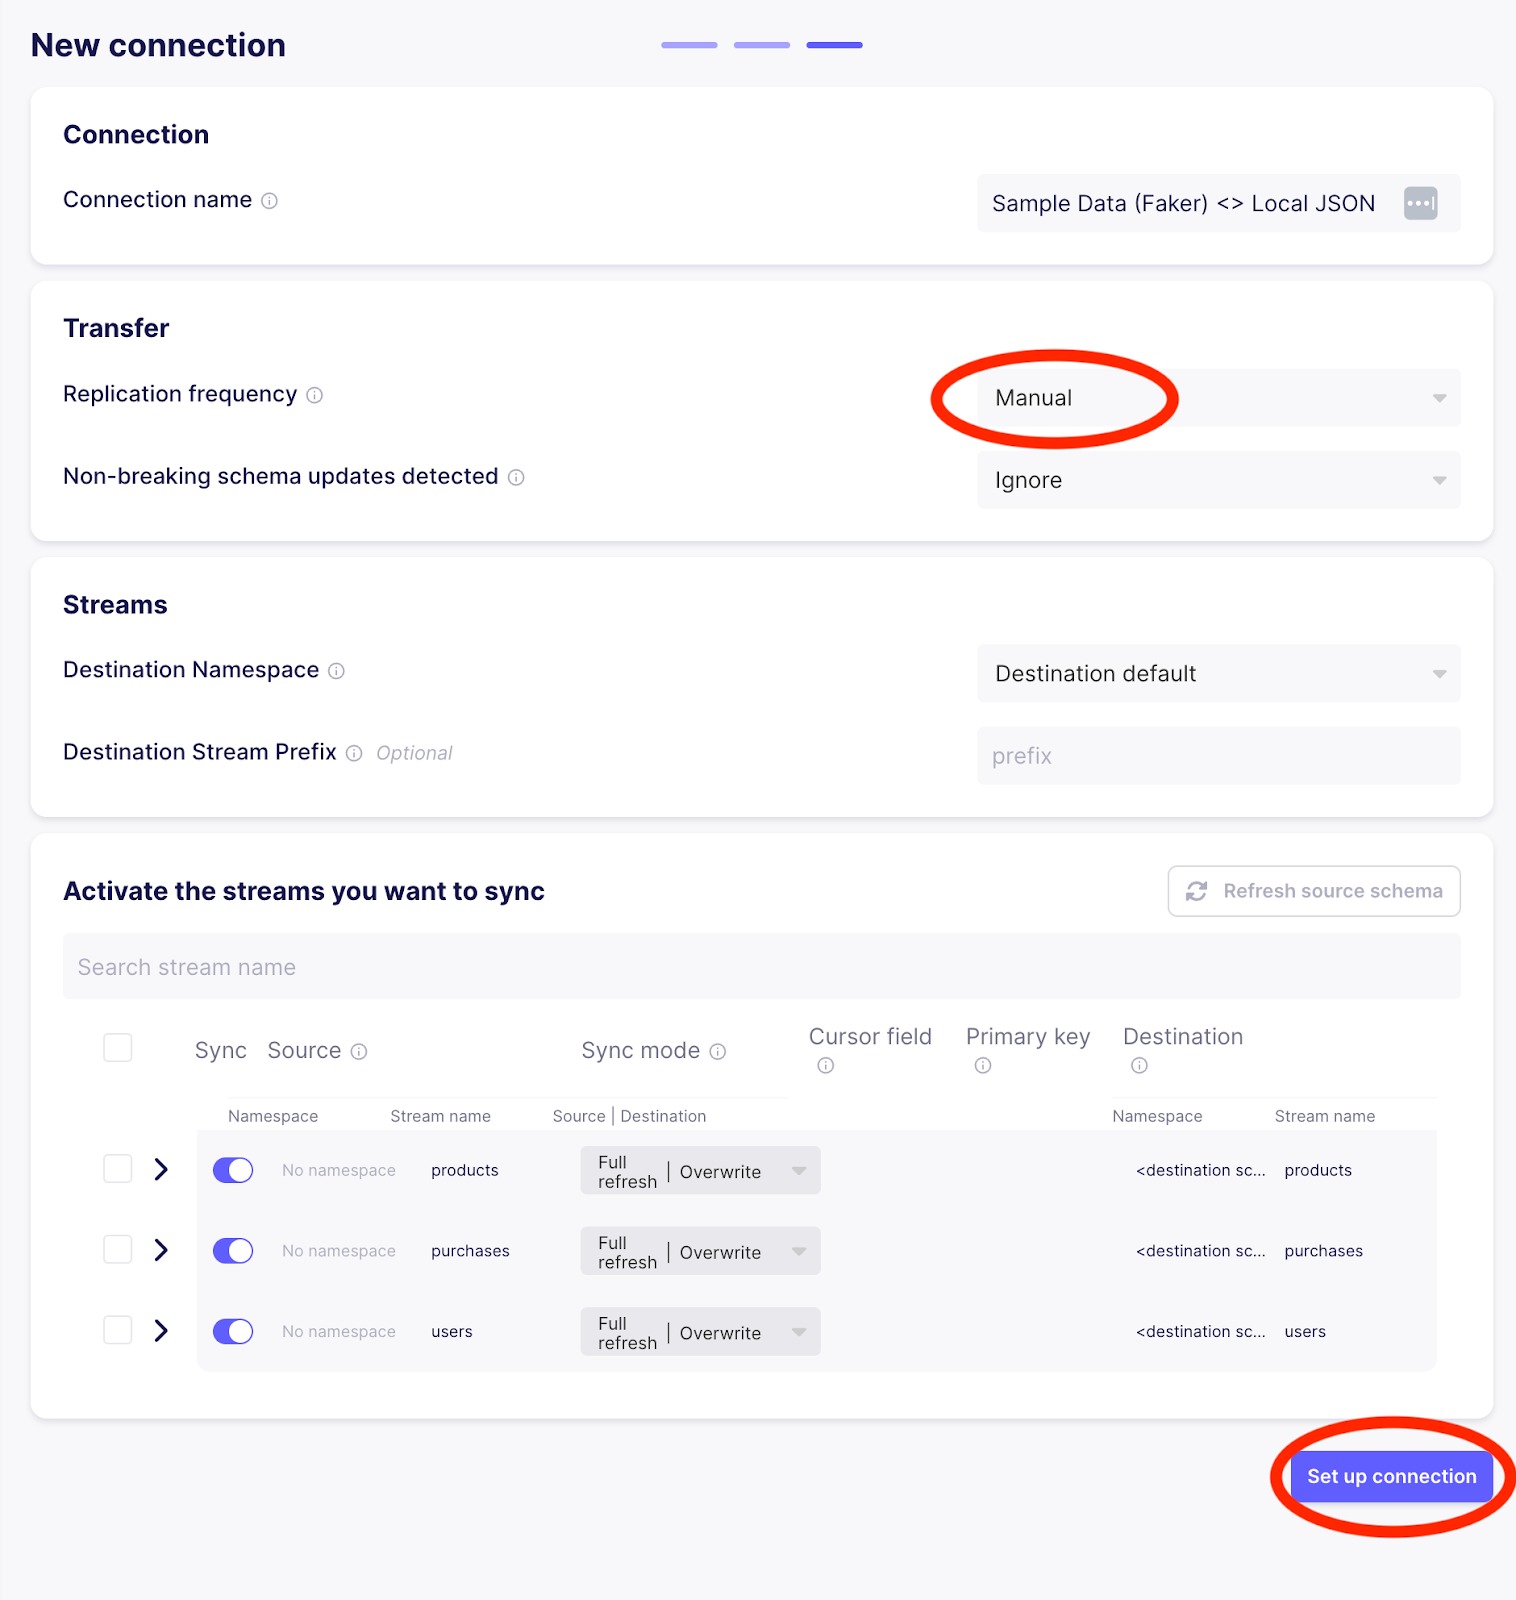
This will take you to a page to set up the connection. Set the replication frequency to Manual (since we will use Airflow to trigger Airbyte syncs rather than using Airbyte’s scheduler) and then click on Set up connection, as highlighted in the image below.
Trigger a sync from the Sample Data (faker) source to the Local JSON output by clicking on Sync now, as highlighted in the image below.
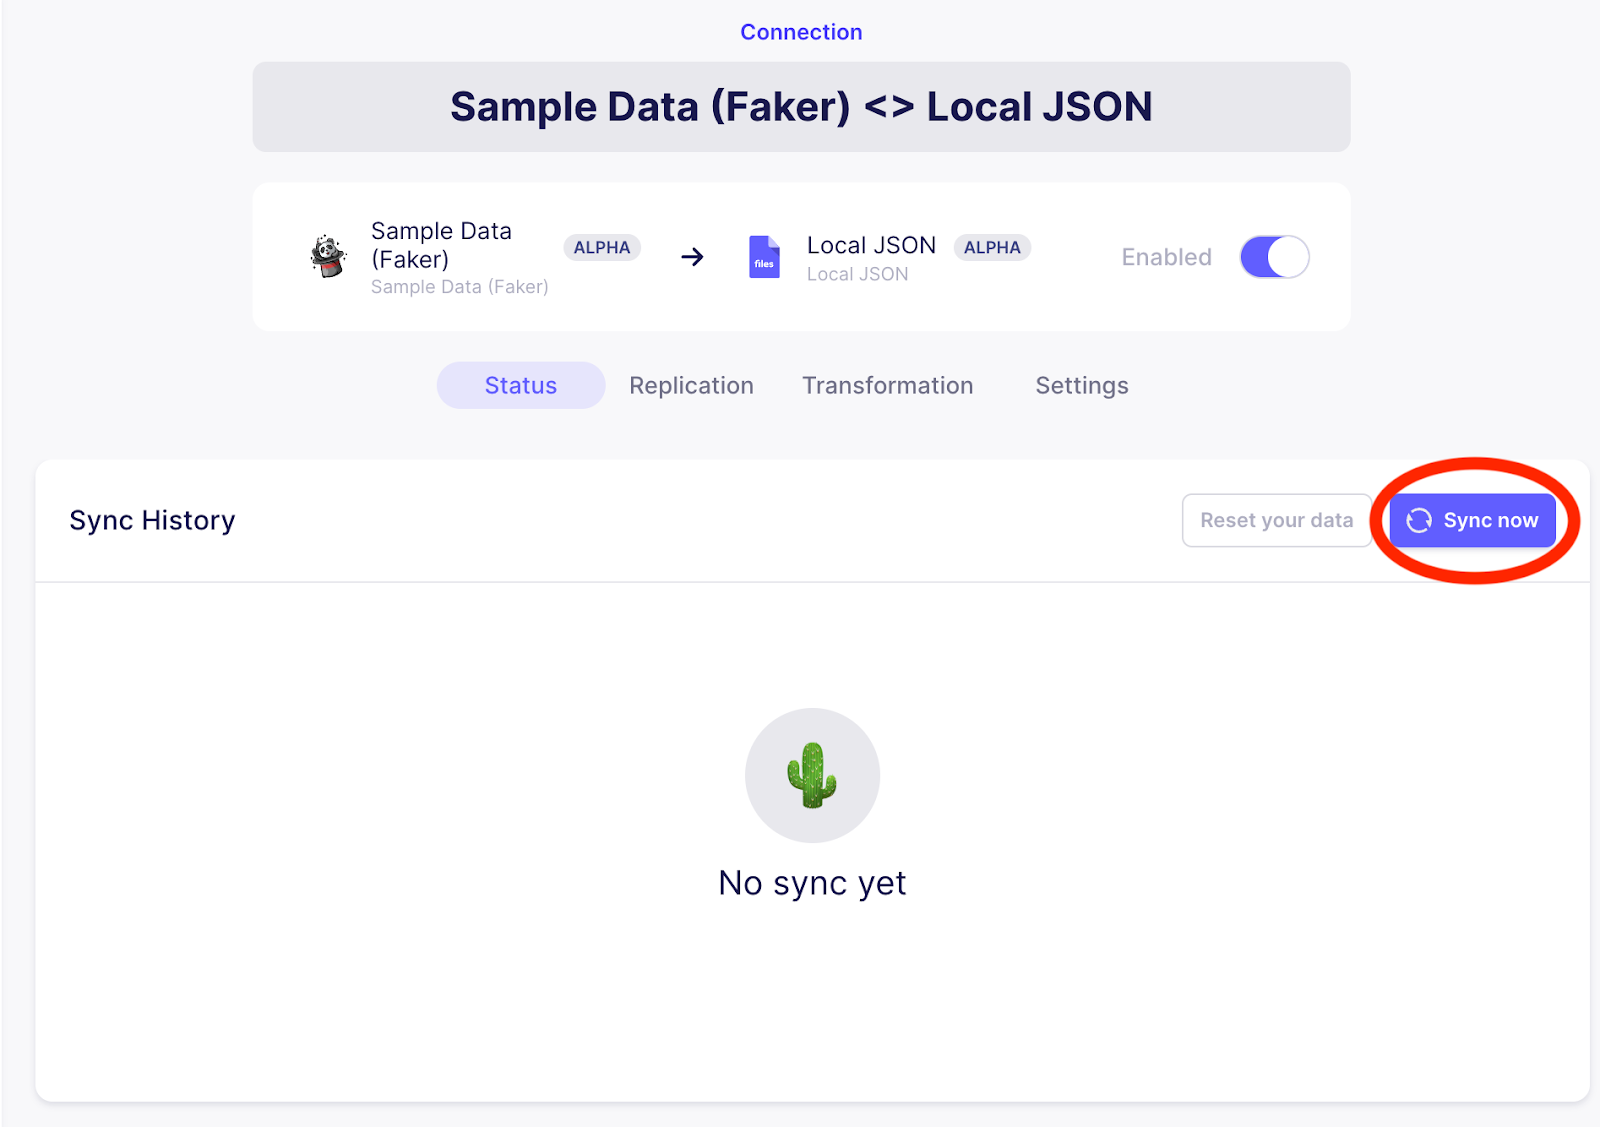
Manually trigger a sync from the UI
The sync should take a few seconds, at which point you should see that the sync has succeeded, as shown below.
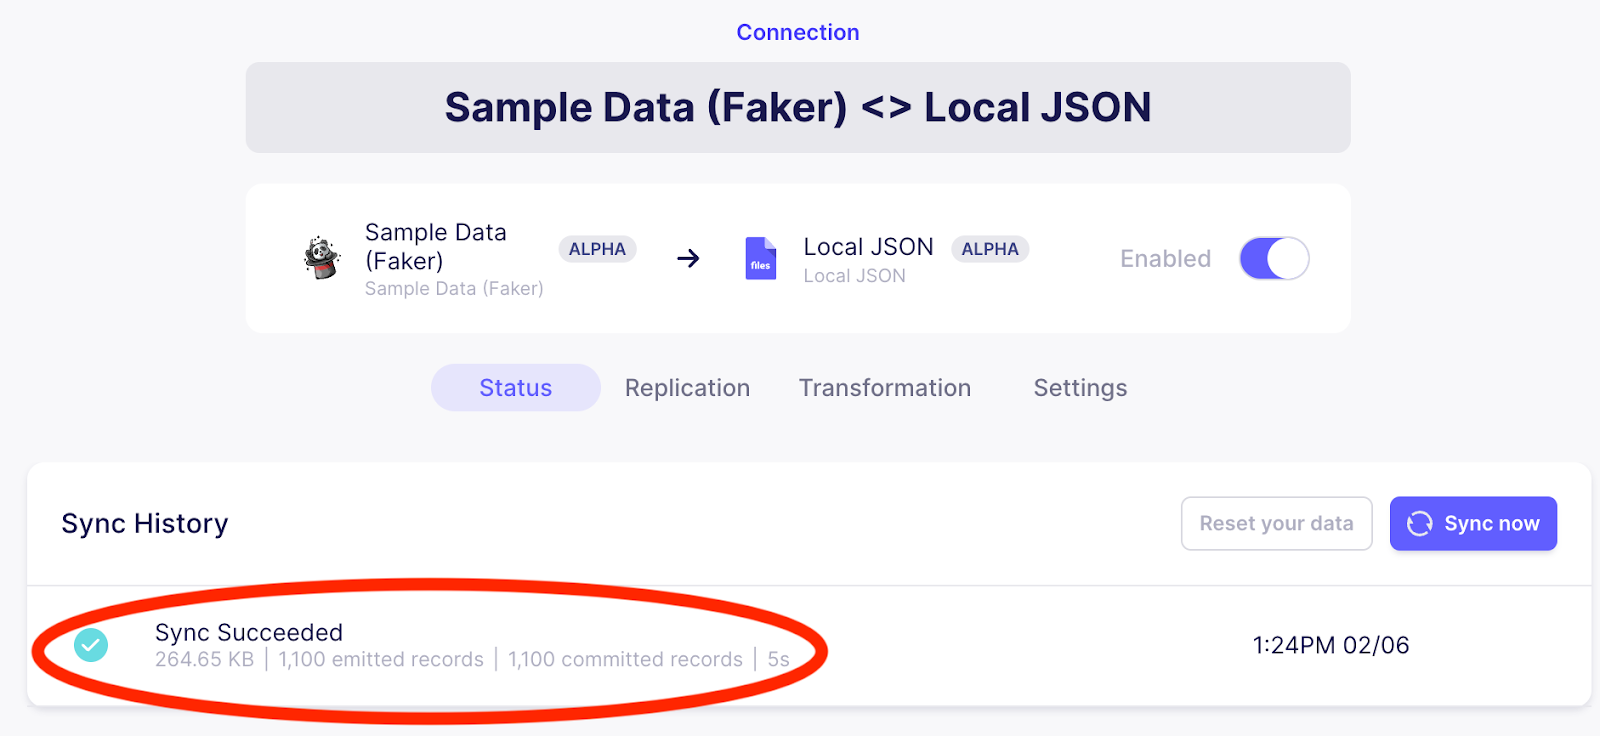
After the sync has been completed
You can now confirm if some sample data has been copied to the expected location. As previously mentioned, for this example, the JSON data can be seen in /tmp/airbyte_local_json_from_faker. Because there were three streams generated, the following three JSON files should be available:

You have now created a simple example connection in Airbyte, which can be manually triggered. A manually triggered connection is ideal for situations where you wish to use an external orchestrator.
In the next section, you will see how to trigger a manual sync on this connection by hitting a REST endpoint directly. After that, you will see how Airflow can be used to hit that same endpoint to trigger synchronizations.
Test the API Endpoints With cURL
Before using the REST endpoint from within Airflow, it is useful to verify that it is working as expected. Get the connectionId from the URL shown in your browser as annotated in the following image:
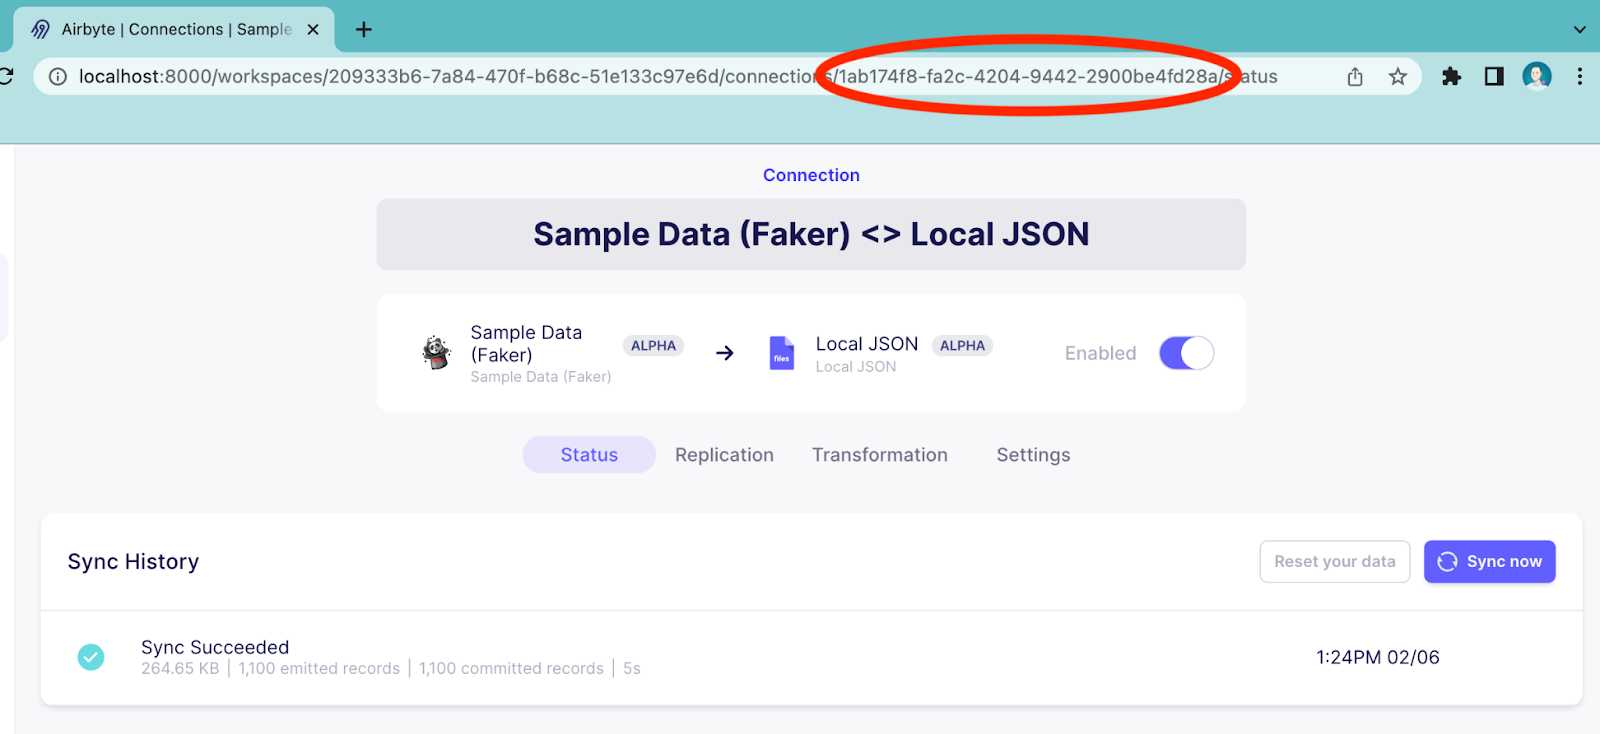
Get the Airbyte connection ID
You can use cURL to verify that Airbyte’s API endpoint is working as expected. Be sure to update the connectionID in the following command to reflect the value extracted from the URL above. Execute a call to the REST API as follows:

The above command should respond with the following, which indicates that a Sync has started:

If you look in the UI, you will see that a sync executes each time that you run the cURL command. In my case, I have executed the command twice within a minute of each other, so my UI looks as follows:
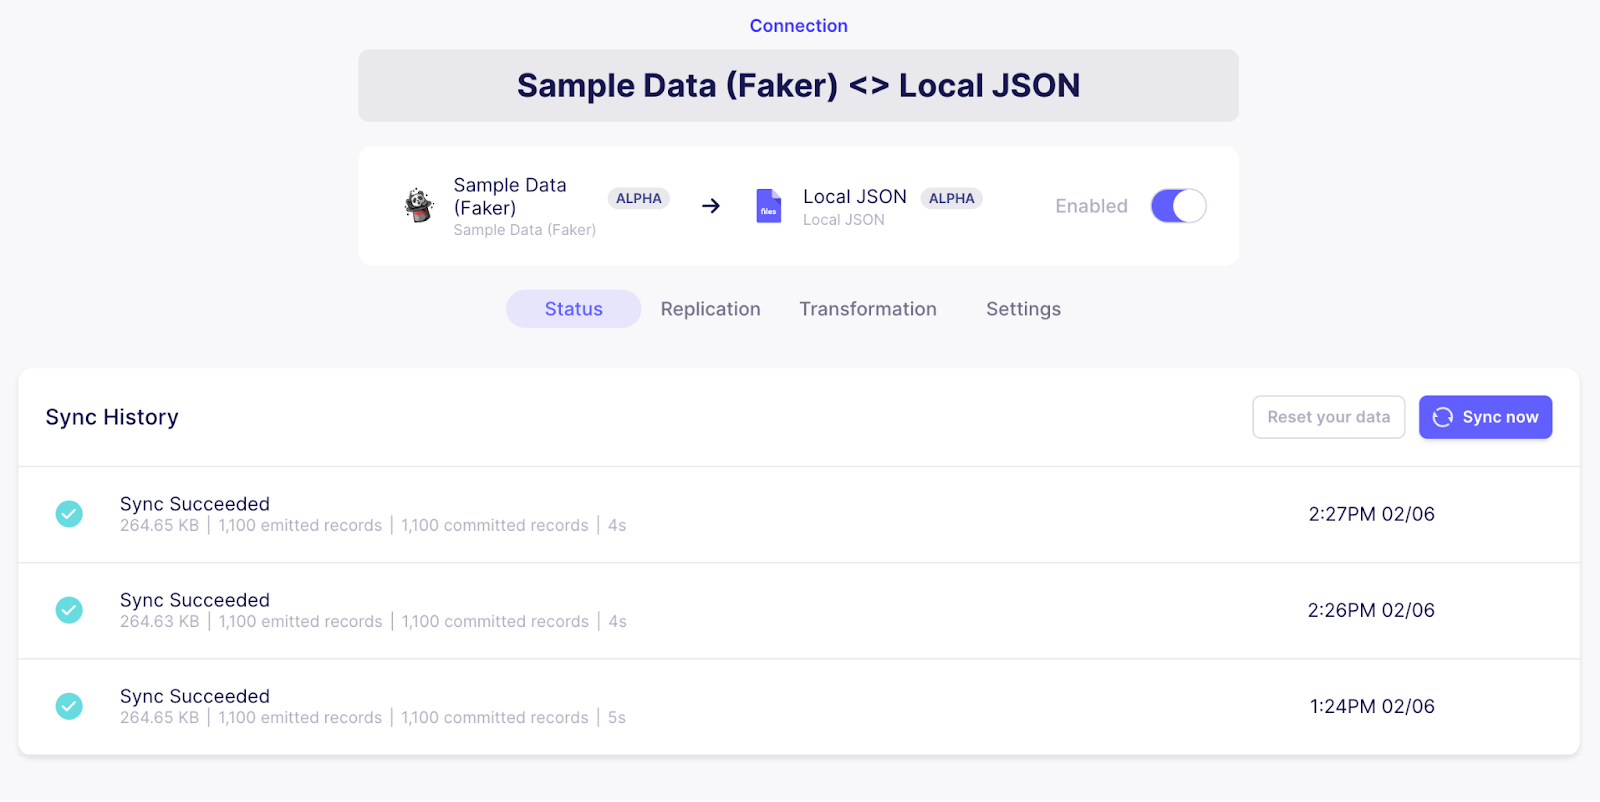
View the Sync History
Install and Launch Airflow
Now that you have verified that the REST endpoint is functioning as expected, we’ll start working with Airflow, which will trigger that same Airbyte API endpoint to execute a sync. The instructions for this section are based on Running Airflow in Docker, with additional information about how to get the Airbyte provider installed.
Create a new folder that will be used for your Airflow installation and cd into it:
 Download the Docker-compose file for running Airflow as follows:

Then, create additional required sub-directories and assign the Airflow UID as follows:

In order to support Airbyte, the Airflow Docker image requires Airbyte provider functionality. The first step is to create a file called Dockerfile in your airflow folder with the following contents:

In order to enable the building of a new Airflow image using the Dockerfile that you have just created, you should uncomment the following line in docker-compose.yaml:

Additionally, add the following line to docker-compose.yaml in order for Airflow to see and manipulate files in the local folders that Airbyte will write to:

The relevant changes to docker-compose.yaml are highlighted in the following image:
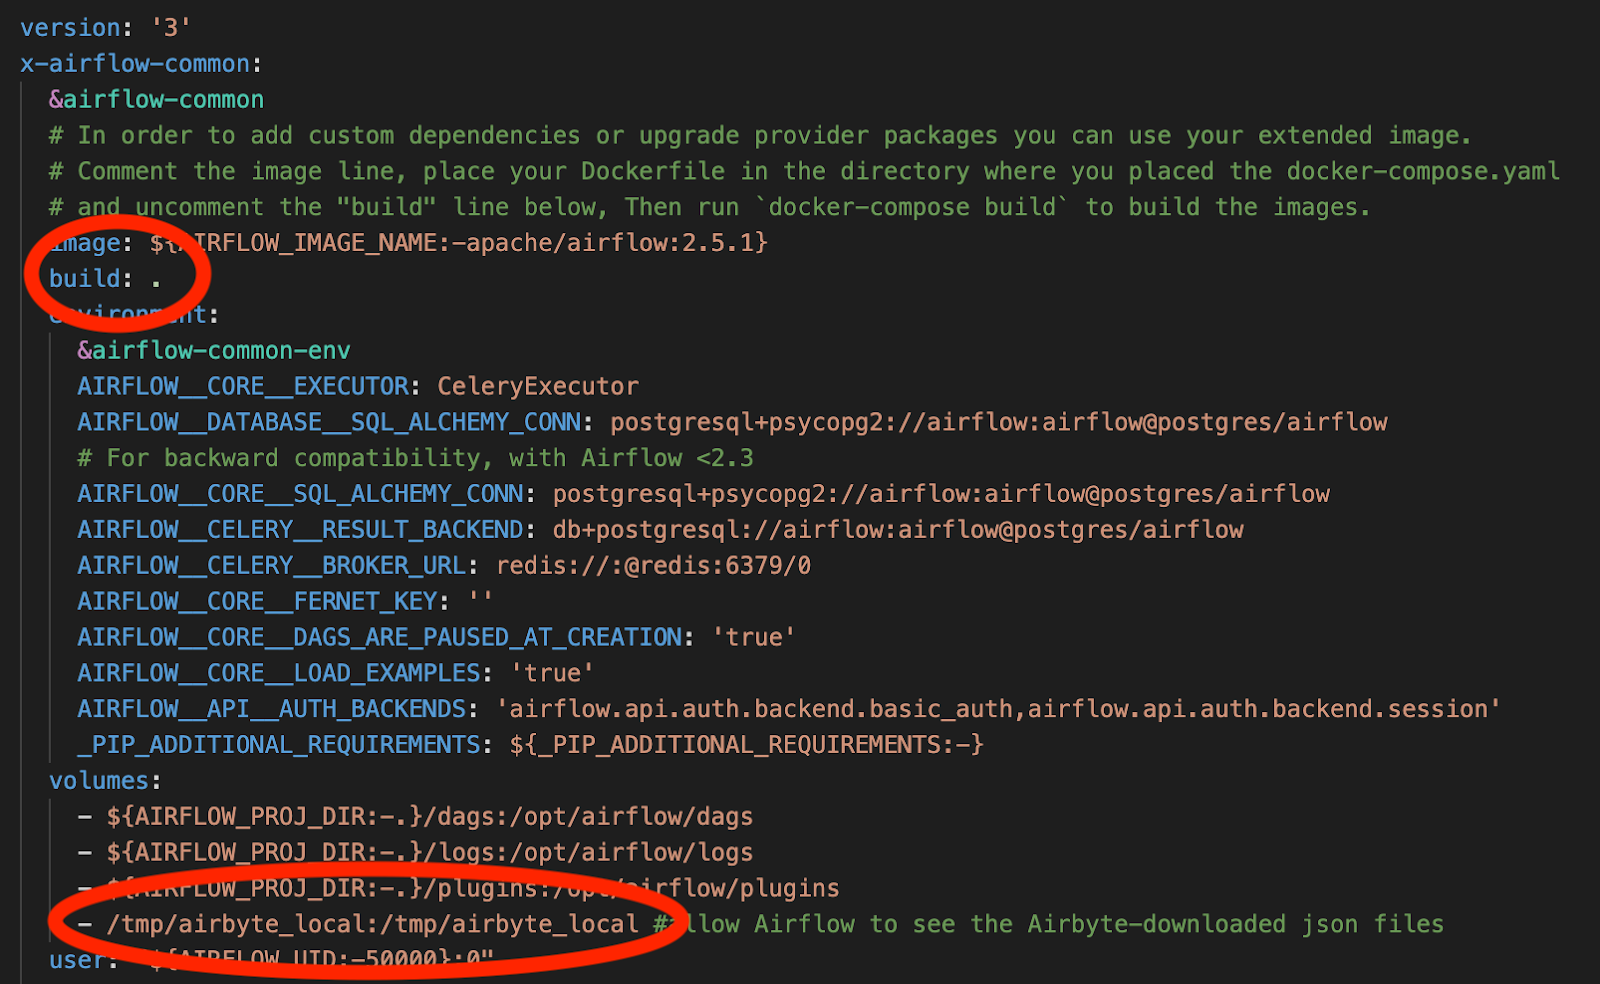
The relevant portions of the docker-compose.yaml file
Build the docker image as follows:

This should show that the Airbyte providers specified in the Dockerfile have been installed, as shown in the following image:
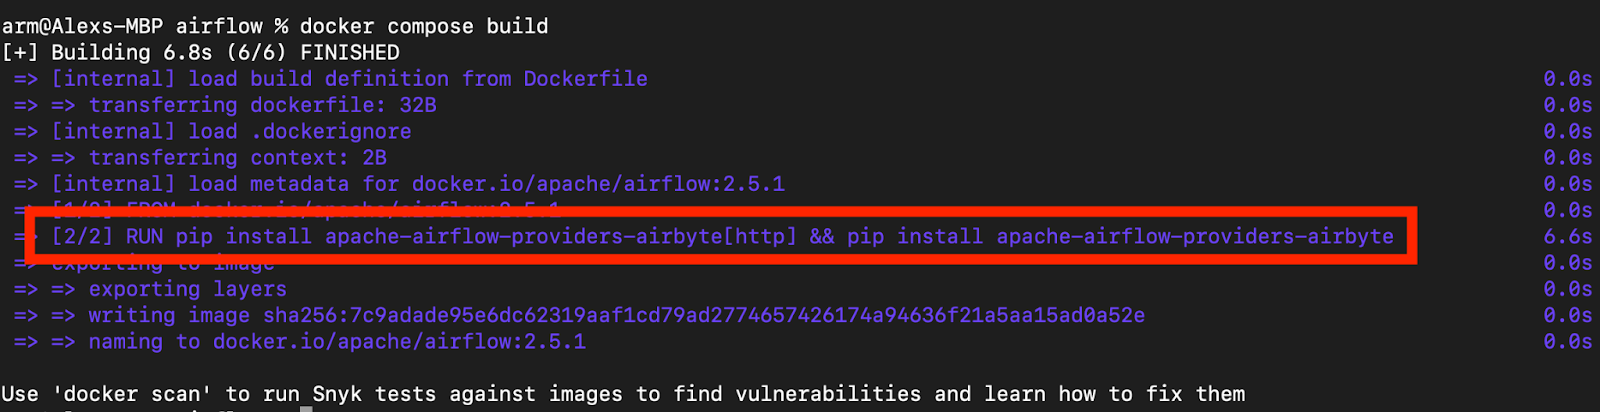
Confirmation that the Airflow provider has been installed
Next, you can initialize Airflow as follows:

You are now ready to start Airflow! Execute the following command to launch Airflow and its associated containers:

Once the containers are running, you can view the list of the containers with the following command:

In my case, there are several containers running for Airbyte and several containers running for Airflow, as shown in the image below:
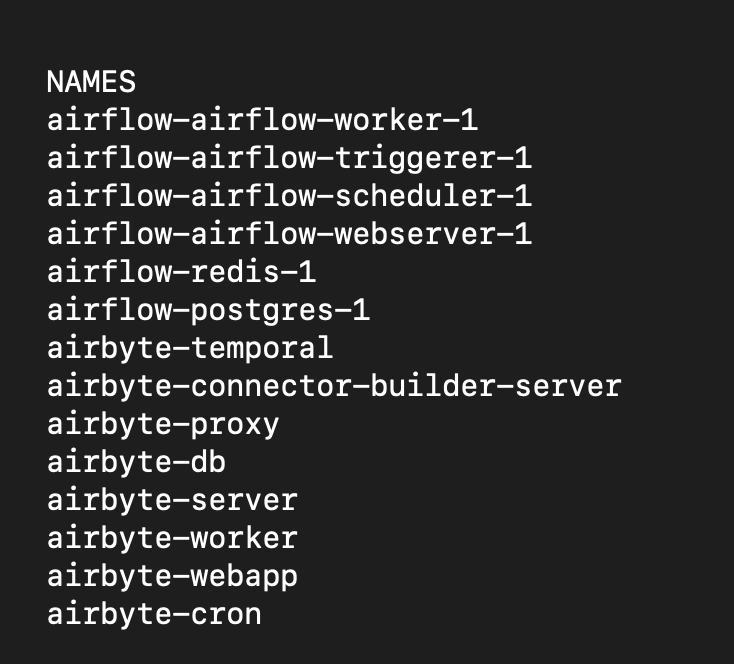
The Docker containers which are running for Airflow and Airbyte
Confirm that the Airbyte folders are visible from Airflow by logging into the Airflow scheduler container with the following command:

From within that container, you should be able to see an airbyte_local folder in the /tmp directory as follows:

Confirmation that the airbyte_local directory is visible
Next, you will log in to Airflow by setting your browser to localhost:8080, which should look as follows:
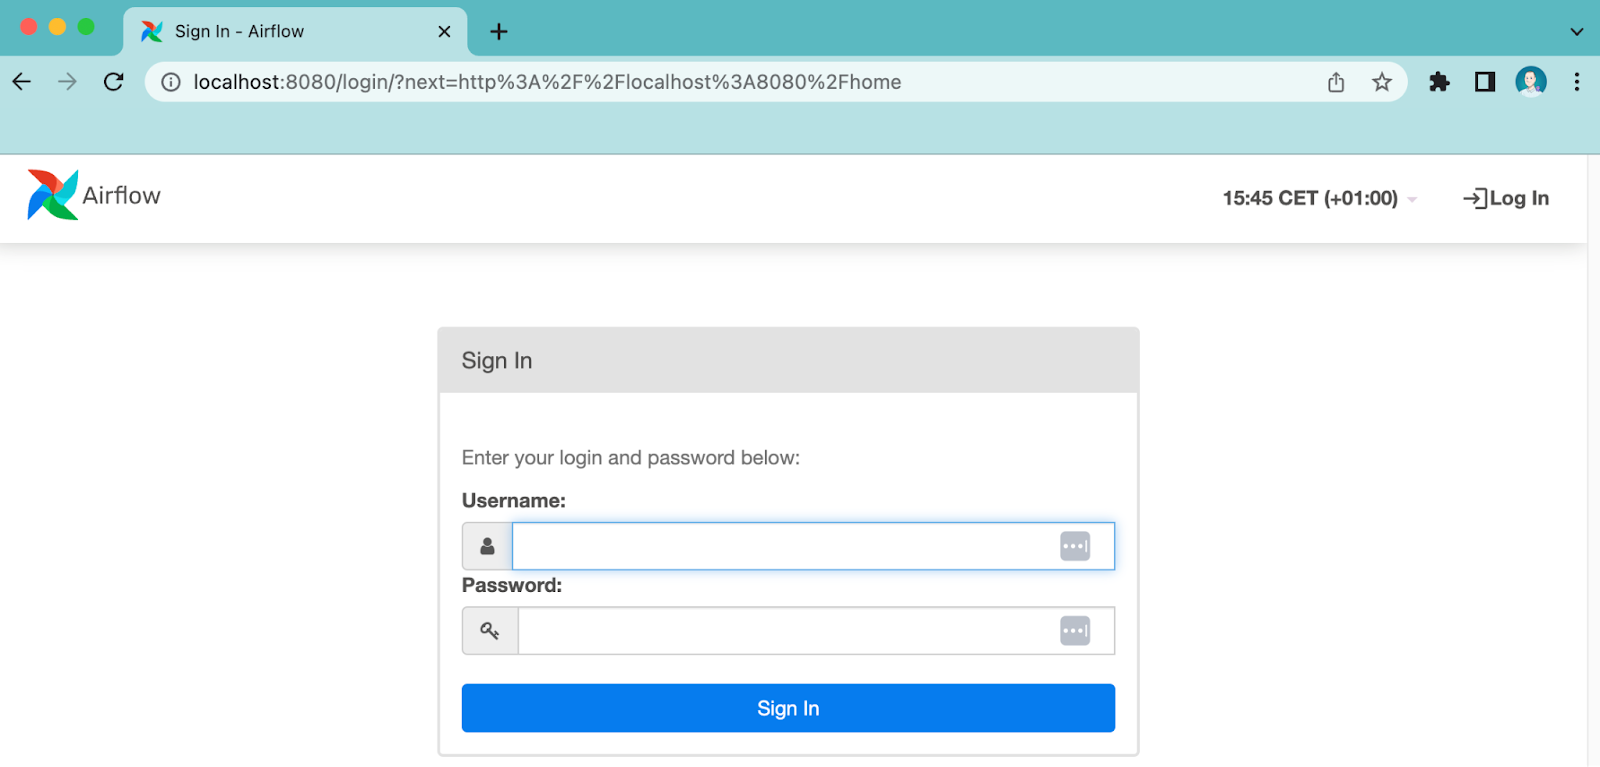
Airflow login prompt
As documented in Airflow’s REST API instructions, the default username is airflow, and the default password is also airflow. Once you have logged in, you will see a screen that looks as follows:
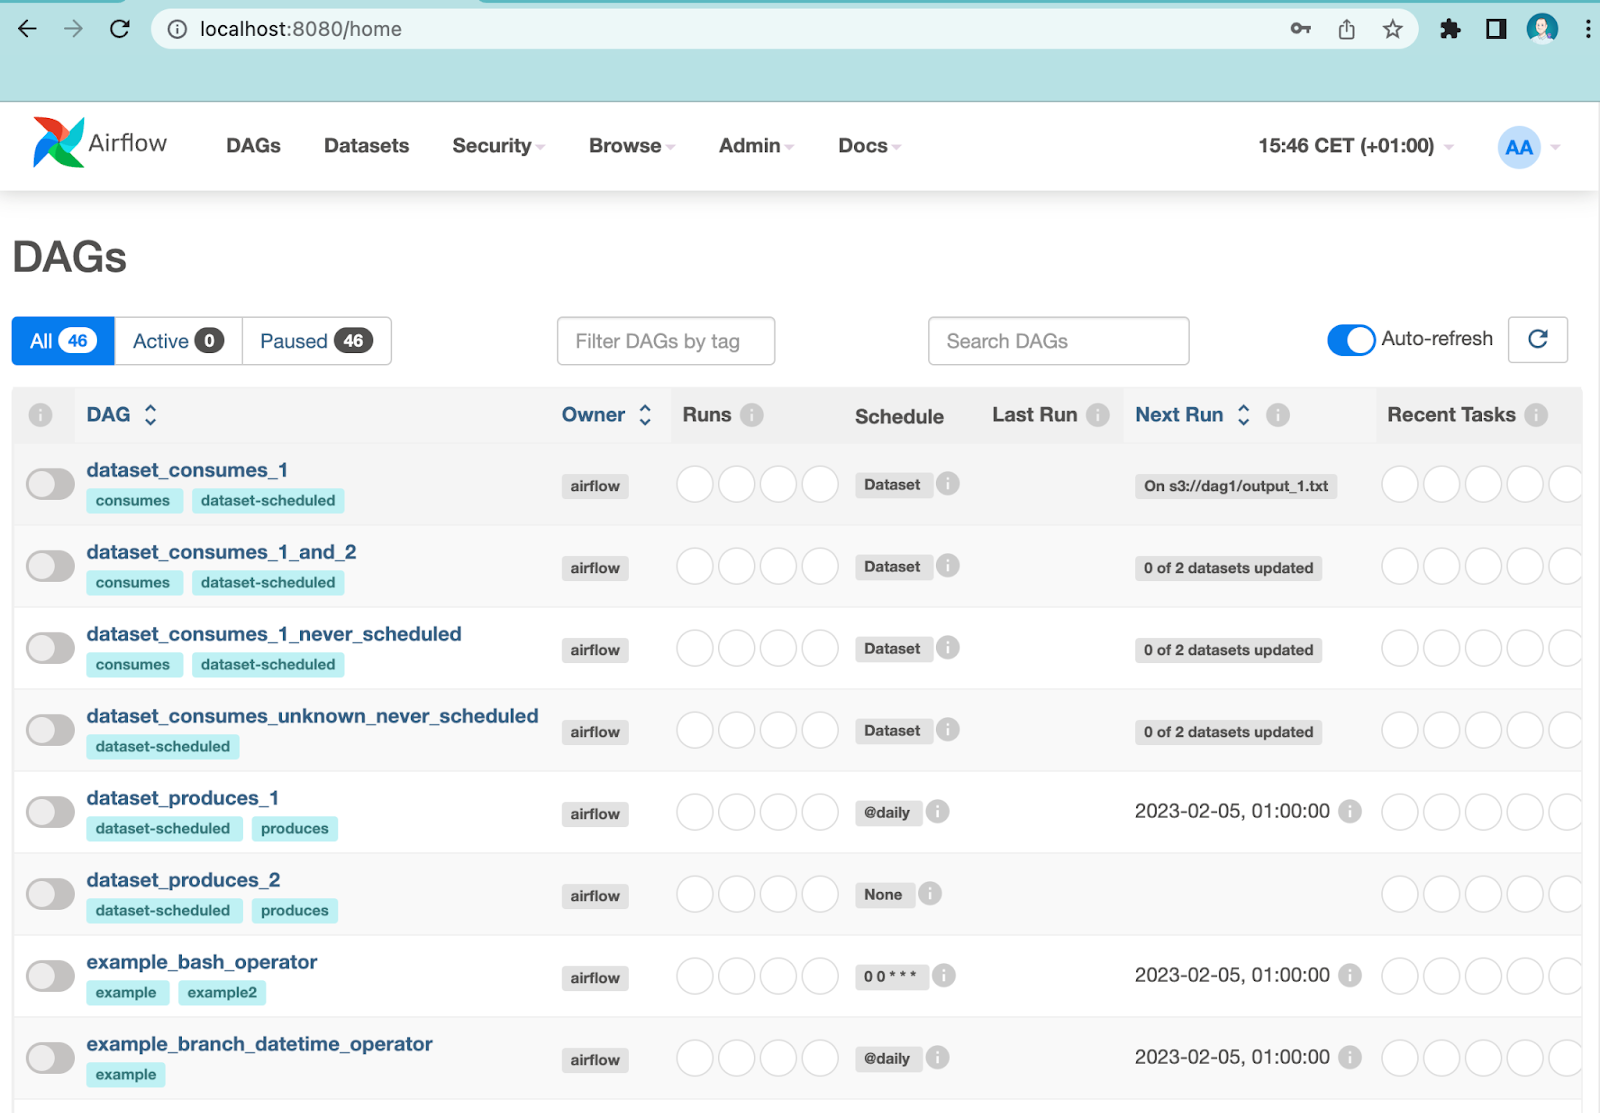
Airflow screen after login
Create Airflow Connections
Airflow has its own concept of connections, and we will make use of an Airflow connection to trigger a synchronization using an Airbyte connection.
In order to demonstrate how Airflow can execute additional tasks that depend on the completion of an Airbyte synchronization, we will also define an Airflow connection that will be used for accessing and modifying files on the local filesystem.
To define a connection Airflow will use to communicate with Airbyte, go to admin→connections as shown below:
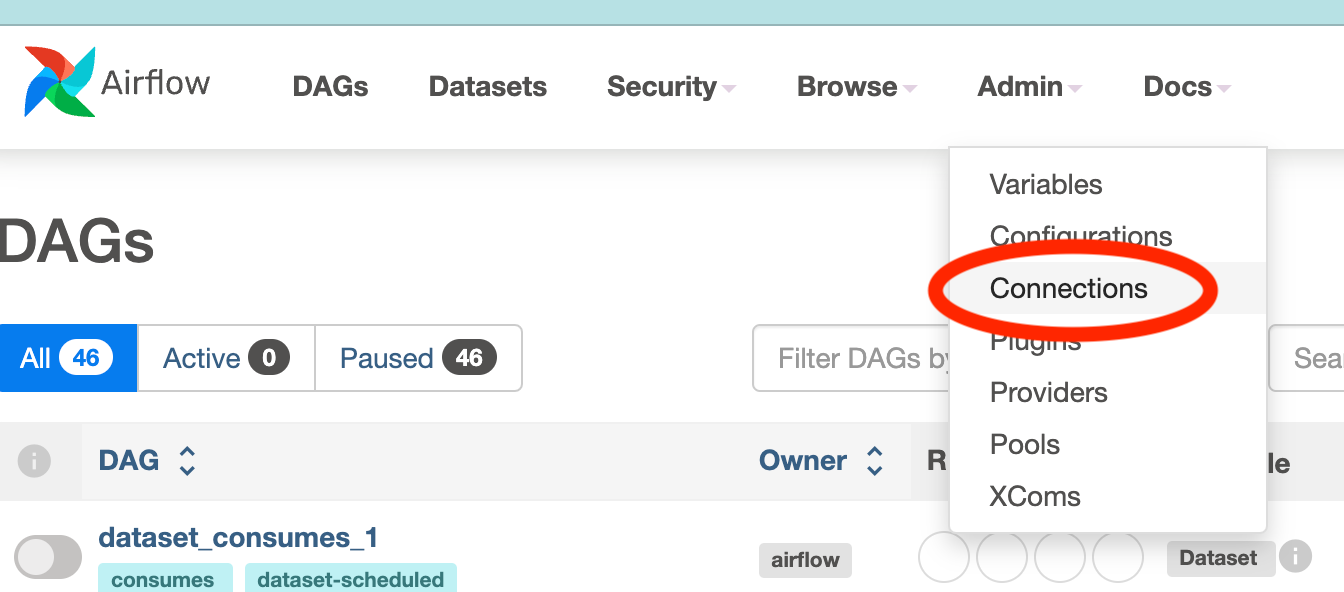
Create an Airflow connection
Then click on the + symbol as annotated in the image below:
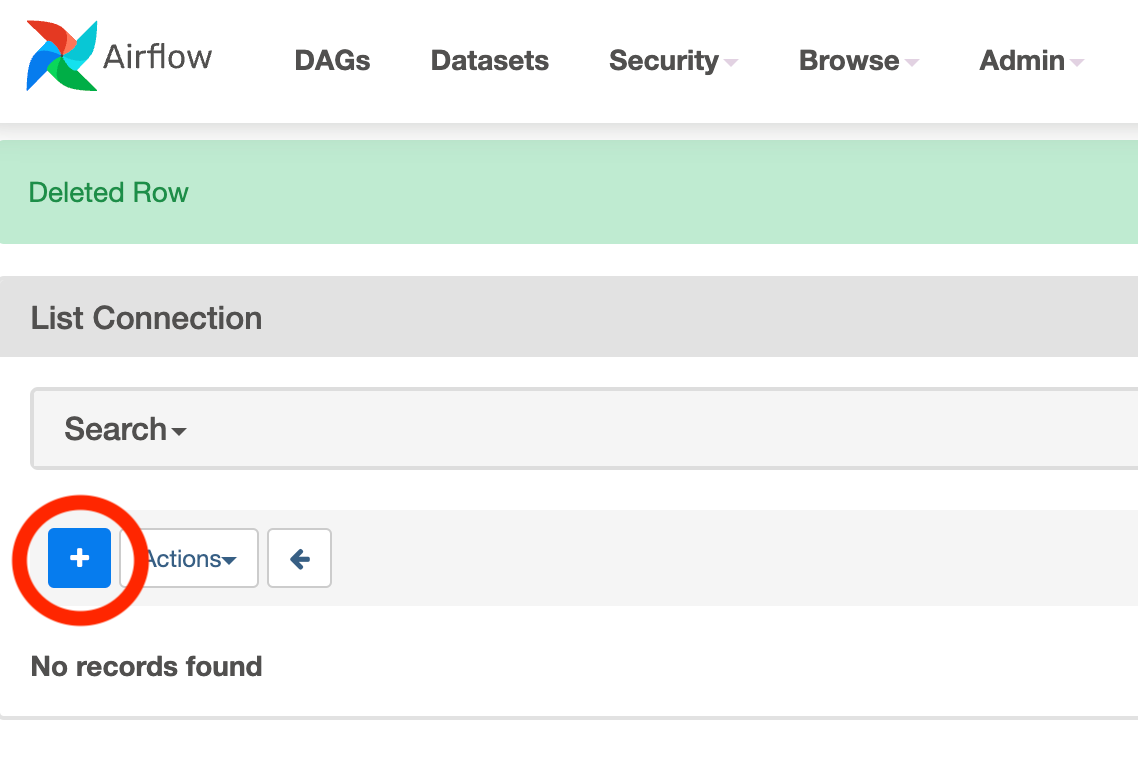
Click on the button to create a new Airflow connection
Complete the information about the connection that Airflow will use to connect to Airbyte as follows, and click on the Test button. This should look as follows:
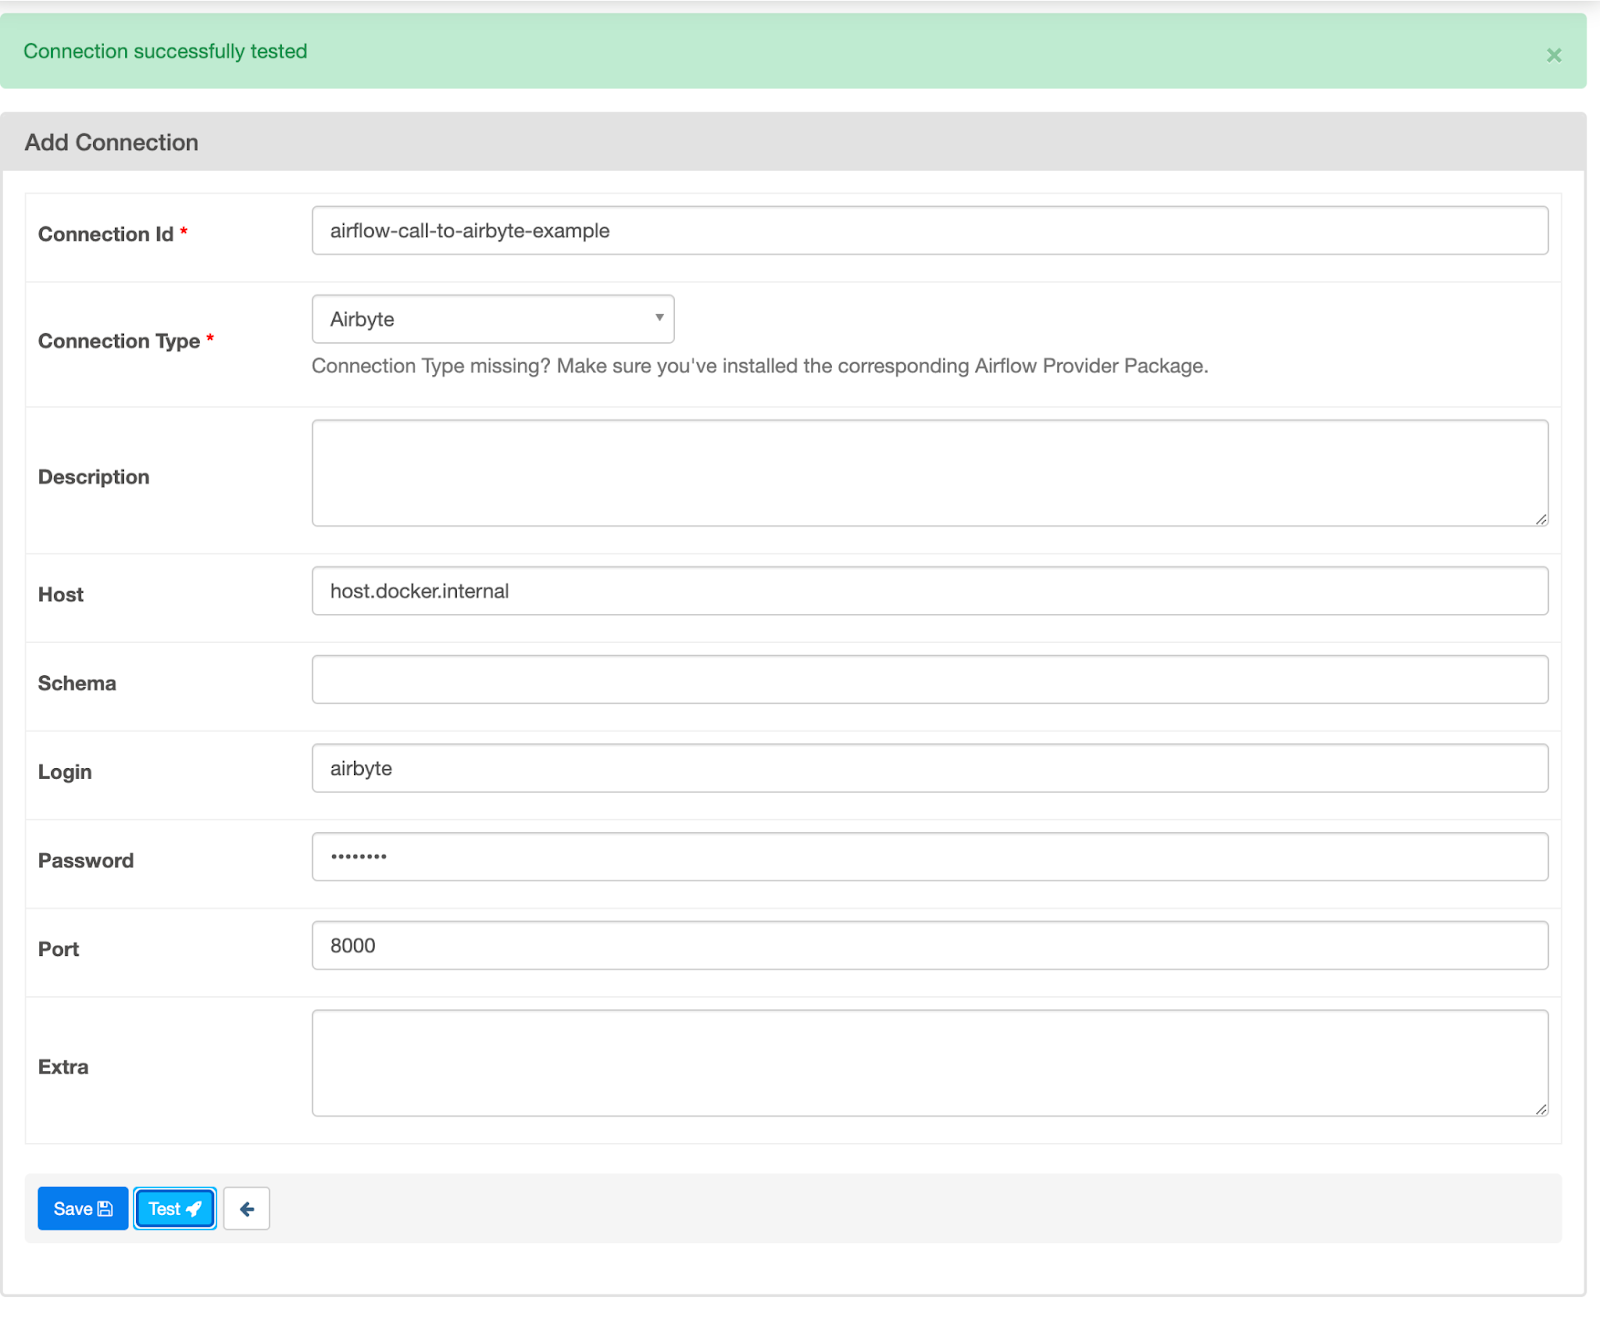
Configure an Airflow connection to Airbyte
The connection parameters are:
- Connection Id: Define an identifier that Airflow DAGs can use to communicate with Airbyte. In this example, the identifier is given the name airflow-call-to-airbyte-example, which will be used in the DAG definition (shown later).
- Connection Type: Specifies that this is a connection to Airbyte. Note that if you do not see Airbyte in the dropdown menu, then the Docker image has not been correctly built. Adding the Airbyte provider to the Docker image was done earlier in this tutorial.
- Host: The host that is running Airbyte. Note the use of host.docker.internal, which resolves to the internal IP address used by the host, as discussed in Docker’s instructions on network interfaces.
- Login: The default user to connect to Airbyte is airbyte. If you have changed this, then use whichever username you have defined.
- Password: If you are using the default, then the value is password. If you have changed this, then use whichever password you have defined.
- Port: By default, Airbyte listens on port 8000.
Click on Save, which should take you back to the Connections screen.
Because the DAG that we will define is also going to manipulate files, we will also create a File connection. Again, click on the + symbol as shown below:
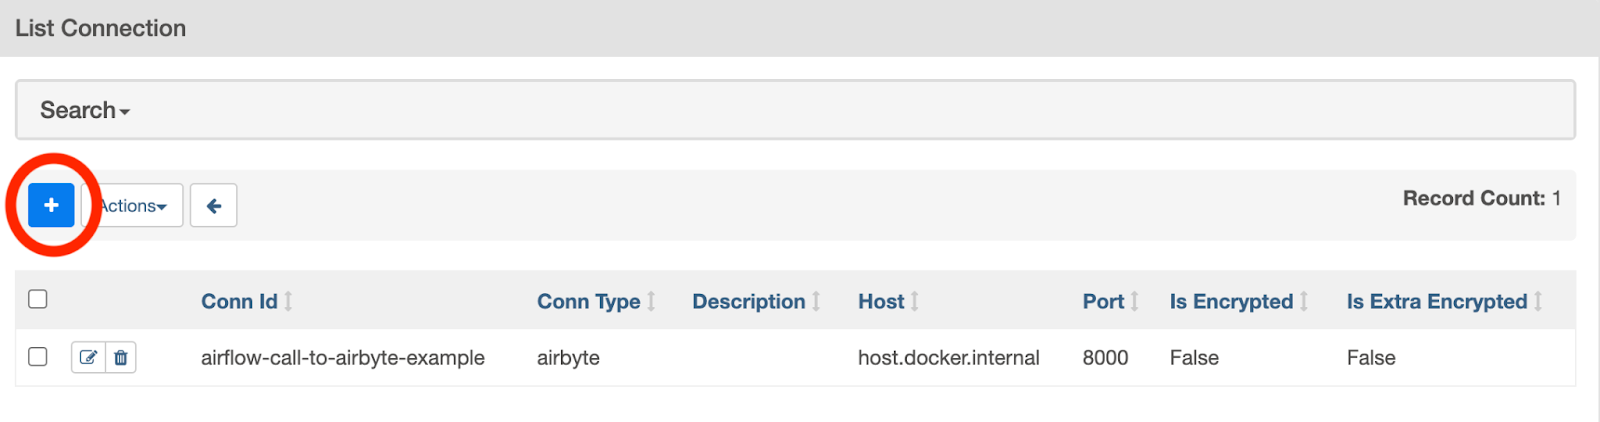
Create another Airflow connection
This should take you to a screen that looks like the following:

Create an Airflow connection to manipulate files on the local filesystem
The connection parameters are:
- Connection Id: As mentioned above, this will be used in the DAG to connect to the file system. In this example, the value is set to airflow-file-connector.
- Connection Type: Select File (path). This connector will be used in the DAG to interact with files on the local filesystem.
After saving the above connection, your Connections screen should look as follows:
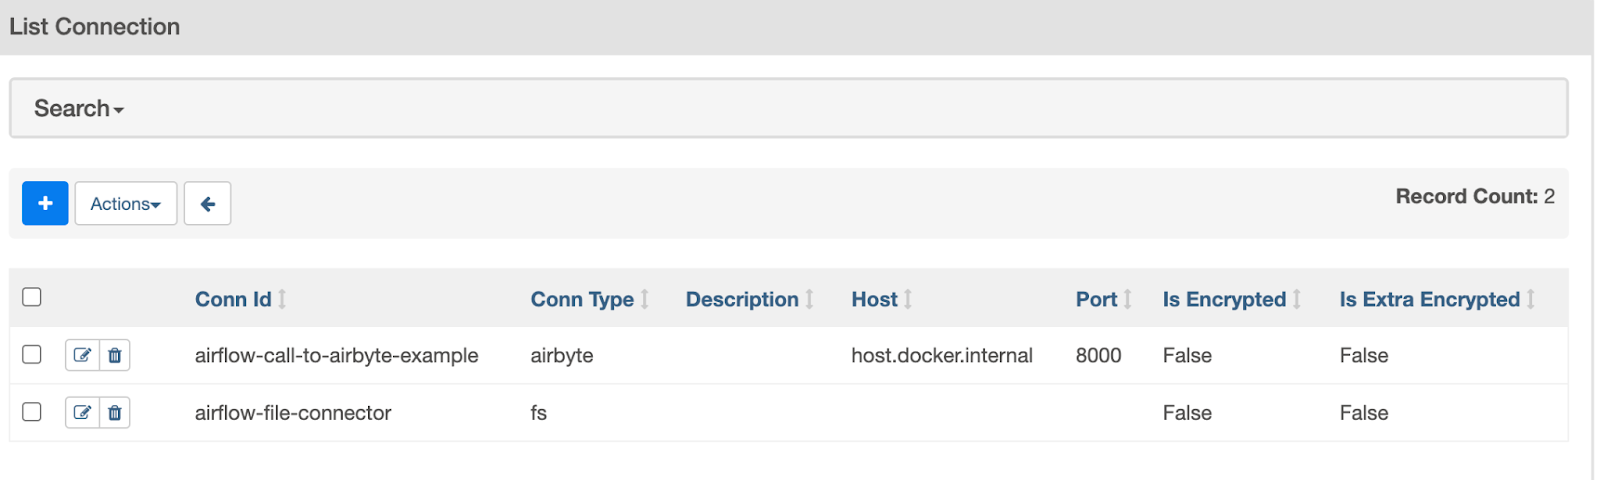
The Airflow connections that have just been created
Now that the relevant Airflow connections are defined, they can be used in an Airflow DAG.
Create an Airflow DAG
In this section, I present Python code for a simple DAG that performs the following tasks:
- trigger_airbyte: Uses AirbyteTriggerSyncOperator to asynchronously trigger Airbyte to perform a synchronization from the Sample Data (Faker) input to the Local JSON (file) output using the Airbyte connection that we defined above. Because this is executed asynchronously, it immediately returns along with a job id that is used for determining the completion of the synchronization.
- wait_for_sync_completion: Uses AirbyteJobSensor to wait for Airbyte to complete the synchronization.
- raw_products_file_sensor: Uses FileSensor to confirm that the file created by Airbyte exists. One of the files created by the Sample Data (Faker) source is called _airbyte_raw_products.jsonl, and this task waits for that file to exist.
- mv_raw_products_file: Uses BashOperator to rename the raw products file.
The code which demonstrates these steps is given below.
Copy the code into a file called example_dag.py in the airflow/dags directory that you created earlier in this tutorial. Then, set the AIRBYTE_CONNECTION_ID to the value that you extracted from the Airbyte connection URL earlier.
Furthermore, the file paths assume that you have specified /json_from_faker in the Airbyte connector that we defined earlier — if this is not your case, then update RAW_PRODUCTS_FILE and COPY_OF_RAW_PRODUCTS in the code to reflect the correct path.
In order to see the new DAG, click on DAGs on the top of the screen and then click on the refresh button highlighted below:

View a list of the DAGs and click on the refresh button
After some time, the DAG which you just added to the DAGs folder will appear. The name that will appear corresponds to the dag_id you specify in the code:
This will appear in the list of DAGs as follows:
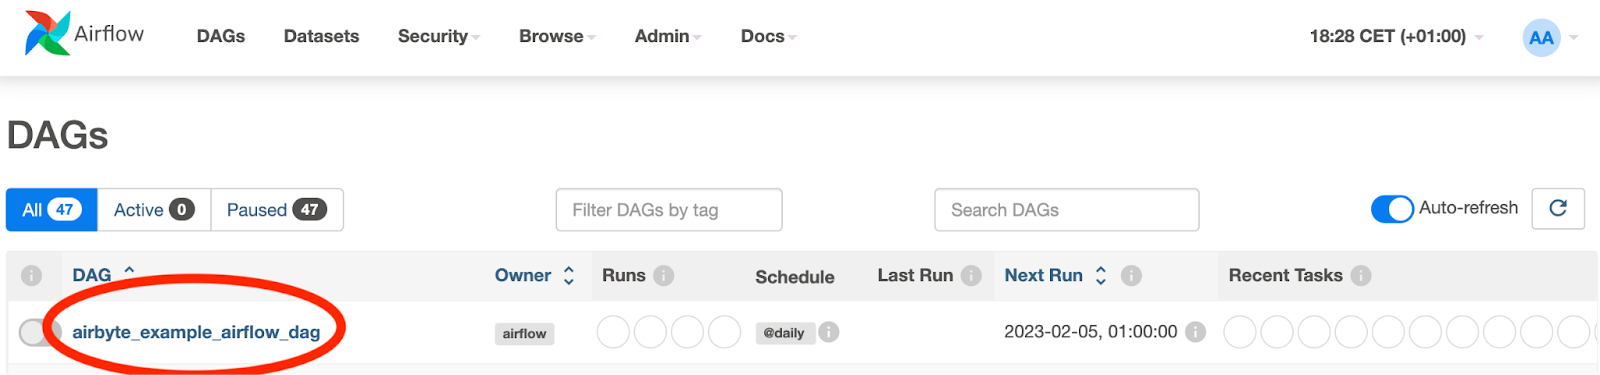
Ensure that the DAG that you have created appears in the list
View the New DAG
The DAG that is specified by the above code can be viewed in Airflow by clicking on the Graph button that is annotated in the following illustration and looks as follows:
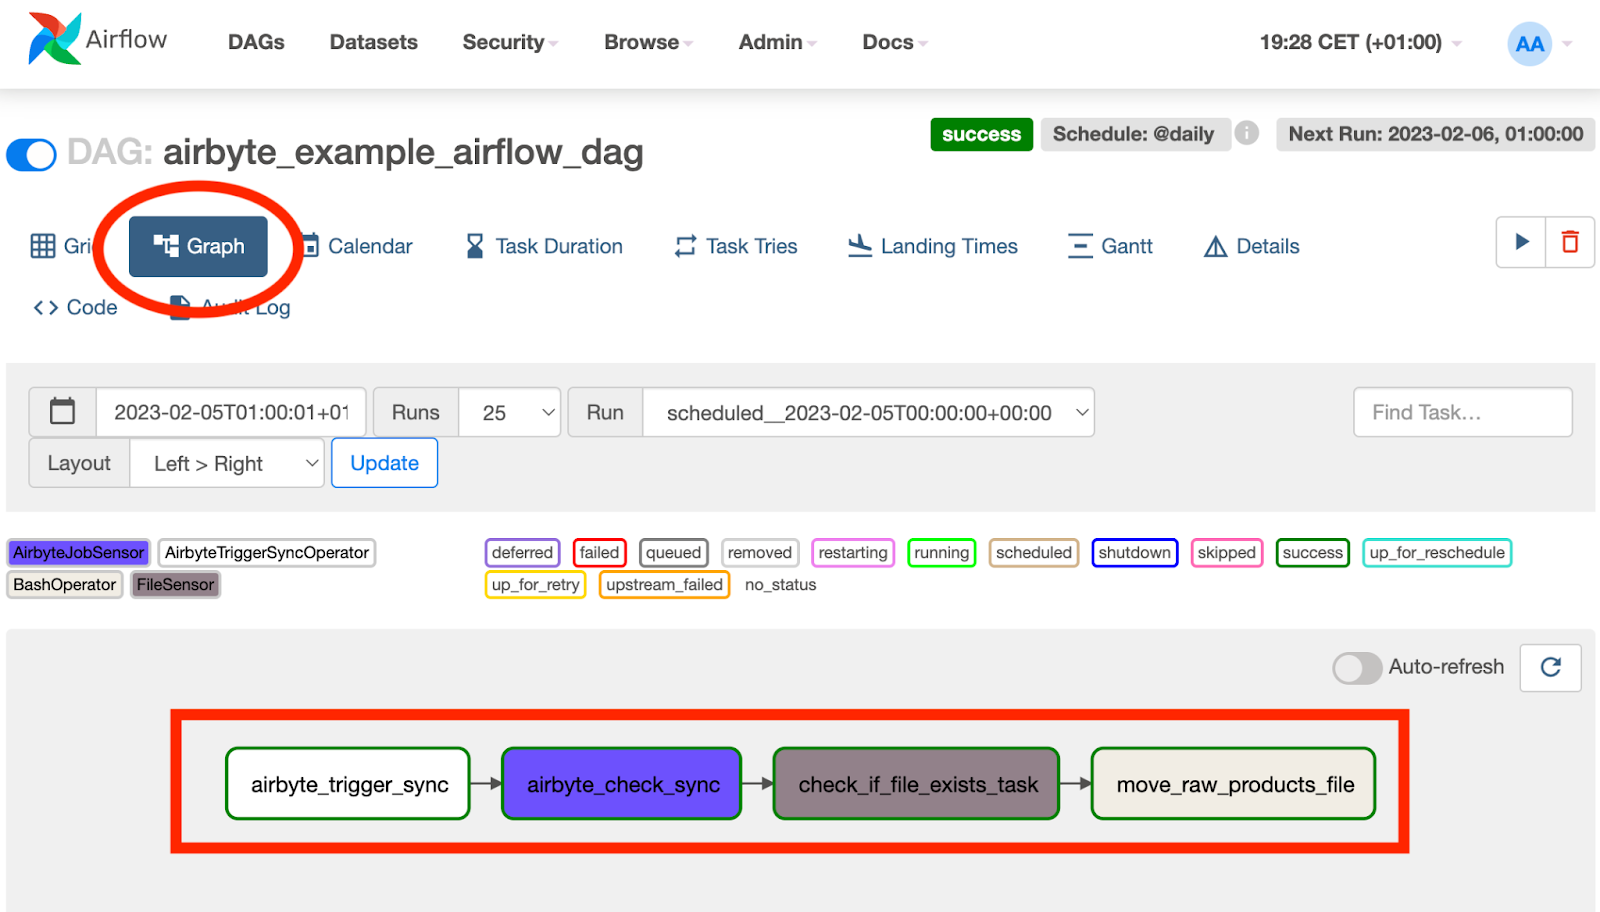
View a graph of the tasks in the selected DAG
Execute the Airflow DAG
Click on the newly created DAG called airbyte_example_airflow_dag highlighted in the image above. This will take you to a screen that gives more information about the DAG. Run the DAG by clicking on the button in the top right corner as annotated in the following image:

Trigger the Airflow DAG that executes an Airbyte synchronization
After triggering the DAG, you will see a screen similar to the following, which indicates that it is executing:
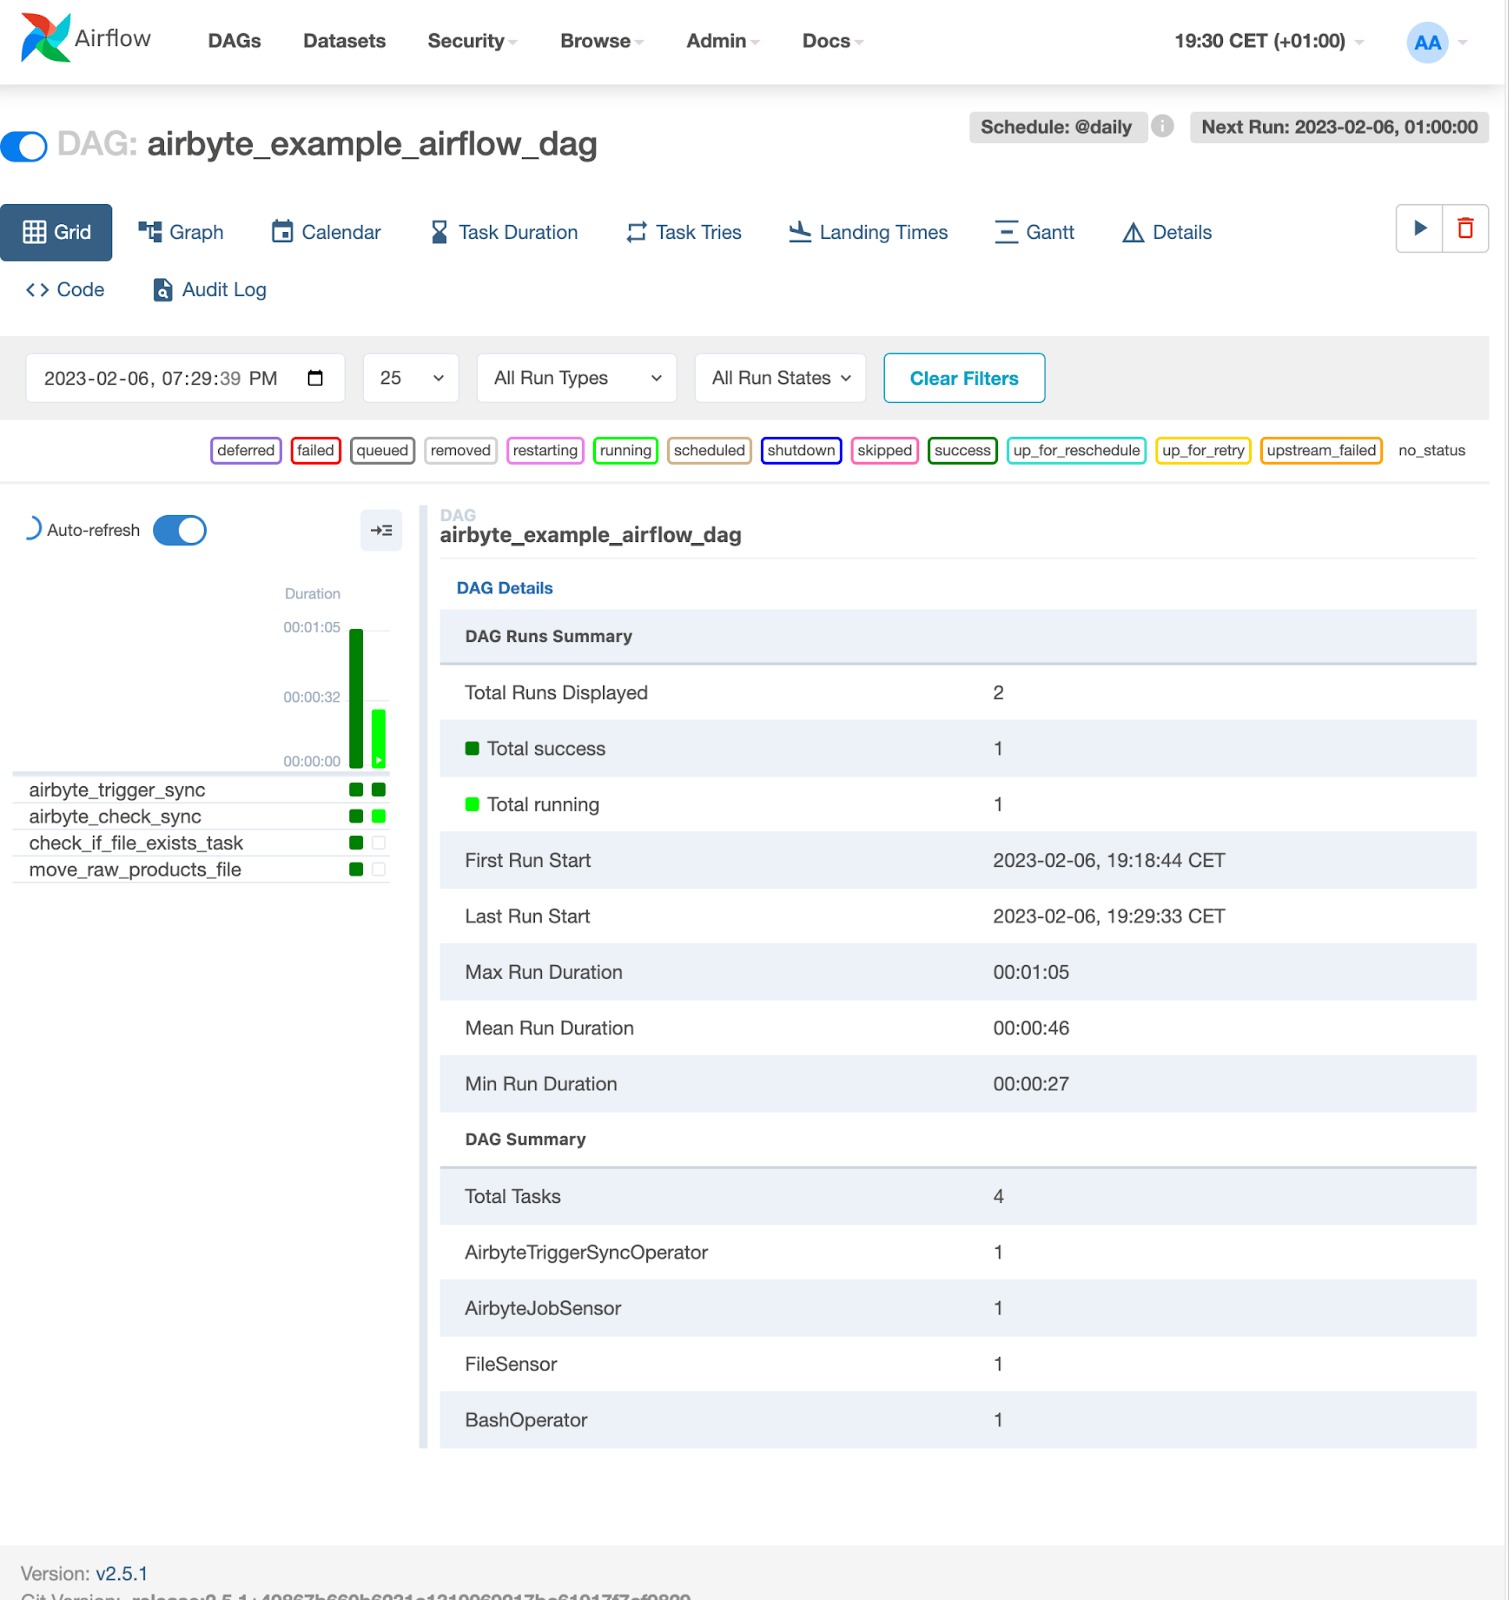
The status of the Airflow DAG
Each time the above DAG is executed, you should see an associated Sync in Airbyte’s Sync History UI as follows:

The status of the synchronization that has been executed by Airbyte
Finally, once the DAG has been completed, you can look in your local file system to see the files that Airbyte created, as well as the file that Airflow renamed from _airbyte_raw_products.jsonl to moved_raw_products.jsonl. Your /tmp/airbyte_local/json_from_faker folder should look as follows:

Relevant files that exist on the local filesystem
Conclusion
This article has shown you how to set up a simple Airbyte connection for which synchronizations are triggered by an Airflow DAG. After the completion of each synchronization, Airflow checks that the expected file exists and then renames that file. While the tasks that are demonstrated in this tutorial are simple, the concepts that they have demonstrated are powerful. You can extend the functionality demonstrated here to build complex Airbyte ELT pipelines that are orchestrated by Airflow!
Opinions expressed by DZone contributors are their own.
Comments