Yet Another Android Snake With Kivy, Python
Two of a kind: build Snake with Python.
Join the DZone community and get the full member experience.
Join For Free
Hello, there.
A lot of people want to start programming apps for Android, but they prefer not to use Android Studio and/or Java. Why? Because it's an overkill. "I just wanna create Snake and nothing more!"
Let's snake without java! (with a bonus at the end)
Get familiarized
First app
Please confirm that you have already installed Kivy (if not, follow the instructions) and ran buildozer init in the project directory.
Let's run our first app:
# main.py
from kivy.app import App
from kivy.uix.widget import Widget

class WormApp(App):
    def build(self):
        return Widget()

if __name__ == '__main__':
    WormApp().run()
We created a Widget. Analogously, we can create a button or any other UI element:
from kivy.app import App
from kivy.uix.widget import Widget
from kivy.uix.button import Button

class WormApp(App):
    def build(self):
        self.but = Button()
        self.but.pos = (100, 100)
        self.but.size = (200, 200)
        self.but.text = "Hello, cruel world"

        self.form = Widget()
        self.form.add_widget(self.but)
        return self.form

if __name__ == '__main__':
    WormApp().run()
Wow! Congratulations! You've created a button!
.kv files
However, there's another way to create UI elements. First, we implement our form:
from kivy.app import App
from kivy.uix.widget import Widget
from kivy.uix.button import Button


class Form(Widget):
    def __init__(self):
        super().__init__()
        self.but1 = Button()
        self.but1.pos = (100, 100)
        self.add_widget(self.but1)


class WormApp(App):
    def build(self):
        self.form = Form()
        return self.form


if __name__ == '__main__':
    WormApp().run()
Then, we create a «worm.kv» file.
# worm.kv
<Form>:
    but2: but_id

    Button:
        id: but_id
        pos: (200, 200)
What just happened? We created another Button and assigned id as but_id. Then, but_id was matched to but2 of the form. It means that now we can refer to this button by but2.
class Form(Widget):
    def __init__(self):
        super().__init__()
        self.but1 = Button()
        self.but1.pos = (100, 100)
        self.add_widget(self.but1)   #
        self.but2.text = "OH MY"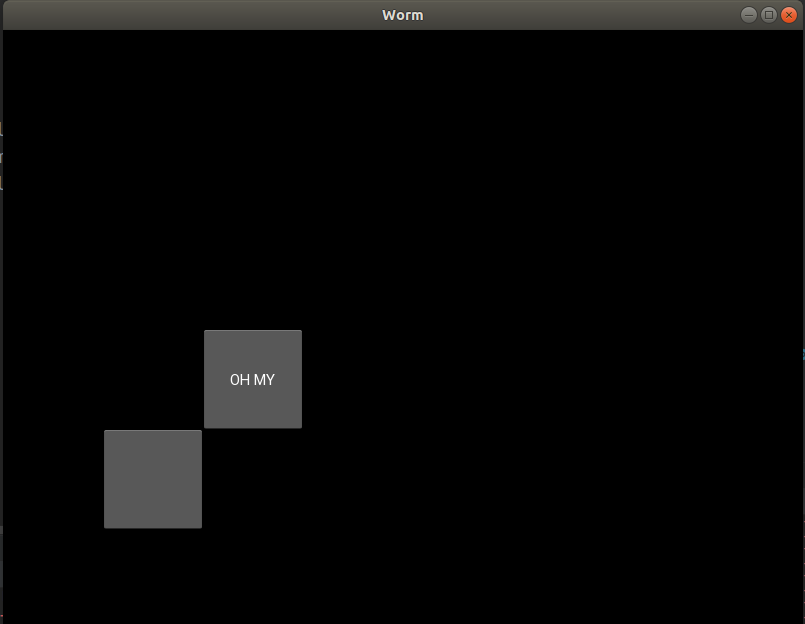
Graphics
What we do next is creating a graphical element. First, we implement it in worm.kv:
<Form>:

<Cell>:
    canvas:
        Rectangle:
            size: self.size
            pos: self.pos
We linked the rectangle's position to self.pos and its size to self.size. So now, those properties are available from Cell, for example, once we create a cell, we can do:
class Cell(Widget):
    def __init__(self, x, y, size):
        super().__init__()
        self.size = (size, size)   # As you can see, we can change self.size which is "size" property of a rectangle
        self.pos = (x, y)

class Form(Widget):
    def __init__(self):
        super().__init__()
        self.cell = Cell(100, 100, 30)
        self.add_widget(self.cell)
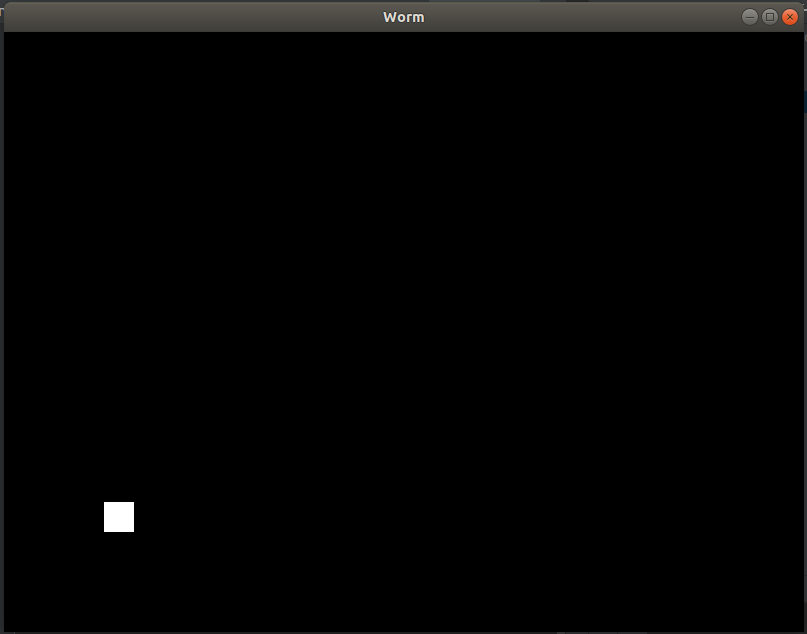
Ok, we have created a cell.
Necessary Methods
Let's try to move it. To do that, we should add Form.update function and schedule it.
from kivy.app import App
from kivy.uix.widget import Widget
from kivy.clock import Clock

class Cell(Widget):
    def __init__(self, x, y, size):
        super().__init__()
        self.size = (size, size)
        self.pos = (x, y)


class Form(Widget):
    def __init__(self):
        super().__init__()
        self.cell = Cell(100, 100, 30)
        self.add_widget(self.cell)

    def start(self):
        Clock.schedule_interval(self.update, 0.01)

    def update(self, _):
        self.cell.pos = (self.cell.pos[0] + 2, self.cell.pos[1] + 3)


class WormApp(App):
    def build(self):
        self.form = Form()
        self.form.start()
        return self.form


if __name__ == '__main__':
    WormApp().run()
The cell will move across the form. As you can see, we can schedule any function with Clock.
Next, let's make a touch event. Rewrite Form:
class Form(Widget):
    def __init__(self):
        super().__init__()
        self.cells = []

    def start(self):
        Clock.schedule_interval(self.update, 0.01)

    def update(self, _):
        for cell in self.cells:
            cell.pos = (cell.pos[0] + 2, cell.pos[1] + 3)

    def on_touch_down(self, touch):
        cell = Cell(touch.x, touch.y, 30)
        self.add_widget(cell)
        self.cells.append(cell)
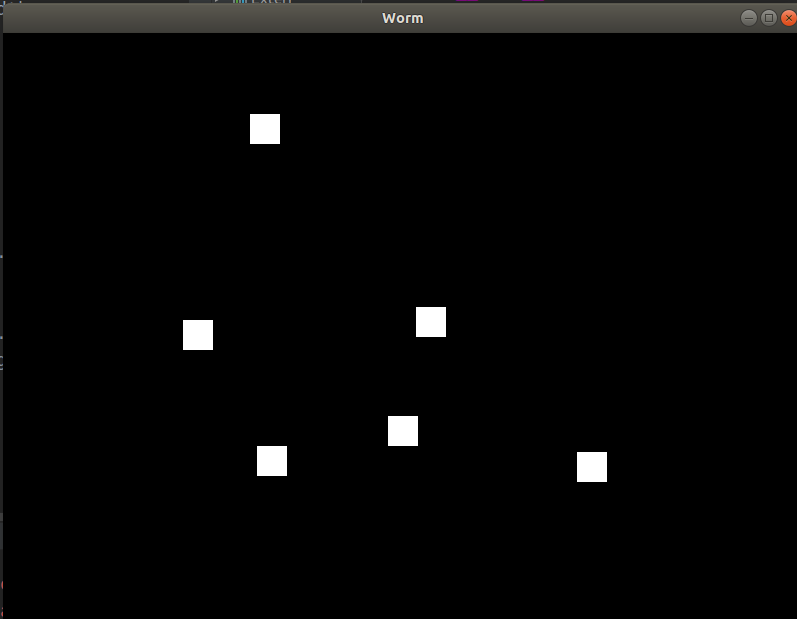
Each touch_down creates a cell with coordinates = (touch.x, touch.y) and size of 30. Then, we add it as a widget of the form AND to our own array (in order to easily access them).
Now you can tap on your form and generate cells.
Neat settings
Because we want to get a nice snake, we should distinguish the graphical positions and the actual positions of cells.
Why?
A lot of reasons to do so. All logic should be connected with the so-called actual data, while the graphical data is the result of the actual data. For example, if we want to make margins, the actual pos of the cell will be (100, 100) while the graphical pos of the rectangle — (102, 102).
P. S. We wouldn't do it if we dealt with classical on_draw. But here, we don't have to program on_draw.
Let's fix the worm.kv file:
<Form>:

<Cell>:
    canvas:
        Rectangle:
            size: self.graphical_size
            pos: self.graphical_pos
and main.py:
...
from kivy.properties import *
...
class Cell(Widget):
    graphical_size = ListProperty([1, 1])
    graphical_pos = ListProperty([1, 1])

    def __init__(self, x, y, size, margin=4):
        super().__init__()
        self.actual_size = (size, size)
        self.graphical_size = (size - margin, size - margin)
        self.margin = margin
        self.actual_pos = (x, y)
        self.graphical_pos_attach()

    def graphical_pos_attach(self):
        self.graphical_pos = (self.actual_pos[0] - self.graphical_size[0] / 2, self.actual_pos[1] - self.graphical_size[1] / 2)
...
class Form(Widget):
    def __init__(self):
        super().__init__()
        self.cell1 = Cell(100, 100, 30)
        self.cell2 = Cell(130, 100, 30)
        self.add_widget(self.cell1)
        self.add_widget(self.cell2)
...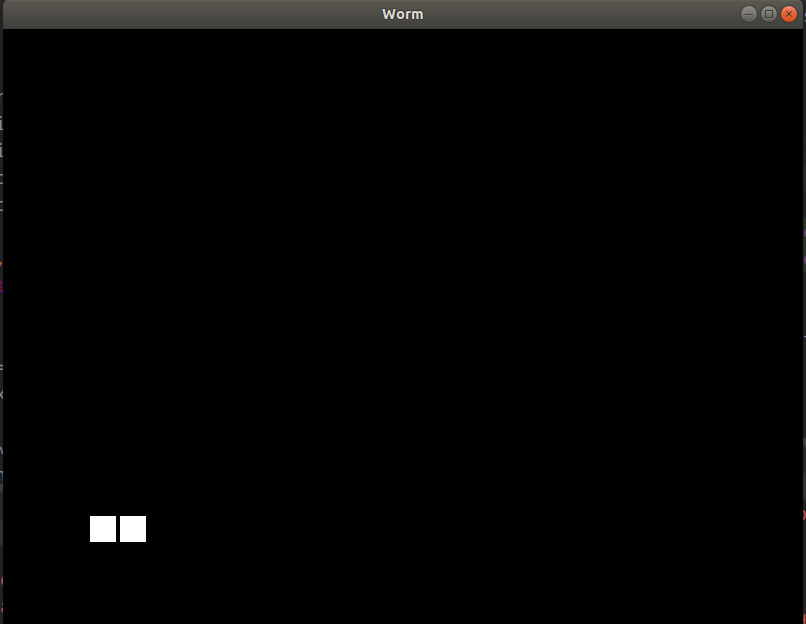
The margin appeared, so it looks pretty although we created the second cell with X = 130 instead of 132. Later, we will make smooth motion based on the distance between actual_pos and graphical_pos.
Coding the Worm
Implementation
Init config in main.py
class Config:
    DEFAULT_LENGTH = 20
    CELL_SIZE = 25
    APPLE_SIZE = 35
    MARGIN = 4
    INTERVAL = 0.2
    DEAD_CELL = (1, 0, 0, 1)
    APPLE_COLOR = (1, 1, 0, 1)
(Trust me, you'll love it!)
Then, assign config to the app:
class WormApp(App):
    def __init__(self):
        super().__init__()
        self.config = Config()
        self.form = Form(self.config)

    def build(self):
        self.form.start()
        return self.form
Rewrite init and start:
class Form(Widget):
    def __init__(self, config):
        super().__init__()
        self.config = config
        self.worm = None

    def start(self):
        self.worm = Worm(self.config)
        self.add_widget(self.worm)
        Clock.schedule_interval(self.update, self.config.INTERVAL)
Then, the Cell:
class Cell(Widget):
    graphical_size = ListProperty([1, 1])
    graphical_pos = ListProperty([1, 1])

    def __init__(self, x, y, size, margin=4):
        super().__init__()
        self.actual_size = (size, size)
        self.graphical_size = (size - margin, size - margin)
        self.margin = margin
        self.actual_pos = (x, y)
        self.graphical_pos_attach()

    def graphical_pos_attach(self):
        self.graphical_pos = (self.actual_pos[0] - self.graphical_size[0] / 2, self.actual_pos[1] - self.graphical_size[1] / 2)

    def move_to(self, x, y):
        self.actual_pos = (x, y)
        self.graphical_pos_attach()

    def move_by(self, x, y, **kwargs):
        self.move_to(self.actual_pos[0] + x, self.actual_pos[1] + y, **kwargs)

    def get_pos(self):
        return self.actual_pos

    def step_by(self, direction, **kwargs):
        self.move_by(self.actual_size[0] * direction[0], self.actual_size[1] * direction[1], **kwargs)
Hopefully, it's more or less clear.
and finally the Worm:
class Worm(Widget):
    def __init__(self, config):
        super().__init__()
        self.cells = []
        self.config = config
        self.cell_size = config.CELL_SIZE
        self.head_init((100, 100))
        for i in range(config.DEFAULT_LENGTH):
            self.lengthen()

    def destroy(self):
        for i in range(len(self.cells)):
            self.remove_widget(self.cells[i])
        self.cells = []

    def lengthen(self, pos=None, direction=(0, 1)):
        # If pos is set, we put the cell in pos, otherwise accordingly to the specified direction
        if pos is None:
            px = self.cells[-1].get_pos()[0] + direction[0] * self.cell_size
            py = self.cells[-1].get_pos()[1] + direction[1] * self.cell_size
            pos = (px, py)
        self.cells.append(Cell(*pos, self.cell_size, margin=self.config.MARGIN))
        self.add_widget(self.cells[-1])

    def head_init(self, pos):
        self.lengthen(pos=pos)
Let's give life to our wormie.
Motion
Now, we will make it move.
It's simple:
class Worm(Widget):
...
    def move(self, direction):
        for i in range(len(self.cells) - 1, 0, -1):
            self.cells[i].move_to(*self.cells[i - 1].get_pos())
        self.cells[0].step_by(direction)
class Form(Widget):
def __init__(self, config):
super().__init__()
self.config = config
self.worm = None
self.cur_dir = (0, 0)
def start(self):
self.worm = Worm(self.config)
self.add_widget(self.worm)
self.cur_dir = (1, 0)
Clock.schedule_interval(self.update, self.config.INTERVAL)
def update(self, _):
self.worm.move(self.cur_dir)
It's alive! It's alive!
Controlling
As you could judge by the preview image, the controls of the snake will be the following:
class Form(Widget):
...
    def on_touch_down(self, touch):
        ws = touch.x / self.size[0]
        hs = touch.y / self.size[1]
        aws = 1 - ws
        if ws > hs and aws > hs:
            cur_dir = (0, -1)         # Down
        elif ws > hs >= aws:
            cur_dir = (1, 0)          # Right
        elif ws <= hs < aws:
            cur_dir = (-1, 0)         # Left
        else:
            cur_dir = (0, 1)           # Up
        self.cur_dir = cur_dir
Cool.
Creating the Fruit
First, we initialize it.
class Form(Widget):
...
    def __init__(self, config):
        super().__init__()
        self.config = config
        self.worm = None
        self.cur_dir = (0, 0)
        self.fruit = None
...
    def random_cell_location(self, offset):
        x_row = self.size[0] // self.config.CELL_SIZE
        x_col = self.size[1] // self.config.CELL_SIZE
        return random.randint(offset, x_row - offset), random.randint(offset, x_col - offset)

    def random_location(self, offset):
        x_row, x_col = self.random_cell_location(offset)
        return self.config.CELL_SIZE * x_row, self.config.CELL_SIZE * x_col

    def fruit_dislocate(self):
        x, y = self.random_location(2)
        self.fruit.move_to(x, y)
...
    def start(self):
        self.fruit = Cell(0, 0, self.config.APPLE_SIZE, self.config.MARGIN)
        self.worm = Worm(self.config)
        self.fruit_dislocate()
        self.add_widget(self.worm)
        self.add_widget(self.fruit)
        self.cur_dir = (1, 0)
        Clock.schedule_interval(self.update, self.config.INTERVAL)
The current result:
Now, we should implement some Worm methods:
class Worm(Widget):
...
    # Here we get all the positions of our cells
    def gather_positions(self):
        return [cell.get_pos() for cell in self.cells]
    # Just check if our head has the same position as another Cell
    def head_intersect(self, cell):
        return self.cells[0].get_pos() == cell.get_pos()
...and add this check to update().
class Form(Widget):
...
    def update(self, _):
        self.worm.move(self.cur_dir)
        if self.worm.head_intersect(self.fruit):
            directions = [(0, 1), (0, -1), (1, 0), (-1, 0)]
            self.worm.lengthen(direction=random.choice(directions))
            self.fruit_dislocate()
Detection of Self Tile Hitting
We want to know whether the head has the same position as one of the worm's cells.
class Form(Widget):
...
    def __init__(self, config):
        super().__init__()
        self.config = config
        self.worm = None
        self.cur_dir = (0, 0)
        self.fruit = None
        self.game_on = True

    def update(self, _):
        if not self.game_on:
            return
        self.worm.move(self.cur_dir)
        if self.worm.head_intersect(self.fruit):
            directions = [(0, 1), (0, -1), (1, 0), (-1, 0)]
            self.worm.lengthen(direction=random.choice(directions))
            self.fruit_dislocate()
       if self.worm_bite_self():
            self.game_on = False

    def worm_bite_self(self):
        for cell in self.worm.cells[1:]:
            if self.worm.head_intersect(cell):
                return cell
        return False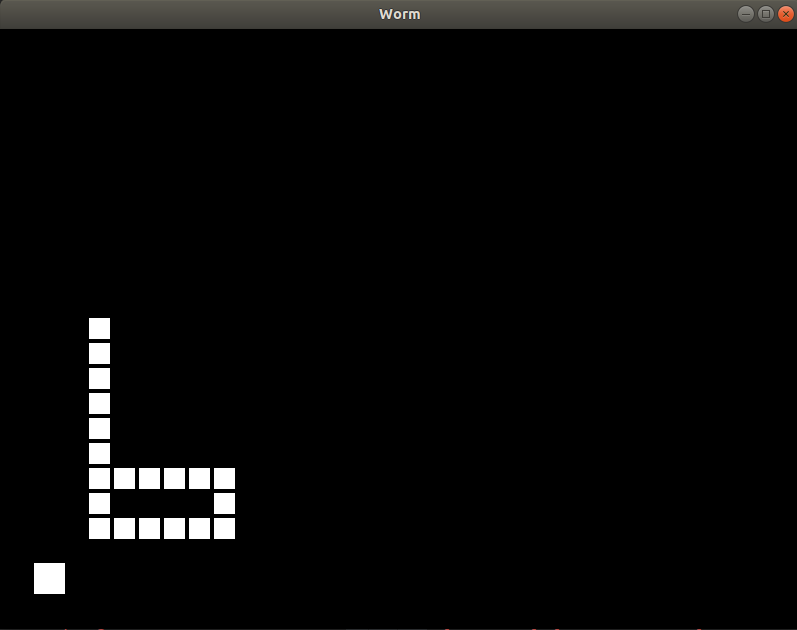
Coloring, Decorating, and Code Refactoring
Let's start with code refactoring.
Rewrite and add
class Form(Widget):
...
    def start(self):
        self.worm = Worm(self.config)
        self.add_widget(self.worm)
        if self.fruit is not None:
            self.remove_widget(self.fruit)
        self.fruit = Cell(0, 0, self.config.APPLE_SIZE)
        self.fruit_dislocate()
        self.add_widget(self.fruit)
        Clock.schedule_interval(self.update, self.config.INTERVAL)
        self.game_on = True
        self.cur_dir = (0, -1)

    def stop(self):
        self.game_on = False
        Clock.unschedule(self.update)

    def game_over(self):
        self.stop()
...
    def on_touch_down(self, touch):
        if not self.game_on:
            self.worm.destroy()
            self.start()
            return
        ...
Now, if the worm is dead (frozen), and you tap again, the game will be reset.
Now, let's go to decorating and coloring.
worm.kv
<Form>:
    popup_label: popup_label
    score_label: score_label

    canvas:
        Color:
            rgba: (.5, .5, .5, 1.0)

        Line:
            width: 1.5
            points: (0, 0), self.size

        Line:
            width: 1.5
            points: (self.size[0], 0), (0, self.size[1])


    Label:
        id: score_label
        text: "Score: " + str(self.parent.worm_len)
        width: self.width

    Label:
        id: popup_label
        width: self.width


<Worm>:


<Cell>:
    canvas:
        Color:
            rgba: self.color
        Rectangle:
            size: self.graphical_size
            pos: self.graphical_pos
Rewrite WormApp:
class WormApp(App):
    def build(self):
        self.config = Config()
        self.form = Form(self.config)
        return self.form

    def on_start(self):
        self.form.start()
Let's color it. Rewrite Cell in .kv:
<Cell>:
    canvas:
        Color:
            rgba: self.color

        Rectangle:
            size: self.graphical_size
            pos: self.graphical_pos
Add this to Cell.__init__
self.color = (0.2, 1.0, 0.2, 1.0) # and this to Form.start
self.fruit.color = (1.0, 0.2, 0.2, 1.0)Great, enjoy your snake

Finally, we will make a «game over» label
class Form(Widget):
...
    def __init__(self, config):
    ...
        self.popup_label.text = ""
...
    def stop(self, text=""):
        self.game_on = False
        self.popup_label.text = text
        Clock.unschedule(self.update)

    def game_over(self):
        self.stop("GAME OVER" + " " * 5 + "\ntap to reset")
and make the hit cell red:
instead of
    def update(self, _):
    ...
        if self.worm_bite_self():
            self.game_over()
    ...
write
    def update(self, _):
        cell = self.worm_bite_self()
        if cell:
            cell.color = (1.0, 0.2, 0.2, 1.0)
            self.game_over()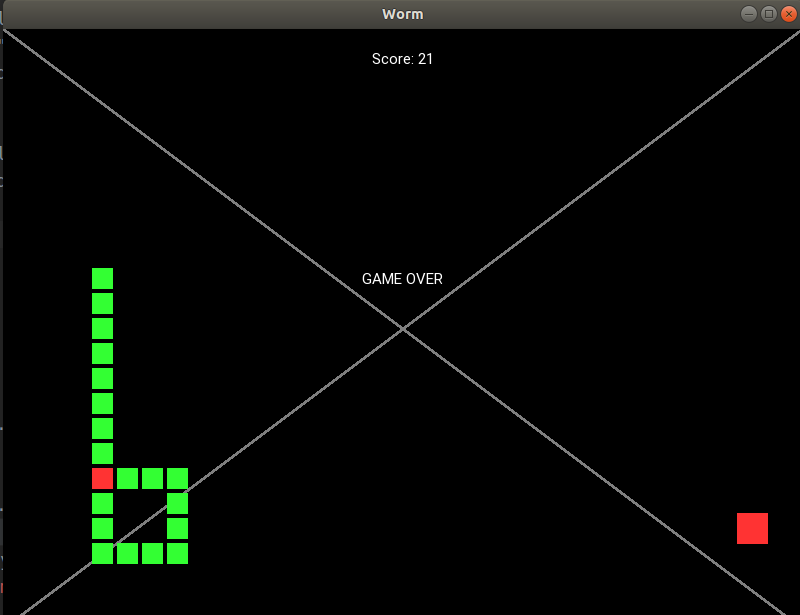
Are you still paying attention? Coming next is the most interesting part.
Bonus Section — Smooth Motion
Because the worm's step is equal to the cell_size, it's not that smooth. But we want to make it step as frequently as possible, without rewriting the entire logic of the game. So, we need to create a mechanism moving our graphical poses but not our actual poses. So, I wrote a simple file:
smooth.py
from kivy.clock import Clock
import time


class Timing:
    @staticmethod
    def linear(x):
        return x

class Smooth:
    def __init__(self, interval=1.0/60.0):
        self.objs = []
        self.running = False
        self.interval = interval

    def run(self):
        if self.running:
            return
        self.running = True
        Clock.schedule_interval(self.update, self.interval)

    def stop(self):
        if not self.running:
            return
        self.running = False
        Clock.unschedule(self.update)

    def setattr(self, obj, attr, value):
        exec("obj." + attr + " = " + str(value))

    def getattr(self, obj, attr):
        return float(eval("obj." + attr))

    def update(self, _):
        cur_time = time.time()
        for line in self.objs:
            obj, prop_name_x, prop_name_y, from_x, from_y, to_x, to_y, start_time, period, timing = line
            time_gone = cur_time - start_time
            if time_gone >= period:
                self.setattr(obj, prop_name_x, to_x)
                self.setattr(obj, prop_name_y, to_y)
                self.objs.remove(line)
            else:
                share = time_gone / period
                acs = timing(share)
                self.setattr(obj, prop_name_x, from_x * (1 - acs) + to_x * acs)
                self.setattr(obj, prop_name_y, from_y * (1 - acs) + to_y * acs)
        if len(self.objs) == 0:
            self.stop()

    def move_to(self, obj, prop_name_x, prop_name_y, to_x, to_y, t, timing=Timing.linear):
        self.objs.append((obj, prop_name_x, prop_name_y, self.getattr(obj, prop_name_x), self.getattr(obj, prop_name_y), to_x,
                          to_y, time.time(), t, timing))
        self.run()


class XSmooth(Smooth):
    def __init__(self, props, timing=Timing.linear, *args, **kwargs):
        super().__init__(*args, **kwargs)
        self.props = props
        self.timing = timing

    def move_to(self, obj, to_x, to_y, t):
        super().move_to(obj, *self.props, to_x, to_y, t, timing=self.timing)
This module is not the most elegant solution ©. It's a bad solution and I acknowledge it. It is an only-hello-world solution.
So you just create smooth.py and copy-paste this code to the file.
Finally, let's make it work:
class Form(Widget):
...
    def __init__(self, config):
    ...
        self.smooth = smooth.XSmooth(["graphical_pos[0]", "graphical_pos[1]"])
Then, we replace self.worm.move() with
class Form(Widget):
...
    def update(self, _):
    ...
        self.worm.move(self.cur_dir, smooth_motion=(self.smooth, self.config.INTERVAL))
And this is how methods of Cell should look like:
class Cell(Widget):
...
    def graphical_pos_attach(self, smooth_motion=None):
        to_x, to_y = self.actual_pos[0] - self.graphical_size[0] / 2, self.actual_pos[1] - self.graphical_size[1] / 2
        if smooth_motion is None:
            self.graphical_pos = to_x, to_y
        else:
            smoother, t = smooth_motion
            smoother.move_to(self, to_x, to_y, t)

    def move_to(self, x, y, **kwargs):
        self.actual_pos = (x, y)
        self.graphical_pos_attach(**kwargs)

    def move_by(self, x, y, **kwargs):
        self.move_to(self.actual_pos[0] + x, self.actual_pos[1] + y, **kwargs)
That's it, thank you for your attention!
How the final result works:
I received some issues with my code, for example, tshirtman, one of the Kivy project contributors, suggested me not to make Cells as Widgets but instead make a Point instruction. However, I don't find this code easier to understand than mine, even though it is definitely nicer in terms of UI and game development. Anyway, the code is here
P. S. I am the author of this original article. It was first published on a Russian site, so it got very few views, which is why I am posting it here.
Related Articles
Published at DZone with permission of Lev Brovchenkov. See the original article here.
Opinions expressed by DZone contributors are their own.

Comments