3D Reconstruction With OpenCV and Python
See how OpenCV helps with 3D reconstructions, including a sample app that moves a robotic arm.
Join the DZone community and get the full member experience.
Join For FreeOpenCV is a library for real-time computer vision. It has very powerful functions that make the art of processing images and getting information about them easy. In this post, we will review some of the functions that we used for making a 3D-reconstruction from an image in order to make an autonomous robotic arm.
OpenCV uses a pinhole camera model. This model works by projecting 3D points onto the image plane using a perspective transformation.
There are some functions of OpenCV that help us accomplish our goal. These functions work with a chess board model to calibrate the model, so the first thing is to get a chess board and take some photos of it. We took several photographs in order to get a better calibration.
import glob
import cv2
import numpy as np

criteria = (cv.TERM_CRITERIA_EPS + cv.TERM_CRITERIA_MAX_ITER, 30 , 0.001)
objp = np.zeros((9*6,3), np.float32)
objp[:,:2] = np.mgrid[0:6.0:9].T.reshape(-1,2)

objpoints = []
imgpoints = []
images = glob.glob('./Muestras_Calibracio/*.jpg')

for fname in images:
  img = cv2.imread(fname)
  gray = cv2.cvtColor(img,cv.COLOR_BGR2GRAY)
  ret , corners = cv.findChessboardCorners(gray,(6,9), None)

  if ret == True:
    objpoints.append(objp)
    corners2 = cv2.cornerSubPix(gray , corners , (11,11) , (-1,-1) , criteria)
    imgpoints.append(corners)

    cv2.drawChessboardCorners(img , (6,9) , corners2 , ret)
Ok, we've seen a little piece of code, so let's take a look at what it does.
In the first lines, we import the necessary libraries. Next, we define the termination criteria for the iterative algorithms of OpenCV. We use them in the function cornerSubPix.
The next variables are for preparing the object points, and then we define some empty arrays in order to store the object points and image points from all the images we have from the chessboard.
Then we open all the images we have in grayscale to pass them as parameters to the function findChessboardCorners(). This function has 3 parameters: the first one is the image, must be an 8-bit grayscale; the second one is the number of inner corners per chessboard, must be a tuple (points_per_row, points_per_column); and the third one is the corners, and in this case we don't want to detect them, so we put None.
The next step is to refine the corner locations with the cornerSubPix() function. Then we draw the corners on the chessboard. The next image shows where we found the chessboard corners and the image where we draw them.

So we just found our object points and images points. We are ready to go for the camera calibration. In order to achieve this purpose, we use the function calibrateCamera(). This function returns all the necessary parameters to make the 3D reconstruction — like the camera matrix, the distortion coefficients, the rotation vectors, etc.
ret, mtx, dist, rvecs, tvecs = cv2.calibrateCamera(objpoints, imgpoints, gray.shape[::-1],None,None)We now have the camera parameters, so let's use them for the 3D reconstruction.
corners2 = cv2.cornerSubPix(gray,corners,(11,11),(-1,-1),criteria)
_, rvecs, tvecs, inliers = cv2.solvePnPRansac(objp, corners2, mtx, dist)
axis = np.float32( [ [0,0,0], [0,6,0], [6,6,0], [6,0,0], [0,0,-3],[0,6,-3],[6,6,-3],[6,0,-3] ] )
imgpts, jac = cv2.projectPoints(axis, rvecs, tvecs, mtx, dist)
So in the first line, we make a refinement to improve the location of the corners and then apply the camera parameters we got previously. In the function solvePnRansac(), OpenCV finds an object pose from 3D-2D point correspondences using an iterative method to estimate the parameters of the mathematical model from a set of an observed data that contains outliers. In the third line, we define our axes in order to make a box in the picture and project in the box. The next step is to project the points and then draw them using the draw() function.
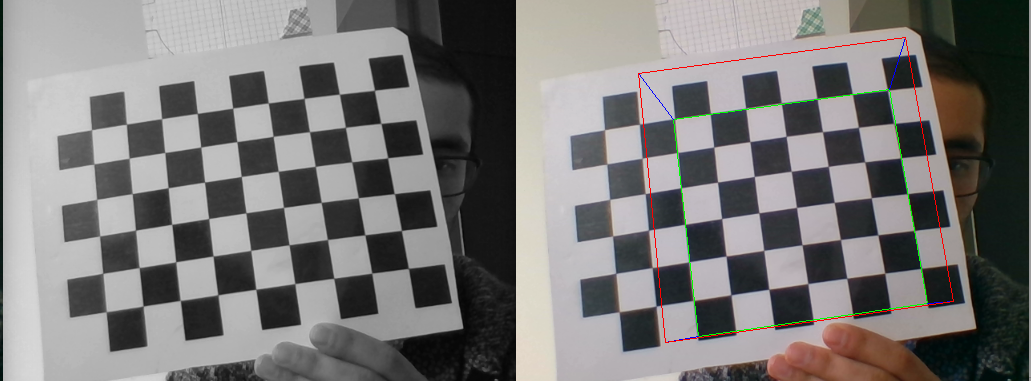
In the previous image, we see the input image on the left side, and on the right side, we see the image with the axes drawn on it.
Use Case: Autonomous Robotic Arm
With these 2D-3D projections, we can know the spatial coordinates of an object from an image. So we decide to implement this OpenCV algorithm in order to make an autonomous robotic arm, but if we want to make it autonomous we need to make use of an object detection model, so we can know what and where are the things we are going to grab.
For this purpose, we use the MASK r-cnn model for object detection and instance segmentation on Keras and TensorFlow. Please take a look at this GitHub in order to get more specific information about the model.
In addition to the MASK model, we use an Arduino Mega for the arm control because we know the position of the objects and now we need to know how to move the arm to grasp them. So we made a little Arduino function to control each of the four arm engines.
Each motor has one potentiometer working as a goniometer. This is achieved by computing a relation between the voltage in the potentiometer and the engine position. Obtaining this relation is very simple — it is a linear regression. You can do it on Excel or OriginLab. Now that we have the relation, we are going to use it in the Arduino, so let's prepare a piece of code:

In the previous image, we see a piece of code of the functions that we used for the Arduino programming. Each engine has one of these functions.
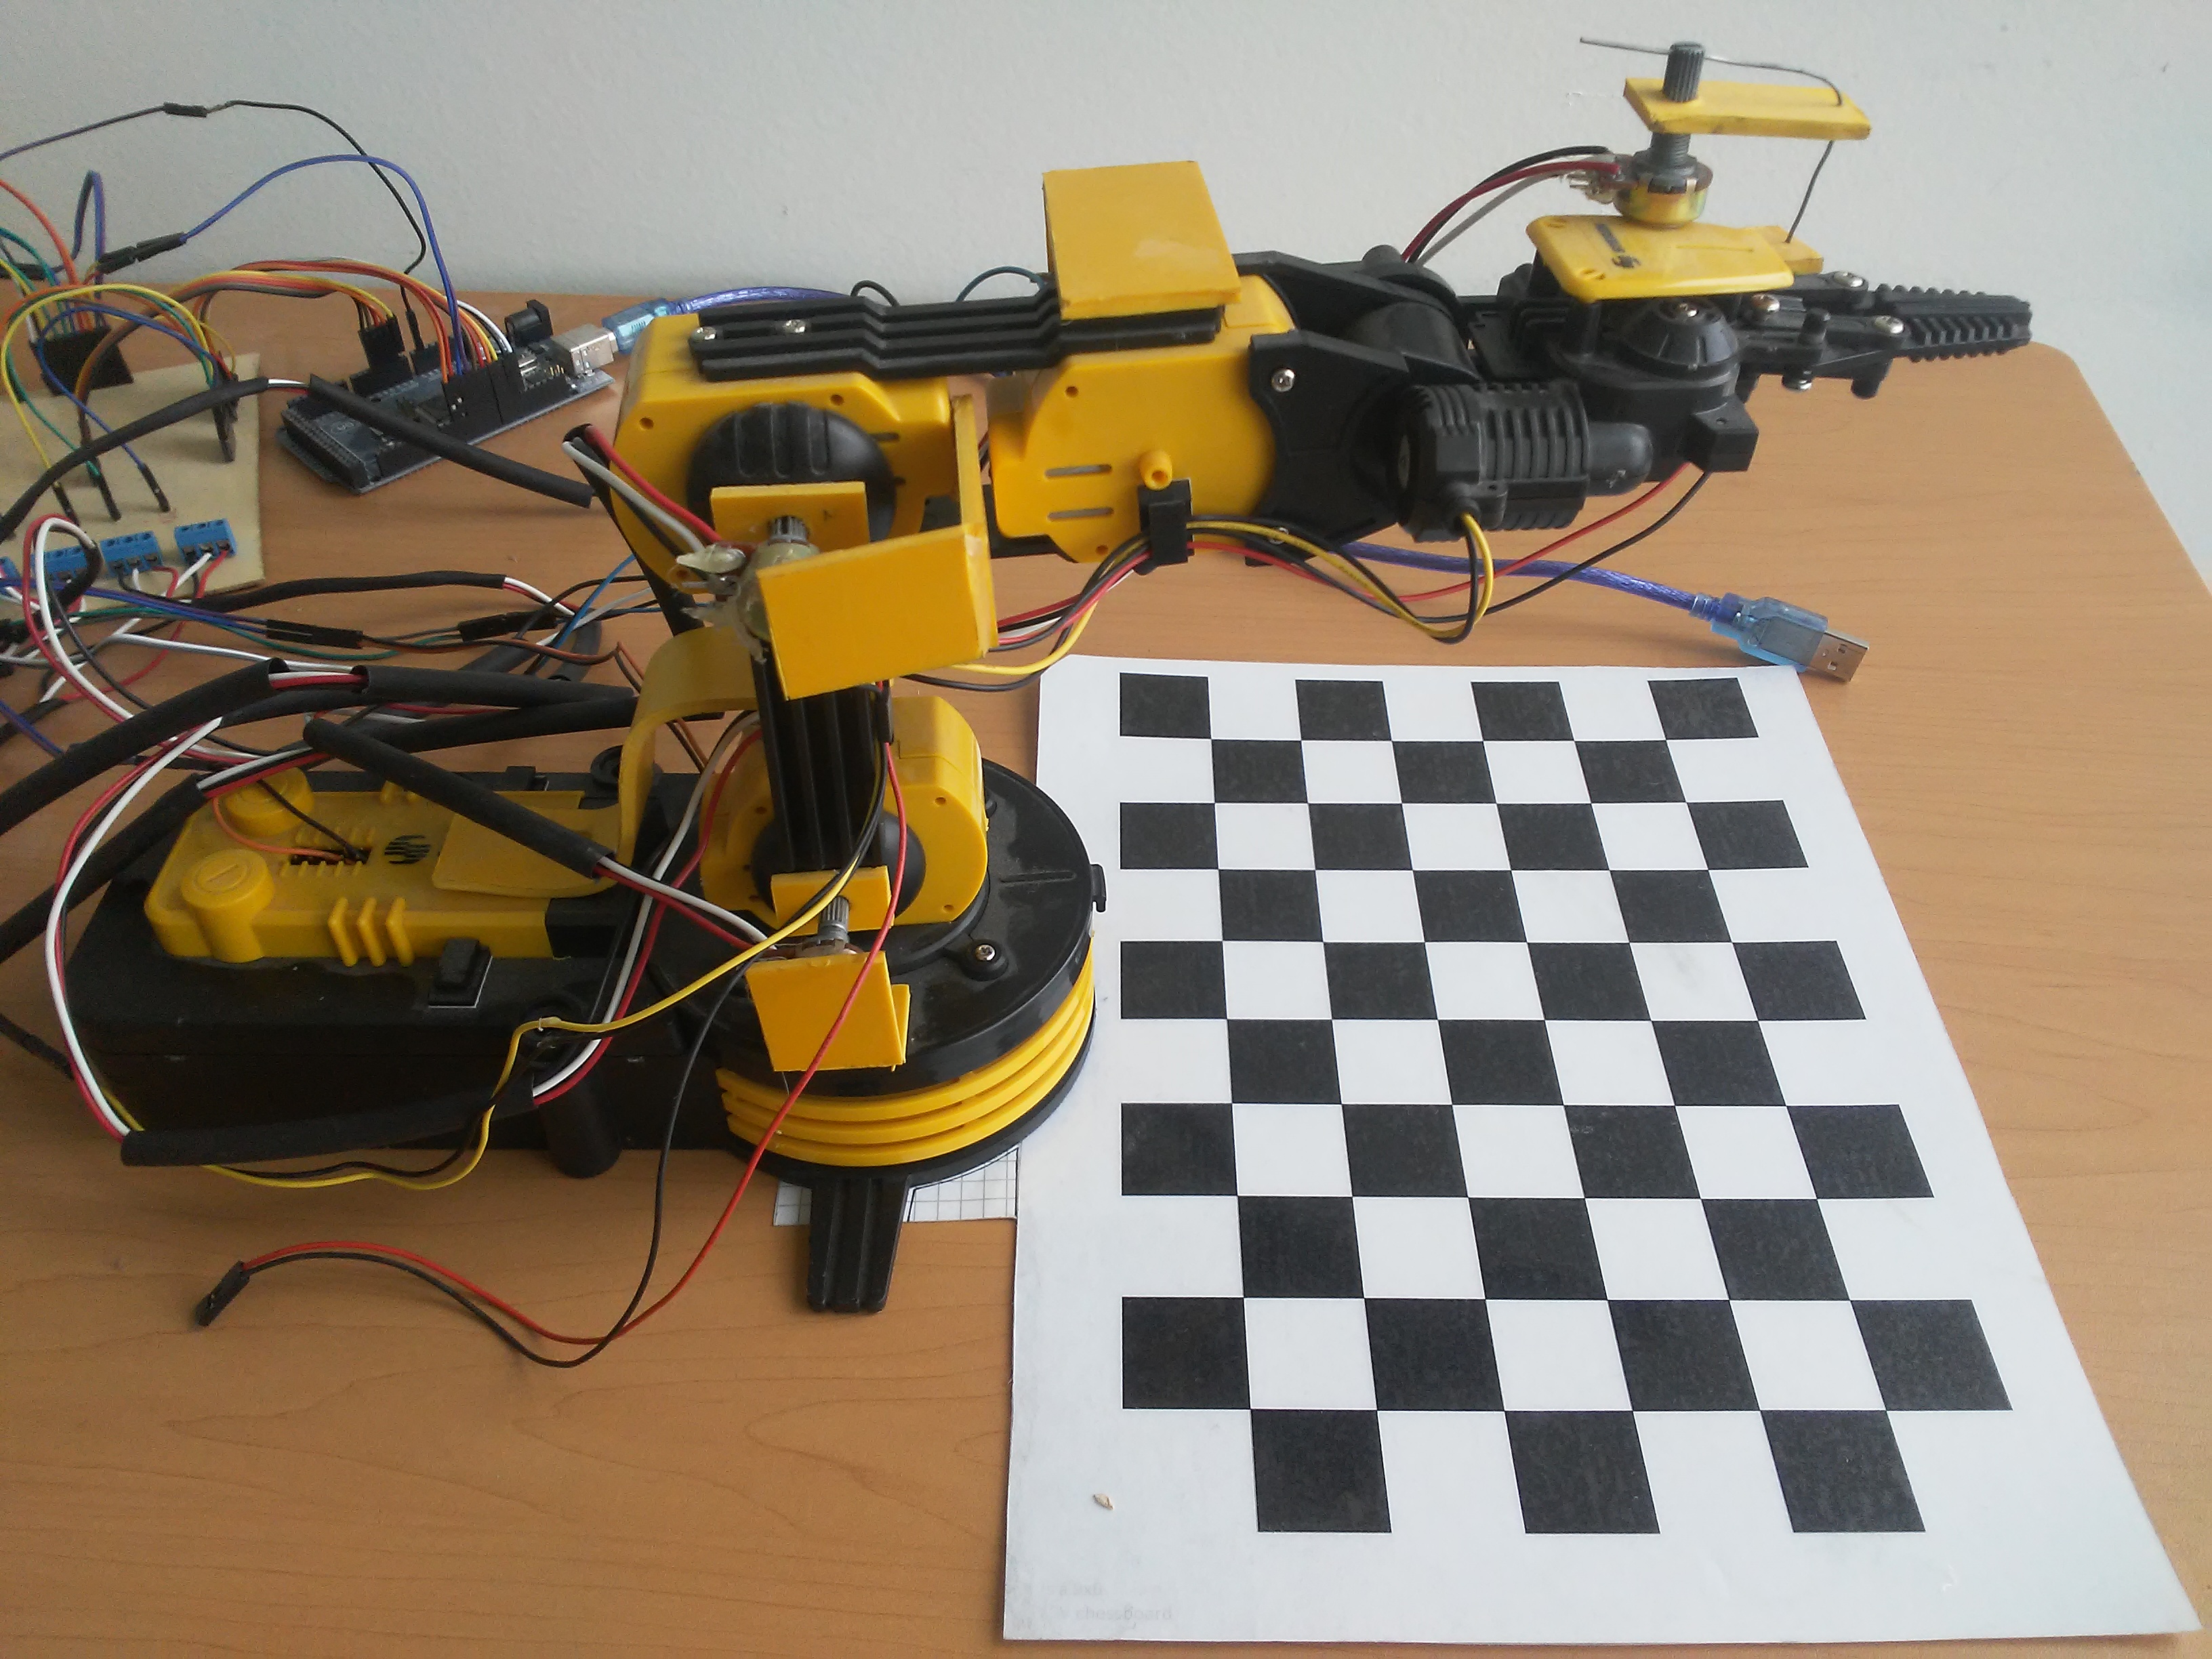
In the previous image, we see our set up of the robotic arm and the chessboard. We used a webcam that was in front of the arm to make the camera calibration and the 3D reconstruction.
Opinions expressed by DZone contributors are their own.
Comments