ActiveMQ: Configuring Multiple Instances of the Web Console
By
 ·
·
Interview
·
·
Interview
Likes
(1)
Likes
There are no likes...yet! 👀
Be the first to like this post!
It looks like you're not logged in.
Sign in to see who liked this post!
Comment
Save
10.5K Views
Join the DZone community and get the full member experience.
Join For FreeWhen configuring multiple instances of ActiveMQ brokers in master slave configurations it may be useful to configure the web console for each broker in a single Jetty instance. This will allow you to use a single URL to access each of the brokers by simply changing the URL context.
We will configure the ActiveMQ brokers using two master slave pairs as follows:
AMQ1M - AMQ1 Master
AMQ1S - AMQ1 Slave
The web console to service these brokers will be configured as: http://localhost:8080/amq1
In the event that AMQ1M should fail, this url will then failover to AMQ1S.
AMQ2M - AMQ2 Master
AMQ2S - AMQ2 Slave
The web console to service these brokers will be configured as: http://localhost:8080/amq2
In the event that AMQ2M should fail, this url will then failover to AMQ2S.
This configuration allows the URL to be descriptive by identifying the brokers it is servicing while keeping port configuration to a minimum by utilizing a single Jetty instance.
So with the concept out of the way lets look at the configuration that will make this happen.
Note: In this example I will be using the FuseSource distribution of ActiveMQ. Below is a list of binaries used to setup this example. However, the instructions provided should work with both the Apache and FuseSource distributions.
Step 1.
Grab a Jetty distribution from the Eclipse Jetty download site. Once downloaded, extract the zip or tar.
Step 2.
Add the activemq-all-x.x.x-fuse-xx-xx.jar to the Jetty /lib directory.
Step 3.
Down the ActiveMQ web console war. This can be obtained via the FuseSource repo: activemq-web-console. Explode the activemq-web-console-x.x.x-fuse-xx-xx.war to Jetty's web apps directory in a web context named amq1. Repeat this, and create web context amq2. Once the war is exploded we will need to add some JNDI configuration to each webapp's web descriptor (WEB-INF/web.xml). At this point you should have a directory structure that resembles the following:
webapps
|_amq1
|_amq2
Step 5.
For each of the web application's (amq1 and amq2) web descriptor files (WEB-INF/web.xml) we are going to add the following JNDI configuration:
The last piece of configuration we need is to create jetty-env.xml files for each of the web applications. The jetty-env.xml is used to configure the JNDI resources specific to the application and the file will reside in the WEB-INF/ directory. In each file, the ConnectionFactory and JMX URL will be specified.
For amq1 the jetty-env.xml will be configured as follows:
Now we can start jetty using the following command:
Step 8.
In addition to the master/slave configuration required for the ActiveMQ brokers, which I will cover in my next post, we also need to disable the Jetty configuration. The default configuration file for ActiveMQ is activemq.xml located in the /conf directory of the broker. At the bottom of this file you will find an import tag that is used to import the resource: jetty.xml. This should be commented out as follows:
Now we are ready to start our master/slave configuration of brokers. For each broker run the following command:
Now lets take a look at how the web console and Jetty behave with this configuration. In your browser navigate to http://localhost:8080/amq1. You should see that this connects you to broker amq1M which is the master in the amq1 pair.
Now if we go to the terminal where the broker amq1M was started and issue a 'control c' command to kill it, when the browser is refreshed the connection will failover to broker amq1S which is the slave in the amq1 pair.
To check on the amq2 broker pairs, navigate to http://localhost:8080/amq2. You should see this connects you to amq2M which is the master in the amq2 pair of brokers.
We will configure the ActiveMQ brokers using two master slave pairs as follows:
AMQ1M - AMQ1 Master
AMQ1S - AMQ1 Slave
The web console to service these brokers will be configured as: http://localhost:8080/amq1
In the event that AMQ1M should fail, this url will then failover to AMQ1S.
AMQ2M - AMQ2 Master
AMQ2S - AMQ2 Slave
The web console to service these brokers will be configured as: http://localhost:8080/amq2
In the event that AMQ2M should fail, this url will then failover to AMQ2S.
This configuration allows the URL to be descriptive by identifying the brokers it is servicing while keeping port configuration to a minimum by utilizing a single Jetty instance.
So with the concept out of the way lets look at the configuration that will make this happen.
Note: In this example I will be using the FuseSource distribution of ActiveMQ. Below is a list of binaries used to setup this example. However, the instructions provided should work with both the Apache and FuseSource distributions.
- apache-activemq-5.5.1-fuse-01-13
- activemq-web-console-5.5.1-fuse-01-13.war
- jetty-distribution-7.5.4.v20111024.zip
Step 1.
Grab a Jetty distribution from the Eclipse Jetty download site. Once downloaded, extract the zip or tar.
Step 2.
Add the activemq-all-x.x.x-fuse-xx-xx.jar to the Jetty /lib directory.
Step 3.
Down the ActiveMQ web console war. This can be obtained via the FuseSource repo: activemq-web-console. Explode the activemq-web-console-x.x.x-fuse-xx-xx.war to Jetty's web apps directory in a web context named amq1. Repeat this, and create web context amq2. Once the war is exploded we will need to add some JNDI configuration to each webapp's web descriptor (WEB-INF/web.xml). At this point you should have a directory structure that resembles the following:
webapps
|_amq1
|_amq2
Step 5.
For each of the web application's (amq1 and amq2) web descriptor files (WEB-INF/web.xml) we are going to add the following JNDI configuration:
<!--  ========================================================== -->
<!--  JNDI Config -->
<!--  ========================================================== -->

<resource-ref>
        <res-ref-name>jms/connectionFactory</res-ref-name>
        <res-type>javax.jms.ConnectionFactory</res-type>
        <res-auth>Container</res-auth>
</resource-ref>

<resource-ref>
          <res-ref-name>jmx/url</res-ref-name>
          <res-type>java.lang.String</res-type>
          <res-auth>Container</res-auth>
</resource-ref>
Step 6.The last piece of configuration we need is to create jetty-env.xml files for each of the web applications. The jetty-env.xml is used to configure the JNDI resources specific to the application and the file will reside in the WEB-INF/ directory. In each file, the ConnectionFactory and JMX URL will be specified.
For amq1 the jetty-env.xml will be configured as follows:
<?xml version="1.0"?>
<!DOCTYPE Configure PUBLIC "-//Mort Bay Consulting//DTD Configure//EN" "http://jetty.mortbay.org/configure.dtd">
<Configure id="amq1" class="org.eclipse.jetty.webapp.WebAppContext">
    <New id="connectionFactory" class="org.eclipse.jetty.plus.jndi.Resource">
        <Arg><Ref id="amq1"/></Arg>
        <Arg>jms/connectionFactory</Arg>
        <Arg>
            <New class="org.apache.activemq.ActiveMQConnectionFactory">
                <Arg>failover:(tcp://localhost:61616,tcp://localhost:62616)</Arg>
            </New>
        </Arg>
    </New>
    <New id="url" class="org.eclipse.jetty.plus.jndi.Resource">
        <Arg><Ref id="amq1"/></Arg>
        <Arg>jmx/url</Arg>
        <Arg>
            <New class="java.lang.String">
                <Arg>service:jmx:rmi:///jndi/rmi://localhost:1099/jmxrmi,service:jmx:rmi:///jndi/rmi://localhost:1299/jmxrmi</Arg>
            </New>
        </Arg>
    </New>
</Configure>
For amq2 the jetty-env.xml will be configured as follows:<?xml version="1.0"?>
<!DOCTYPE Configure PUBLIC "-//Mort Bay Consulting//DTD Configure//EN" "http://jetty.mortbay.org/configure.dtd">
<Configure id="amq2" class="org.eclipse.jetty.webapp.WebAppContext">
<New id="connectionFactory" class="org.eclipse.jetty.plus.jndi.Resource">
<Arg><Ref id="amq2"/></Arg>
<Arg>jms/connectionFactory</Arg>
<Arg>
<New class="org.apache.activemq.ActiveMQConnectionFactory">
<Arg>failover:(tcp://localhost:63616,tcp://localhost:64616)</Arg>
</New>
</Arg>
</New>
<New id="url" class="org.eclipse.jetty.plus.jndi.Resource">
<Arg><Ref id="amq2"/></Arg>
<Arg>jmx/url</Arg>
<Arg>
<New class="java.lang.String">
<Arg>service:jmx:rmi:///jndi/rmi://localhost:1399/jmxrmi,service:jmx:rmi:///jndi/rmi://localhost:1499/jmxrmi</Arg>
</New>
</Arg>
</New>
</Configure>Step 7.Now we can start jetty using the following command:
java -Dwebconsole.type=jndi -jar start.jarThis command informs the brokers' web consoles to use the JNDI properties to provision the ConnectionFactory and the JMX connection.
Step 8.
In addition to the master/slave configuration required for the ActiveMQ brokers, which I will cover in my next post, we also need to disable the Jetty configuration. The default configuration file for ActiveMQ is activemq.xml located in the /conf directory of the broker. At the bottom of this file you will find an import tag that is used to import the resource: jetty.xml. This should be commented out as follows:
<!--<import resource="jetty.xml"/>-->Step 9.
Now we are ready to start our master/slave configuration of brokers. For each broker run the following command:
./bin/activemq consoleThe Result of This Configuration
Now lets take a look at how the web console and Jetty behave with this configuration. In your browser navigate to http://localhost:8080/amq1. You should see that this connects you to broker amq1M which is the master in the amq1 pair.
 |
| ActiveMQ - amq1M (Master) |
Now if we go to the terminal where the broker amq1M was started and issue a 'control c' command to kill it, when the browser is refreshed the connection will failover to broker amq1S which is the slave in the amq1 pair.
 |
| ActiveMQ - amq1S (Slave) |
To check on the amq2 broker pairs, navigate to http://localhost:8080/amq2. You should see this connects you to amq2M which is the master in the amq2 pair of brokers.
 |
| ActiveMQ - amq2M (Master) |
Again, if we go to the terminal where the broker amq2M was started and
issue a 'control c' command to kill it, when the browser is refreshed
the connection will failover to broker amq2S which is the slave in the
amq2 pair.
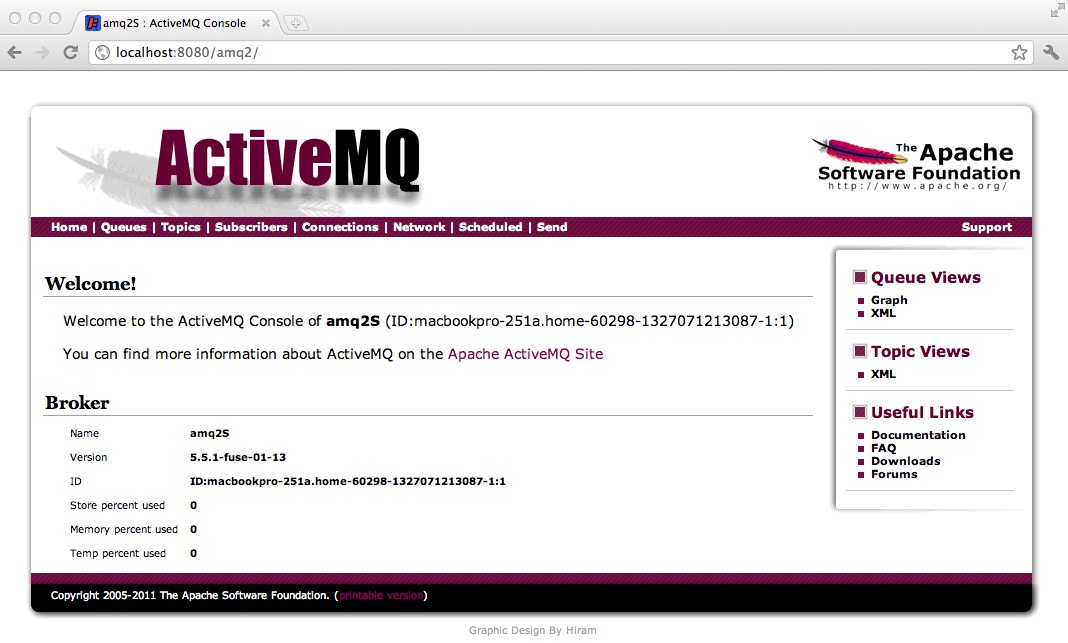 |
| ActiveMQ - amq2S (Slave) |
Summary
Using this configuration to set up multiple instances of ActiveMQ broker
pairs in a single Jetty instance you can see how it could simplify
managing and accessing the web consoles for all brokers as the
environment scales to support many instances of ActiveMQ master/slave
pairs. This eliminates the need for each individual broker to have
separate URLs and ports to access the web console. In a followup to
this post I will show how the brokers were configured to support a
master/slave configuration.
Web Service
Console (video game CLI)
Published at DZone with permission of Jason Sherman, DZone MVB. See the original article here.
Opinions expressed by DZone contributors are their own.
Comments