Angular 11 + Firebase Cloud Messaging Push Notifications
A push notification is a popup message similar to an SMS. Push notifications work the same as SMS text messages and mobile alerts.
Join the DZone community and get the full member experience.
Join For FreeWhat Are Push Notifications?
A push notification is a popup message similar to an SMS. Push notifications work the same as SMS text messages and mobile alerts. This provides the ability to receive messages pushed to them from a server, whether or not the web app is in the foreground, or even currently loaded, on a user agent.
Second, look for versions needed for Push Notifications
As we looking for push notifications in angular 11 so you must have installed Node.js version > 12. NPM will be updated by default. Here, I am using Node version 12.2.0 and installing the latest version of Angular CLI else you can upgrade your older version to the latest CLI by following the command – npm install -g @angular/cli@latest.
Once the project environment has been done we need a firebase account to connect the web application to the cloud messaging.
Steps To Set up the Firebase Account
1 ) Simply go to firebase.google.com link.
2 ) If you are new then you click on the sign-up button else you can log in to your old account credentials.
3) Once you log in click on go to the console tab which is in the top right corner.
4) Click on Create a project tab
5) When the project has been created then go to its project settings General tab and create one app for getting its credentials
6 ) Now once your app is ready then simply copy its config for future use

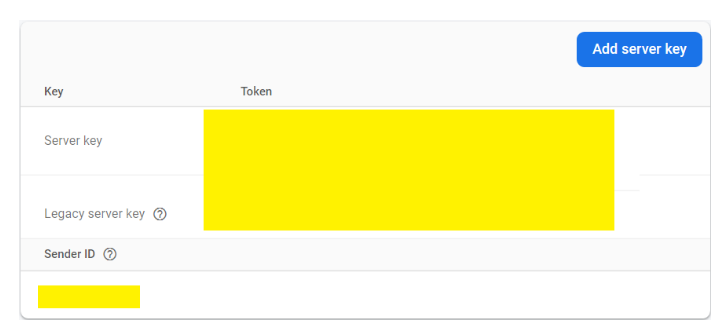
7) Now you also copy the server key from the Cloud Messaging tab.
Create the Angular Project
Let’s create an Angular 11 project by using the following command:
ng new push-notification cd push-notificationHere we are using firebase so to install the firebase library we need to enter the following command in the same project directory.
npm install firebase @angular/fire --save npm install firebase --save npm audit fix (if any vulnerabilities are found else ignore them)Now we need to create some files so follow the instruction carefully.
- Create a JSON file. save this file in the same folder where the index.html file is present. We need to add a manifest.json file to our angular app and register it with the Angular CLI.
{ "gcm_sender_id": "YOUR-SENDER-ID" }
 After that, you link it to the index.html file.
<head> <link rel="manifest" href="./manifest.json"> </head>- Create firebase-messaging-sw.js Push messaging requires a service worker. This allows your angular app to detect new messages, even after the angular app has been closed by the user and it is needed to create this file in the same directory as the manifest.json file which is in the src/ directory.
Note:- Before importing the below script please check the latest version it’s better if you import the latest version of the CDN link, so here I importing the 8.0.2 version links.
importScripts('https://www.gstatic.com/firebasejs/8.0.2/firebase-app.js');
importScripts('https://www.gstatic.com/firebasejs/8.0.2/firebase-messaging.js');firebase.initializeApp({
apiKey: “from firebase config”,
authDomain: “from firebase config”,
databaseURL: “from firebase config”,
projectId: “from firebase config”,
storageBucket: “from firebase config”,
messagingSenderId: “from firebase config”,
appId: “from firebase config”,
measurementId: “from firebase config”
});const messaging = firebase.messaging();
3. Register these files in angular-cli.json
"assets": [
      "src/favicon.ico",
      "src/assets",
      "src/firebase-messaging-sw.js", // add this one
"src/manifest.json" // this one also ]- Now we have to create the service provider here I’m going to create a messaging service provider in the service folder which is an angular app directory. so move into the app directory and enter the below command in cmd.
mkdir service
cd service
ng g s messaging
5. Now once the service part is done we have to paste the below exact code into the messaging.service.ts file
import { BrowserModule } from ‘@angular/platform-browser’;
import { NgModule } from ‘@angular/core’;
import { AppRoutingModule } from ‘./app-routing.module’;
import { AppComponent } from ‘./app.component’;
import { AngularFireMessagingModule } from ‘@angular/fire/messaging’;
import { AngularFireDatabaseModule } from ‘@angular/fire/database’;
import { AngularFireAuthModule } from ‘@angular/fire/auth’;
import { AngularFireModule } from ‘@angular/fire’;
import { MessagingService } from ‘./service/messaging.service’;
import { environment } from ‘../environments/environment’;
import { AsyncPipe } from ‘../../node_modules/@angular/common’;@NgModule({
   declarations: [AppComponent],
   imports: [
AppRoutingModule,
BrowserModule,
AngularFireDatabaseModule,
AngularFireAuthModule,
AngularFireMessagingModule,
AngularFireModule.initializeApp(environment.firebase),
   ],
   providers: [MessagingService,AsyncPipe],
   bootstrap: [AppComponent]
})
export class AppModule { }
Then now in the HTML part, you can use pipe async and JSON like this:-
{{ message | async | json }}And now update the App Components file like this
import { Component } from ‘@angular/core’;
import { MessagingService } from ‘./service/messaging.service’;
@Component({
  selector: ‘app-root’,
templateUrl: ‘./app.component.html’,
styleUrls: [‘./app.component.css’]
})
export class AppComponent {
  title = ‘push-notification’;
  message;
  constructor(private messagingService: MessagingService) { }ngOnInit() {
this.messagingService.requestPermission()
this.messagingService.receiveMessage()
this.message = this.messagingService.currentMessage
 }
}
Finally, you did the Setup process
Run the Project
Using the ng serve -o command after compilation is complete, open can your browser, and the browser will ask for permission.
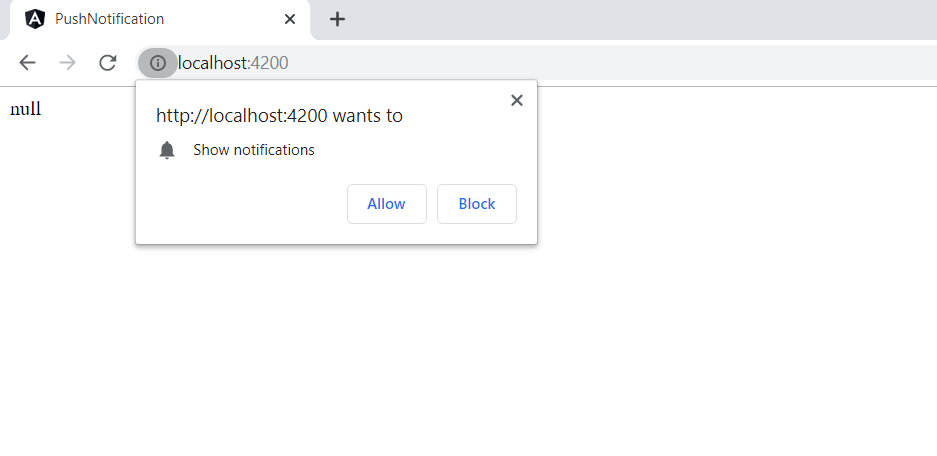
Now when you click on the allow button then it will print the token id on the browser console sometimes it may take time to load the token id but surely you will get that id in the console dialogue.

Here in the above screenshot, you can see the TOKEN ID which is generated after the permission
Sending a Push Notification
Now You can also hit Firebase Cloud Messaging directly using cURL like this:-
curl -X POST \\
-H 'Authorization: key=YOUR-SERVER-KEY' \
-H 'Content-Type: application/JSON \
-d '{
"notification": {
"title": "Hey there",
"body": "Subscribe to mighty ghost hack youtube channel"
},
"to": "YOUR-GENERATED-TOKEN"
}'Now copy the below JSON request and enter it into the body part and provide the authorization key in the header section of postman before sending any request over google apps and authorization key is nothing but the legacy serve key which we saw in prerequisite sections like this:-
{
 "notification": {
 "title": "Hey there",
 "body": "Subscribe to might ghost hack youtube channel"
 },
 "to": "YOUR-GENERATED-TOKEN"
}
The above screenshot includes your legacy server key in the header section. Once all things are done we can send the request to the server: Google APIs.
Now once we click on the send button on postman we will receive the popup.

That’s it
Hope you get how easily we can implement push notifications with the angular app to receive the push notification.
Published at DZone with permission of Kamal Singh. See the original article here.
Opinions expressed by DZone contributors are their own.
Comments