Angular Application : Spring Data-ldap part-3
Join the DZone community and get the full member experience.
Join For FreeHaving created the Spring rest service in the previous two blogs, it is time to look at the angular based application that will be interacting with those end points. I prefer using angular-cli to create and add features to my application, it is an easy and reliable way of adding stub code which is easier to manage and traverse.
ng : Angular CLI
A simple definition from the angular.io website
The Angular CLI is a command-line interface tool that you use to initialize, develop, scaffold, and maintain Angular applications. You can use the tool directly in a command shell, or indirectly through an interactive UI such as Angular Console.
In this blog I will try to provide quick insights into how one can use Angular CLI and some basic introduction of its commonly used commands, as we work towards creating our example application to consume the Sprint Data-LDAP rest endpoints.
The first step in the journey is to install angular cli.
Please note, I am not going to cover angular basics, or node and npm and will assume you have some prior exposure to these technologies.
How to install @angular/cli
You can open a terminal and issue a simple command to install the angular cli as in shown in the image below.
npm install -g @angular/cliTo validate you can issue a command as under on the terminal
ng -v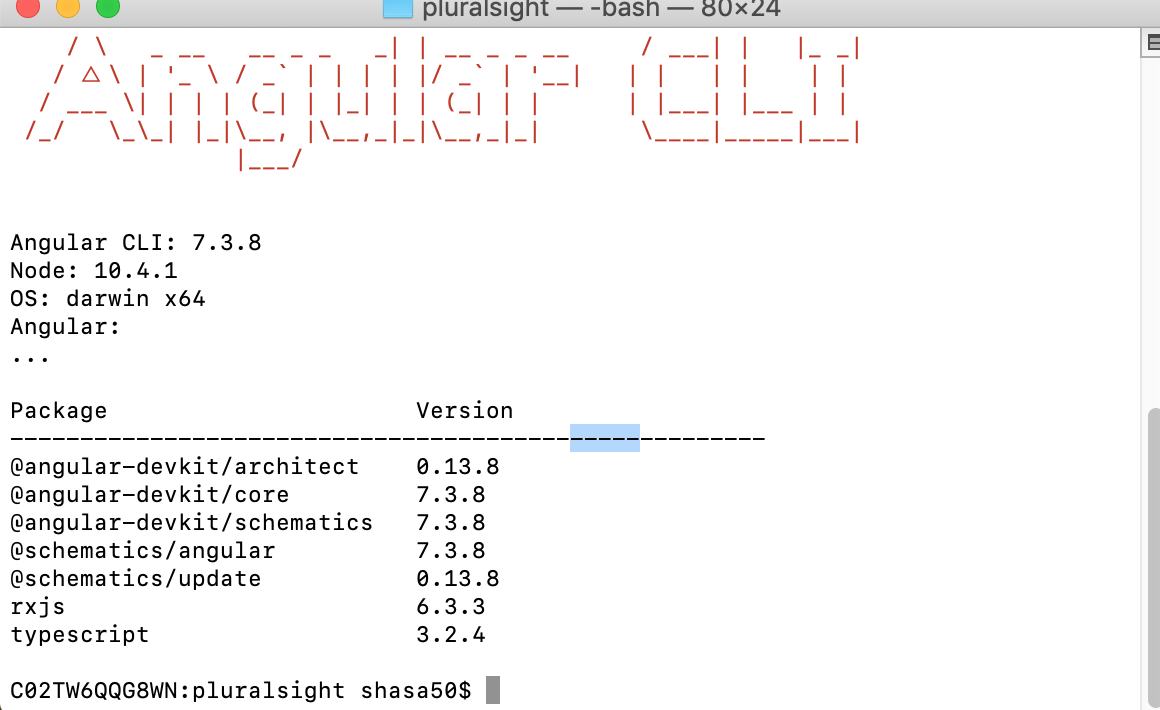
ng --versionOn the day I am writing this blog the version that I am using is 7.3.8.
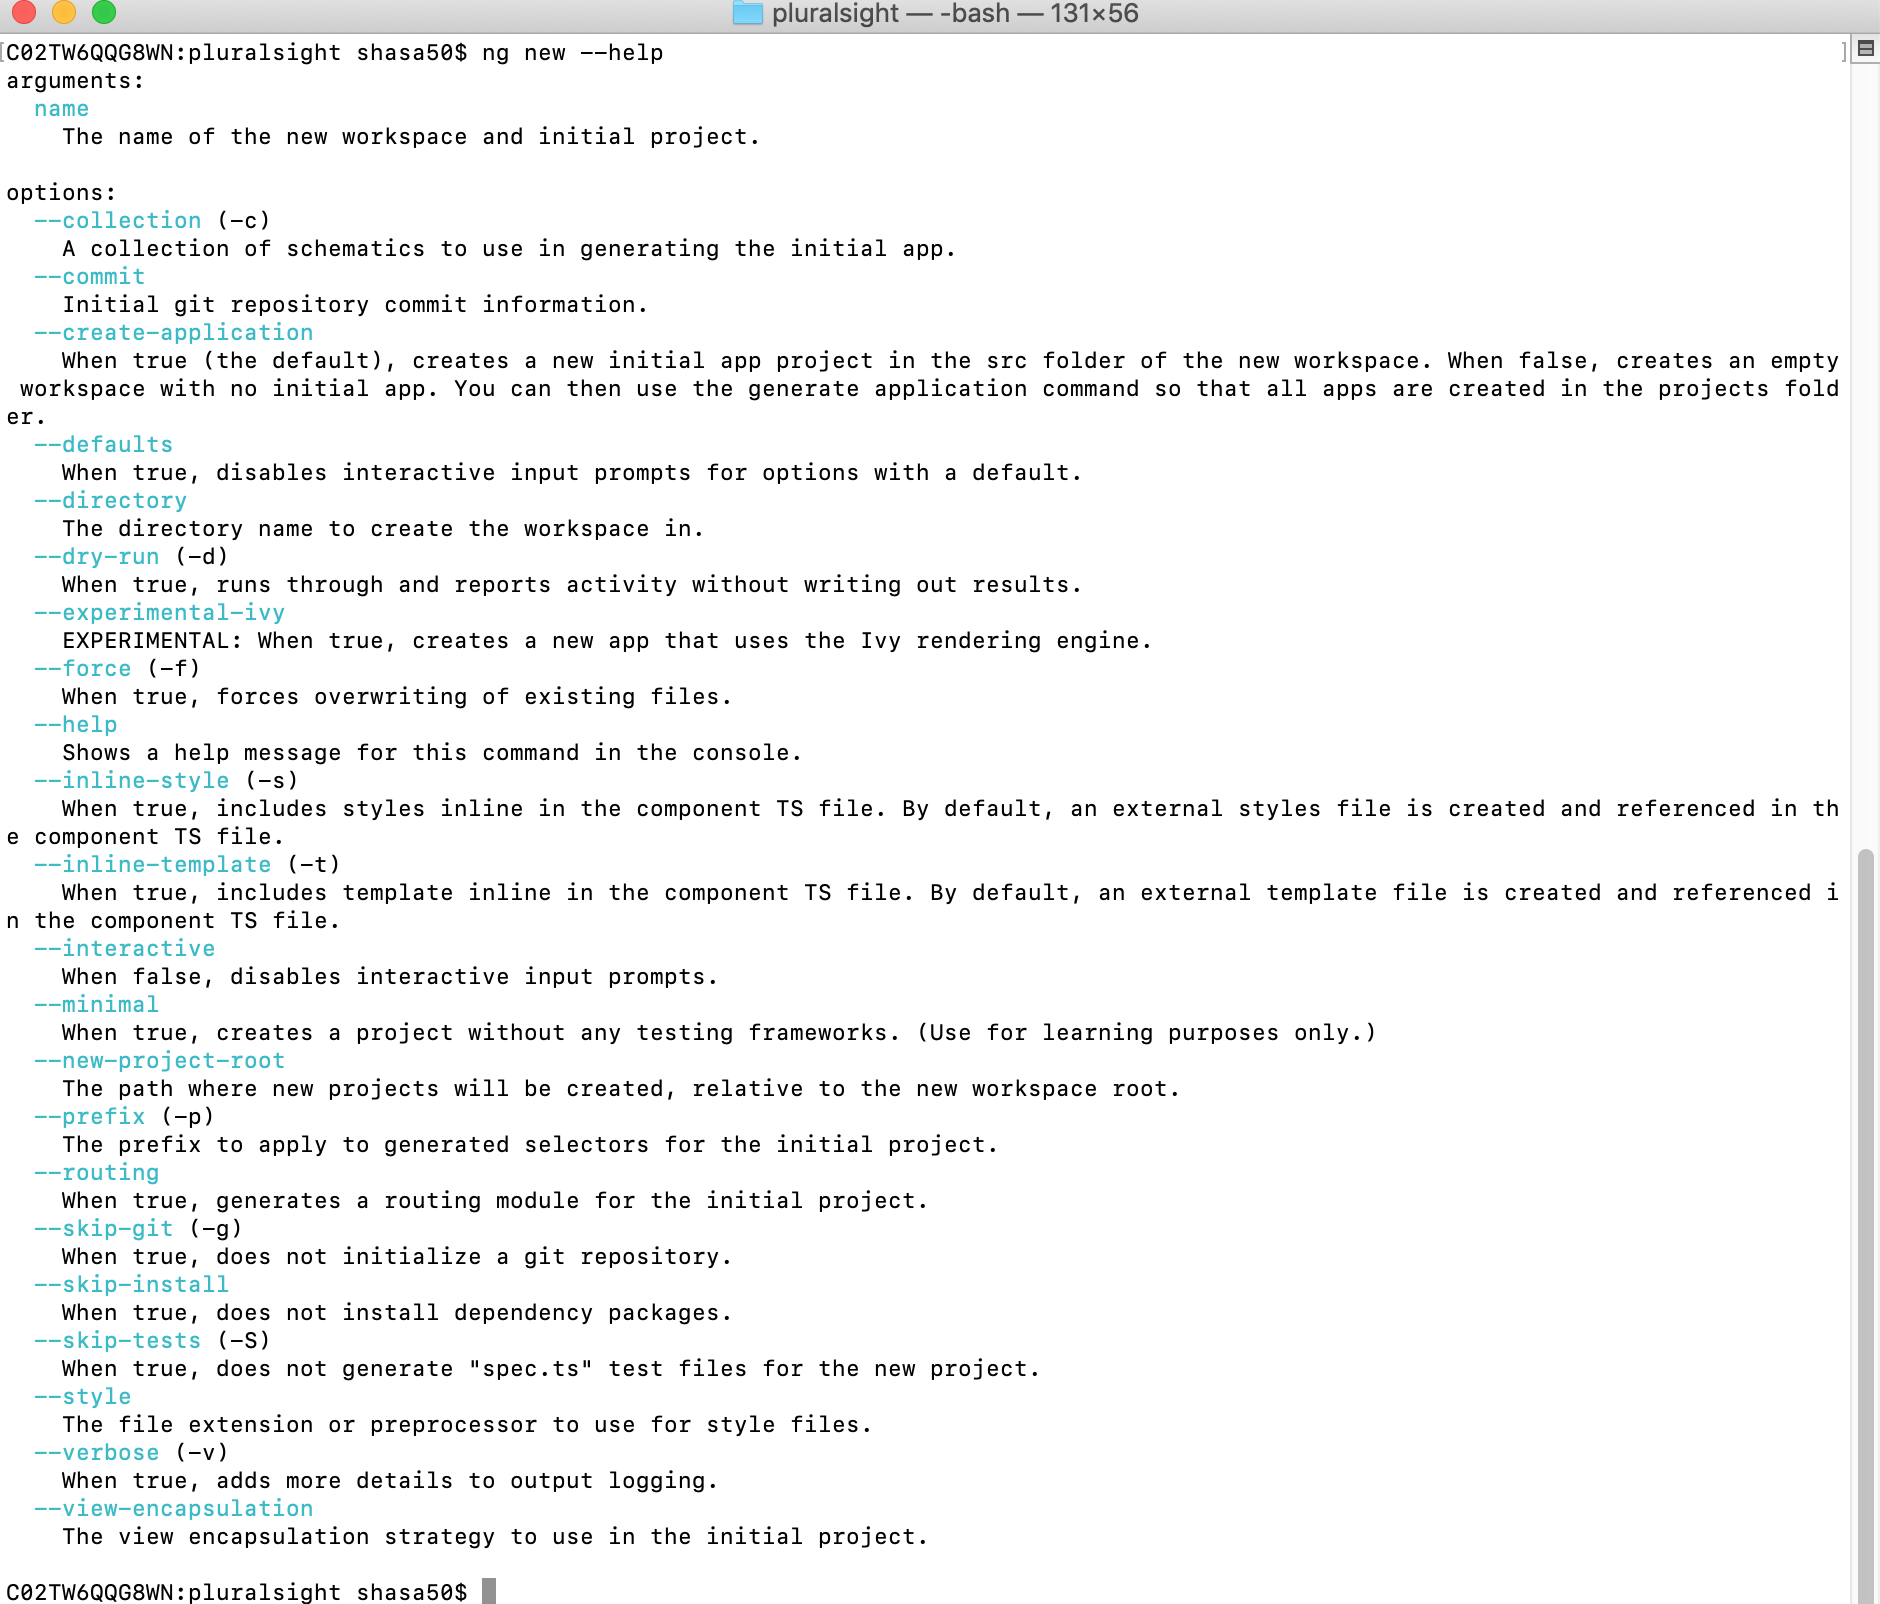
Options
The --help option can help you explore the options for any of the commands. In the image below you can see all the options available that we can use along with new. The information is available with a brief ddescription to what purpose it serves.
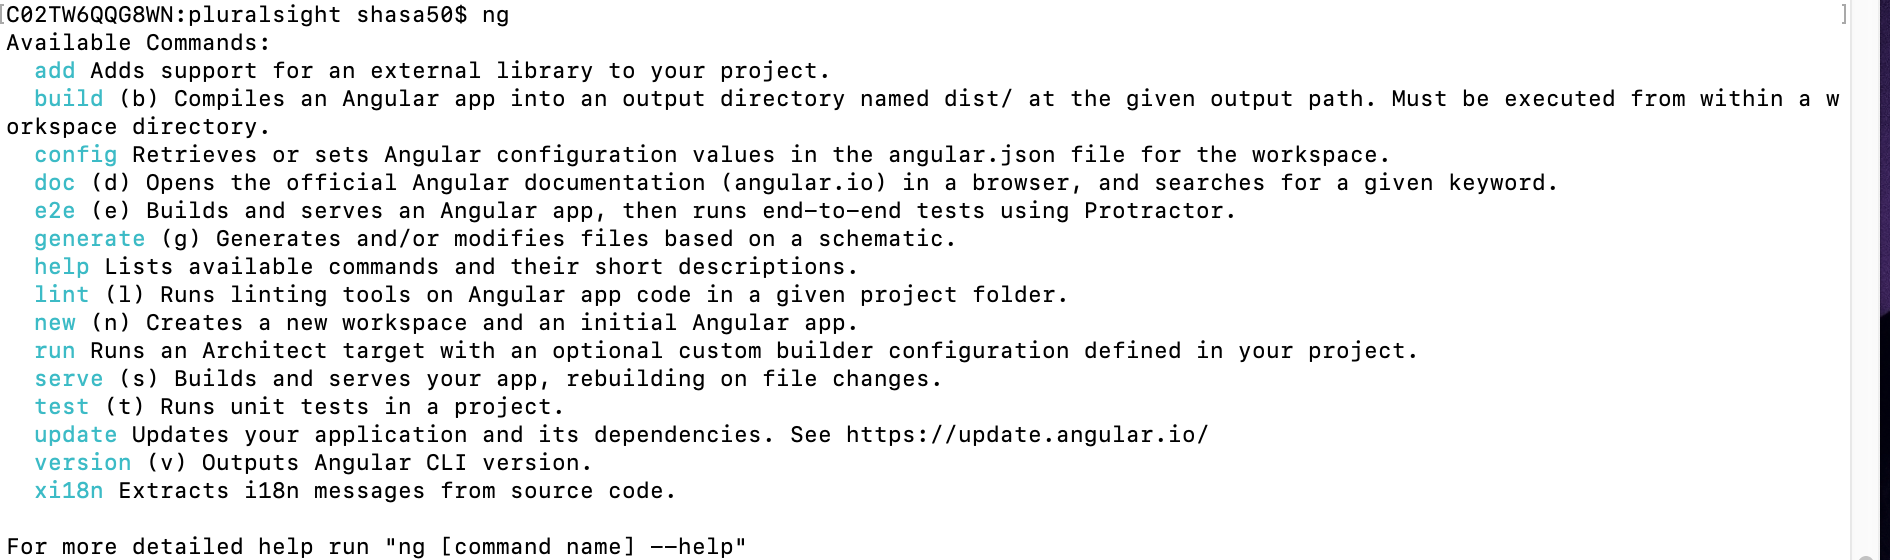
If you issue just ng on the terminal you can see the commands that you can use and can explore further by using the --help option.
Node & NPM
The Node and NPM version information for my sytem is
samarthyas$ node -v && npm -v
v10.4.1
6.4.1
Creating a New app
Time to get started for creating a new application that I will use for my Spring data-ldap integration.
ng create --helpProvides with all the information required to launch a new application.
Let's create the boiler plate code using the new option
ng new samarthya -dOption: --dry-run (-d)
I have used an option -d for dry run which lists the file that it will create without actually creating them on the disk. I often use this option to see the number of files that it will create and the folder structure, if applicable.

You can also see the NOTE at the end pointing to the information - no changes were made.
Option: --skip-install
Skip install allows you skip npm install that is executed after the files are created, I seldom use it, but is a good option to reduce the development time.
After I verified, the list of files that it will create, time for executing the command without the flag.

The last step of the command is executing the npm install that pulls in all the dependencies required to launch test and debug the application.
You can open the folder in any preferred code editor, I use VS code and is my go to option for any Angular related development and validate the folder structure.

From the angular documentation
| Folder and files | PURPOSE |
|---|---|
app/ |
Contains the component files in which your app logic and data are defined. See details in App source folder below. |
assets/ |
Contains image files and other asset files to be copied as-is when you build your application. |
environments/ |
Contains build configuration options for particular target environments. By default there is an unnamed standard development environment and a production ("prod") environment. You can define additional target environment configurations. |
browserslist |
Configures sharing of target browsers and Node.js versions among various front-end tools. See Browserslist on GitHub for more information. |
favicon.ico |
An icon to use for this app in the bookmark bar. |
index.html |
The main HTML page that is served when someone visits your site. The CLI automatically adds all JavaScript and CSS files when building your app, so you typically don't need to add any <script> or<link> tags here manually. |
main.ts |
The main entry point for your app. Compiles the application with the JIT compiler and bootstraps the application's root module (AppModule) to run in the browser. You can also use the AOT compiler without changing any code by appending the --aot flag to the CLI build and serve commands. |
polyfills.ts |
Provides polyfill scripts for browser support. |
styles.sass |
Lists CSS files that supply styles for a project. The extension reflects the style preprocessor you have configured for the project. |
test.ts |
The main entry point for your unit tests, with some Angular-specific configuration. You don't typically need to edit this file. |
tsconfig.app.json |
Inherits from the workspace-wide tsconfig.json file. |
tsconfig.spec.json |
Inherits from the workspace-wide tsconfig.json file. |
tslint.json |
Inherits from the workspace-wide tslint.jsonfile. |
You can find more information here.
.gitignore
This file contains the information that is utlized for specifically ignoring a bunch of files or folder while using git, rest information available here.
pacakge.json
This file lists out the metadata about you project, if you look at it closely for the one we created you will find the project name, version and other useful information listed in the file.
{
  "name": "samarthya",
  "version": "0.1.0",
  "scripts": {
    "ng": "ng",
    "start": "ng serve",
    "build": "ng build",
    "test": "ng test",
    "lint": "ng lint",
    "e2e": "ng e2e"
  },
  "private": true,
  "dependencies": {
    "@angular/animations": "~7.2.0",
    "@angular/common": "~7.2.0",
    "@angular/compiler": "~7.2.0",
    "@angular/core": "~7.2.0",
    "@angular/forms": "~7.2.0",
    "@angular/platform-browser": "~7.2.0",
    "@angular/platform-browser-dynamic": "~7.2.0",
    "@angular/router": "~7.2.0",
    "core-js": "^2.5.4",
    "rxjs": "~6.3.3",
    "tslib": "^1.9.0",
    "zone.js": "~0.8.26"
  },
  "devDependencies": {
    "@angular-devkit/build-angular": "~0.13.0",
    "@angular/cli": "~7.3.8",
    "@angular/compiler-cli": "~7.2.0",
    "@angular/language-service": "~7.2.0",
    "@types/node": "~8.9.4",
    "@types/jasmine": "~2.8.8",
    "@types/jasminewd2": "~2.0.3",
    "codelyzer": "~4.5.0",
    "jasmine-core": "~2.99.1",
    "jasmine-spec-reporter": "~4.2.1",
    "karma": "~4.0.0",
    "karma-chrome-launcher": "~2.2.0",
    "karma-coverage-istanbul-reporter": "~2.0.1",
    "karma-jasmine": "~1.1.2",
    "karma-jasmine-html-reporter": "^0.2.2",
    "protractor": "~5.4.0",
    "ts-node": "~7.0.0",
    "tslint": "~5.11.0",
    "typescript": "~3.2.2"
  }
}
You can employ NPM options, just to say if I want to see what are the outdated component in the package.json file you can employ (in the working directory ./samarthya)
npm outdated
Versioning strategy
In all dependencies listed in the package file you can see three numbers
"@types/jasmine": "~2.8.8"The first is the Major version, Minor version and Patch release version.
Update types
You can also specify which updates are acceptable in the package.json
For example, to specify acceptable version ranges up to 1.0.4, use the following syntax:
- Patch releases:
1.0or1.0.xor~1.0.4 - Minor releases:
1or1.xor^1.0.4 - Major releases:
*orx
File: angular.json
There is plethora of information available on this topic and further explaination, is beyond the scope of this blog.
"projects": {
    "samarthya": {
      "root": "",
      "sourceRoot": "src",
      "projectType": "application",
      "prefix": "app",
      "schematics": {},
      "architect": {
        "build": {
          "builder": "@angular-devkit/build-angular:browser",
          "options": {
            "outputPath": "dist/samarthya",
            "index": "src/index.html",
            "main": "src/main.ts",
            "polyfills": "src/polyfills.ts",
            "tsConfig": "src/tsconfig.app.json",
            "assets": [
              "src/favicon.ico",
              "src/assets"
            ],
            "styles": [
              "src/styles.css"
            ],
            "scripts": [],
            "es5BrowserSupport": true
          },
          "configurations": {
            "production": {
              "fileReplacements": [
                {
                  "replace": "src/environments/environment.ts",
                  "with": "src/environments/environment.prod.ts"
                }
              ],
              "optimization": true,
              "outputHashing": "all",
              "sourceMap": false,
              "extractCss": true,
              "namedChunks": false,
              "aot": true,
              "extractLicenses": true,
              "vendorChunk": false,
              "buildOptimizer": true,
              "budgets": [
                {
                  "type": "initial",
                  "maximumWarning": "2mb",
                  "maximumError": "5mb"
                }
              ]
            }
          }
        },
        "serve": {
          "builder": "@angular-devkit/build-angular:dev-server",
          "options": {
            "browserTarget": "samarthya:build"
          },
          "configurations": {
            "production": {
              "browserTarget": "samarthya:build:production"
            }
          }
        },
        "extract-i18n": {
          "builder": "@angular-devkit/build-angular:extract-i18n",
          "options": {
            "browserTarget": "samarthya:build"
          }
        },
        "test": {
          "builder": "@angular-devkit/build-angular:karma",
          "options": {
            "main": "src/test.ts",
            "polyfills": "src/polyfills.ts",
            "tsConfig": "src/tsconfig.spec.json",
            "karmaConfig": "src/karma.conf.js",
            "styles": [
              "src/styles.css"
            ],
            "scripts": [],
            "assets": [
              "src/favicon.ico",
              "src/assets"
            ]
          }
        },
        "lint": {
          "builder": "@angular-devkit/build-angular:tslint",
          "options": {
            "tsConfig": [
              "src/tsconfig.app.json",
              "src/tsconfig.spec.json"
            ],
            "exclude": [
              "**/node_modules/**"
            ]
          }
        }
      }
    },
    "samarthya-e2e": {
      "root": "e2e/",
      "projectType": "application",
      "prefix": "",
      "architect": {
        "e2e": {
          "builder": "@angular-devkit/build-angular:protractor",
          "options": {
            "protractorConfig": "e2e/protractor.conf.js",
            "devServerTarget": "samarthya:serve"
          },
          "configurations": {
            "production": {
              "devServerTarget": "samarthya:serve:production"
            }
          }
        },
        "lint": {
          "builder": "@angular-devkit/build-angular:tslint",
          "options": {
            "tsConfig": "e2e/tsconfig.e2e.json",
            "exclude": [
              "**/node_modules/**"
            ]
          }
        }
      }
    }
  },
Show time
You can test the code that has been generated so far by simply executing the command
npm startThis will run the start script in the package.json and you can see an output as under.
$ npm start

> [email protected] start /Users/shasa50/sourcebox/pluralsight/sample/samarthya
> ng serve

** Angular Live Development Server is listening on localhost:4200, open your browser on http://localhost:4200/ **

Date: 2019-04-29T18:14:16.023Z
Hash: cde6a447c4dfc04c3ff3
Time: 10366ms
chunk {es2015-polyfills} es2015-polyfills.js, es2015-polyfills.js.map (es2015-polyfills) 284 kB [initial] [rendered]
chunk {main} main.js, main.js.map (main) 9.88 kB [initial] [rendered]
chunk {polyfills} polyfills.js, polyfills.js.map (polyfills) 236 kB [initial] [rendered]
chunk {runtime} runtime.js, runtime.js.map (runtime) 6.08 kB [entry] [rendered]
chunk {styles} styles.js, styles.js.map (styles) 16.3 kB [initial] [rendered]
chunk {vendor} vendor.js, vendor.js.map (vendor) 3.51 MB [initial] [rendered]
ℹ 「wdm」: Compiled successfully.
Next challenge: Adding bootstrap library
Adding bootstrap support to the existing angular application is relatively simple.
npm install bootstrap --saveYou might have to add support for JQuery and Popper.js as well to use bootstrap. You can validate the addition by checking the package.json file and should see the new entries as below.
"bootstrap": "^4.3.1",
"jquery": "^3.4.0",
"popper.js": "^1.15.0",
Time to add scripts and css to the angular.json
CLI option: ng config
You can retrieve or modify the existing values in the angular.json configuration by using the ng config comand
The --help option will allow a quick peek into how to use it
ng config --help
samarthya>ng config --help
Retrieves or sets Angular configuration values in the angular.json file for the workspace.
usage: ng config <jsonPath> <value> [options]

arguments:
  jsonPath
    The configuration key to set or query, in JSON path format. For example: "a[3].foo.bar[2]". If no new value is provided, returns the current value of this key.
  value
    If provided, a new value for the given configuration key.

options:
  --global (-g)
    When true, accesses the global configuration in the caller's home directory.
  --help
    Shows a help message for this command in the console.
Let's see the current prefix option set for my workspace (it might be app for you)
samarthya>ng config projects.samarthya.prefix
sm
And if I look at the json information, it validates the information.
projects": {
    "samarthya": {
      "root": "",
      "sourceRoot": "src",
      "projectType": "application",
      "prefix": "sm",
How it is getting this information is by reading the angular.json projects->samarthya->prefix and fetches that information.
At the moment there is no option to append some information using the same option, so I will manually edit the angular.json file to add the information.
"styles": [
              "src/styles.css",
              "node_modules/bootstrap/dist/css/bootstrap.min.css"
            ],
You can see the global script information as well using ng config option
ng config projects.samarthya.architect.build.options.scriptsFrom the angular.io documentation
scripts |
An object containing JavaScript script files to add to the global context of the project. The scripts are loaded exactly as if you had added them in a <script>tag inside index.html. |
This placeholder we add the bootstrap related scripts which we will be using in the project.
"scripts": [
              "node_modules/jquery/dist/jquery.min.js",
              "node_modules/popper.js/dist/popper.min.js",
              "node_modules/bootstrap/dist/js/bootstrap.min.js"
            ],
Once done you can remove the content from app.component.html and app.component.css and add the contents like this.
h1 {
  font-family: 'Lucida Sans', 'Lucida Sans Regular', 'Lucida Grande', 'Lucida Sans Unicode', Geneva, Verdana, sans-serif;
  font-size: 3em;
}

p {
  font-size: 1.2em;
  font-style: italic;
}
<div class="container">
<h1>My landing page.</h1>
<p>My content in a paragrpah. Lorem ipsum dolor, sit amet consectetur adipisicing elit. Nesciunt dolorem impedit cumque, delectus in inventore natus atque ab voluptas, doloribus quidem molestiae sunt itaque fuga ex tempore eaque. Neque, nostrum.</p>
</div>
and you can see the change

Linting: ng lint
If you look for the helper option you may get something like below
samarthya>ng lint --help
Runs linting tools on Angular app code in a given project folder.
usage: ng lint <project> [options]

arguments:
  project
    The name of the project to lint.

options:
  --configuration (-c)
    The linting configuration to use.
  --exclude
    Files to exclude from linting.
  --files
    Files to include in linting.
  --fix
    Fixes linting errors (may overwrite linted files).
  --force
    Succeeds even if there was linting errors.
  --format
    Output format (prose, json, stylish, verbose, pmd, msbuild, checkstyle, vso, fileslist).
  --help
    Shows a help message for this command in the console.
  --silent
    Show output text.
  --ts-config
    The name of the TypeScript configuration file.
  --tslint-config
    The name of the TSLint configuration file.
  --type-check
    Controls the type check for linting.
You can check the linting for you application by issuing
samarthya>ng lint samarthya
Linting "samarthya"...


All files pass linting.
Let's add some deliberate mistakes (I am adding information in app.component.ts)
myDummyFunction() {
    console.log(" I am a lint error ")
  }
and if I run the ng lint I should get notifications
samarthya>ng lint samarthya
Linting "samarthya"...

ERROR: /Users/shasa50/sourcebox/pluralsight/sample/samarthya/src/app/app.component.ts[12, 17]: " should be '
ERROR: /Users/shasa50/sourcebox/pluralsight/sample/samarthya/src/app/app.component.ts[12, 39]: Missing semicolon

Lint errors found in the listed files.
If you want to style this information you can look for options of --format
samarthya>ng lint samarthya --format stylish
Linting "samarthya"...
/Users/shasa50/sourcebox/pluralsight/sample/samarthya/src/app/app.component.ts:12:17
ERROR: 12:17  quotemark  " should be '
ERROR: 12:39  semicolon  Missing semicolon

Lint errors found in the listed files.
and if you want to autofix them
samarthya>ng lint samarthya --format stylish --fix
Linting "samarthya"...


All files pass linting.
The visible code changes done are as under. (You can identify the semicolon and singlequote)
export class AppComponent {
  title = 'samarthya';

  myDummyFunction() {
    console.log(' I am a lint error ');
  }
}
Time to generate the other basic elements of the application, but before that a quick peek into the helper option.
samarthya>ng generate --help
Generates and/or modifies files based on a schematic.
usage: ng generate <schematic> [options]

arguments:
  schematic
    The schematic or collection:schematic to generate.

options:
  --defaults
    When true, disables interactive input prompts for options with a default.
  --dry-run (-d)
    When true, runs through and reports activity without writing out results.
  --force (-f)
    When true, forces overwriting of existing files.
  --help
    Shows a help message for this command in the console.
  --interactive
    When false, disables interactive input prompts.

Available Schematics:
  Collection "@schematics/angular" (default):
    appShell
    application
    class
    component
    directive
    enum
    guard
    interface
    library
    module
    pipe
    service
    serviceWorker
    universal
Navbar component
Let's use this bootstrap libray to add a navigation bar to our application.
samarthya>ng g c navbar -d
CREATE src/app/navbar/navbar.component.css (0 bytes)
CREATE src/app/navbar/navbar.component.html (25 bytes)
CREATE src/app/navbar/navbar.component.spec.ts (628 bytes)
CREATE src/app/navbar/navbar.component.ts (268 bytes)
UPDATE src/app/app.module.ts (396 bytes)

NOTE: The "dryRun" flag means no changes were made.
I just used the dry run flag to see the number of files it will generate and eventually I will run it without the flag.
@Component({
  selector: 'sm-navbar',
  templateUrl: './navbar.component.html',
  styleUrls: ['./navbar.component.css']
})
export class NavbarComponent implements OnInit {

  constructor() { }

  ngOnInit() {
  }

}
Let's add some HTML and CSS for navbar from the navbar examples in bootstrap library.
<nav class="navbar navbar-expand-lg navbar-light bg-light">
    <a class="navbar-brand" href="#">Samarthya</a>
    <button class="navbar-toggler" type="button" data-toggle="collapse" data-target="#navbarSupportedContent" aria-controls="navbarSupportedContent" aria-expanded="false" aria-label="Toggle navigation">
      <span class="navbar-toggler-icon"></span>
    </button>

    <div class="collapse navbar-collapse" id="navbarSupportedContent">
      <ul class="navbar-nav mr-auto">
        <li class="nav-item active">
          <a class="nav-link" href="#">Home <span class="sr-only">(current)</span></a>
        </li>
        <li class="nav-item">
          <a class="nav-link" href="#">Link</a>
        </li>
        <li class="nav-item dropdown">
          <a class="nav-link dropdown-toggle" href="#" id="navbarDropdown" role="button" data-toggle="dropdown" aria-haspopup="true" aria-expanded="false">
            Dropdown
          </a>
          <div class="dropdown-menu" aria-labelledby="navbarDropdown">
            <a class="dropdown-item" href="#">Action</a>
            <a class="dropdown-item" href="#">Another action</a>
            <div class="dropdown-divider"></div>
            <a class="dropdown-item" href="#">Something else here</a>
          </div>
        </li>
        <li class="nav-item">
          <a class="nav-link disabled" href="#" tabindex="-1" aria-disabled="true">Disabled</a>
        </li>
      </ul>
      <form class="form-inline my-2 my-lg-0">
        <input class="form-control mr-sm-2" type="search" placeholder="Search" aria-label="Search">
        <button class="btn btn-outline-success my-2 my-sm-0" type="submit">Search</button>
      </form>
    </div>
  </nav>
You can also check the modules file app.module.ts and you will be able to find the declaration for your new component there.
@NgModule({
  declarations: [
    AppComponent,
    NavbarComponent
  ],
Adding the component (as below) to the html file in app.component.html
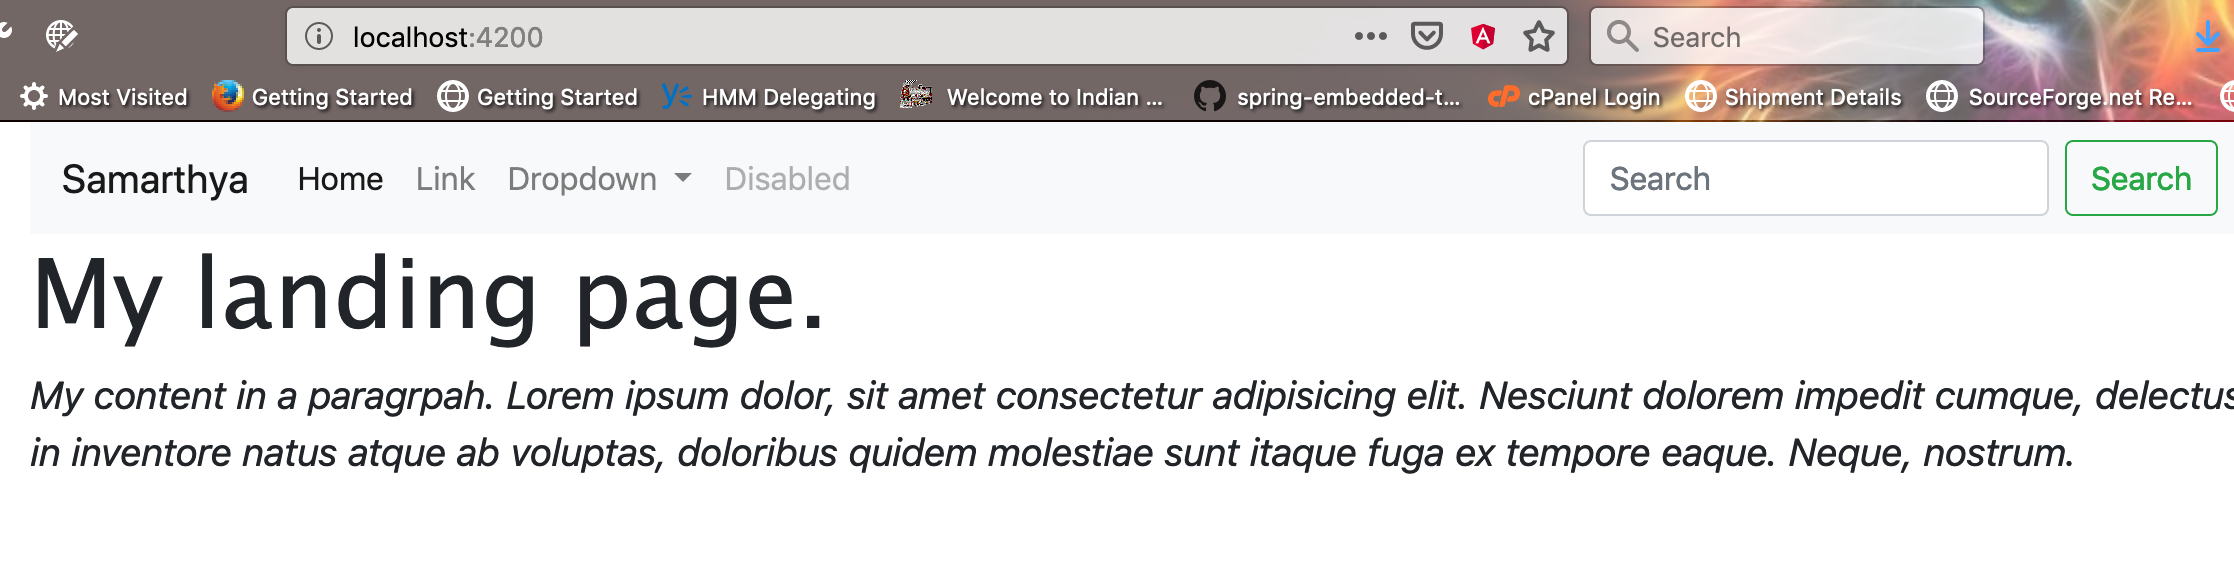
<div class="container">
  <sm-navbar></sm-navbar>
  <h1>My landing page.</h1>
  <p>My content in a paragrpah. Lorem ipsum dolor, sit amet consectetur adipisicing elit. Nesciunt dolorem impedit cumque, delectus in inventore natus atque ab voluptas, doloribus quidem molestiae sunt itaque fuga ex tempore eaque. Neque, nostrum.</p>
</div>
and you can see the results
Please note: I have not added any routing capability so far.
Angular Routing
A base template is ready and the next step would be to add further capability into my application. Angular routing is the mechanism that enables navigation, specifically linking pages.
Using the router, you can declaratively specify application states, manage state transitions while taking care of the URL, and load bundles ondemand.
<base href="/">
This tag tells the router how to compose navigation URLs.
<head>
  <base href="/">
  <meta charset="utf-8">
  <title>Samarthya</title>
  <meta name="viewport" content="width=device-width, initial-scale=1">
  <link rel="icon" type="image/x-icon" href="favicon.ico">
</head>
More information available here.
Time to define a new component that will be my home page component (snippet below).
samarthya>ng g c homepage
CREATE src/app/homepage/homepage.component.css (0 bytes)
CREATE src/app/homepage/homepage.component.html (27 bytes)
CREATE src/app/homepage/homepage.component.spec.ts (642 bytes)
CREATE src/app/homepage/homepage.component.ts (276 bytes)
UPDATE src/app/app.module.ts (608 bytes)
@Component({
selector: 'sm-homepage',
templateUrl: './homepage.component.html',
styleUrls: ['./homepage.component.css']
})
export class HomepageComponent implements OnInit {
constructor() { }
ngOnInit() {
}
}I modified the template information as under
<p>
  My Landing page.
</p>
After creating this component it is time to define routes, that will allow me to have an outlet to push out views based on user selection and I can have multiple screens to create the required capability
I created a new routes.ts file
import { Routes } from '@angular/router';
import { HomepageComponent } from './homepage/homepage.component';

export const appRoutes: Routes = [
  {
    path: 'home',
    component: HomepageComponent
  },
  {
    path: '',
    redirectTo: '/home',
    pathMatch: 'full'
  }
];
This defines a routes that can be stitched into the main application with the help of the RouterModule.forRoot()
static forRoot(routes: Route[], config?: ExtraOptions): ModuleWithProviders<RouterModule>In the app.module.ts I add the following lines to complete the stitching
import { appRoutes } from './routes';

imports: [
    BrowserModule,
    RouterModule.forRoot(appRoutes)
  ]
I can enable some debugging information by passing configuration options too.
Finally I modify the app.component.ts as under
@Component({
  selector: 'sm-root',
  template: `
  <div class="container">
    <sm-navbar></sm-navbar>
    <router-outlet></router-outlet>
  </div>
`,
})

export class AppComponent {
  myDummyFunction() {
    console.log(' I am a lint error ');
  }
}
You can see the router-outlet directive
<router-outlet> acts as a placeholder that Angular dynamically fills based on the current router state.
Time to test the code to see if it works, time to re-execute npm start

This is in continuation to my other blogs and another one would soon follow as I continue to build my complete application to create the desired deployment as discussed in the first blog.
Opinions expressed by DZone contributors are their own.
Comments