Building a Google Calendar-like Component Using Plain JavaScript
Creating a calendar-like component similar to Google Calendar can be an excellent way to strengthen your JavaScript skills.
Join the DZone community and get the full member experience.
Join For FreeCalendars have become an indispensable part of modern web applications as they enable users to organize, schedule, and track events seamlessly. Whether you’re building a project management tool, an event scheduling app, or a personal productivity suite, a custom calendar component can greatly enhance the user experience. While numerous pre-built calendar libraries exist, creating your own component can provide the flexibility to meet specific design and functionality requirements.
In this tutorial, we’ll explore how to build a Google Calendar-like component using JavaScript. By the end of this guide, you’ll have a fully functional calendar with interactive features and a deeper understanding of how to construct reusable components for your web applications. Whether you're a developer looking to add a unique touch to your project or someone eager to learn the inner workings of calendar functionalities, this step-by-step walkthrough will be invaluable. Let’s get started!
Overview
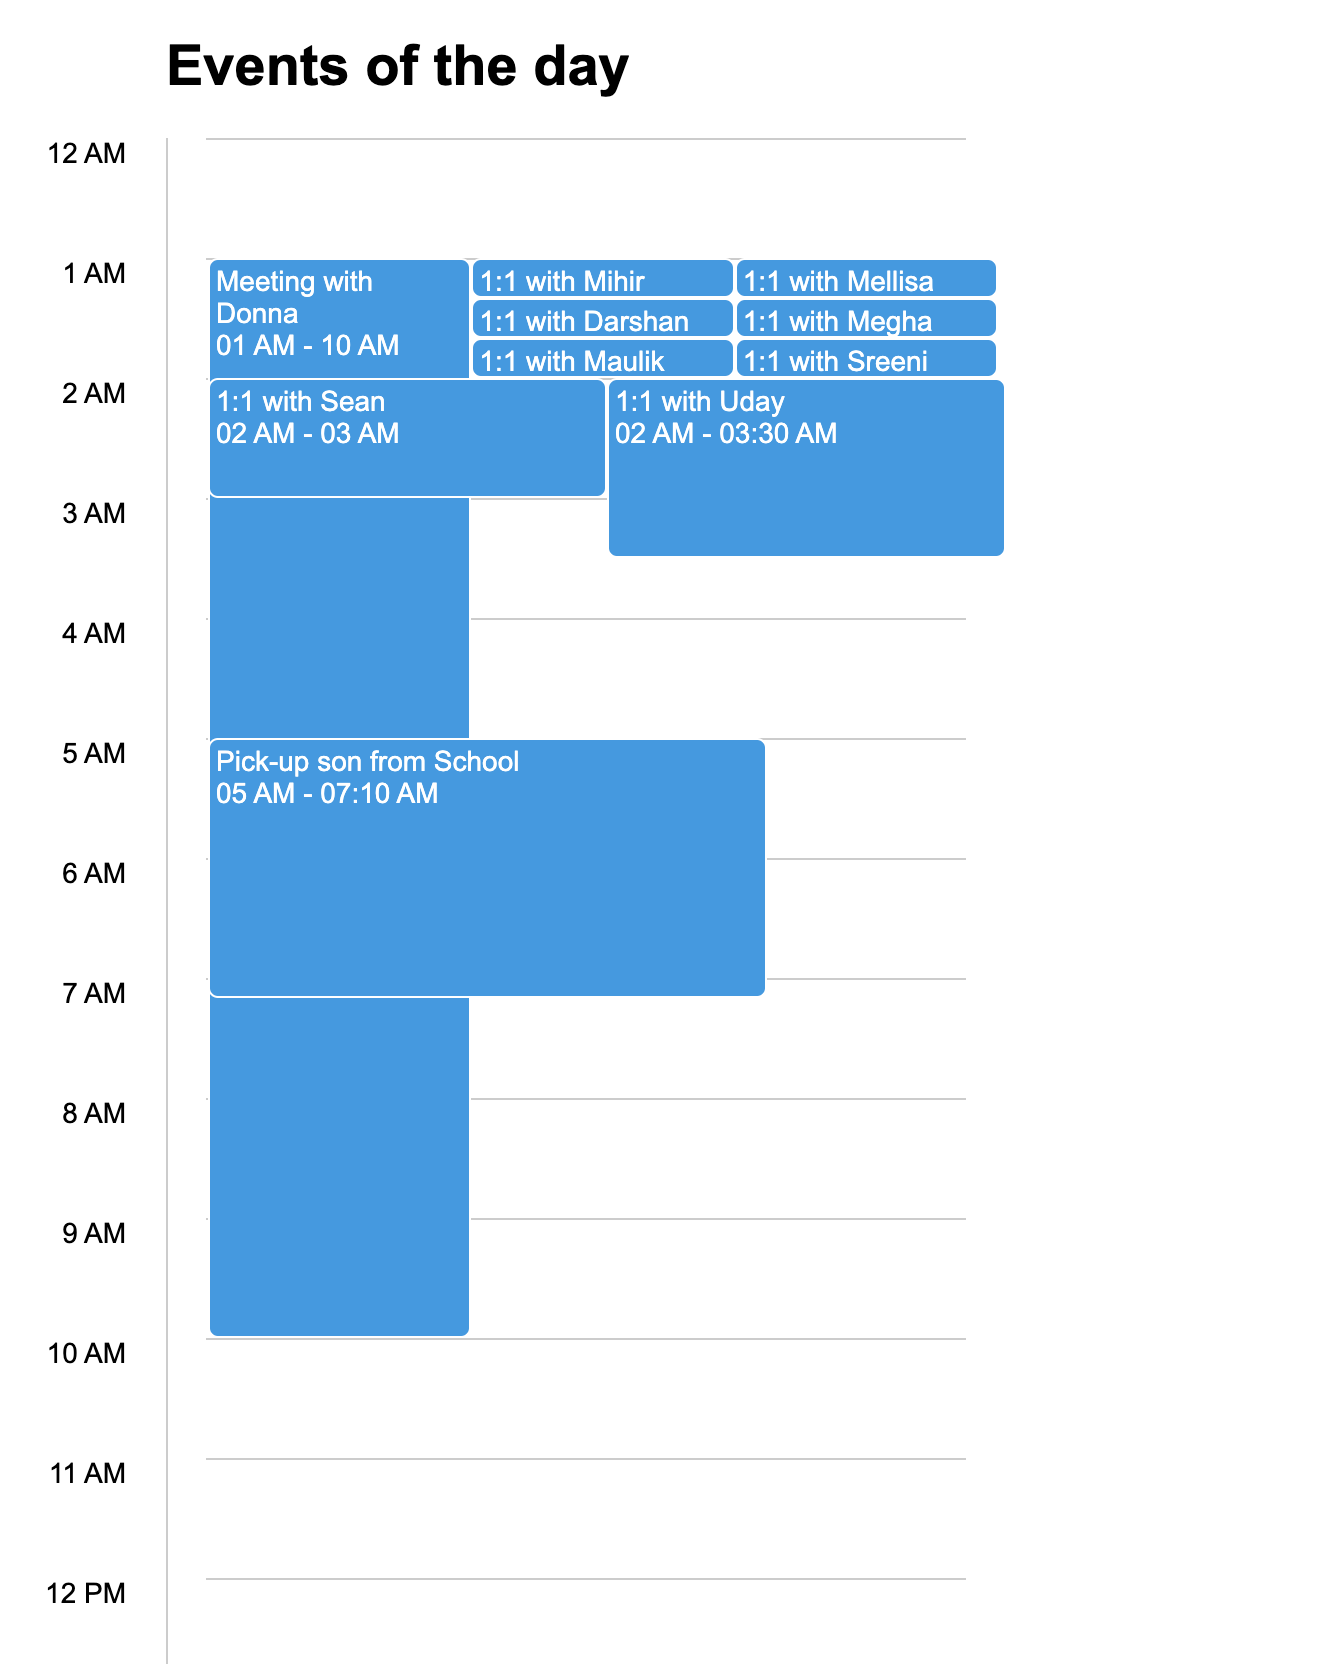
We’ll create a calendar component with the following features:
- Time Axis: A vertical timeline from 12 AM to 11 PM.
- Event Blocks: Dynamically rendered events with proper positioning and height based on their start and end times.
- Overlap Handling: Events overlapping in time will appear side by side.

Here’s how you can create this component step by step.
Step-by-Step Guide
1. Set Up the HTML and Basic Styles
We start by creating a minimal HTML structure for the calendar. The layout includes a timeline and a container for events.
<div class="calendar">
  <div class="calendar-time">
    <ul id="timelist" class="calendar-timelist"></ul>
  </div>
  <div id="events" class="calendar-events"></div>
</div>
Add basic CSS for styling the calendar:
.calendar {
  display: flex;
  width: 500px;
  margin: 20px auto;
  position: relative;
}

.event {
  background: #039be5;
  border: 1px solid white;
  border-radius: 5px;
  position: absolute;
  box-sizing: border-box;
  color: white;
  overflow: hidden;
  padding: 3px;
}

.calendar-time {
  border-right: 1px solid #ccc;
  width: 100px;
}

.calendar-timelist {
  list-style: none;
  padding: 0;
  margin: 0;
  text-align: right;
  padding-right: 20px;
}

.calendar-timelist li {
  height: 60px;
  box-sizing: border-box;
  width: 100%;
}

.calendar-events {
  flex-grow: 1;
  position: relative;
}
2. Create the JavaScript Class for the Calendar
Define a Calendar class to encapsulate all functionality.
Constructor
The constructor initializes the calendar by rendering the timeline and events:
class Calendar {
  constructor(data) {
    // Render the timeline on the Y-axis
    this.renderTime();

    // Render the event blocks
    this.renderEvents(data);
  }

  renderTime() {
    let timeHTML = Array.from({ length: 24 }, (_, i) => `<li>${this.to12HourFormat(i)}</li>`).join("");
    document.getElementById("timelist").innerHTML = timeHTML;
  }

  renderEvents(data) {
    let groupedEvents = this.groupEvents(data);
    let eventData = this.calculateEventStyles(groupedEvents);

    let eventHTML = eventData
      .map(
        (e) =>
          `<div class="event" style="top: ${e.top}px; height: ${e.height}px; width: ${e.width}%; left: ${e.left}%; z-index: ${e.zIndex};">
             <strong>${e.title}</strong><br>${e.time}
           </div>`
      )
      .join("");
    document.getElementById("events").innerHTML = eventHTML;
  }

  to12HourFormat(hour) {
    if (hour === 0) return "12 AM";
    if (hour < 12) return `${hour} AM`;
    if (hour === 12) return "12 PM";
    return `${hour - 12} PM`;
  }
}
3. Handle Event Overlaps and Positioning
We need logic to handle overlapping events. This is achieved by grouping and calculating appropriate positions.
Group Events by Start Hour
groupEvents(data) {
  let groups = [];
  data.forEach((event) => {
    let hour = parseInt(event.start.split(":")[0], 10);
    if (!groups[hour]) groups[hour] = [];
    groups[hour].push(event);
  });
  return groups;
}
Calculate Event Styles
For each group, calculate the event’s top, height, width, and left based on time and overlap.
calculateEventStyles(groups) {
  let eventData = [];

  groups.forEach((group) => {
    let columns = [];
    group.forEach((event) => {
      let { start, end } = event;
      let [sh, sm] = start.split(":").map(Number);
      let [eh, em] = end.split(":").map(Number);

      let top = sh * 60 + sm; // Convert start time to minutes
      let height = (eh * 60 + em) - top; // Calculate duration in minutes

      let left = columns.findIndex((col) => col.end <= start);
      if (left === -1) {
        left = columns.length;
        columns.push({ end });
      } else {
        columns[left].end = end;
      }

      eventData.push({
        title: event.name,
        time: `${this.to12HourFormat(sh)} - ${this.to12HourFormat(eh)}`,
        top,
        height,
        left: (left * 100) / columns.length,
        width: 100 / columns.length,
        zIndex: left,
      });
    });
  });

  return eventData;
}
4. Example Data and Initialization
Define your event data and initialize the Calendar:
const events = [
  { name: "Meeting with Donna", start: "09:00", end: "10:30" },
  { name: "Project Sync", start: "10:00", end: "11:00" },
  { name: "Lunch Break", start: "12:00", end: "13:00" },
  { name: "Client Call", start: "11:30", end: "12:30" },
];

new Calendar(events);
5. Full Code Example
<!DOCTYPE html>
<html lang="en">
<head>
  <meta charset="UTF-8">
  <meta name="viewport" content="width=device-width, initial-scale=1.0">
  <link rel="stylesheet" href="styles.css">
  <title>Calendar Component</title>
</head>
<body>
  <div class="calendar">
    <div class="calendar-time">
      <ul id="timelist" class="calendar-timelist"></ul>
    </div>
    <div id="events" class="calendar-events"></div>
  </div>
  <script src="script.js"></script>
</body>
</html>
Conclusion
This approach uses plain JavaScript to dynamically generate a Google Calendar-like component. By breaking down the problem into rendering time, grouping events, and calculating styles, you can build scalable, interactive components. You can experiment with the code to add features like draggable events or additional styling!
Opinions expressed by DZone contributors are their own.

Comments