Deploy MuleSoft App to CloudHub2 Using GitHub Actions CI/CD Pipeline
This article aims to provide a comprehensive guide on effectively deploying a MuleSoft application to CloudHub2 by using GitHub Actions CI/CD pipeline.
Join the DZone community and get the full member experience.
Join For FreeIn this post, I will provide a step-by-step guide on deploying a MuleSoft application to CloudHub2 using GitHub Actions.
Prerequisites
- GitHub account and basic knowledge of git.
- Anypoint Platform account.
- Anypoint Studio and basic knowledge of MuleSoft.
Before we start, let's learn about GitHub Actions.
GitHub Actions is a versatile and powerful automation platform provided by GitHub. It enables developers to define and automate workflows for their software development projects. With GitHub Actions, you can easily set up custom workflows to build, test, deploy, and integrate your code directly from your GitHub repository.
Deploying the MuleSoft Application
We will outline three key steps involved in this process.
1. Creating a Connected App
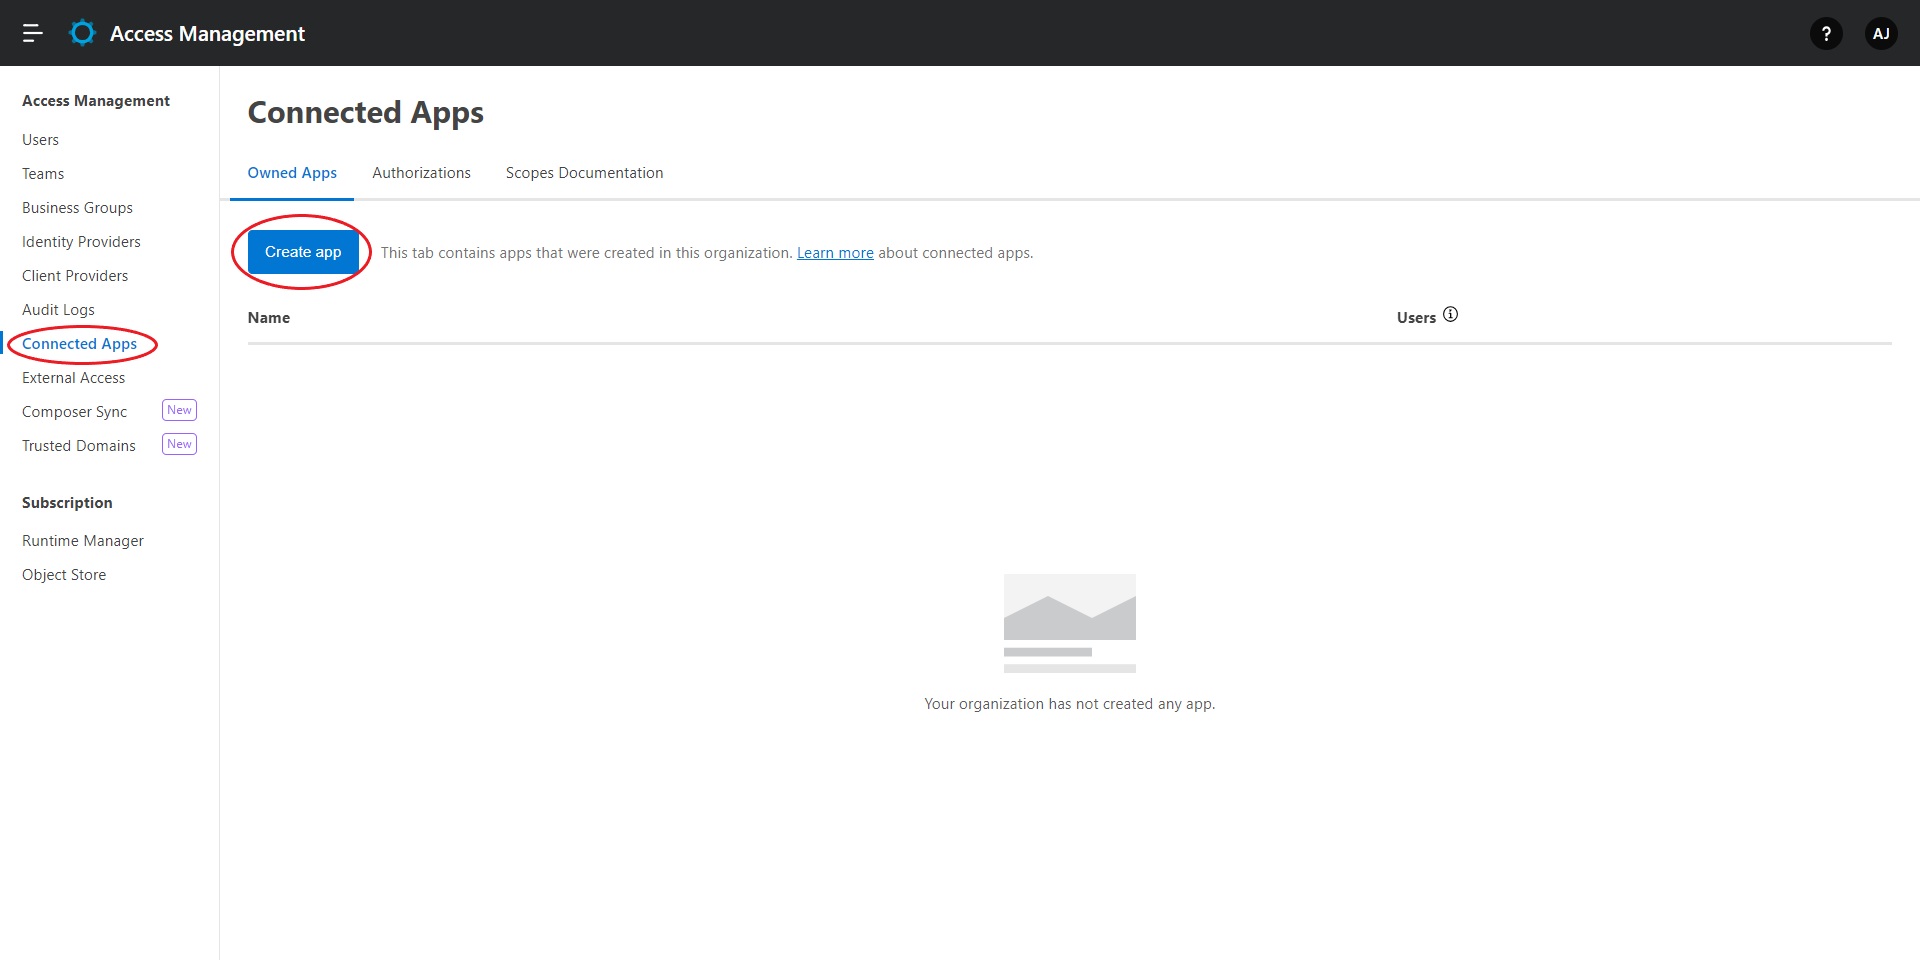
Go to Access Management in the Anypoint Platform. Click on "Connected Apps" from the left side menu.
Click on the "Create App" button.
Give a suitable name to the application and select the "App acts on its own behalf (client credentials)" radio button. "Click on Add Scopes" button.

Add the following scopes to the connected app and click on the "Save" button.


The Connected App will be created. Copy the Id and Secret and keep it aside for further use.

2. Configuring the MuleSoft App
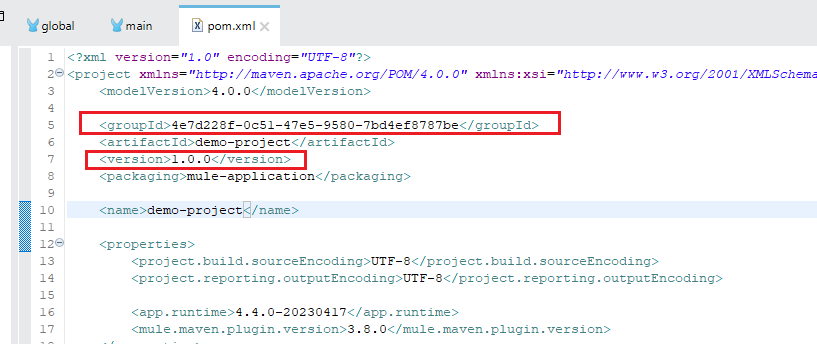
Open the project in the Anypoint studio and go to the pom.xml file.
In the pom.xml file, replace the value of "groupId" with the "Business Group Id" of your Anypoint Platform.
Remove the "-SNAPSHOT" from the version.
Go to the project folder in system explorer and add a folder named ".maven" inside the project folder.
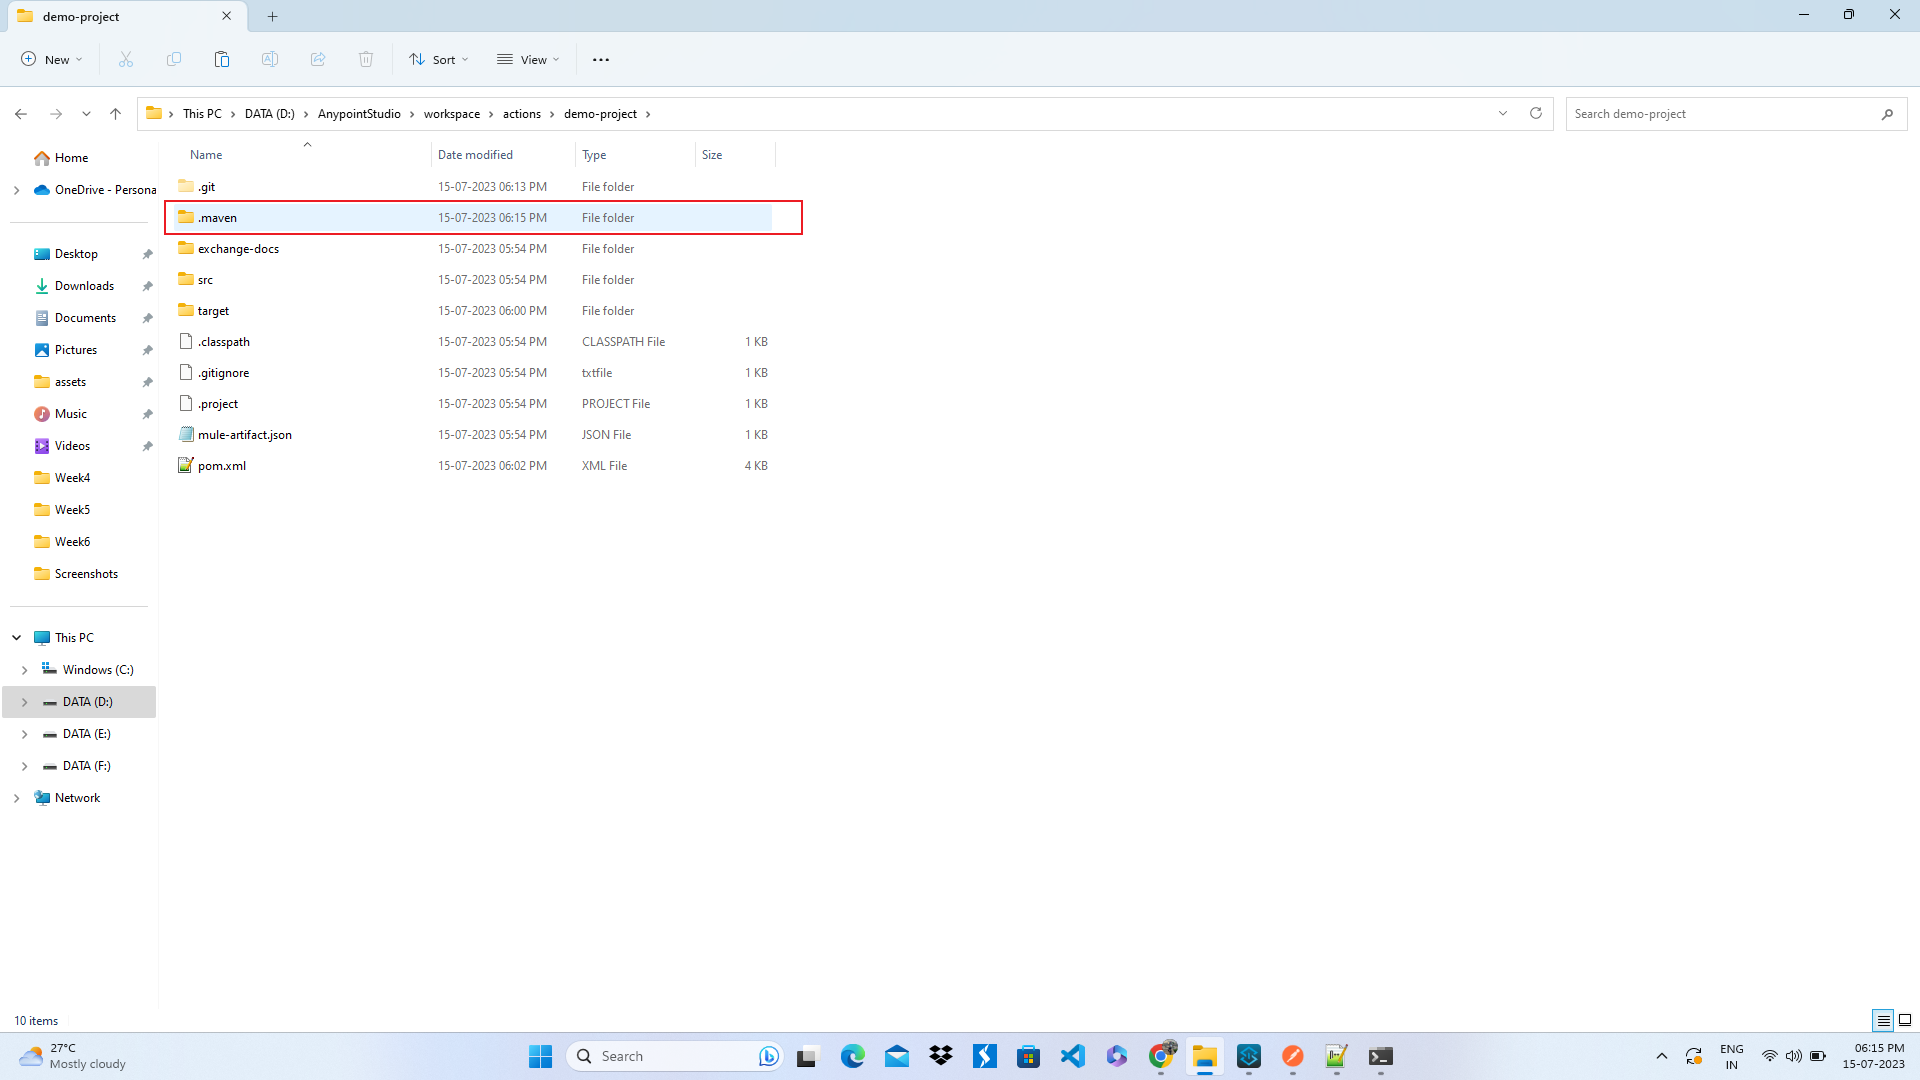
Inside the ".maven" folder, create a file named "settings.xml" and add the following configuration in the settings.xml file.
<settings>
    <servers>
        <server>
            <id>ca.anypoint.credentials</id>
            <username>~~~Client~~~</username>
            <password>${CA_CLIENT_ID}~?~${CA_CLIENT_SECRET}</password>
        </server>
    </servers>
</settings>
Add the CloudHub2 Deployment configurations in the "mule-maven-plugin" inside the "build" tag like the image below.
After the "build" tag, add the "distributionManagement."

<configuration>
	<cloudhub2Deployment>
		<uri>https://anypoint.mulesoft.com</uri>
		<provider>MC</provider>
		<environment>Sandbox</environment>
		<target>Cloudhub-US-East-2</target>
		<muleVersion>4.4.0</muleVersion>
		<server>ca.anypoint.credentials</server>
		<applicationName>ashish-demo-project-v1</applicationName>
		<replicas>1</replicas>
		<vCores>0.1</vCores>
		<skipDeploymentVerification>${skipDeploymentVerification}</skipDeploymentVerification>
		<integrations>
			<services>
				<objectStoreV2>
					<enabled>true</enabled>
				</objectStoreV2>
			</services>
		</integrations>
	</cloudhub2Deployment>
</configuration><distributionManagement>
<repository>
<id>ca.anypoint.credentials</id>
<name>Corporate Repository</name>
<url>https://maven.anypoint.mulesoft.com/api/v2/organizations/${project.groupId}/maven</url>
<layout>default</layout>
</repository>
</distributionManagement>Note:
- Keep the "applicationName" unique.
- "skipDeploymentVerification" is optional.
- "server" should match with the "id" provider in "distributionManagement".
- "id" provided in "distributionManagement" should match with the 'id" provided in the "settings.xml" file.
- For more information, visit the MuleSoft documentation.
3. Creating a Workflow File and Deploying the App
Create a GitHub repository and push the project code to the repository. In this post, we will be using the "main" branch.

Click on the "Settings" tab and select "Actions" from the "Secrets and variables" dropdown menu from the left side panel on the "Settings" page.

Click on the "New Repository Secret" button and add the Client-Id of the Connected app that we created in Step 1.


Similarly, add the Client-Secret also.

Click on the "Actions" tab and select "Simple workflow" from the "Actions" page.

Change the name of the pipeline and replace the default code with the pipeline code given below.

# This workflow will build a MuleSoft project and deploy to CloudHub

name: Build and Deploy to Sandbox

on:
  push:
    branches: [ main ]
  workflow_dispatch:

jobs:
  build:
    runs-on: ubuntu-latest
    env:
      CA_CLIENT_ID: ${{ secrets.CA_CLIENT_ID }}
      CA_CLIENT_SECRET: ${{ secrets.CA_CLIENT_SECRET }}

    steps:

    - uses: actions/checkout@v3

    - uses: actions/cache@v3
      with:
        path: ~/.m2/repository
        key: ${{ runner.os }}-maven-${{ hashFiles('**/pom.xml') }}
        restore-keys: |
          ${{ runner.os }}-maven-

    - name: Set up JDK 11
      uses: actions/setup-java@v3
      with:
        java-version: 11
        distribution: 'zulu'

    - name: Print effective-settings (optional)
      run: mvn help:effective-settings

    - name: Build with Maven
      run: mvn -B package -s .maven/settings.xml

    - name: Stamp artifact file name with commit hash
      run: |
        artifactName1=$(ls target/*.jar | head -1)
        commitHash=$(git rev-parse --short "$GITHUB_SHA")
        artifactName2=$(ls target/*.jar | head -1 | sed "s/.jar/-$commitHash.jar/g")
        mv $artifactName1 $artifactName2

    - name: Upload artifact
      uses: actions/upload-artifact@master
      with:
          name: artifacts
          path: target/*.jar


  upload:
    needs: build
    runs-on: ubuntu-latest
    env:
      CA_CLIENT_ID: ${{ secrets.CA_CLIENT_ID }}
      CA_CLIENT_SECRET: ${{ secrets.CA_CLIENT_SECRET }}

    steps:

    - uses: actions/checkout@v3

    - uses: actions/cache@v3
      with:
        path: ~/.m2/repository
        key: ${{ runner.os }}-maven-${{ hashFiles('**/pom.xml') }}
        restore-keys: |
          ${{ runner.os }}-maven-

    - uses: actions/download-artifact@master
      with:
        name: artifacts

    - name: Upload to Exchange
      run: |
        artifactName=$(ls *.jar | head -1)
        mvn deploy \
         -s .maven/settings.xml \
         -Dmule.artifact=$artifactName \


  deploy:
    needs: upload
    runs-on: ubuntu-latest
    env:
      CA_CLIENT_ID: ${{ secrets.CA_CLIENT_ID }}
      CA_CLIENT_SECRET: ${{ secrets.CA_CLIENT_SECRET }}

    steps:

    - uses: actions/checkout@v3

    - uses: actions/cache@v3
      with:
        path: ~/.m2/repository
        key: ${{ runner.os }}-maven-${{ hashFiles('**/pom.xml') }}
        restore-keys: |
          ${{ runner.os }}-maven-

    - uses: actions/download-artifact@master
      with:
        name: artifacts

    - name: Deploy to Sandbox
      run: |
        artifactName=$(ls *.jar | head -1)
        mvn deploy -DmuleDeploy \
         -Dmule.artifact=$artifactName \
         -s .maven/settings.xml \
         -DskipTests \
         -DskipDeploymentVerification="true"
This workflow contains three jobs.
1. Build: This step sets up the required environment, such as the Java Development Kit (JDK) version 11. It then executes Maven commands to build the project, package it into a JAR file, and append the commit hash to the artifact's filename. The resulting artifact is uploaded as an artifact for later use.
2. Upload: This step retrieves the previously built artifact and prepares it for deployment. It downloads the artifact from the artifacts repository and uses Maven to upload the artifact to the desired destination, such as the MuleSoft Exchange. The necessary credentials and settings are provided to authenticate and configure the upload process.
3. Deploy: The final step involves deploying the uploaded artifact to the CloudHub Sandbox environment. The artifact is downloaded, and the Maven command is executed with specific parameters for deployment, including the artifact name and necessary settings. Tests are skipped during deployment, and deployment verification is disabled.
Commit the workflow file and click on the "Actions" tab. The workflow will automatically start since we made a commit.

Click on the workflow and observe the steps as they execute.

After Completion of the "Upload" stage, go to "Anypoint Exchange" and go to "root" from the left side menu and in the address bar, append "&type=app" and hit enter. You will see the uploaded artifact.

Wait for the workflow to complete execution. After all three stages get executed successfully, go to "Runtime Manager" in "Anypoint Platform," and you will see your app being deployed there.


Note:
- If you change the name of Client-Id and Client-Secret, make sure to update it in the Workflow file and the Repository Secrets as well.
- In this tutorial, we have used the main branch; you can change the branch in the workflow file to target some other branch.
- Changes in the CloudHub2 deployment configurations can be made according to the MuleSoft documentation.
I hope this tutorial will help you. You can find the source code here.
Opinions expressed by DZone contributors are their own.
Comments