Develop a Java Application With Kafka
Join the DZone community and get the full member experience.
Join For Free
Today’s app users demand the very best user experience. They are accustomed to accessing their apps from all their devices (computers, mobile phones, tablets, etc). As platforms continue to transition to Software as a Service (SaaS), developers are constantly collaborating with powerful tools that scope to handle thousands of requests every second. This is where Apache Kafka, a robust tool that is known for handling highly intense environments, comes in.
In this post, we’ll introduce you to the basics of Apache Kafka and move on to building a secure, scalable messaging app with Java and Kafka.
Prerequisites: Java 8+, an internet connection, and a free Okta developer account.
A Brief Overview of Apache Kafka
Apache Kafka is a distributed streaming platform that utilizes the publish/subscribe message pattern to interact with applications; it’s designed to create durable messages.
Let’s break down those concepts in more detail.
Distributed Streaming Platform
When you want to run Kafka, you need to start its broker: a simple instance of Kafka running on a machine, just like any other server. The broker is responsible to send, receive, and store messages into the disk.
A single broker is not enough to ensure Kafka can handle a high-throughput of messages. That goal is achieved through many brokers working together at the same time, communicating and coordinating with each other.
A Kafka cluster groups together one or more brokers. Instead of connecting to a single node, your application connects to a cluster that manages all the distributed details for you.
You may also like: A Kafka Tutorial for Everyone, no Matter Your Stage in Development.
Publish/Subscribe Messaging System With Durable Messages
The publish/subscribe is a common pattern in distributed systems. The image below illustrates the basic structure of this pattern within Kafka:
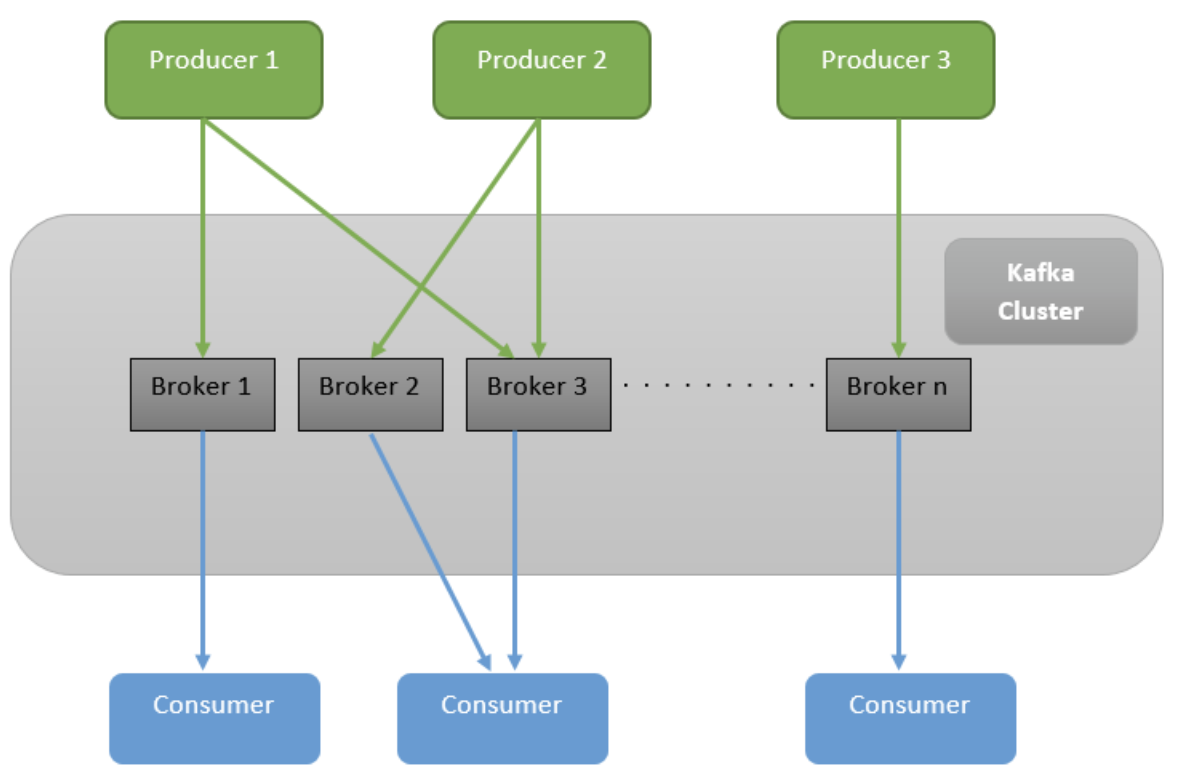
The image includes two components not mentioned so far: Producers and Consumers.
A Producer is an application that sends messages to the cluster. In this example, Producer 1, 2, and 3 are sending messages. The cluster then elects which broker should store them and sends it to the ones selected.
On the other side, you have consumers. A consumer is an application that connects to the cluster and receives the messages posted from producers. Any application that is interested in consuming messages sent by producers must connect into the Kafka consumer.
As Kafka stores messages for long durations (the default value is seven days), you can have many consumers receiving the same message even if they were not there when the message was sent!
Kafka Topics
When you send a message to a Kafka broker, you need to specify where the message will be sent by specifying a topic. A topic is a category of messages that a consumer can subscribe to. This mechanism ensures that consumers only receive messages relevant to them, rather than receiving every message published to the cluster.
Now that you understand Kafka’s basic architecture, let’s download and install it.
Install and Run Kafka
To download Kafka, go to the Kafka website. Extract the contents of this compressed file into a folder of your preference.
Inside the Kafka directory, go to the bin folder. Here, you’ll find many bash scripts that will be useful for running a Kafka application. If you are using Windows, you also have the same scripts inside the windows folder. This tutorial uses Linux commands, but you just need to use the equivalent Windows version if you’re running a Microsoft OS.
Start Zookeeper to Manage Your Kafka Cluster
Apache Kafka is always run as a distributed application. This means your cluster has to deal with some distributed challenges along the way, like synchronizing configurations or electing a leader to take care of the cluster.
Kafka uses Zookeeper to keep track of those details. Don’t worry about downloading it, though. Kafka already ships with Zookeeper, allowing you to get up and running very fast.
Let’s start a Zookeeper instance! Inside the bin folder in your Kafka directory, run the following command:
./zookeeper-server-start.sh ../config/zookeeper.properties
This command starts a Zookeeper server on port 2181 by default. Zookeeper is responsible to coordinate the Kafka brokers inside your cluster. You’ll use the default configurations inside the Kafka project for this tutorial, but you can always change those values as needed.
Run a Kafka Broker
The next step is to run the broker itself. From another terminal, run the following command from the bin folder:
xxxxxxxxxx
./kafka-server-start.sh ../config/server.properties
As you might have guessed, this command runs the Kafka server with the default configurations on the default port, 9092.
Create a Kafka Topic
Now that you have the broker and Zookeeper running, you can specify a topic to start sending messages from a producer. You’re going to run a command inside the bin folder, just like you did in the previous steps:
xxxxxxxxxx
./kafka-topics.sh --create --topic myTopic -zookeeper \
localhost:2181 --replication-factor 1 --partitions 1
This command creates a topic named myTopic pointing to the Zookeeper instance you started with the first command. There are also two different parameters you have to specify: replication-factor and partitions. Don’t worry about them right now; they are used to control specific aspects related to distributed systems in Kafka. As you are running a simple setup, you can specify “1” for both parameters.
Now that you have everything up and running, you can start integrating Kafka with a Java application!
Create a Java + Kafka Application
Let’s start with the project structure, using Spring Initializer to create the application.
Go to https://start.spring.io and fill in the following information:
- Project: Maven Project.
- Language: Java.
- Group:
com.okta.javakafka - Artifact:
kafka-java - Dependencies:
- Spring Web.
- Spring for Apache Kafka.
You can also generate the project using the command line. Paste the following command in your terminal, and it will download the project with the same configurations defined above:
xxxxxxxxxx
curl https://start.spring.io/starter.zip -d language=java \
-d dependencies=web,kafka \
-d packageName=com.okta.javakafka \
-d name=kafka-java \
-d type=maven-project \
-o kafka-java.zip
This tutorial uses Maven, but you can easily follow it with Gradle if you prefer.
That’s it! Now, your Java project structure is created, and you can start developing your app.
Push Messages to a Kafka Topic in Your Java App
The first step to create a producer that can push messages is to configure the producers inside your Java application. Let’s create a configuration class to do just that.
Create a src/main/java/com/okta/javakafka/configuration folder, and a ProducerConfiguration class in it:
xxxxxxxxxx
import org.apache.kafka.clients.producer.ProducerConfig;
import org.apache.kafka.common.serialization.StringSerializer;
import org.springframework.context.annotation.Bean;
import org.springframework.context.annotation.Configuration;
import org.springframework.kafka.core.DefaultKafkaProducerFactory;
import org.springframework.kafka.core.KafkaTemplate;
import org.springframework.kafka.core.ProducerFactory;
import java.util.HashMap;
import java.util.Map;
public class ProducerConfiguration {
private static final String KAFKA_BROKER = "localhost:9092";
public ProducerFactory<String, String> producerFactory() {
return new DefaultKafkaProducerFactory<>(producerConfigurations());
}
public Map<String, Object> producerConfigurations() {
Map<String, Object> configurations = new HashMap<>();
configurations.put(ProducerConfig.BOOTSTRAP_SERVERS_CONFIG, KAFKA_BROKER);
configurations.put(ProducerConfig.KEY_SERIALIZER_CLASS_CONFIG, StringSerializer.class);
configurations.put(ProducerConfig.VALUE_SERIALIZER_CLASS_CONFIG, StringSerializer.class);
return configurations;
}
public KafkaTemplate<String, String> kafkaTemplate() {
return new KafkaTemplate<>(producerFactory());
}
}
This class creates a ProducerFactory which knows how to create producers based on the configurations you provided. You’ve also specified to connect to your local Kafka broker and to serialize both the key and the values with String.
You also declared a KafkaTemplate bean to perform high-level operations on your producer. In other words, the template is able to do operations such as sending a message to a topic and efficiently hides under-the-hood details from you.
The next step is to create the endpoint to send the message to the producer. Inside the src/main/java/com/okta/javakafka/controller package, create the following class:
import org.springframework.kafka.core.KafkaTemplate;
import org.springframework.web.bind.annotation.GetMapping;
import org.springframework.web.bind.annotation.RequestParam;
import org.springframework.web.bind.annotation.RestController;
import java.util.List;
public class KafkaController {
private KafkaTemplate<String, String> template;
public KafkaController(KafkaTemplate<String, String> template) {
this.template = template;
}
("/kafka/produce")
public void produce( String message) {
template.send("myTopic", message);
}
Note: Since you’re sending data to be processed, the produce() method really ought to be a POST. For demo purposes, it’s easier to leave it as a GET so you can exercise it in the browser.
As you can see, this endpoint is very simple. It injects the KafkaTemplate configured earlier and sends a message to myTopic when a GET request is made to /kafka/produce.
Let’s test if everything is working as expected. Run the main method inside the JavaKafkaApplication class. To run from the command line, execute the following command:
xxxxxxxxxx
./mvnw spring-boot:run
Your server should be running on port 8080, and you can already make API requests against it!
Go to your web browser and access http://localhost:8080/kafka/produce?message=This is my message.
When you make a call with the command above, your application will execute the /kafka/produce endpoint, which sends a message to myTopic topic inside Kafka.
But how do you know the command successfully sent a message to the topic? Right now, you don’t consume messages inside your app, which means you cannot be sure!
Fortunately, there is an easy way to create a consumer to test right away. Inside the bin folder of your Kafka directory, run the following command:
xxxxxxxxxx
./kafka-console-consumer.sh --bootstrap-server localhost:9092 --topic myTopic
Access http://localhost:8080/kafka/produce?message=This is my message again to see the following message in the terminal running the Kafka consumer:
xxxxxxxxxx
This is my message
Great job! You can stop this command for now.
Instead of executing from a terminal, let’s add some Java code to consume the messages inside your app.
Consume Messages From a Kafka Topic in a Java App
As with the producer, you need to add configurations to enable the consumer to find the Kafka Broker.
Inside the src/main/java/com/okta/javakafka/configuration create the following class:
xxxxxxxxxx
import org.apache.kafka.clients.consumer.ConsumerConfig;
import org.apache.kafka.common.serialization.StringDeserializer;
import org.springframework.context.annotation.Bean;
import org.springframework.context.annotation.Configuration;
import org.springframework.kafka.config.ConcurrentKafkaListenerContainerFactory;
import org.springframework.kafka.core.ConsumerFactory;
import org.springframework.kafka.core.DefaultKafkaConsumerFactory;
import java.util.HashMap;
import java.util.Map;
public class ConsumerConfiguration {
private static final String KAFKA_BROKER = "localhost:9092";
private static final String GROUP_ID = "kafka-sandbox";
public ConsumerFactory<String, String> consumerFactory() {
return new DefaultKafkaConsumerFactory<>(consumerConfigurations());
}
public Map<String, Object> consumerConfigurations() {
Map<String, Object> configurations = new HashMap<>();
configurations.put(ConsumerConfig.BOOTSTRAP_SERVERS_CONFIG, KAFKA_BROKER);
configurations.put(ConsumerConfig.GROUP_ID_CONFIG, GROUP_ID);
configurations.put(ConsumerConfig.KEY_DESERIALIZER_CLASS_CONFIG, StringDeserializer.class);
configurations.put(ConsumerConfig.VALUE_DESERIALIZER_CLASS_CONFIG, StringDeserializer.class);
return configurations;
}
ConcurrentKafkaListenerContainerFactory<String, String> kafkaListenerContainerFactory() {
ConcurrentKafkaListenerContainerFactory<String, String> factory = new ConcurrentKafkaListenerContainerFactory<>();
factory.setConsumerFactory(consumerFactory());
return factory;
}
}
The code above creates a factory that knows how to connect to your local broker. It also configures your consumer to deserialize a String for both the key and the value, matching the producer configuration.
The Group ID is mandatory and used by Kafka to allow parallel data consumption. The ConcurrentKafkaListenerContainerFactory bean allows your app to consume messages in more than one thread.
Now that your Java app is configured to find consumers inside your Kafka broker, let’s start listening to the messages sent to the topic.
Create a src/main/java/com/okta/javakafka/consumer directory, and the following class in it:
xxxxxxxxxx
import org.springframework.kafka.annotation.KafkaListener;
import org.springframework.stereotype.Component;
import java.util.ArrayList;
import java.util.List;
public class MyTopicConsumer {
private final List<String> messages = new ArrayList<>();
(topics = "myTopic", groupId = "kafka-sandbox")
public void listen(String message) {
synchronized (messages) {
messages.add(message);
}
}
public List<String> getMessages() {
return messages;
}
}
This class is responsible for listening to changes inside the myTopic topic. It does so by using the KafkaListener annotation. Every time a new message is sent from a producer to the topic, your app receives a message inside this class. It adds a message to the list of messages received, making it available to other classes through the getMessages() method.
Next, let’s create an endpoint that displays a list of consumed messages. Go back to the KafkaController to add MyTopicConsumer as a dependency and a getMessages() method.
xxxxxxxxxx
import com.okta.javakafka.consumer.MyTopicConsumer;
import org.springframework.kafka.core.KafkaTemplate;
import org.springframework.web.bind.annotation.GetMapping;
import org.springframework.web.bind.annotation.RequestParam;
import org.springframework.web.bind.annotation.RestController;
import java.util.List;
public class KafkaController {
private KafkaTemplate<String, String> template;
private MyTopicConsumer myTopicConsumer;
public KafkaController(KafkaTemplate<String, String> template, MyTopicConsumer myTopicConsumer) {
this.template = template;
this.myTopicConsumer = myTopicConsumer;
}
("/kafka/produce")
public void produce( String message) {
template.send("myTopic", message);
}
("/kafka/messages")
public List<String> getMessages() {
return myTopicConsumer.getMessages();
}
}
This class now has a new endpoint to display the messages stored in your consumer. When this endpoint is called, it sends the current messages it already processed from the Kafka topic.
Your Java app now has both a Kafka producer and a consumer, so let’s test it all together! Restart your application, and go to http://localhost:8080/kafka/messages.
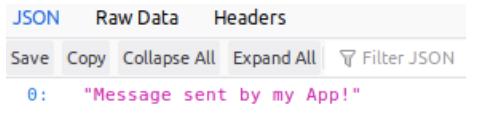
Right now, no information is being returned. The reason is pretty simple: your consumer is configured only to receive new messages and you haven’t sent a new message yet. Let’s fix this problem by going to your web browser and accessing http://localhost:8080/kafka/produce?message=Message sent by my App!.
When Kafka receives the message, it will let your consumer know about it right away. Go ahead and go to http://localhost:8080/kafka/messages in your browser. You will now see that your message was successfully received!
Great job! You have a Java app capable of producing and consuming messages from Kafka! Before we call it a day though, there is one last step and it’s a very important one.
Secure Your Java Kafka Application
Your app is not very secure right now. Although you are prepared to handle many messages in a distributed environment, those messages are still available to anyone who can find the link to your endpoints. This is a critical vulnerability, so let’s make sure it’s addressed the right way.
You’re going to use OAuth 2.0 to make sure only authenticated users can see your endpoints. The best part? It’s going to take only 5 minutes to add this feature in your app by using Okta to authenticate your users!
Create an Okta Account
If you don’t already have an Okta account, go ahead and create one. After completing registration, go through the following steps:
- Login to your account.
- Go to Applications > Add Application. You will be redirected to the following page:

- Select Web and click Next.
- Fill in the following options in the form:
- Name:
Bootiful Kafka - Base URIs:
http://localhost:8080 - Login redirect URLs:
http://localhost:8080/login/oauth2/code/okta
- Name:
- Click Done.
Now that you have your Okta application, you can use it to authenticate users in your Java + Kafka app.
Secure Your Java App With User Auth
Let’s start by adding Okta’s library to your project. Open your pom.xml and add the following dependency inside the <dependencies> tag:
xxxxxxxxxx
<dependency>
<groupId>com.okta.spring</groupId>
<artifactId>okta-spring-boot-starter</artifactId>
<version>1.3.0</version>
</dependency>
This library will integrate with the Okta app you just created. It will also add Spring Security to your current application. Configure it with the following variables in src/main/resources/application.properties:
xxxxxxxxxx
okta.oauth2.issuer: https://{yourOktaDomain}/oauth2/default
okta.oauth2.client-id: {yourClientID}
okta.oauth2.client-secret: {yourClientSecret}
IMPORTANT: This file should only be used locally. Do not commit your client’s secret to Git or any other Version Control System.
To avoid accidentally exposing these credentials, you can also specify your Okta application’s values as environment variables. Create an
okta.envfile in the root directory of your app with the following environment variables. Then runsource okta.envbefore starting your app.Shell
xxxxxxxxxx1
1export OKTA_OAUTH2_ISSUER=https://{yourOktaDomain}/oauth2/default2export OKTA_OAUTH2_CLIENT_ID={yourClientID}3export OKTA_OAUTH2_CLIENT_SECRET={yourClientSecret}
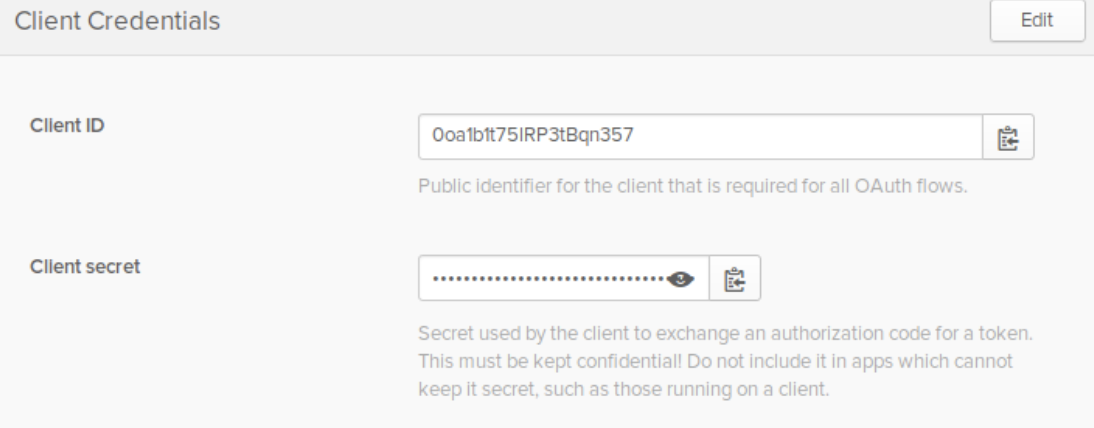
You can find {yourClientID} and {yourClientSecret} in the Okta UI’s applications page. To access it, follow the steps below:
- In your Okta menu, go to Applications.
- Select the Bootiful Kafka application.
- Click on the General tab.
You should see both values inside the Client Credentials area.
The value {yourOktaDomain} for will be visible in your Okta dashboard, just click on the Dashboard on the menu. You will see the Org URL in the right upper corner.
That’s it!
Restart your Spring Boot application and go to http://localhost:8080/kafka/messages. Your app will now redirect you to the login page:
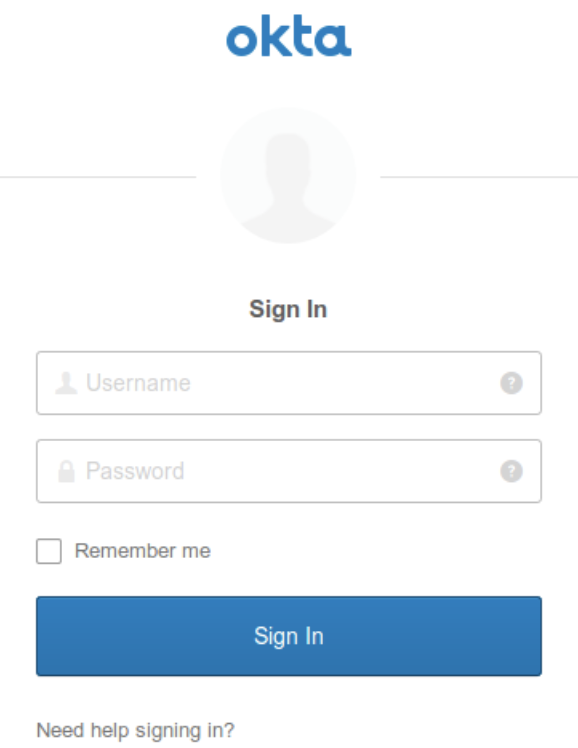
NOTE: If you’re not prompted to log in, it’s because you’re already logged in. Open your app in an incognito window, and you’ll see the login screen shown above.
Enter your username and password. If your login attempt is successful, you’ll be redirected back to your application again.
Congratulations! You now have a secure Java application that can produce and consume messages from Kafka.
If you want to check out the complete source code for this tutorial, head over to oktadeveloper/okta-java-kafka-example on GitHub.
Want to learn more about Java, security, and OAuth 2.0? Here are a few links you might be interested in:
- OAuth 2.0 Java Guide: Secure Your App in 5 Minutes
- An Illustrated Guide to OAuth and OpenID Connect
- Secure Reactive Microservices with Spring Cloud Gateway
For more articles like this one, follow @oktadev on Twitter. We also regularly publish screencasts to our YouTube channel!
Further Reading
Published at DZone with permission of Daniel Pereira. See the original article here.
Opinions expressed by DZone contributors are their own.
Comments