

How to git squash in 6 Steps
Learn how to keep your commit history neat and tidy with the squash git command.
When using a source code management system, we mostly intend to create a new branch to implement functionalities rather than always pushing everything to the main branch. In my opinion, this is the right way to do it — spoiling the branch history with every small commit might make things very hard, especially when there are a number of developers working together.
But how can we keep the main branch history tidy?
Let's see how to to force compress (squash) your git history in 6 steps.
Step 1: git branch –avv: This command checks remote and local branches verbosely.
Step 2: git shortlog (shortlog -10): This command lists 10 commits starting from the HEAD. Before making any changes, it's smart to create a copy of the branch we are on. This not only gives us a backup in case things go wrong, but it also helps us check whether our operation was successful. To do that, we'll use the following command:
git branch -b current new_branch: This command's output will be empty if the operation ended as intended.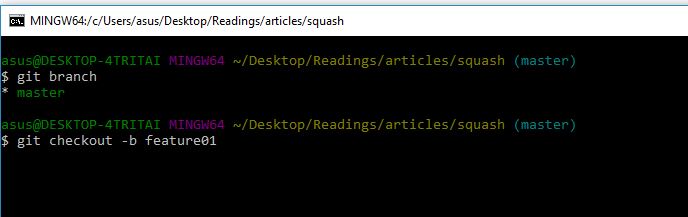
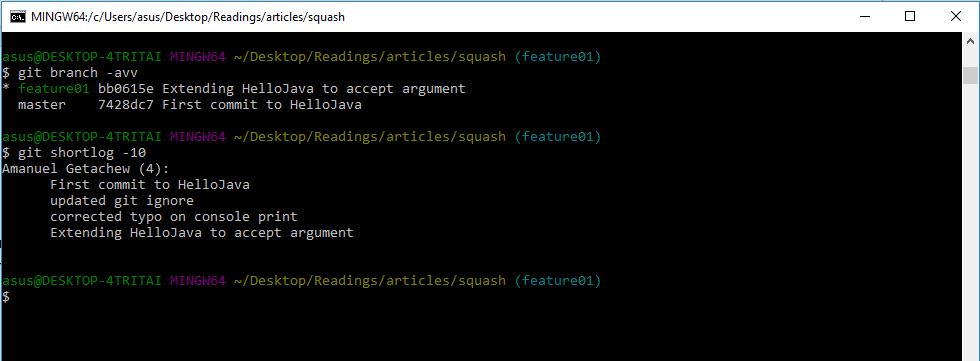
Step 3: git rebase -i HEAD~2: Rebase to the 2nd commit from the HEAD so that the ones in the middle will be merged into the previous commit.
A file will pop up showing commits from the HEAD to the selected commit — and a list of commands that can be applied to these commits. In our case, you should change “pick” to “s” on the specific commit you want to merge to a predecessor commit as shown on the following figure.
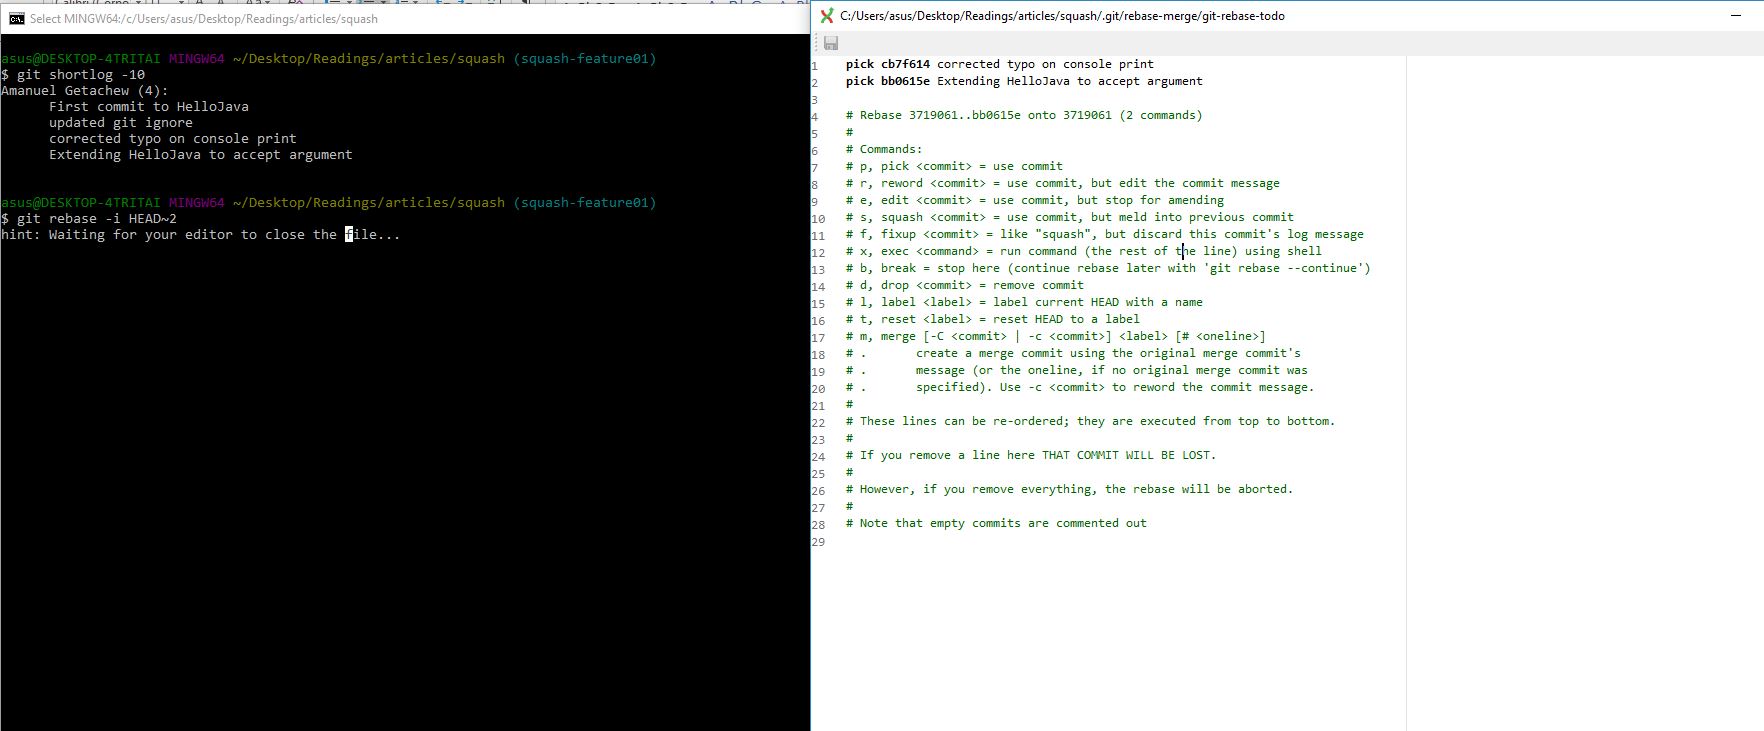
Step 4: Select operations: Once you are done, save and exit from the text editor.
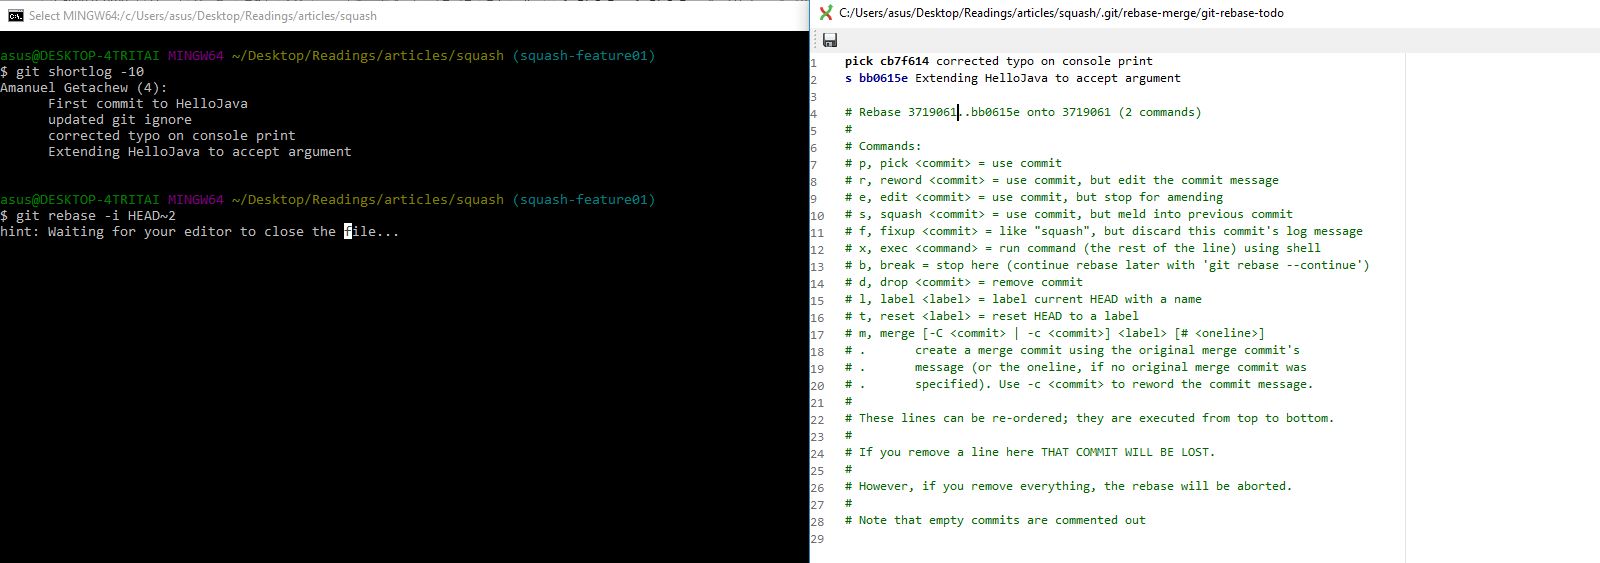
Step 5: Add commit message: A second window will appear, prompting you for a commit message. Put the message string in and save and exit again. If the window stays the same after closing, press enter and it will continue.
Step 6: Validating the operation. This step will help us to make sure that we have completed the operation (squashing) correctly. Check the diff between the two branches. git diff feature01 squash-feature01. 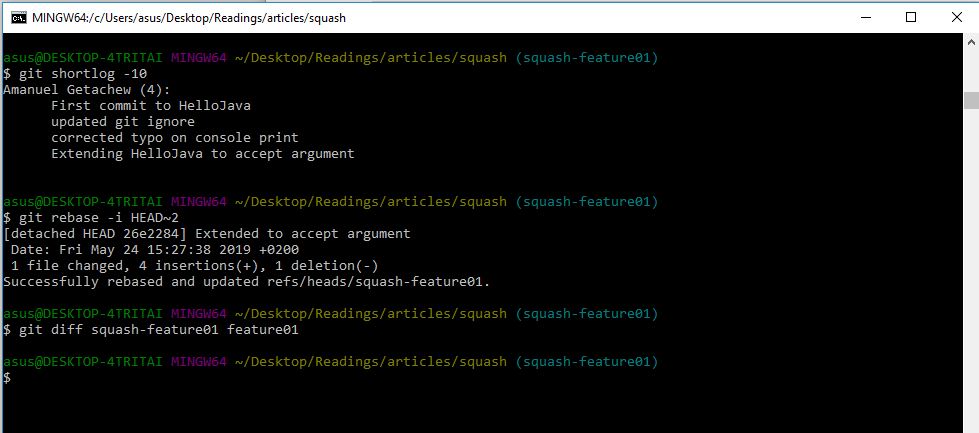
Note: The above command should return an empty output. The two branches should be equal except the commit history
We saw that everything has gone as intended (since there is no code difference between the original and the squashed branch). Let’s check the commit history:
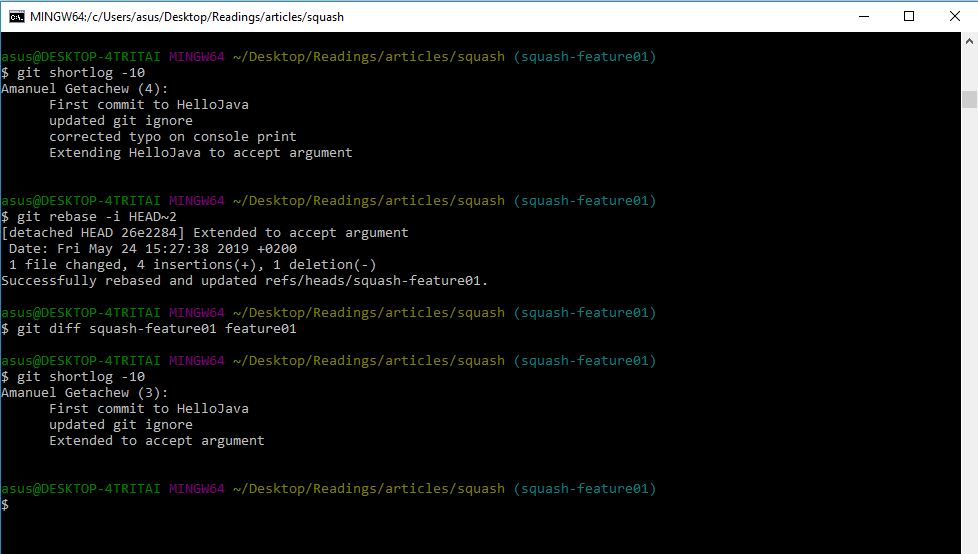
Now it is clear that we have merged the last two commits together and gave it a new commit message.
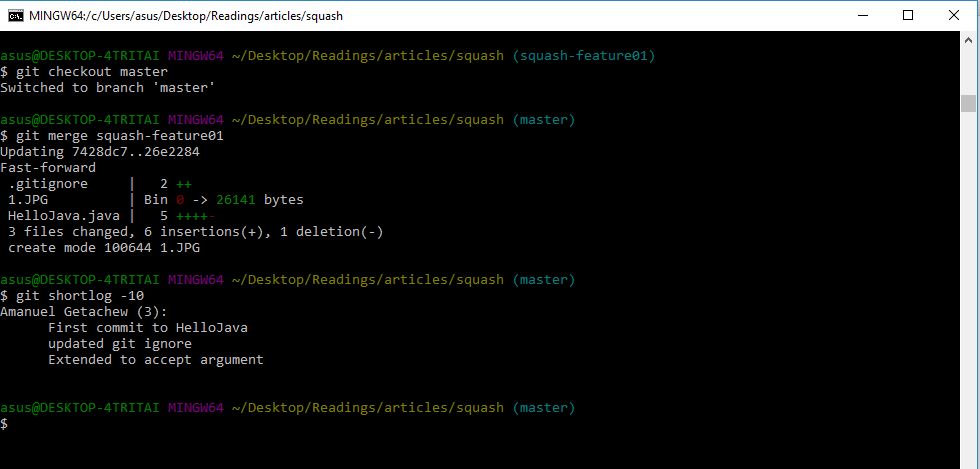
Step 7: Merge to main branch: Check out the main branch and merge
Opinions expressed by DZone contributors are their own.