Hooking Up MuleSoft and AWS, Part 1: Amazon Athena
In Part 1 of this AWS/Mule tutorial series, learn how to integrate Amazon Web Services' Amazon Athena with flows in MuleSoft.
Join the DZone community and get the full member experience.
Join For FreeAmazon Web Services, a.k.a. AWS, offers a broad set of global cloud-based products including computing, storage, databases, analytics, networking, mobile, developer tools, management tools, IoT, security, and enterprise applications. In this series of articles, "Hooking up MuleSoft and AWS," I will explore some of the services on offer from the AWS platform and see how we can hook these up with MuleSoft. The service I have picked for Part 1 is Amazon Athena.
Prerequisites
Amazon Athena
Amazon Athena is an interactive query service that makes it easy to analyze data in Amazon S3 using standard SQL. Athena is serverless, so there is no infrastructure to manage, and you pay only for the queries that you run. It uses Presto with ANSI SQL support and works with a variety of standard data formats, including CSV, JSON, Apache ORC, Avro, and Apache Parquet. Since it uses Amazon S3 as its underlying data store, your data is highly available and durable. You can read more about Amazon Athena here.
Accessing Athena
There are currently two ways to access Athena: using the AWS Management Console or through a JDBC connection. For this article, we will refer to the JDBC option.
Step 1
- See Getting Started to follow a step-by-step tutorial to create a table and write queries in the Athena Query Editor.
- Run the Athena onboarding tutorial in the console. You can do this by logging into the AWS Management Console for Athena.
The table I have used has the following structure:
CREATE EXTERNAL TABLE IF NOT EXISTS sampledb.elb_logs (
  `request_timestamp` string,
  `elb_name` string,
  `request_ip` string,
  `request_port` int,
  `backend_ip` string,
  `backend_port` int,
  `request_processing_time` double,
  `backend_processing_time` double,
  `client_response_time` double,
  `elb_response_code` string,
  `backend_response_code` string,
  `received_bytes` bigint,
  `sent_bytes` bigint,
  `request_verb` string,
  `url` string,
  `protocol` string,
  `user_agent` string,
  `ssl_cipher` string,
  `ssl_protocol` string
)
ROW FORMAT SERDE 'org.apache.hadoop.hive.serde2.RegexSerDe'
WITH SERDEPROPERTIES (
  'serialization.format' = '1',
  'input.regex' = ' ([^ ]*) ([^ ]*) ([^ ]*):([0-9]*) ([^ ]*):([0-9]*) ([.0-9]*) ([.0-9]*) ([.0-9]*) (-|[0-9]*) (-|[0-9]*) ([-0-9]*) ([-0-9]*) \\\"([^ ]*) ([^ ]*) (- |[^ ]*)\\\" (\"[^\"]*\") ([A-Z0-9-]+) ([A-Za-z0-9.-]*)$'
) LOCATION 'YOUR_S3_URL'
TBLPROPERTIES ('has_encrypted_data'='false');
Before moving on to the next step, you'll also need to add the following policies to the user profile, which you'll use to connect to the database you've created:

Step 2
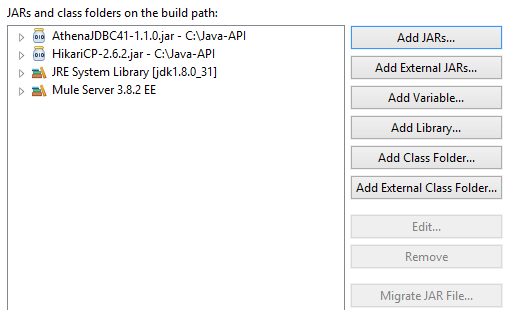
Create a new Mule Project. Add Athena JDBC driver and HikariCP jars in the build path.

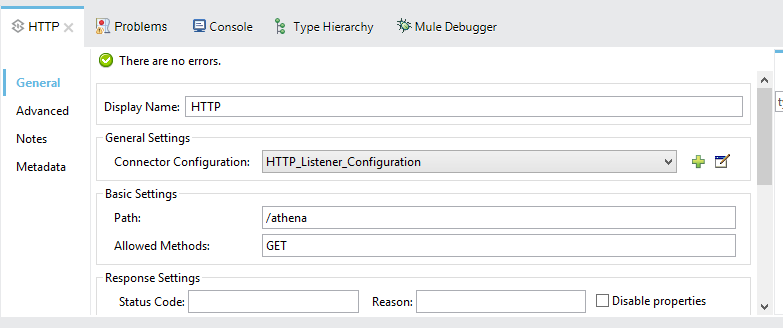
Next, add an HTTP listener.

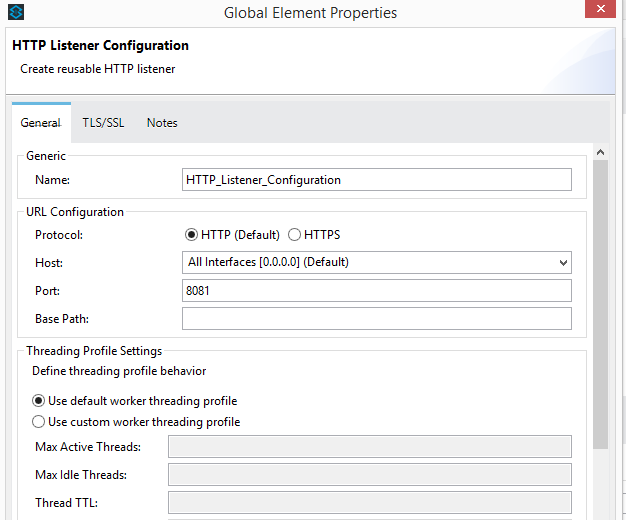
For the HTTP listener configuration, I have used port 8081.

We will be using a generic database configuration. In our case, we will be using a datasource reference. Let's define the datasource reference bean in the configuration of the XML source.
    <context:property-placeholder location="app.properties"/>
    <spring:beans>
        <spring:bean id="hikariConfig" class="com.zaxxer.hikari.HikariConfig">
            <spring:property name="jdbcUrl" value="${jdbc.url}"/>
            <spring:property name="driverClassName" value="${jdbc.driver}"/>
        <spring:property name="dataSourceProperties">
        <spring:props>
        <spring:prop key="s3_staging_dir">s3://S3 Bucket Location/</spring:prop>
        <spring:prop key="log_level">INFO</spring:prop>
        <spring:prop key="user">AWSAccessKey</spring:prop>
        <spring:prop key="password">AWSSecretAccessKey</spring:prop>
        </spring:props>
        </spring:property>
        </spring:bean>

    <spring:bean id="dataSource" class="com.zaxxer.hikari.HikariDataSource">
          <spring:constructor-arg ref="hikariConfig" />
    </spring:bean>
We have added a global property placeholder in app.properties.
jdbc.driver=com.amazonaws.athena.jdbc.AthenaDriver
jdbc.url=jdbc:awsathena://athena.eu-west-1.amazonaws.com:443
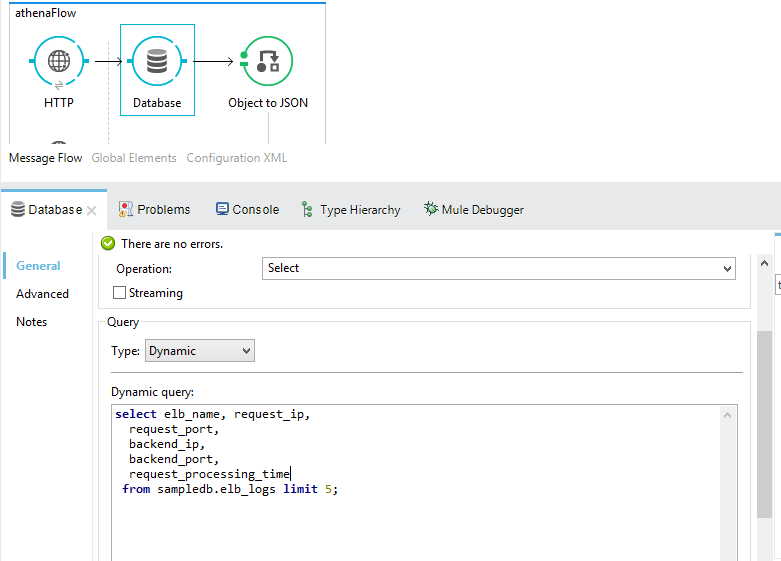
Next, we will write down our SQL query to retrieve data from our newly created database table.
select elb_name, request_ip,
  request_port,
  backend_ip,
  backend_port,
  request_processing_time from sampledb.elb_logs limit 5;
As the last step, let's add an Object to JSON transformer to our flow. Once added, we are all set to test our newly developed Mule flow. Let's run the project and open a new browser. Hit the following URL:
http://localhost:8081/athenaYou should see a similar response as below in your browser window:

All done. I hope this article helps you understand how to hook up MuleSoft with Amazon Athena.
Opinions expressed by DZone contributors are their own.

Comments