How To Add Tab On Admin Side Using The Plugin In nopCommerce 4.3
In this article, you will see how you can add tabs on a nopCommerce admin side using a plugin. Let's directly dive into the implementation part...
Join the DZone community and get the full member experience.
Join For FreeIn this article, you will see how you can add tabs on a nopCommerce admin side using a plugin. Let's directly dive into the implementation part because I believe when developers search for this type of article, they are looking for solutions that will help them to learn or troubleshoot issues. The following are the steps to add a tab on the admin side using a plugin in nopCommerce 4.3.
FindWidgetZone
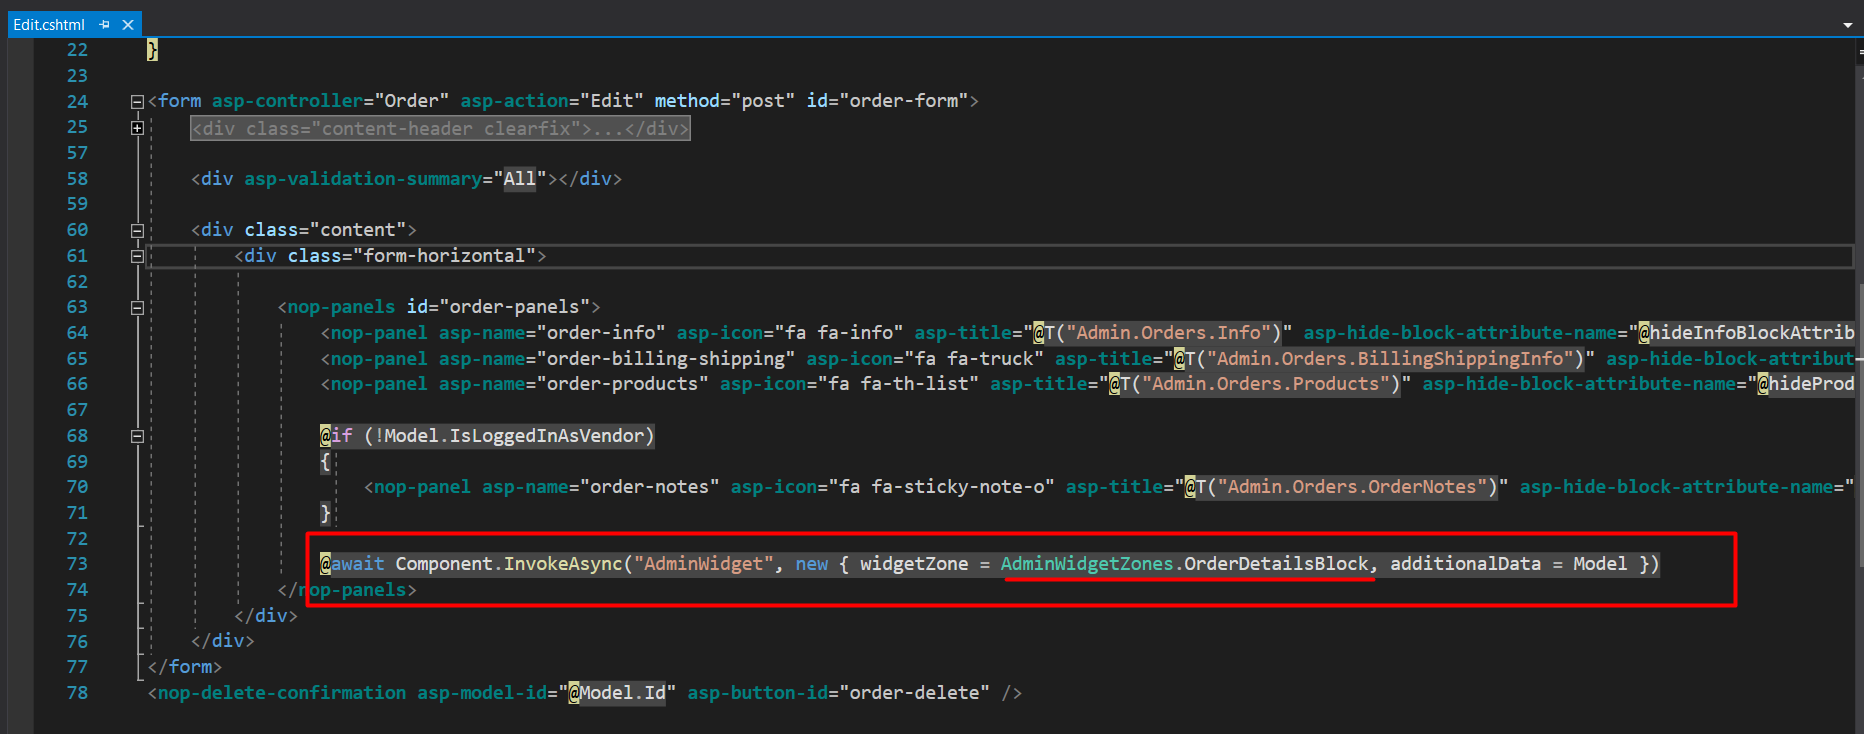
First, identify on which admin side page you want to add a tab. In this article, I am adding a tab on the admin order edit page. So, first I need to find the order edit page in the source code to check the WidgetZone of page. In this widget zone, we will return our new tab view page. I am finding a widget zone on ~\Presentation\Nop.Web\Areas\Admin\Views\Order\Edit.cshtml. The Widgetzone's name is AdminWidgetZones.OrderDetailsBlock
Add ViewComponent and WidgetZone Name
To add a custom tab on the admin side I am using the existing nopCommerce NivoSlider plugin. If you want to check with new plugin then you can Create Plugin. Once you create new plugin or working with existing plugin First, go to the plugin file Plugins\Nop.Plugin.Widgets.NivoSlider\NivoSliderPlugin.cs. If it's a new plugin then make sure your plugin inherits IWidgetPlugin. Go to GetWidgetZones() method, and in that add the widget zone which you found on the order edit page; i.e. AdminWidgetZones.OrderDetailsBlock. Now GetWidgetZones() will look as follows:
x
/// <summary>
/// Gets widget zones where this widget should be rendered
/// </summary>
/// <returns>Widget zones</returns>
public IList < string > GetWidgetZones() {
return new List < string > {
PublicWidgetZones.HomepageTop,
AdminWidgetZones.OrderDetailsBlock // this we added for custom order
};
}
Now we will add viewcomponentname in GetWidgetViewComponentName in the same file. We add viewcomponent name WidgetsAdminOrderDetails. This viewcomponent calls when we view the admin order edit page. And this view component will return the list of tabs that we want to add.
x
/// <summary>
/// Gets a name of a view component for displaying widget
/// </summary>
/// <param name="widgetZone">Name of the widget zone</param>
/// <returns>View component name</returns>
public string GetWidgetViewComponentName(string widgetZone) {
if (widgetZone == AdminWidgetZones.OrderDetailsBlock)
return "WidgetsAdminOrderDetails";
return "WidgetsNivoSlider";
}
Create ViewComponent and TabList and TabContent cshtml file
Now we will create view component file WidgetsAdminOrderDetailsViewComponent.cs following is code. The file location will be \Nop.Plugin.Widgets.NivoSlider\Components\WidgetsAdminOrderDetailsViewComponent.cs
xxxxxxxxxx
namespace Nop.Plugin.Widgets.NivoSlider.Components {
[ViewComponent(Name = "WidgetsAdminOrderDetails")]
public class WidgetsAdminOrderDetailsViewComponent: NopViewComponent {
public WidgetsAdminOrderDetailsViewComponent() {}
public IViewComponentResult Invoke(string widgetZone, object additionalData) {
return View("~/Plugins/Widgets.NivoSlider/Views/WidgetsAdminOrderDetails/AdminOrderTabList.cshtml");
}
}
}
Now we will create AdminOrderTabList.cshtml. In this file, we will provide a list of tabs with their tab content file. We will create this file at the following location: Plugins\Nop.Plugin.Widgets.NivoSlider\Views\WidgetsAdminOrderDetails\AdminOrderTabList.cshtml. I am creating a new folder WidgetAdminOrderDetails under the view folder of the plugin. Following is AdminOrderTabList.cshtml file.
x
@using Nop.Services.Common
@using Nop.Core
@* You can add above 2 namespace in _ViewImport.cshtml. This 2 namespace required for workcontext and generic attribute service.*@
@inject IWorkContext workContext
@inject IGenericAttributeService genericAttributeService
@{
const string hideCustomBlockAttributeName = "CustomOrderPage.HideCustomBlock";
var hideCustomBlock = genericAttributeService.GetAttribute<bool>(workContext.CurrentCustomer, hideCustomBlockAttributeName);
}
<nop-panel asp-name="custom-order-tab" asp-icon="fa fa-th-list"
asp-title="CustomTabTitle"
asp-hide-block-attribute-name="@hideCustomBlockAttributeName"
asp-hide="@hideCustomBlock" asp-advanced="true">
@await Html.PartialAsync("/Plugins/Widgets.NivoSlider/Views/WidgetsAdminOrderDetails/_CustomTab.Order.cshtml")
</nop-panel>
If you want to add multiple tabs in the order edit page, then replicate this code in the same file and provide different cshtml file locations for tab content. [Tips: I copied this content from order/ edit.cshtml file of nopcommerce.]
For tab content we specified /Plugins/Widgets.NivoSlider/Views/WidgetsAdminOrderDetails/_CustomTab.Order.cshtml. So, following is the content of _CustomTab.Order.cshtml file content.
x
<div class="panel-body">
<div class="panel panel-default sub-panel">
<div class="panel-body">
Custom Body content
</div>
</div>
</div>
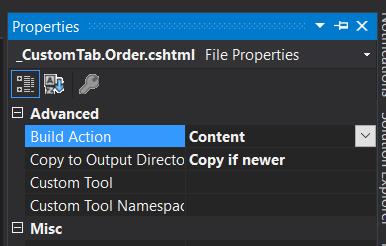
Now please make sure both .cshtml files are marked as copies as in the below screenshot. If you are using VSCode then you manually need to add this in a plugin.csproject file i.e(Plugins\Nop.Plugin.Widgets.NivoSlider\Nop.Plugin.Widgets.NivoSlider.csproj)
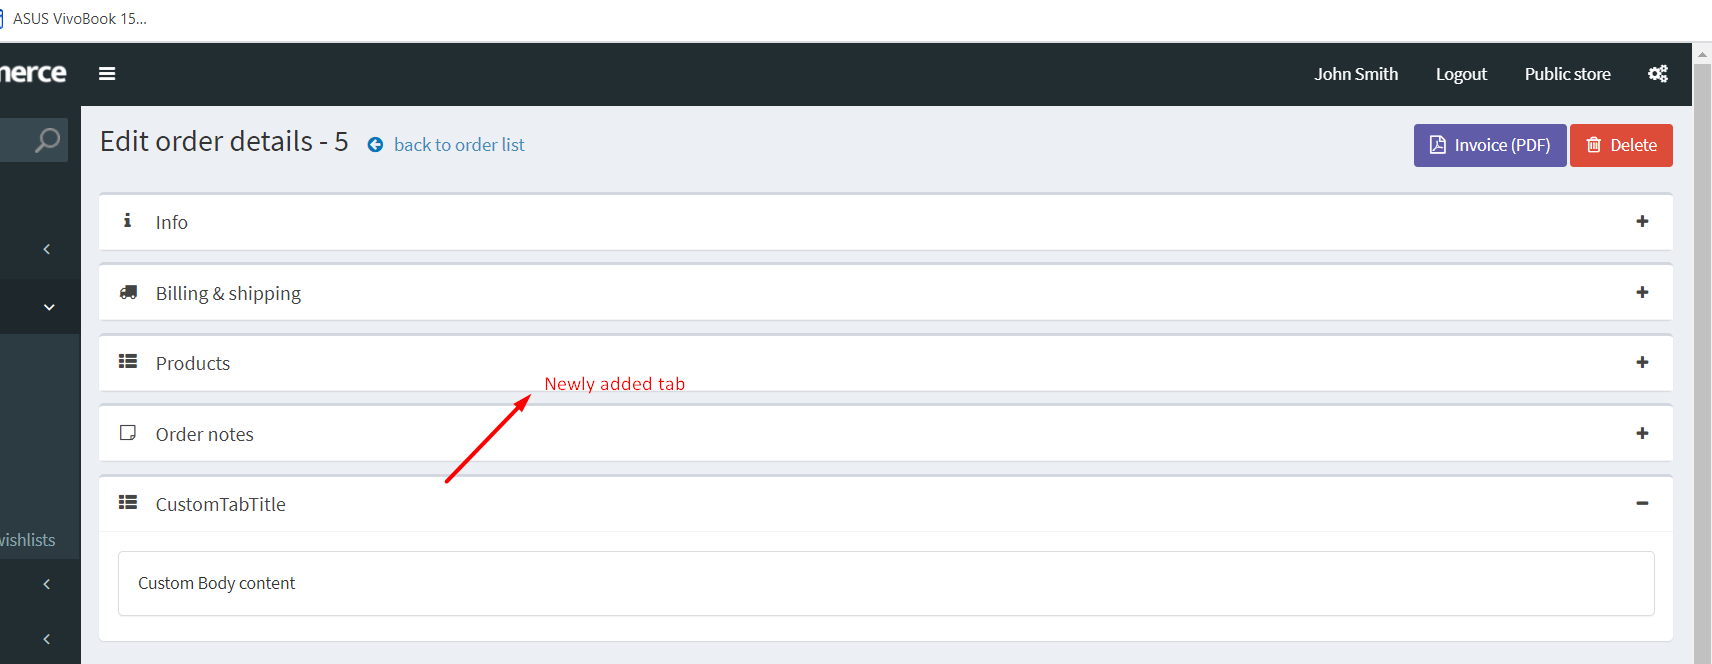
Now build a plugin and check the order edit page ( AdminOrderList -> Click on VIEW button) of nopCommerce. Following is the final result, as you can see the CustomTabTitle tab.
Following is a screenshot of the files which I added or changed to implement this functionality.

Your feedback and suggestions help me to improve this article. In this article, I didn't explain the code very much because the main purpose of this article is to show complete steps to add custom tabs in admin nopCommerce using the plugin. If you face any problem while you follow this article then please mention it in the comments so I can improve. If you want to see any other articles about nopCommerce then also let me know in the comments.
Thanks in advance for taking the time to read and make suggestions.
Opinions expressed by DZone contributors are their own.
Comments