How to Configure a Jenkins Job for a Maven Project
Learn how to configure a Jenkins job for a Maven project to automate builds, tests, and deployments with ease and efficiency.
Join the DZone community and get the full member experience.
Join For FreeJenkins is a widely used automation server that plays a big role in modern software development. It helps teams streamline their continuous integration and continuous delivery (CI/CD) processes by automating tasks like building, testing, and deploying applications.
One of the key strengths of Jenkins is its flexibility. It easily integrates with a wide range of tools and technologies, making it adaptable to different project needs.
In the previous articles, we learnt about setting up Jenkins and a Jenkins agent using Docker Compose. In this tutorial blog, we will learn what Jenkins jobs are and how to set them up for a Maven project.
What Are Jenkins Jobs?
In Jenkins, a job is simply a task or process, like building, testing, or deploying an application. It can also help in running automated tests for the project with specific steps and conditions.
With a Jenkins Job, the tests can be automatically run whenever there’s a code change. Jenkins will clone the source code from version control like Git, compile the code, and run the tests based on the requirements.
These jobs can also be scheduled for a later run, providing flexibility to run the tests on demand. This helps make testing faster and more consistent.
Jenkins jobs can also be triggered using webhooks whenever a commit is pushed to the remote repository, enabling seamless Continuous Integration and Development.
Different Types of Jenkins Jobs
Jenkins supports multiple types of job items, each designed for different purposes. Depending on the complexity of the project and its requirements, we can choose the type of Jenkins job that best fits our needs.
Let’s quickly discuss the different types of jobs available in Jenkins:
Freestyle Project
This is the standard job type in Jenkins that is popular and widely used. It pulls code from one SCM, runs the build steps serially, and then does follow-up tasks like saving artifacts and sending email alerts.
Pipeline
Jenkins Pipeline is a set of tools that help build, test, and deploy code automatically by creating a continuous delivery workflow right inside Jenkins.
Pipelines define the entire build and deployment process as code, using Pipeline domain-specific language (DSL) syntax. Pipeline provides the tools to model and manage simple or complex workflows directly with Jenkins.
The definition of a Jenkins Pipeline is written into a text file called jenkinsfile that can be committed to a project’s source control repository.
Multi-Configuration Project
A multi-configuration project is best for projects that require running multiple setups, such as testing on different environments or creating builds for specific platforms.
It’s helpful in cases where builds share many similar steps, which would otherwise need to be repeated manually. The Configuration Matrix allows us to define which steps to reuse and automatically creates a multi-axis setup for different build combinations.
Multibranch Pipeline
The Multibranch Pipeline lets us set up different Jenkinsfiles for each branch of the project. Jenkins automatically searches and runs the correct pipeline for each branch if it has a Jenkinsfile in the code repository.
This is very helpful as Jenkins handles managing separate pipelines for each branch.
Organization Folders
With Organization Folders, Jenkins can watch over an entire organization on GitHub, Bitbucket, GitLab, or Gitea. Whenever it finds a repository with branches or pull requests that include a Jenkinsfile, it automatically sets up a Multibranch Pipeline.
Maven Project
With the Maven Project, Jenkins can seamlessly build a Maven project. Jenkins makes use of the POM file to automatically handle the setup by greatly reducing the need for manual configuration.
How to Set Up a Jenkins Job for a Maven Project
It is essential to configure and set up the Maven Integration plugin in Jenkins before proceeding with configuring the Jenkins Job for the Maven project.
Initially, the option for the Maven project is not displayed unless the Maven Integration plugin is installed.
Installing Maven Integration Plugin in Jenkins
The Maven Integration plugin can be installed using the following steps:
Step 1
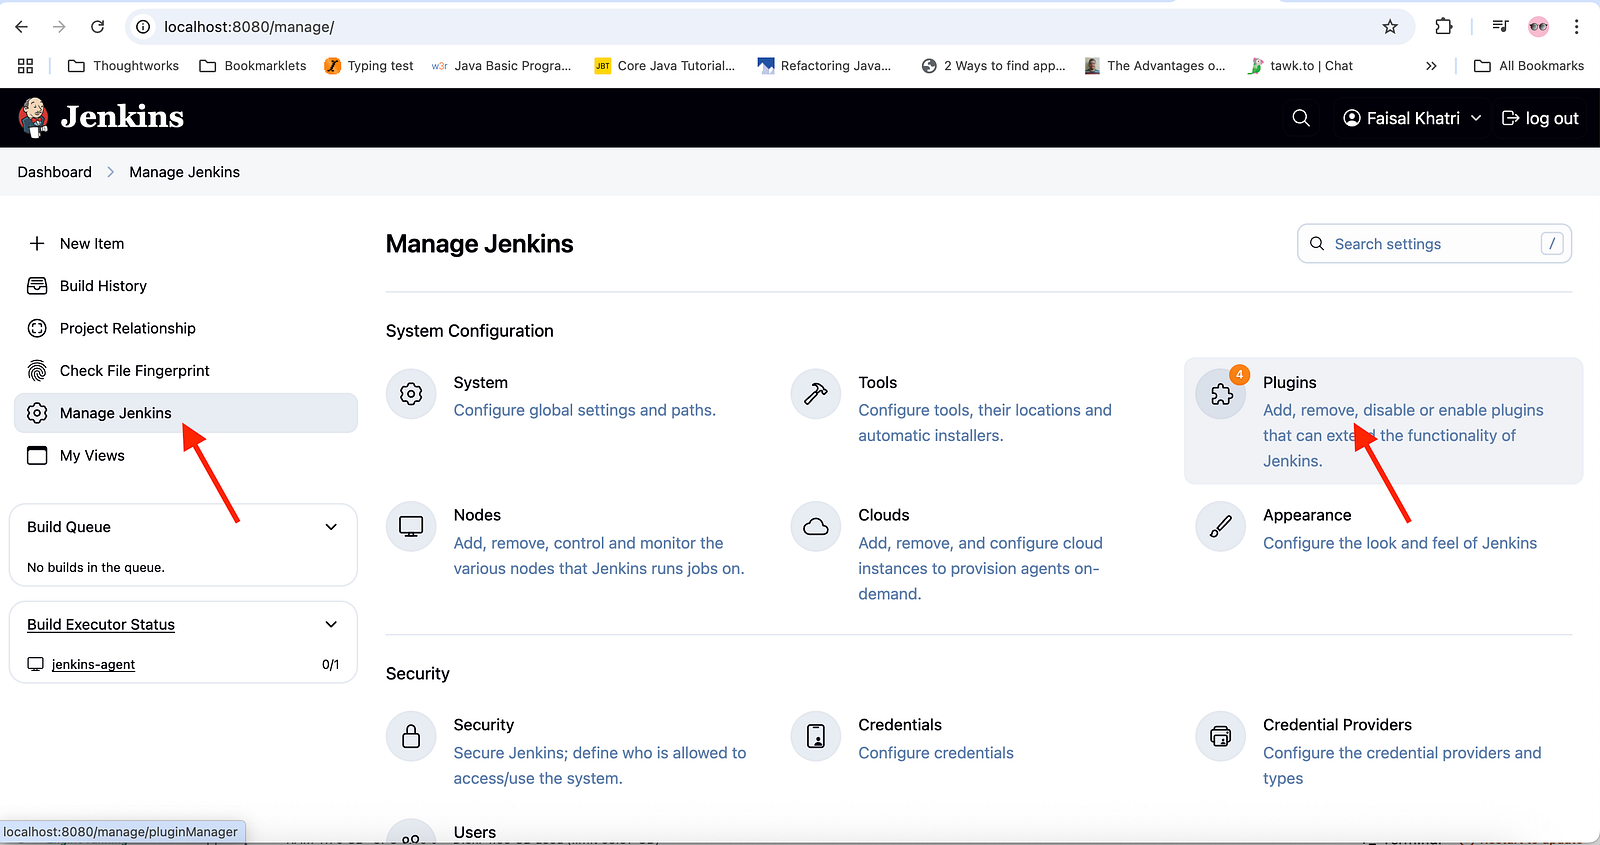
Log in to Jenkins and navigate to the Manage Jenkins > Manage Plugins page.
Step 2
On the Manage Plugins Page, select the “Available plugins” from the left-hand menu and search for “Maven integration plugin”. Select the Plugin and click on the “Install” button on the top right of the page.
Step 3
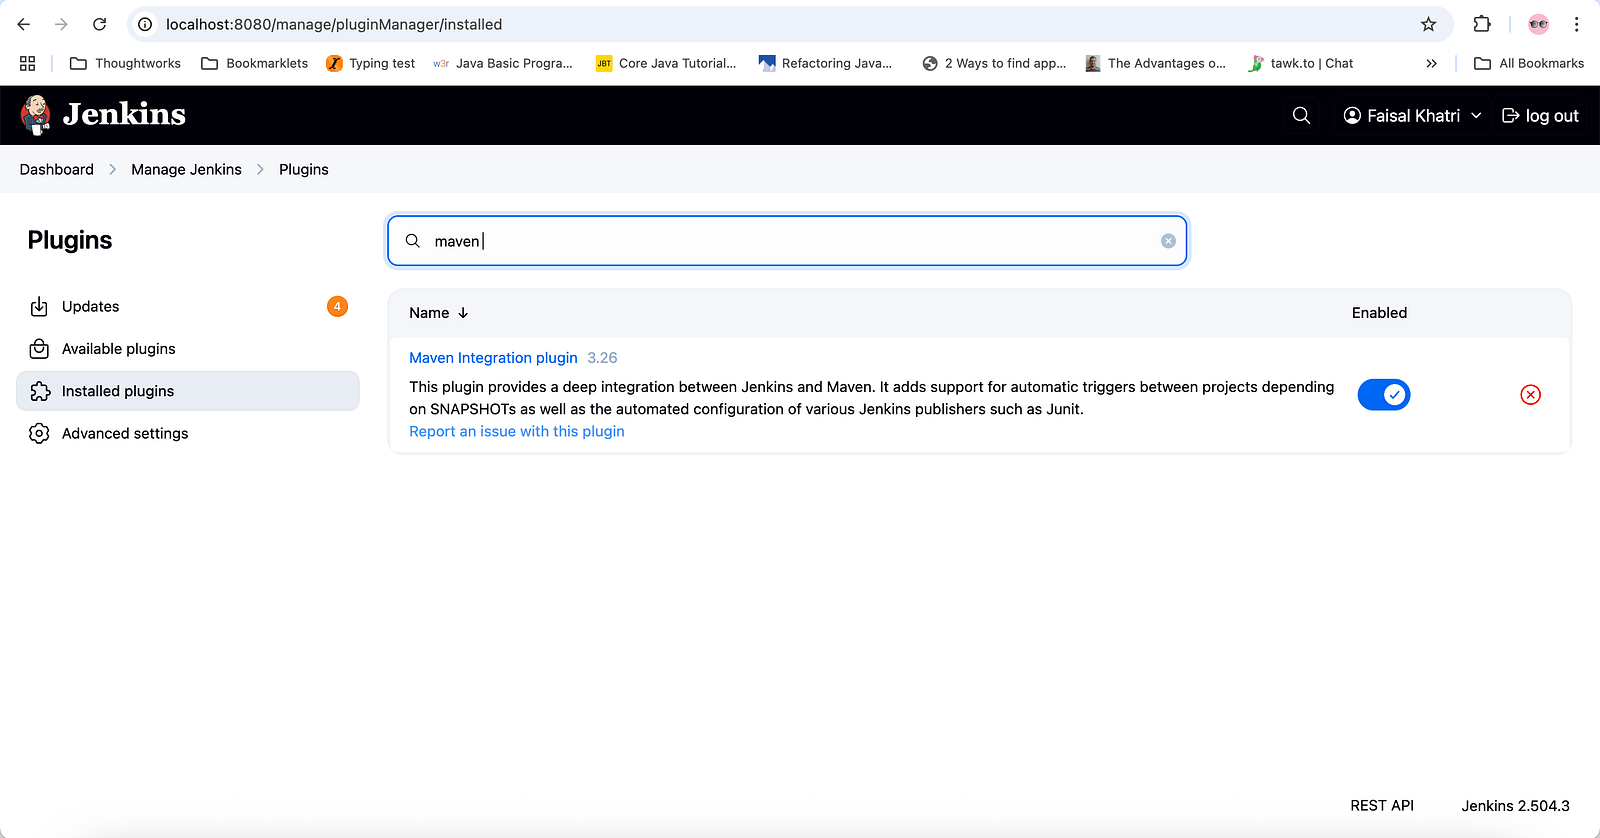
After successful installation, restart Jenkins. Navigate to the Manage Jenkins > Manage Plugins page and select “Installed plugins” from the left-hand menu. The Maven integration plugin should be listed in the installed plugin list.
After the Maven integration plugin is installed successfully, we need to configure Maven in Jenkins.
Configure Maven in Jenkins
Maven can be configured in Jenkins by following these steps:
Step 1
Navigate to Manage Jenkins > Tools window.
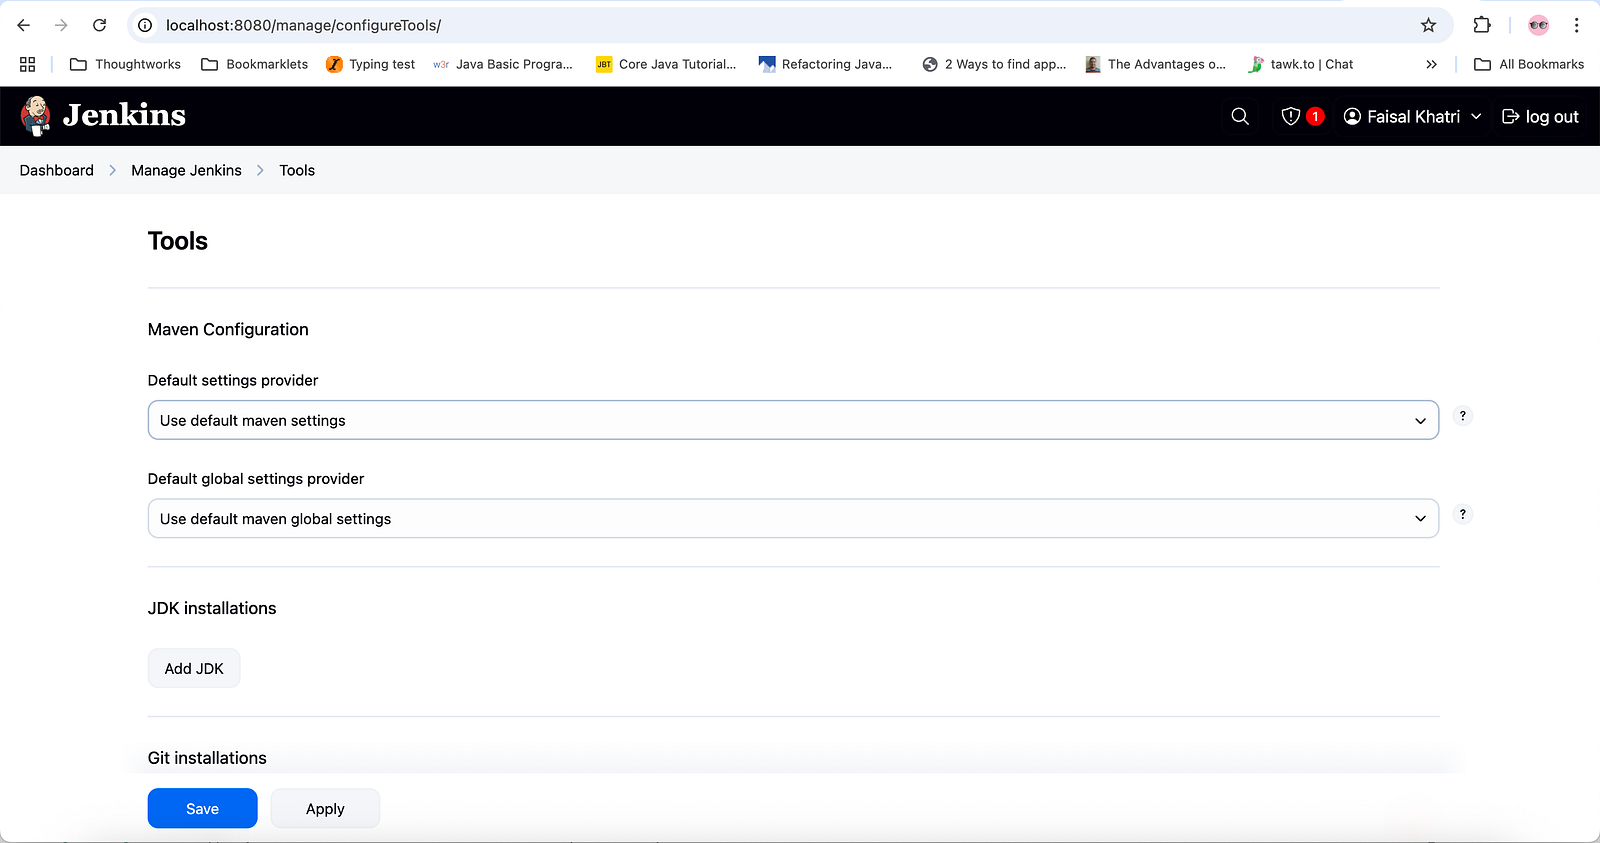
Step 2
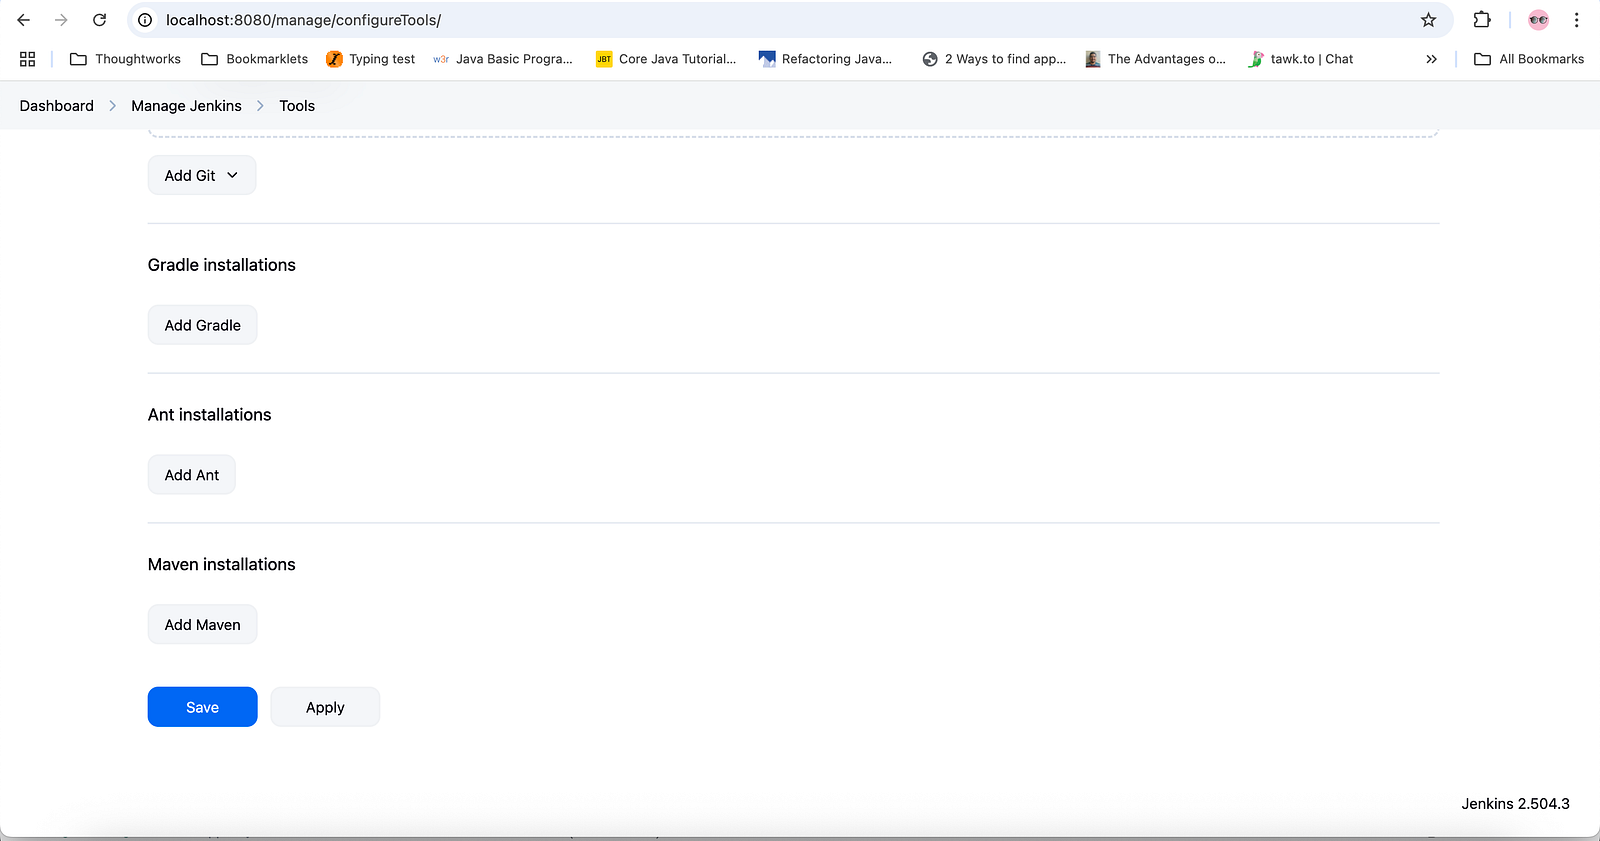
Scroll down to the Maven installations section.
Step 3
Click on the Add Maven button.
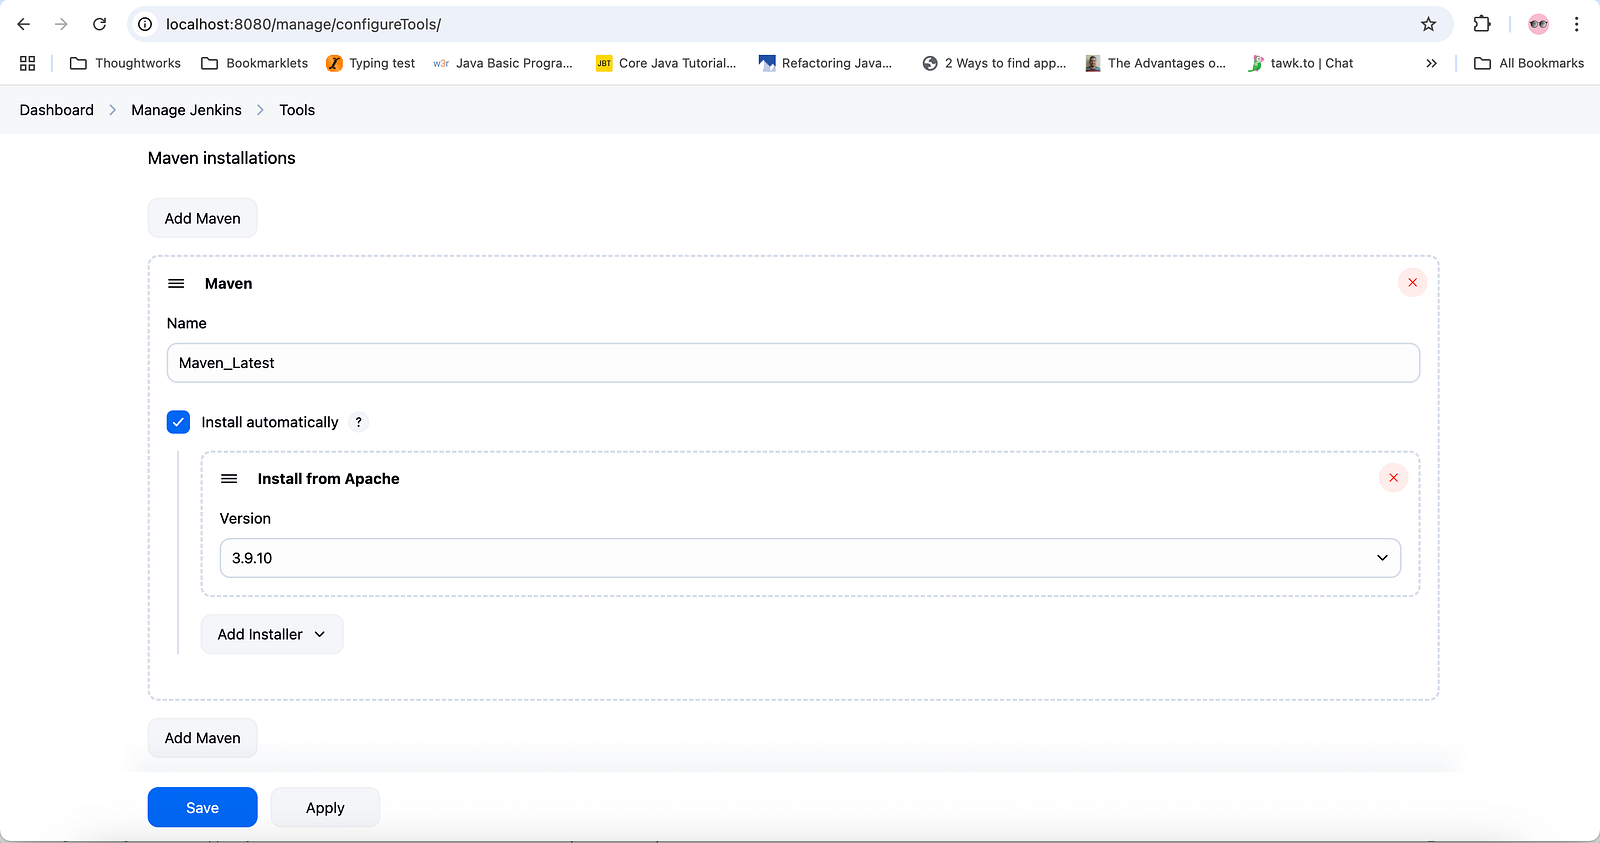
Fill in the mandatory field for Name with an appropriate name(I have updated the name to “Maven_Latest”).
Next, tick the “Install automatically” checkbox and select the appropriate version of Maven to install. We will be using the latest version(3.9.10) in the Version dropdown.
Click on “Apply” and “Save” to save the configuration.
With this, we have configured Maven in Jenkins and are now fully set to create a Jenkins job for the Maven Project.
Configuring a Jenkins Job for a Maven Project
We will be setting up a Jenkins job for the test automation project that will run API automation tests. This Maven project available on GitHub contains API automation tests written using the REST Assured library in Java.

A Jenkins job for a Maven project can be configured with the following steps:
Step 1
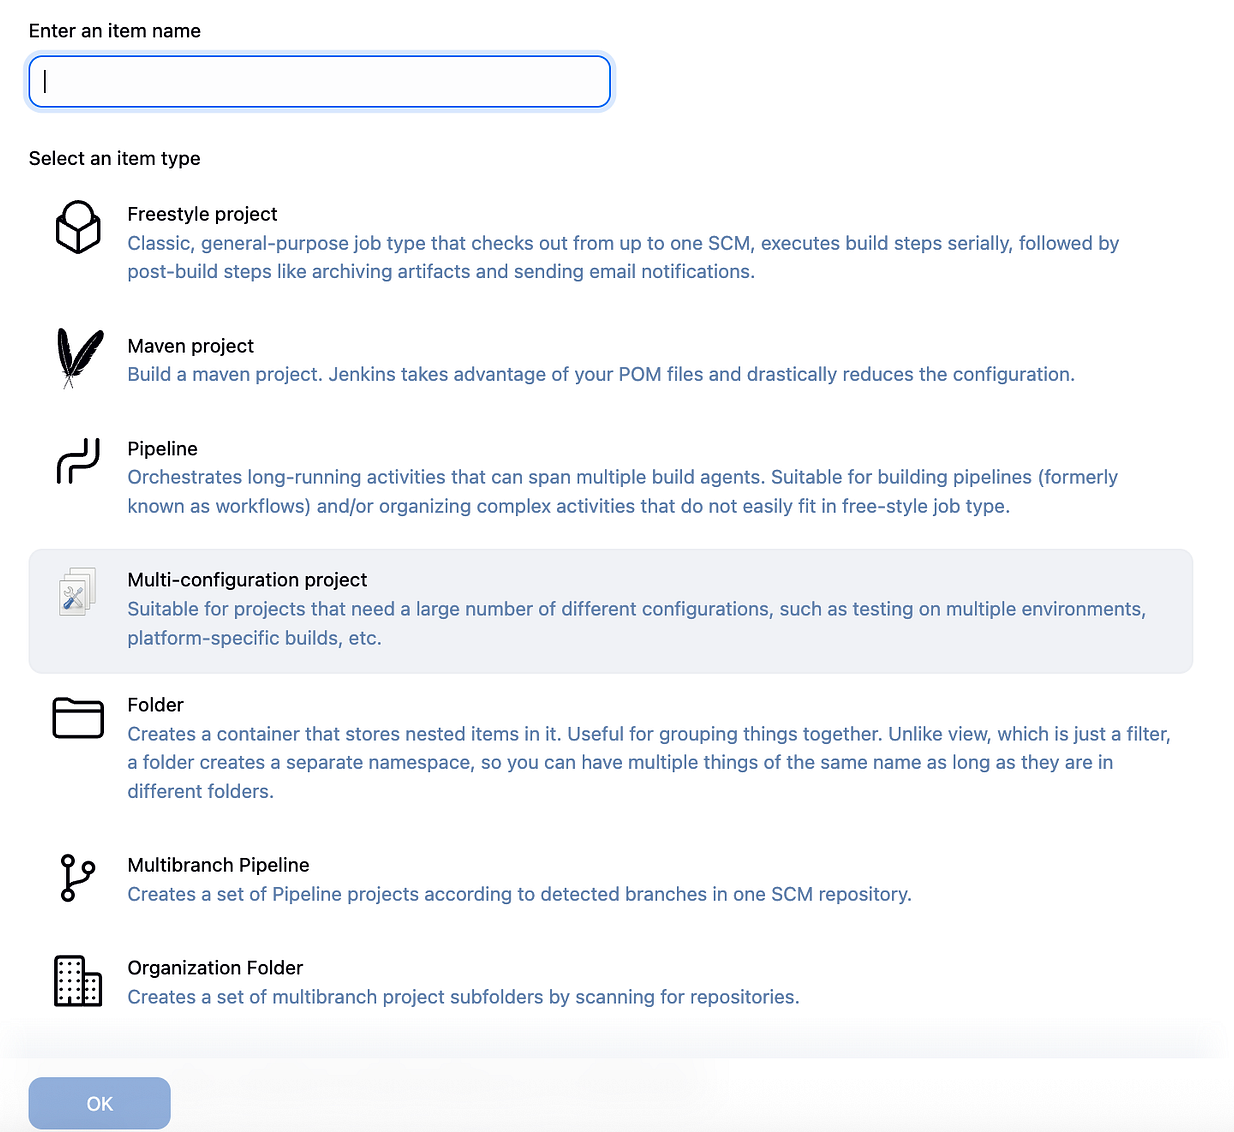
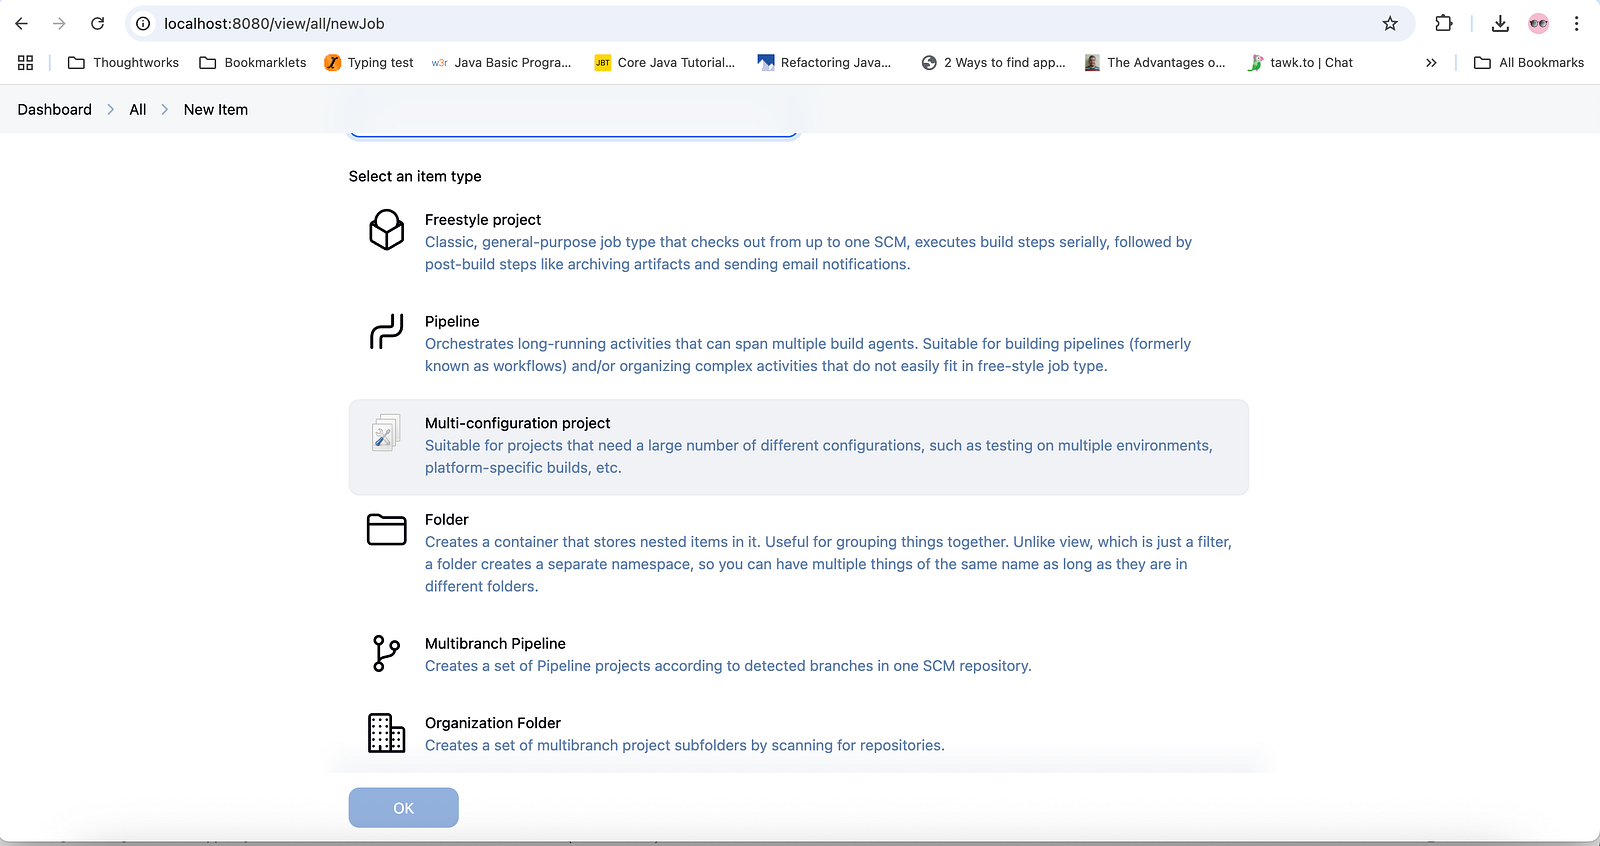
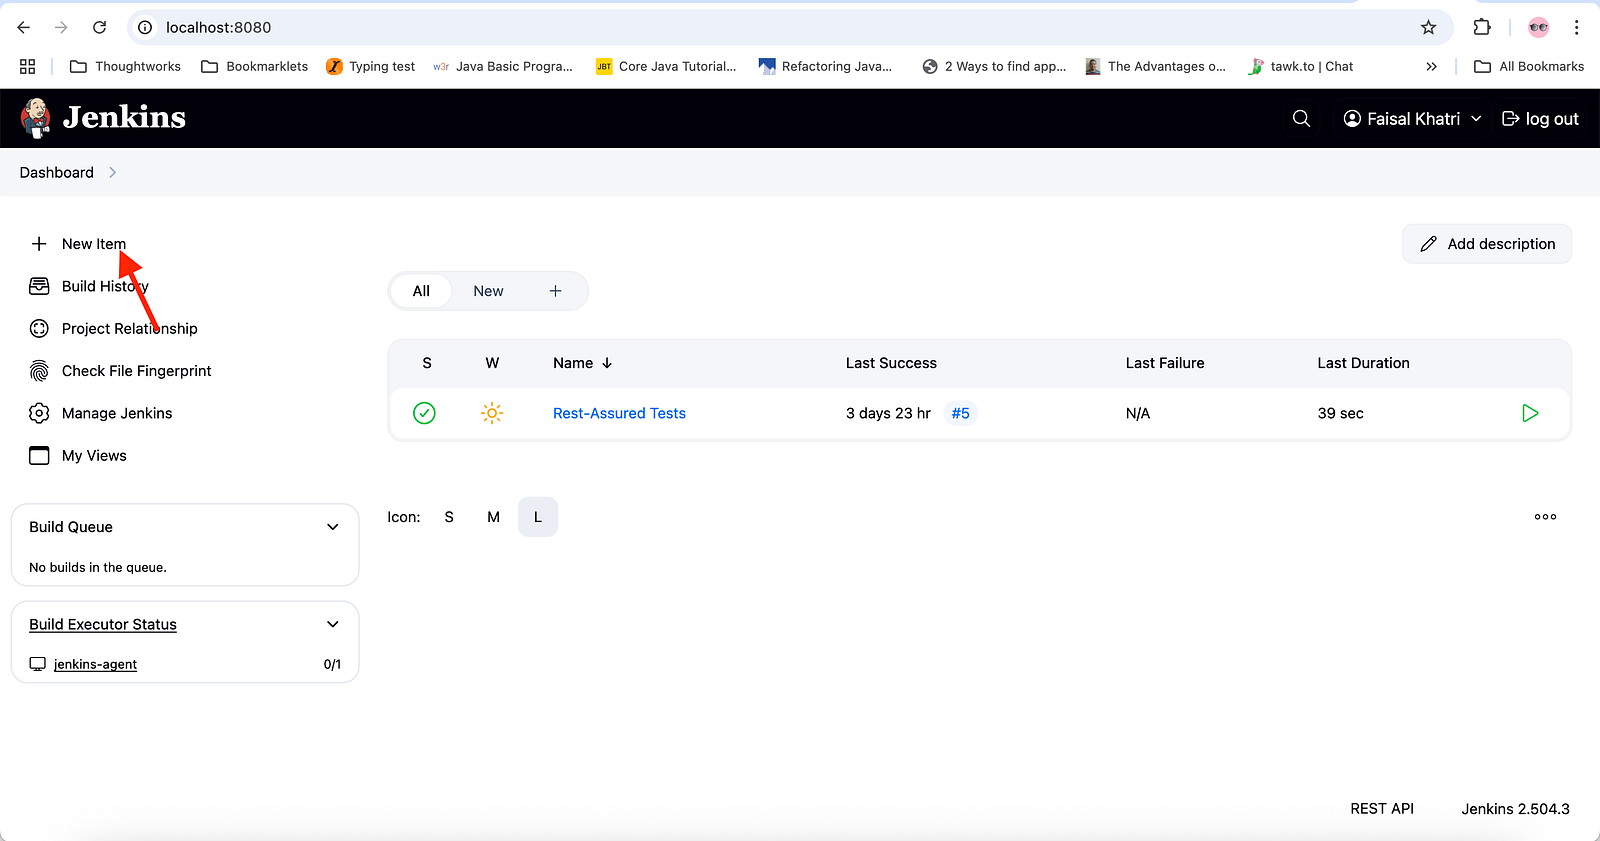
Click on “New Item” on the homepage of Jenkins.
Step 2
Select the Maven project from the list of job names and add a name for the job.
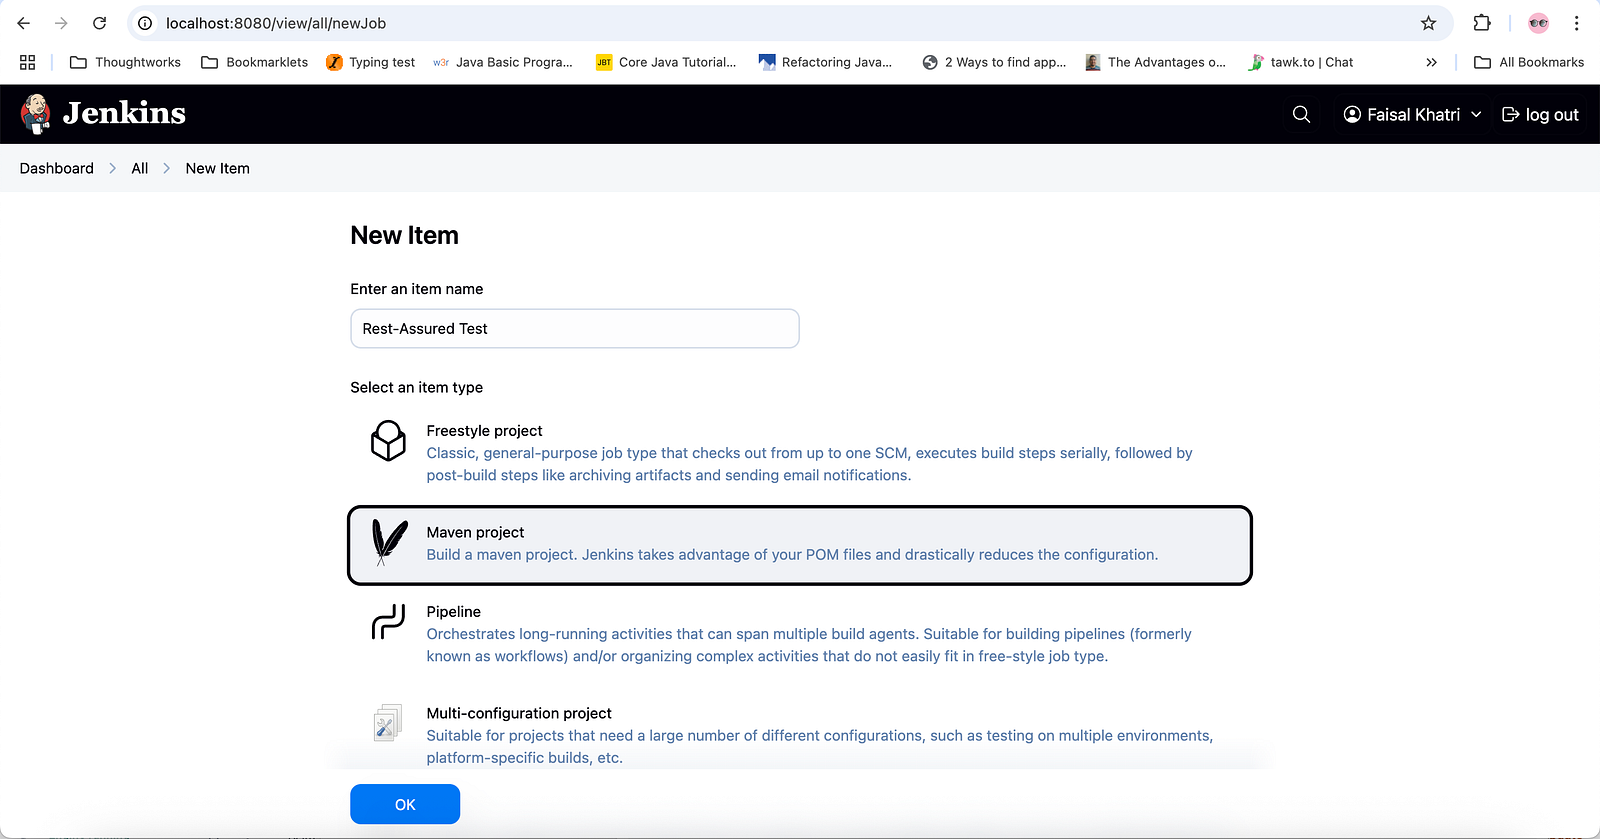
Click on the OK button to continue.
Next, Jenkins will take us to the Job’s configuration page.
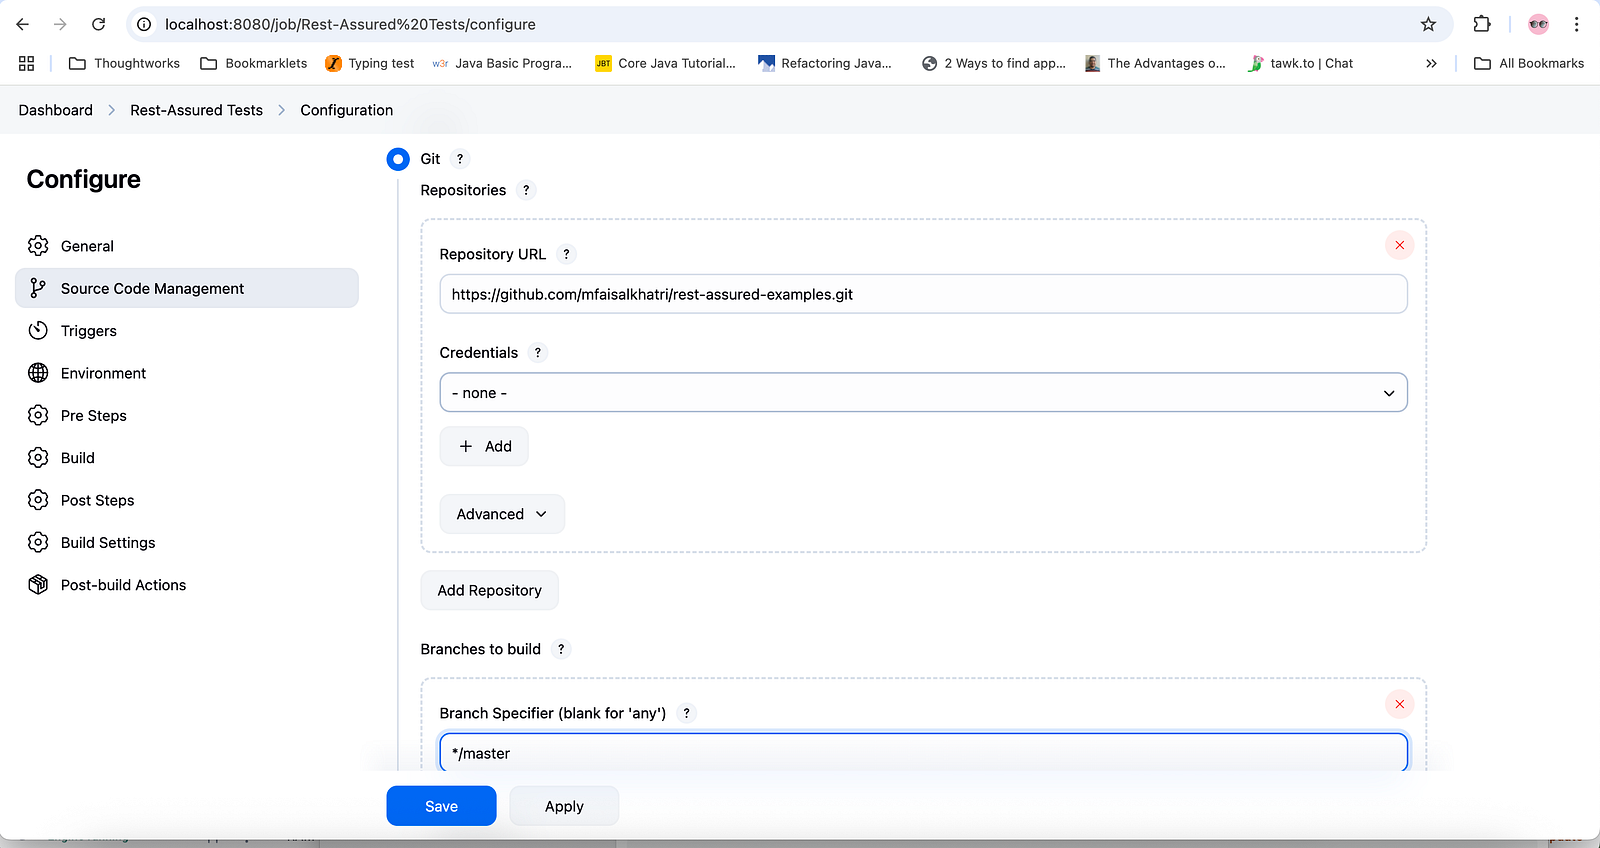
Step 3
Select “Git” in the Source Code Management section.
- Enter the repository URL (https://github.com/mfaisalkhatri/rest-assured-examples.git). This URL should be the one that we select to clone the repository.
- The respective branch name for the job. We’ll add the branch name as “*/master” as we need to pull the code from the master branch to run the tests. Make sure we add the correct branch name here.
Step 4
In the Pre-Steps section, update the Root POM, Goals, and Options.
- Root POM: Add the path to the POM.xml file. Generally, it is in the root folder. So, the value should be the default “pom.xml”.
- Goals and Options: In this text box, we need to provide the Maven command to run the project.
As the API tests are organized in different testng.xml files, and it is available in the test-suite folder in the project, we need to provide the following command to execute:
clean install -Dsuite-xml=test-suite/restfulbookersuitejenkins.xmlDecoding the Maven Command
clean install: The clean command tells Maven to clean the project. It will delete the target/ directory, erasing all the previously built and compiled artifacts.
The install command will compile the code and run the tests.
-Dsuite-xml=test-suite/restfulbookersuitejenkins.xml “-D” uses the System Property of “suite-xml” and passes the value “test-suite/restfulbookersuitejenkins.xml” to it.
In the POM.xml, the “suite-xml” property is defined within the Maven Surefire plugin.
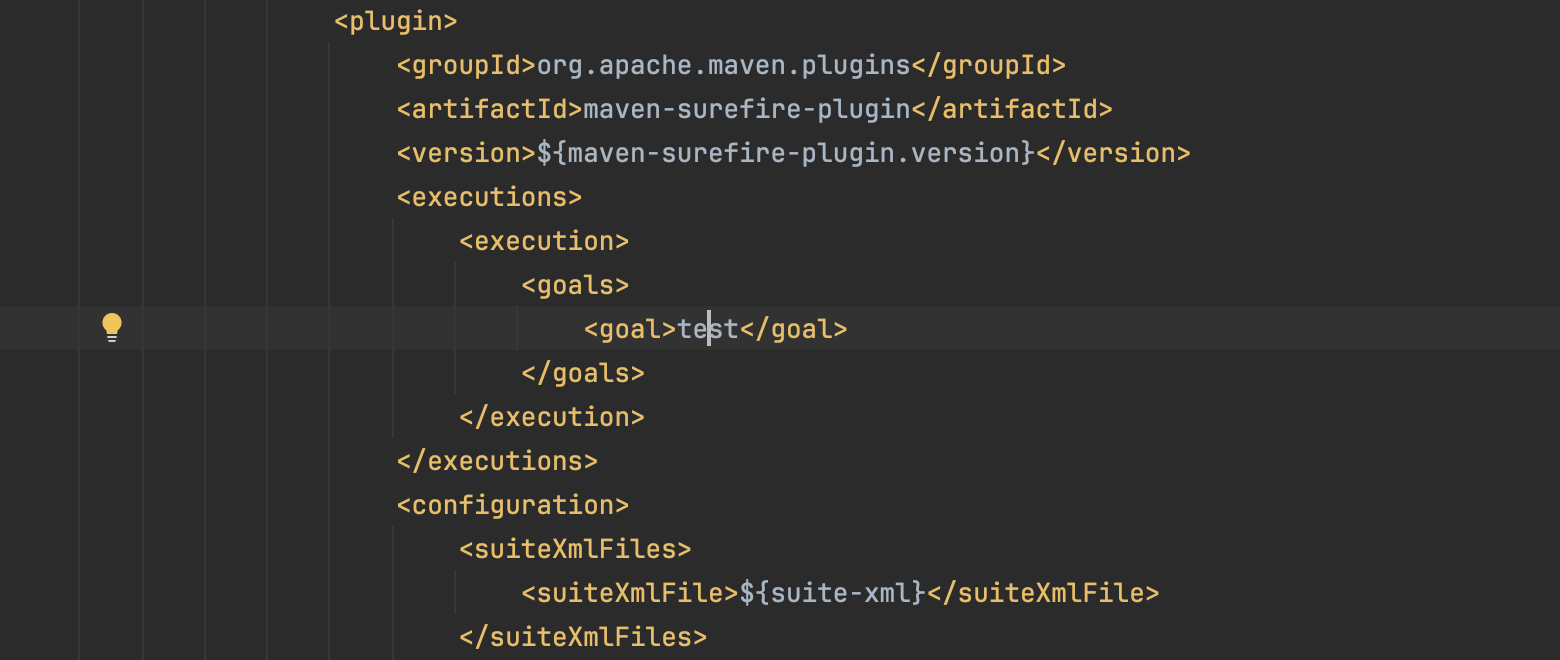
The default value for this “suite-xml” is set to “test-suite/testng.xml” in the Properties section in POM.xml.
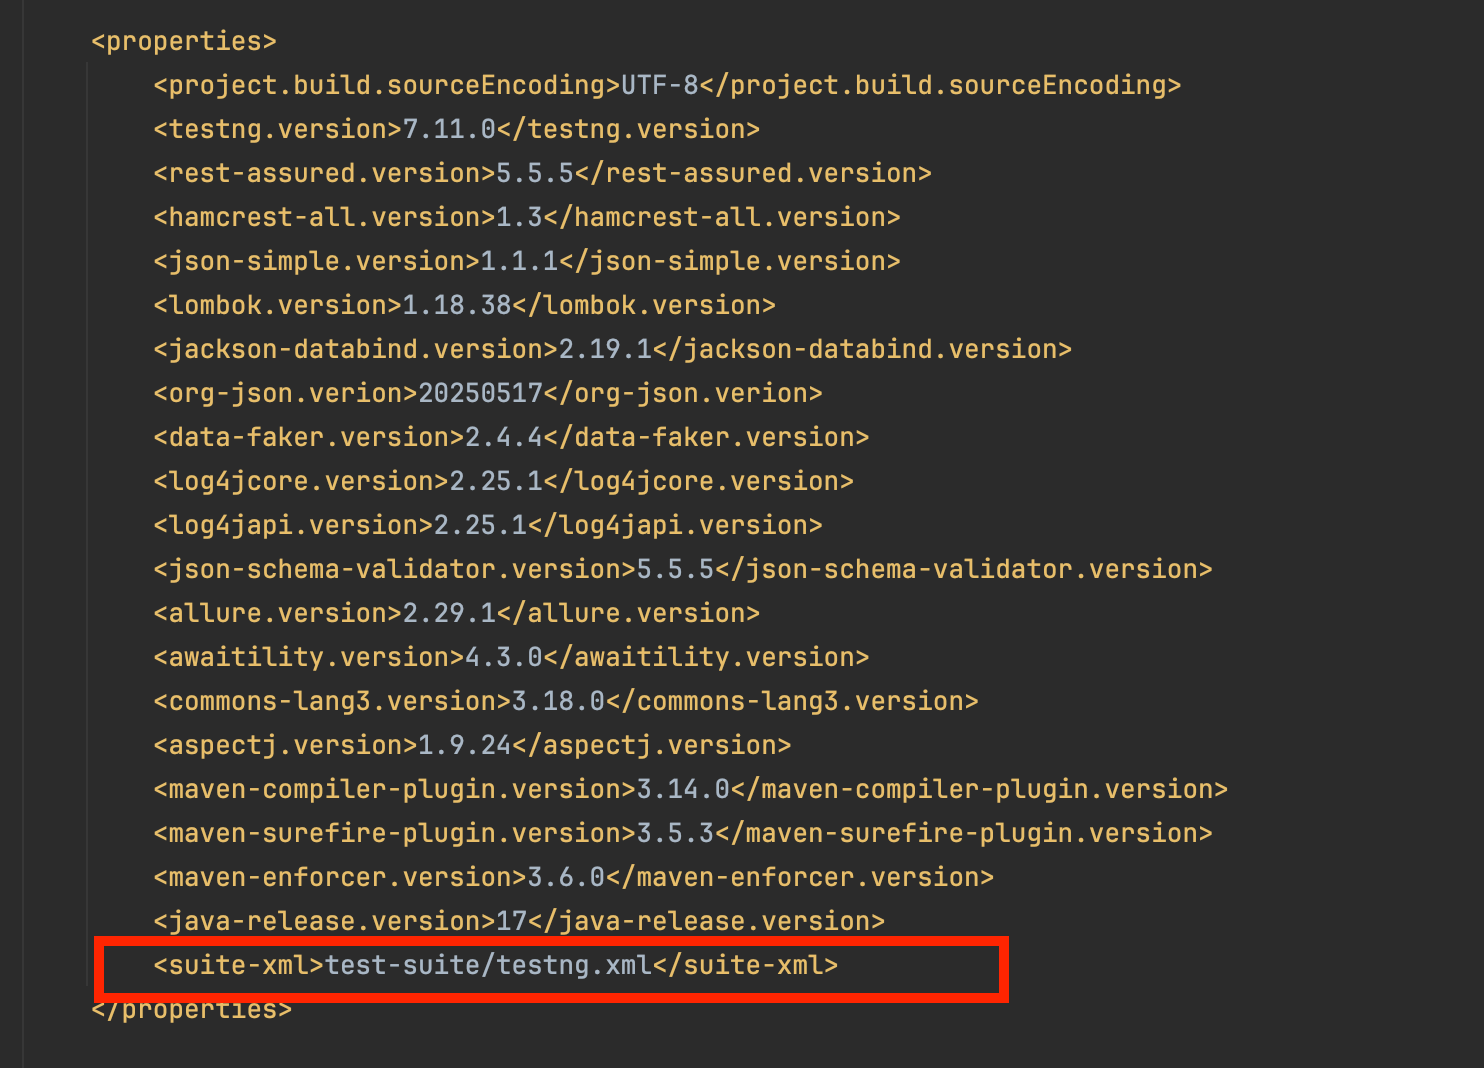
However, as we have multiple testng.xml files and need to run the tests from a specific “restfulbookersuitejenkins.xml,” we will be overwriting the suite-xml using -Dsuite-xml=test-suite/restfulbookersuitejenkins.xml.
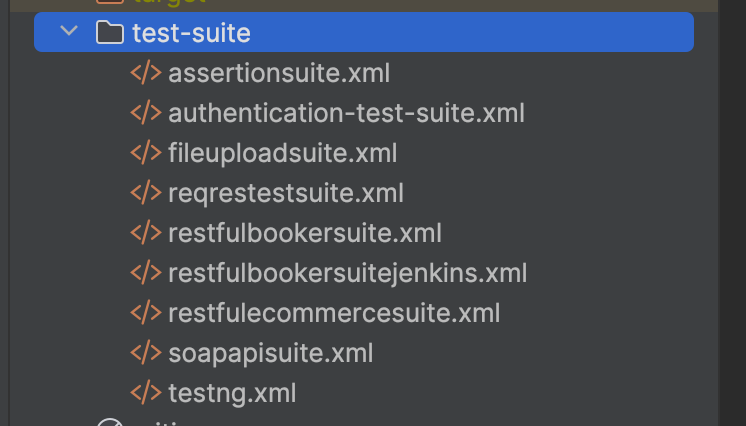
Given below are the contents of the restfulbookersuitejenkins.xml
<?xml version="1.0" encoding="UTF-8"?>
<!DOCTYPE suite SYSTEM "http://testng.org/testng-1.0.dtd">
<suite name="Restful Booker Test Suite" thread-count="3" parallel="tests">
    <listeners>
        <listener
                class-name="in.reqres.utility.TestListener"/>
    </listeners>
    <test name="Restful Booker tests on Jenkins">
        <parameter name="agent" value="jenkins"/>
        <classes>
            <class name="com.restfulbooker.RestfulBookerE2ETests">
                <methods>
                    <include name="createBookingTest"/>
                    <include name="getBookingTest"/>
                    <include name="testTokenGeneration"/>
                    <include name="updateBookingTest"/>
                    <include name="updatePartialBookingTest"/>
                    <include name="deleteBookingTest"/>
                    <include name="checkBookingIsDeleted"/>
                </methods>
            </class>
        </classes>
    </test>
</suite>
This file contains end-to-end tests for the RESTful Booker Demo APIs.
Step 4
Click on the Apply and Save button. This will save the configuration for the job.
The Jenkins job for the Maven project has been configured successfully.
Running the Jenkins Job
There are multiple ways to run the Jenkins Job as mentioned below:
- By manually clicking on the “Build Now” button.
- Using Webhooks to run the build as soon as the developer pushes code to the remote repository.
Let’s run the Jenkins Job manually by clicking on the “Build Now” button.
Once the job is started, a progress bar is displayed on the left-hand side of the screen.
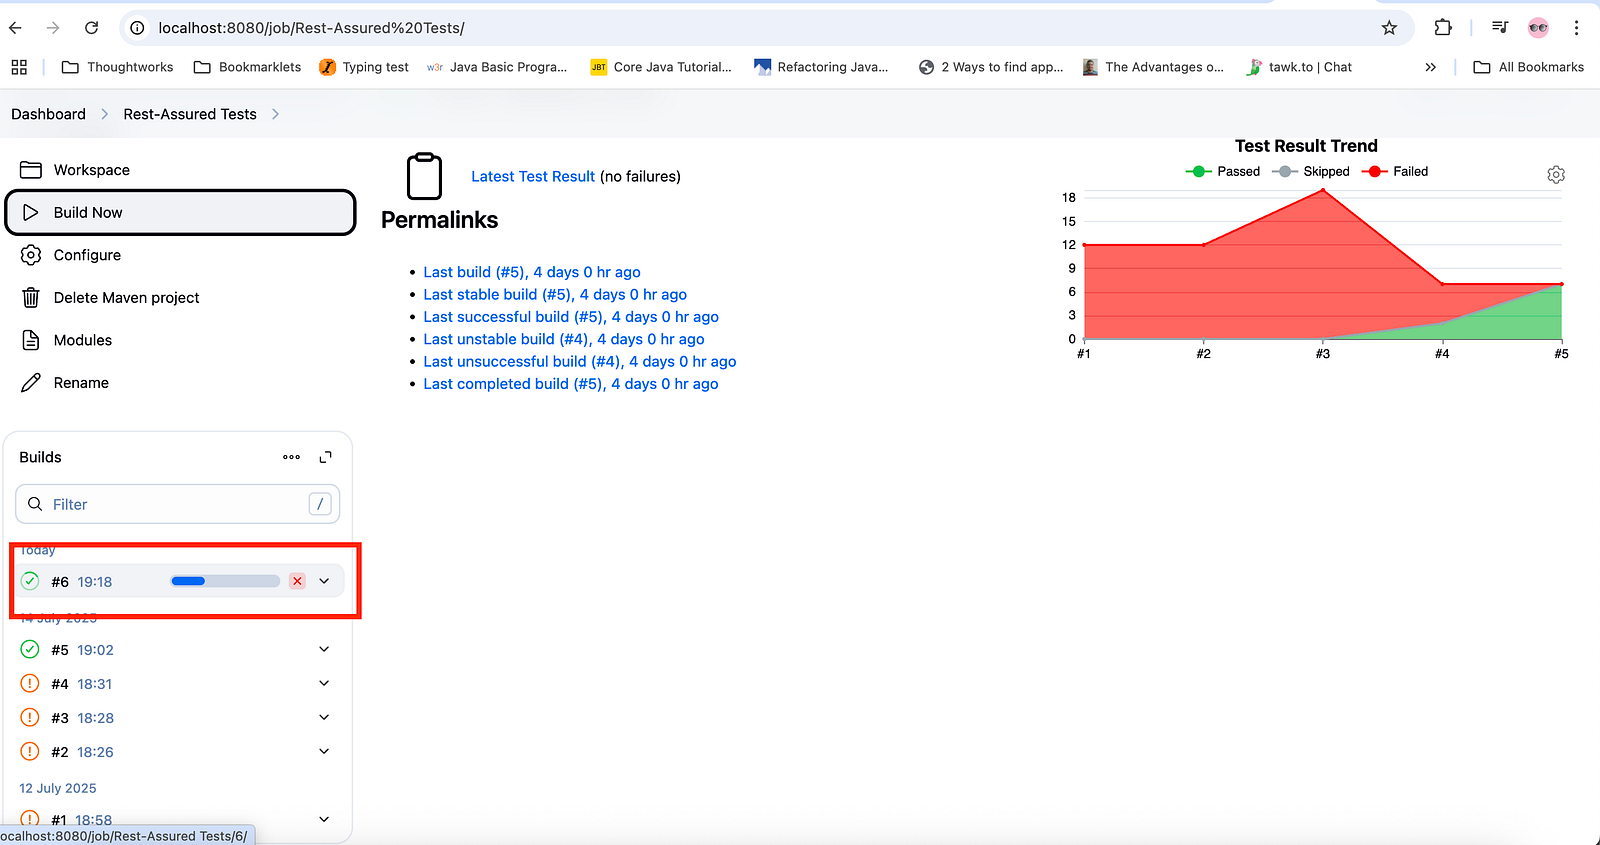
On clicking the Job #, as shown in the screenshot above, Jenkins will take us to the Job details page, where the Job’s details and its progress are displayed.
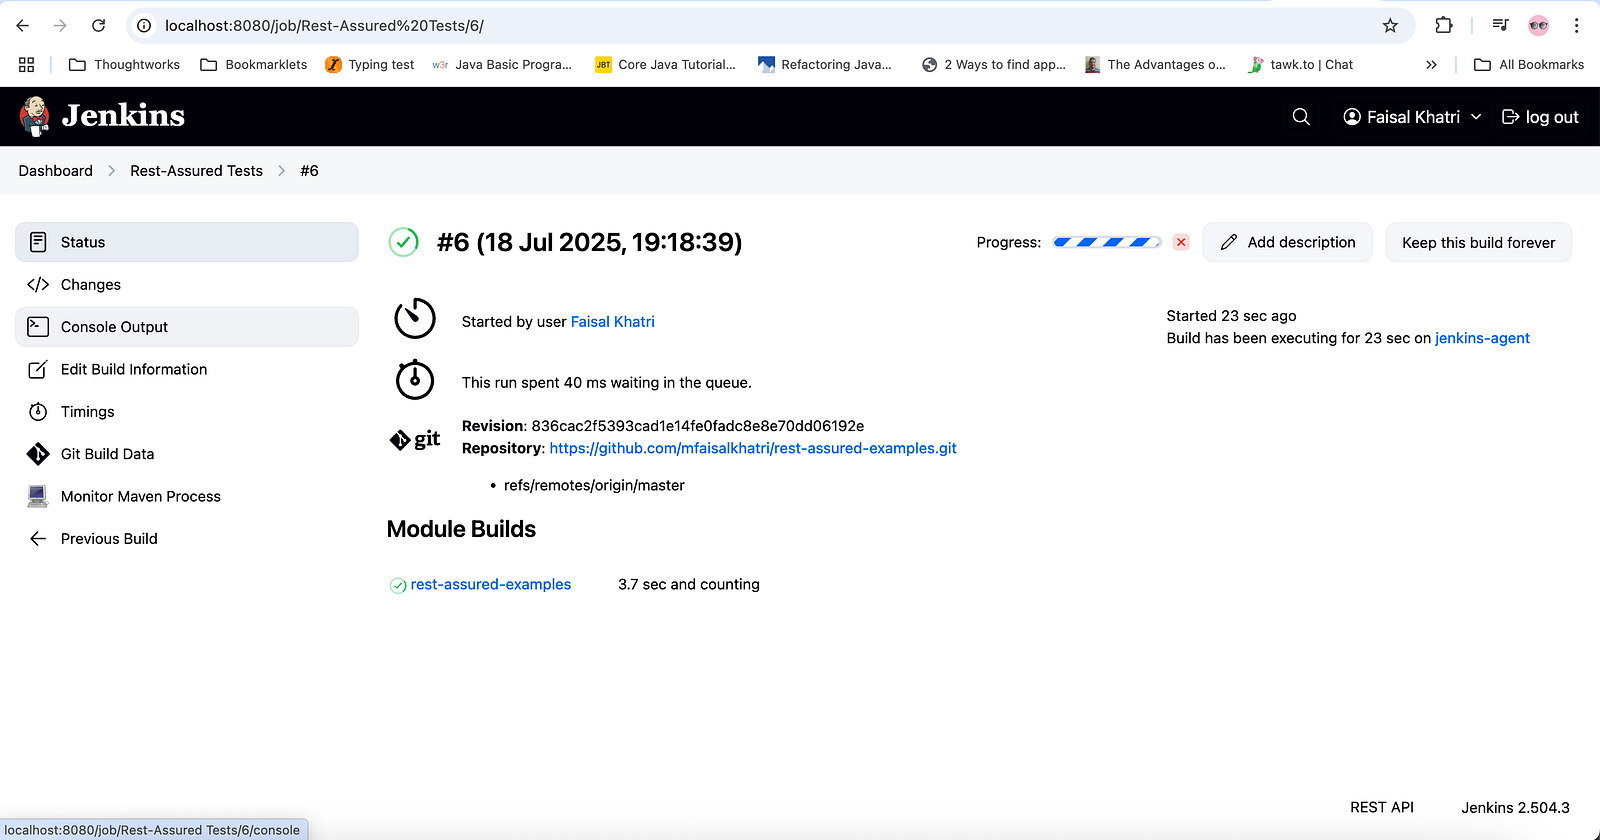
The live console logs of the job can be verified by clicking on the Console Output link on the left-hand menu.
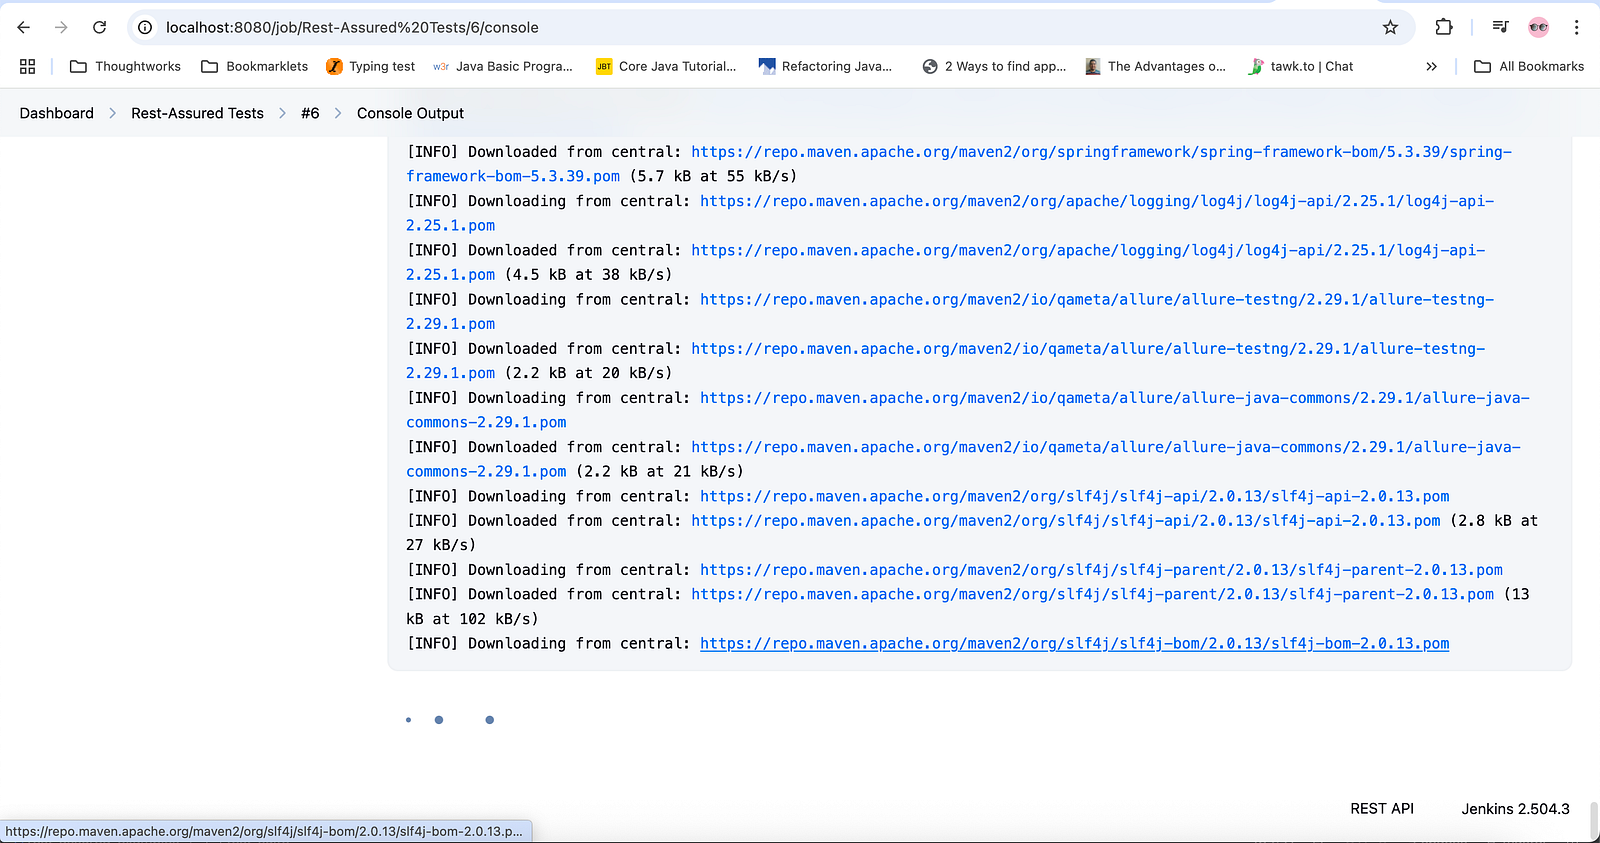
Similarly, the Job’s more granular details can be viewed by scrolling down on the Console output page.
The console output shows that a total of 7 test cases were run and all of them passed. Finally, it shows that the build was generated successfully.
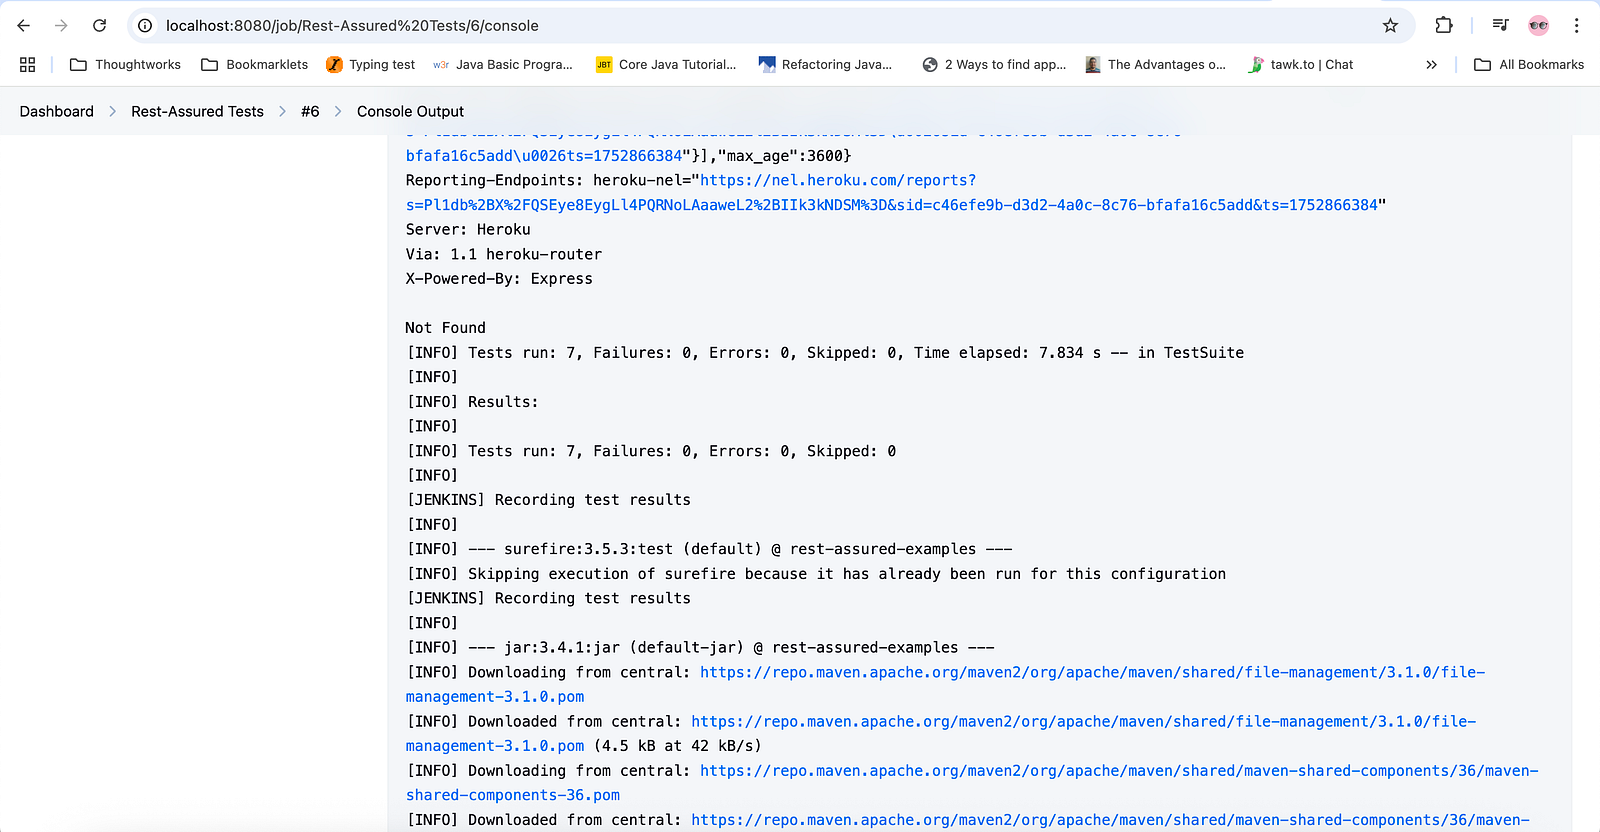
These detailed logging allows us to check the minute details of the job execution and its progress.
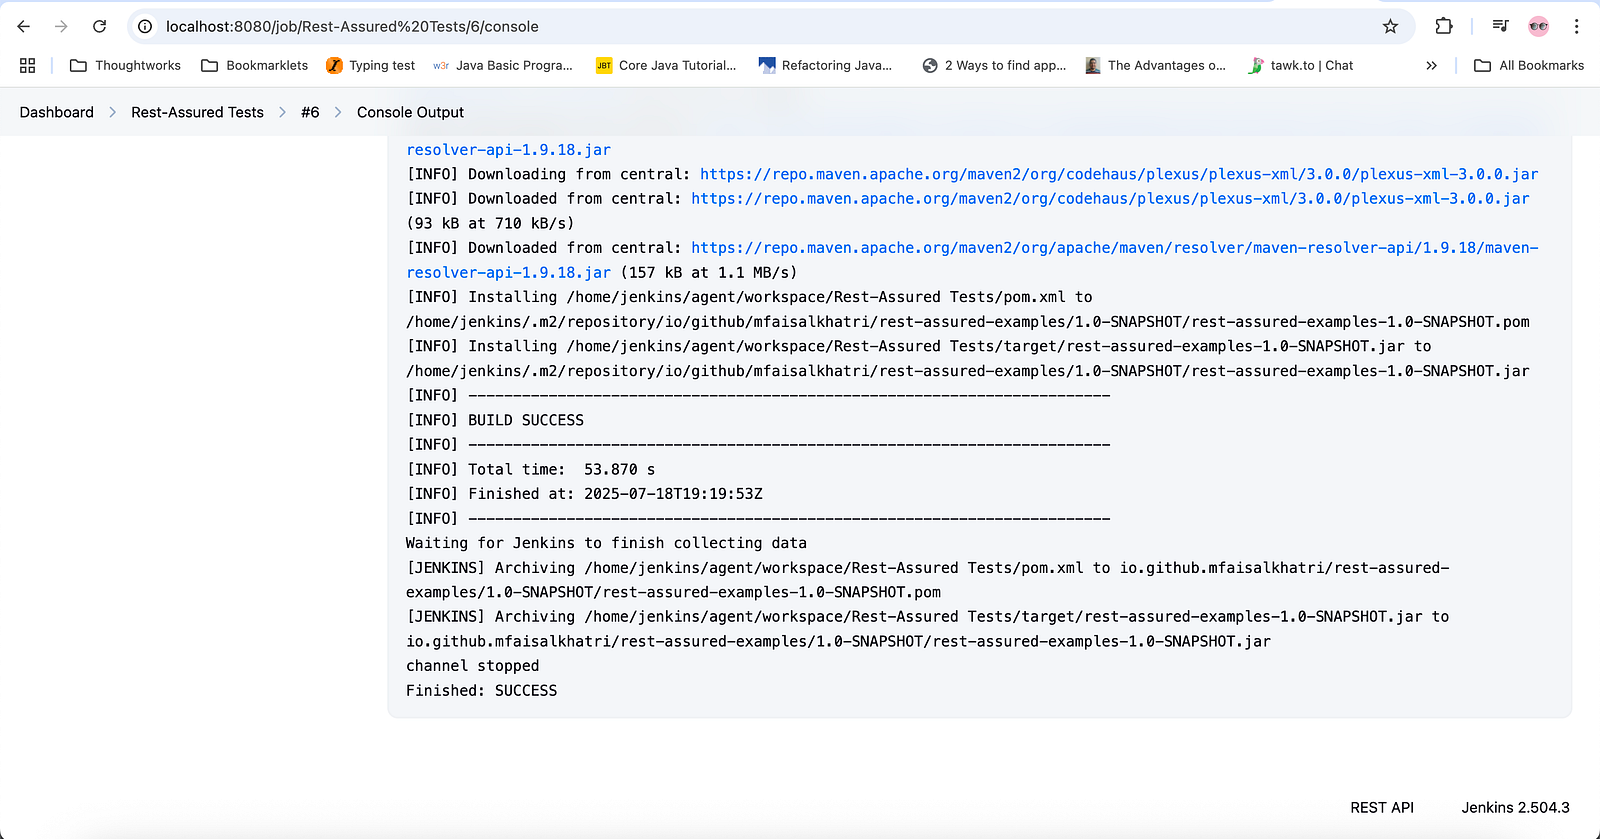
In case the test within the Maven project fails, it can be verified here, and accordingly, an action can be taken.
Verifying the Job Status
The job’s status can be checked after the execution is complete.
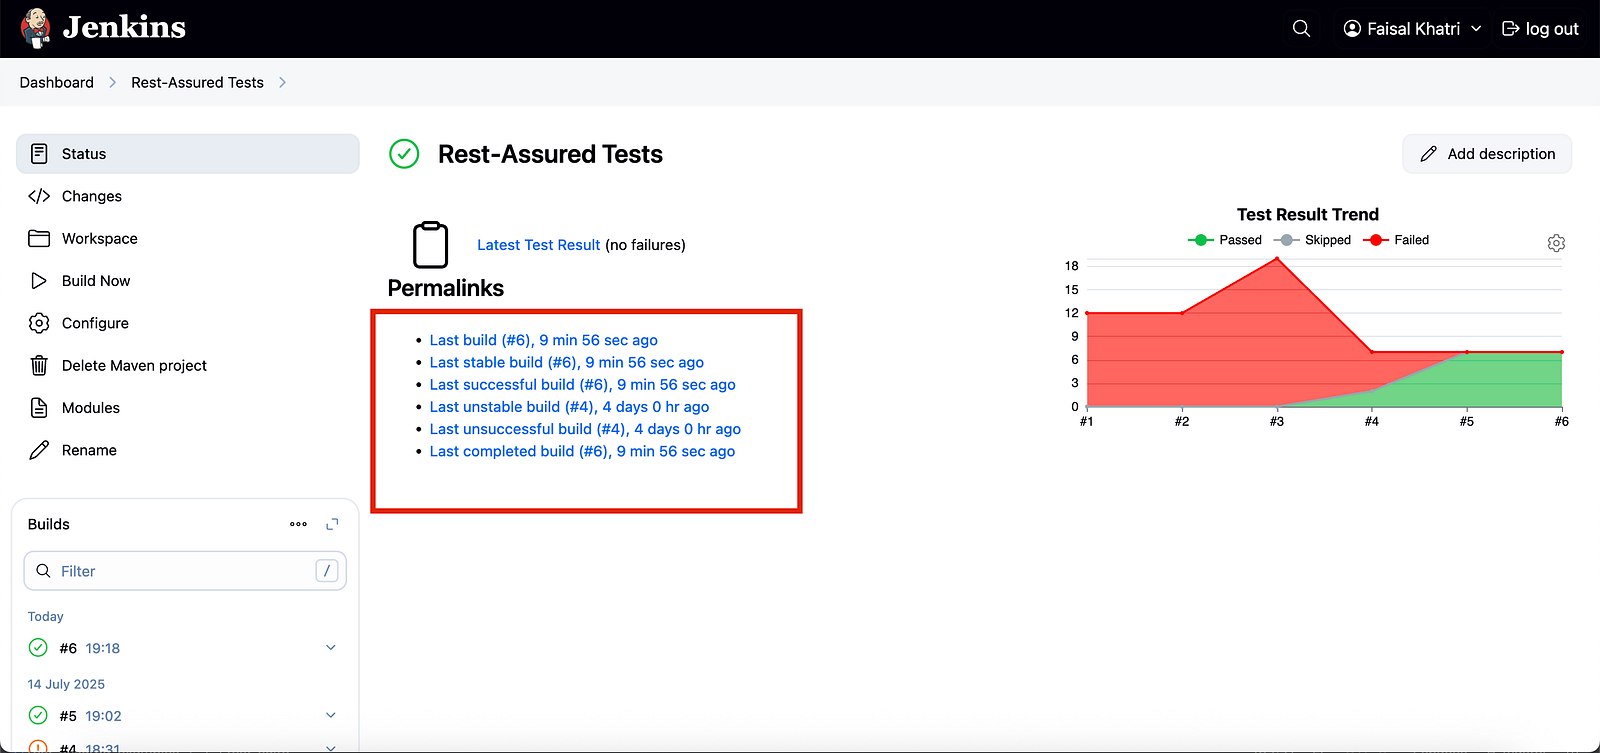
It provides a historical view of the Job runs, which can help in analysing the test failures to check the stability of the project.
A graphical representation of the historical data is also provided, which shows us that the build failed for the first three runs, and passed after the 5th and 6th runs.
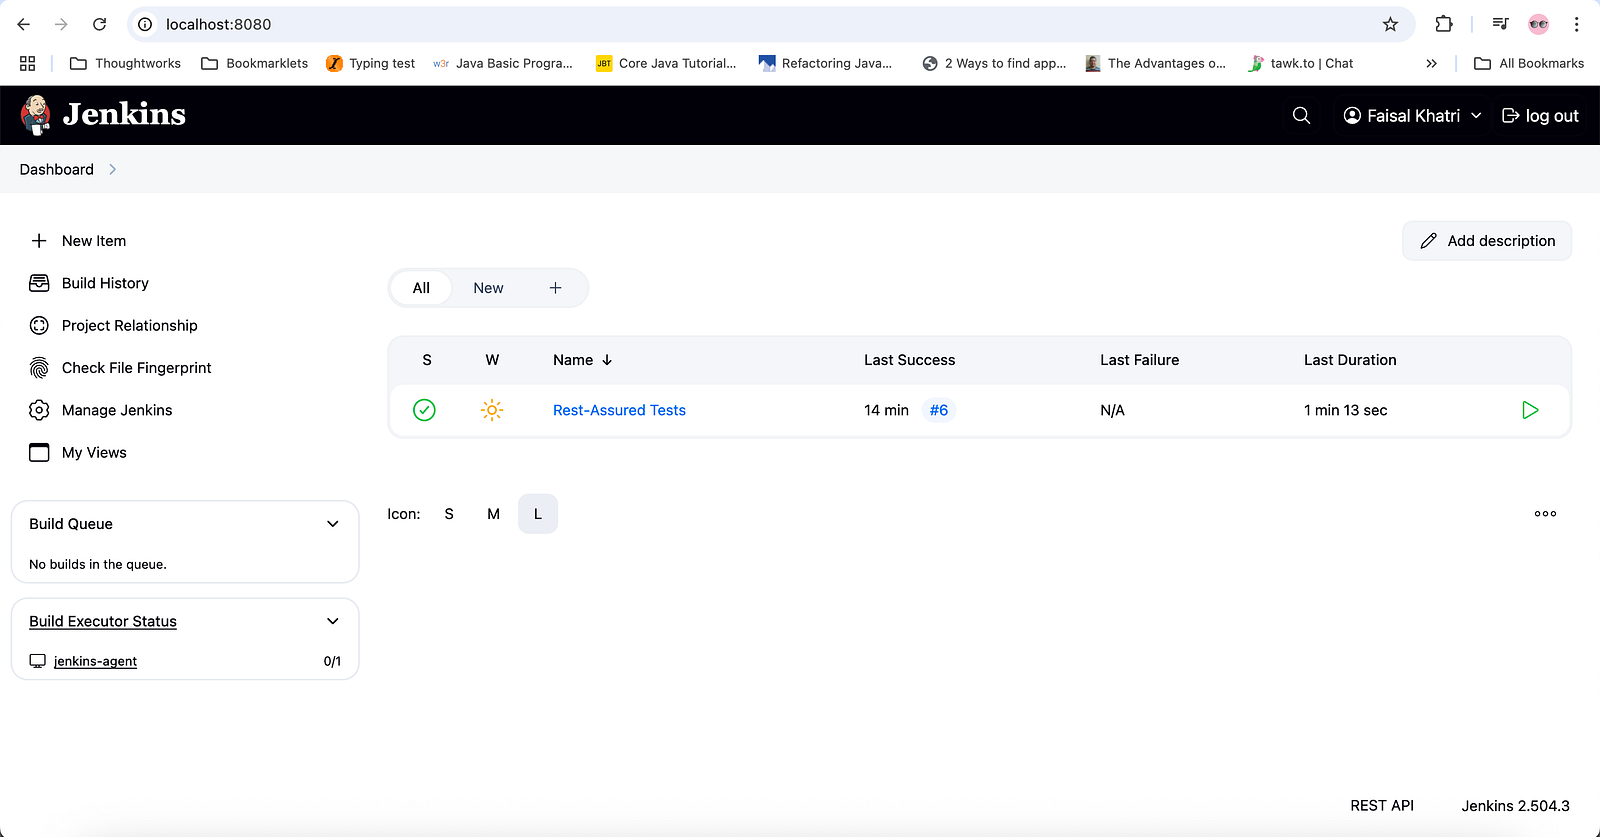
Job Dashboard
Jenkins provides us with the Job Dashboard, which helps us know the current status of the job.
Summary
Jenkins is a powerful tool for setting up the CI/CD pipeline to automate the different stages of deployment. It offers multiple options to set up jobs, one of which is using the Maven Project.
We can easily configure the Jenkins job for a Maven project by installing the Maven integration plugin and setting up Maven in Jenkins. The job pulls the code from the SCM and executes the goal as provided by the user in the job’s configuration.
Jenkins provides detailed job execution status on the dashboard. It provides more granular details on the Job’s console output. The historical graph and job run details help stakeholders verify the stability of the build and take further actions.
Published at DZone with permission of Faisal Khatri. See the original article here.
Opinions expressed by DZone contributors are their own.
Comments