Jenkins: Changing the Jenkins Home Directory
Change up the location of your Jenkins Home Directory and create a freestyle project to test it.
Join the DZone community and get the full member experience.
Join For Free
What Is the Jenkins Home Directory?
The Jenkins home directory contains all the details of your Jenkins server configuration, details that you configure in the Manage Jenkins screen. These configuration details are stored in the form of a set of XML files. Much of the core configuration is stored in the config.xml file.
You may also enjoy: Jenkins: Integrating Jenkins With Microsoft Teams
The Jenkins home directory contains a subdirectory for each Jenkins build job being managed by this instance of Jenkins. Each job directory, in turn, contains two subdirectories, builds and workspace, along with some other files. It contains the build job config.xml file, which contains, as you might expect, the configuration details for this build job.
There are also some other files used internally by Jenkins that you usually wouldn’t touch, such as the nextbuildnumber file (which contains the number that will be assigned to the next build in this build job), as well as symbolic links to the most recent successful build and the last stable one. A successful build is one that does not have any compilation errors. A stable build is a successful build that has passed whatever quality criteria you may have configured, such as unit tests, code coverage.
Both the build and the workspace directories are important. The workspace directory is where Jenkins builds your project: it contains the source code Jenkins checks out, plus any files generated by the build itself. This workspace is reused for each successive build. There is only ever one workspace directory per project, and the disk space it requires tends to be relatively stable.
If the Jenkins server default home directory was full or we want to run Jenkins jobs on block volume or specific directory we can do it by following these steps to change to the Jenkins Home Directory.
Steps to Changing the Jenkins Home Directory
1. Click on Manage Jenkins in the left corner on the Jenkins dashboard.

2. Select the System Information tab.

3. Scroll down to the Environment Variables section and you will see JENKINS_HOME

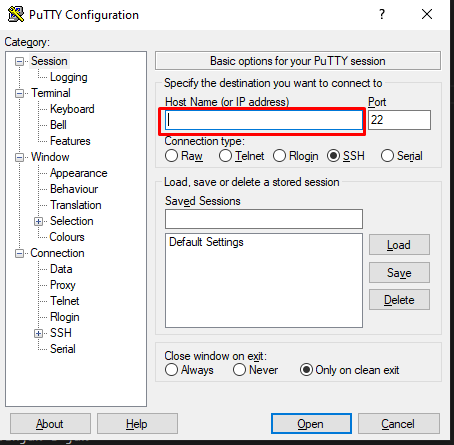
4. Change the Jenkins home login to Jenkins server instance using Putty.
5. Navigate to the root user using the following command.
sudo -i6. Before changing anything on the Jenkins master we have to stop the Jenkins server.
sudo service jenkins stop7. Create a new directory where ever you want to move the Jenkins home to. In this article, I creating a new directory in the /homepath.
mkdir /home/new_home8. We need to change the ownership of a created directory by using the chown command to change the user and group ownership of the created directory.
sudo chown jenkins:jenkins /home/new_home/9. Copy the content from old Jenkins home directory, /var/lib/jenkins , to the new Jenkins home directory, /home/new_home/ , using the following command.
sudo cp -prv /var/lib/jenkins /home/new_home/10. Next, change the Jenkins user home by using the following command.
sudo usermod -d /home/new_home/ jenkins11. Update the new Jenkins home directory path in /etc/default/jenkins.
sudo vi /etc/default/jenkins12. Scroll down to the Jenkins home location and update the new home directory path.
# defaults for Jenkins automation server

# pulled in from the init script; makes things easier.
NAME=jenkins

# arguments to pass to java

# Allow graphs etc. to work even when an X server is present
JAVA_ARGS="-Djava.awt.headless=true"

#JAVA_ARGS="-Xmx256m"

# make jenkins listen on IPv4 address
#JAVA_ARGS="-Djava.net.preferIPv4Stack=true"

PIDFILE=/var/run/$NAME/$NAME.pid

# user and group to be invoked as (default to jenkins)
JENKINS_USER=$NAME
JENKINS_GROUP=$NAME

# location of the jenkins war file
JENKINS_WAR=/usr/share/$NAME/$NAME.war

# jenkins home location
JENKINS_HOME=/home/new_home
13. Start the Jenkins service by using the following command.
sudo service jenkins start 14. Then we need to update the admin password that can be found in a new Jenkins home directory.
cat /home/new_home/secrets/initialAdminPassword15. Copy and paste the Admin Password in the Administrator Password field. Click the continue button.

16. Next, you will be prompted to set up the first admin user. Fill out all required information and click the Save and Continue button.
17. Set the URL for your Jenkins instance. The URL will be generated automatically. Confirm the URL by clicking the Save and Finish button.
18. Once all configuration is done, you can see the "Jenkins is ready" screen. Click Start using Jenkins and you will be redirected to the Jenkins dashboard.
19. Click on Manage Jenkins in the left corner on the Jenkins dashboard, then select System Information.
20. Scroll down to the Environment Variables section, you will see the new JENKINS_HOME.

Create a Freestyle Project
Once the Jenkins home directory is changed, we can test previously created or new jobs. For the sake of this article, I created a new freestyle project.
1. Select New Item in the top left-hand corner on the dashboard.

2. Enter the name of your project in the Enter an item name field, and select Freestyle Project, and click the OK button.
3. Enter a description (optional).
4. Go to the Build section and click on the Add build step.
5. Select Execute Shell as a build step.
6. Copy and paste the following command into a command field.
echo $HOME
7. Click on Save, it will redirect to the job's view page.
8. On the left pane, click the Build Now button to execute your job.
9. We can verify the history of executed build under the Build History by clicking the build number, which is #1 in this case.
10. Click on build number and select Console Output. Here, you can see the Jenkins user home and Jenkins home directory.
Further Reading
Opinions expressed by DZone contributors are their own.
Comments