Creating Microservices With Spring and Eureka
Learn how to create distributed microservices, and make these microservices work together using Spring Boot, Feign, and a Eureka server.
Join the DZone community and get the full member experience.
Join For FreeIn this article, we will talk about how to create distributed microservices using Spring Boot. For this, we will use the package Spring Cloud NetFlix.
Any microservice should be able to locate the different instances of another service without having their addresses defined in the code.
In case it needs to access another service, ideally, you could consult the different addresses where the instances of the other servers are running, since the most common case is that the number of instances and their addresses are dynamic.
To do this in Spring, we will use the Eureka Server from the Spring Cloud NetFlix package. Our application will also use Ribbon and Feign to be able to find the different instances of a microservice and balance the requests.
In this article, I will explain how to create a service that will call to request the capital of a country. This service, in turn, calls another service to locate the requested data, since the first is only be an entry point.
The programs used are these:
- Project: Capitals-service Port: 8100
- Project: countries-Service Port: 8000 and 8001
- Project: eureka-server Port: 8761
The Project: countries-service instance will have a database with the different countries. Two instances of this service will be executed so that we can see how the Project Capitals-service program makes a call to an instance and the other of the two instances performs load balancing.
The sample code in this article is on GitHub.
Creating a Eureka Server
The first thing we need is to have a place where all the microservices can register when they are initialized. This service is, in turn, consulted whenever we need to locate the different instances. In this example, we will use a Eureka server which is very easy to create.
To do this, we will create a new Spring Boot project with the Starter Eureka server.
In this project, we will change the file application.properties to include the following:
spring.application.name = eureka-server
server.port = 8761
eureka.client.register-with-eureka = false
eureka.client.fetch-registry = false
With spring.application.name, we specify the program's name. The port on which the service will listen is specified with server.port. And, most importantly, because the above values are optional, they are the parameters of the Eureka server.
eureka.client.register-with-eureka = false- Makes it so the server does not attempt to register itself.eureka.client.fetch-registry = false- With this, we inform customers that they must not store the data of the available instances in their local cache. This means that they must consult the Eureka server whenever they need to access a service. In production, this is often set to true to expedite requests. I must comment that this cache is updated every 30 seconds by default.
Now, in our class, where it enters Spring Boot we put the annotation EnableEurekaServer:
@SpringBootApplication
@EnableEurekaServer
public class NetflixEurekaNamingServerApplication
{
public static void main (String [] args) {
  SpringApplication.run (NetflixEurekaNamingServerApplication.class, args);
}
}
And it's ready! Our Eureka server is created. To see your status we can use our favorite browser and navigate to http://localhost: 8761/ to view the applications that we have registered. As seen in the screenshot below, there is still no one.
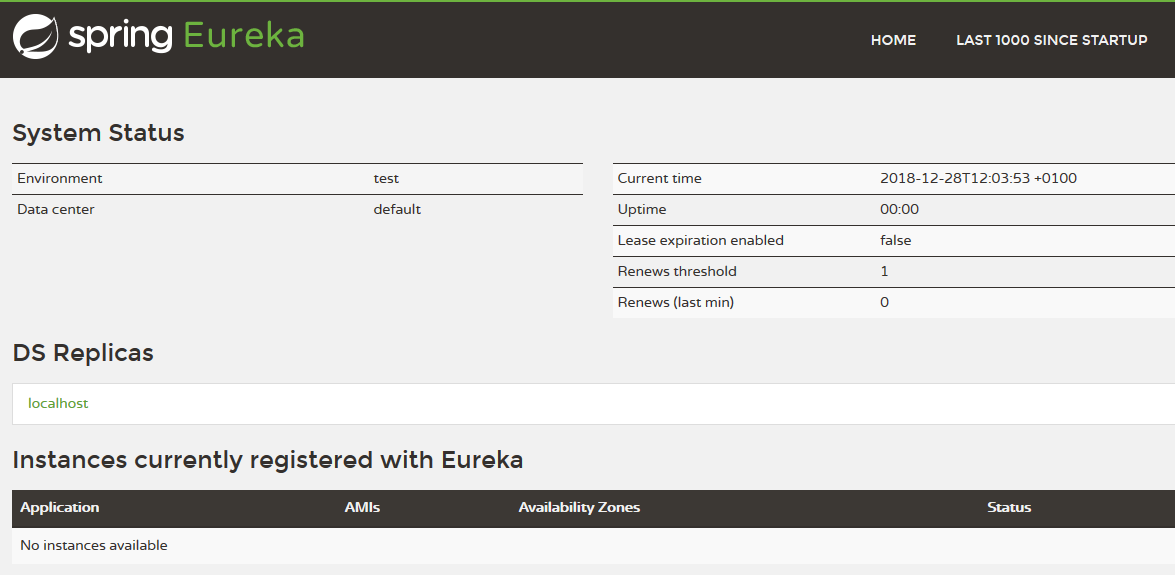

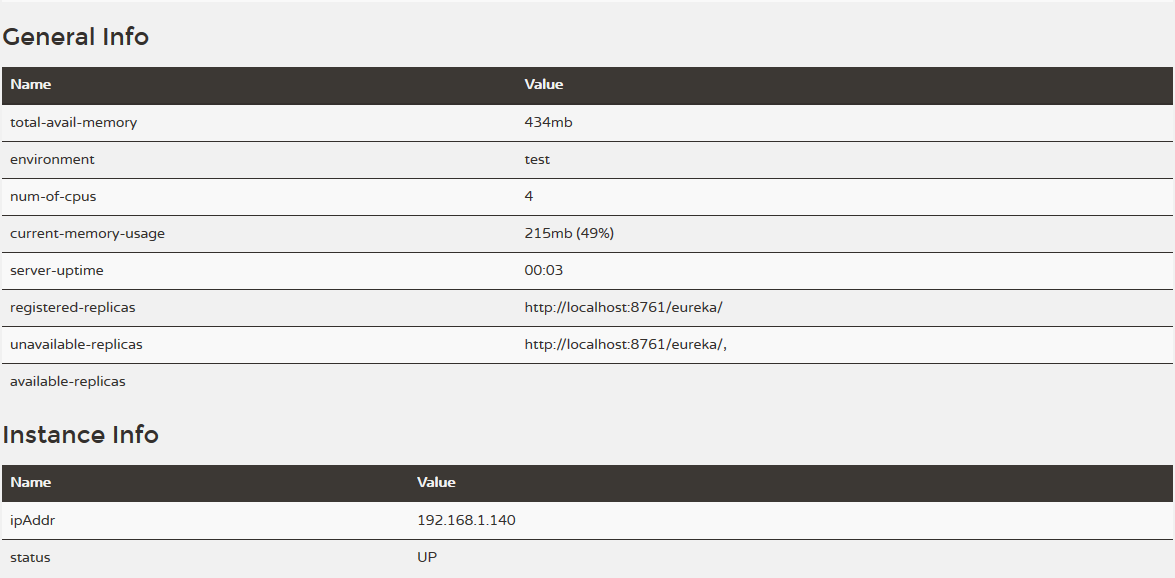
On the same screen, the server's status is displayed.
The 'countries-service' Microservice
Now that we have our server, let's create our first customer. To do this, we will create another Spring Boot project with the following starters:
- Eureka Discovery
- Web
- Lombok
- H2
- JPA
As I mentioned earlier, this microservice is going to have the database and to be consulted by capital-service to find the capital of a country.
The remarkable thing about this project is in the Spring Boot file application.properties.
spring.application.name = countries-service
eureka.client.serviceUrl.defaultZone = http://localhost:8761/eureka
server.port = 8000
#  JPA Configuration
spring.jpa.show-sql = true
spring.h2.console.enabled = true
As you can see, with the parameter eureka.client.serviceUrl.defaultZone, we specify where the Eureka server is. Spring Boot automatically detects that you have the package Eureka Discovery available and tries to register with the corresponding server.
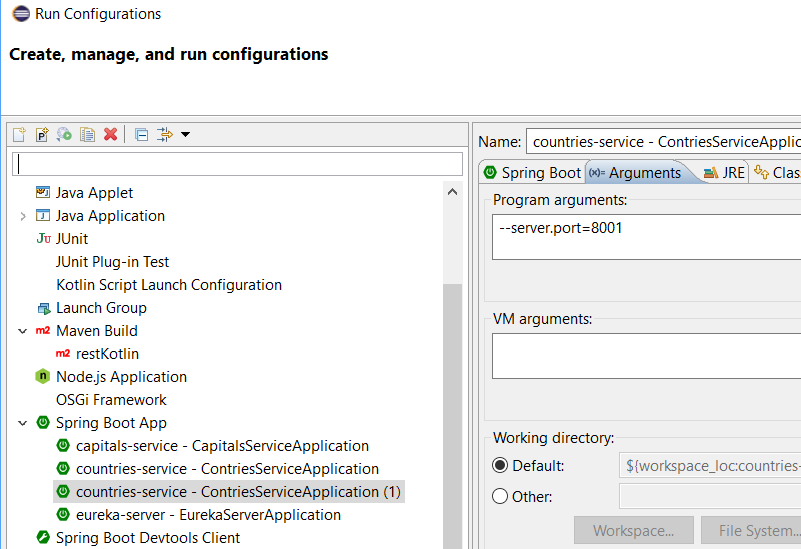
To launch the second instance of the application countries-service on port 8001 with Eclipse, we go to the option Run Configurationsin the menu Runand copy what Eclipse has created for countries-service once we run the application for the first time. In the tab Arguments, we add the parameter--server.port=8001
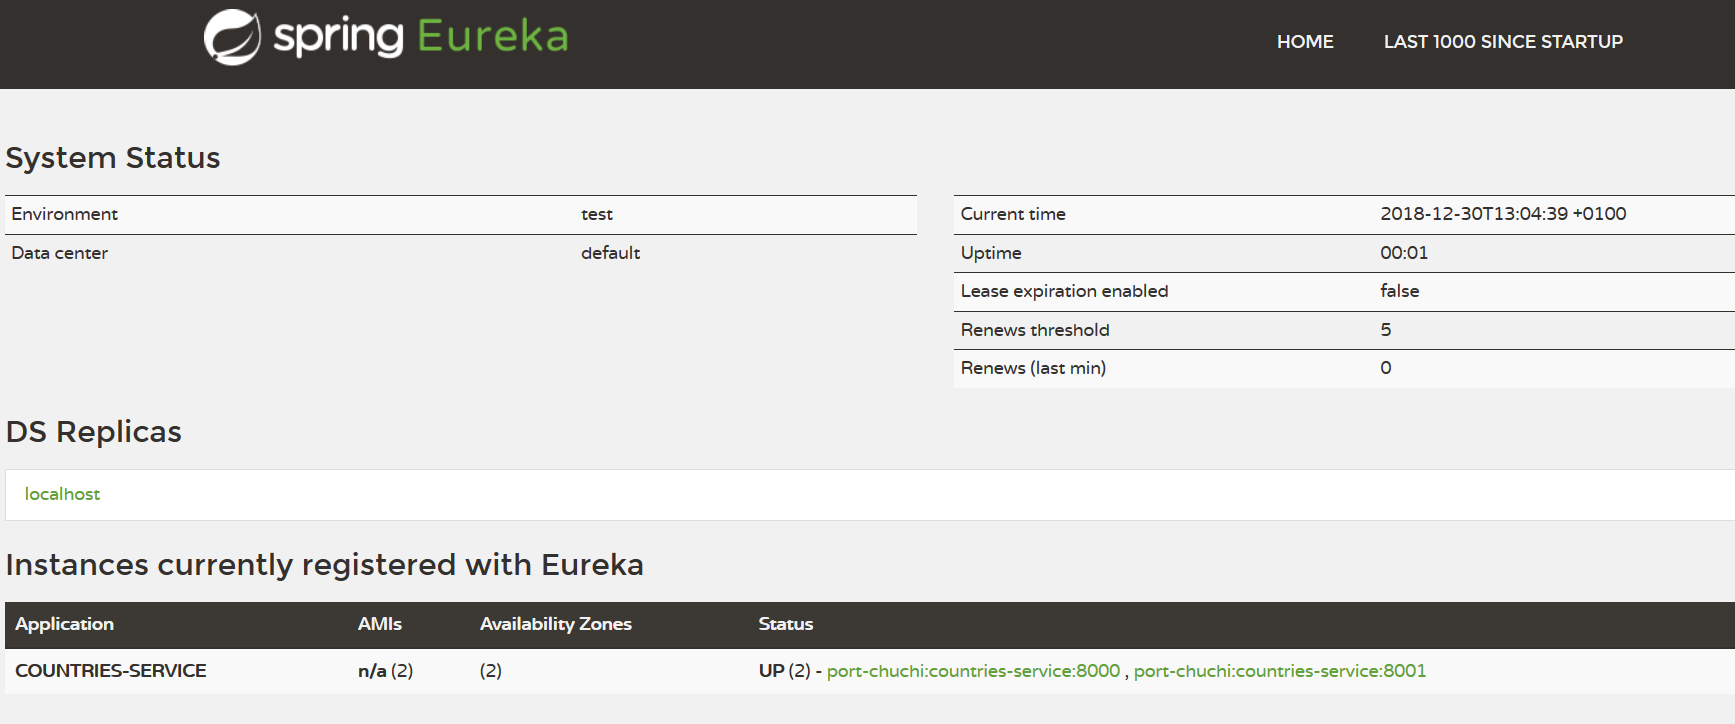
In the following screenshot, you can see how if we launch two instances of this program, one on port 8000 and one on port 8001, we can see how there have been various instances in the Eureka server. The name used for register is the name of the application as declared in the variable spring.application.name of file application.properties file.
Thus, we see that the application countries-service has two instances, both raised in the host port-chuchi — one on port 8000 and one on port 8001.
 My computer is called
 port-chuchi
This simple application will use an H2 database for data persistence, and I only have a simple table called countries, which we will access through JPA. The table structure is defined incom.profesorp.countriesservice.entities.Countries.java
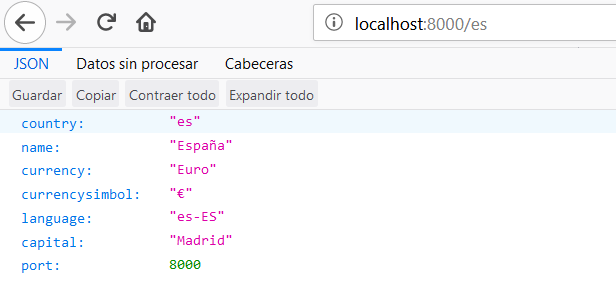
In the class CapitalsServiceControllerthe following entry points are defined.
1. GET request. / {country}
Receive : Country code. ( 'it is', 'eu', 'in' ....)
Return: Object of type CapitalsBean
2. GET request. / time/{time}
Sets the time that the input / {country} pause before returning the result.
The 'capitals-service' Microservice
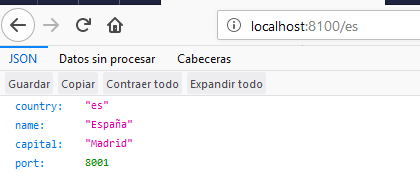
This service calls the above service to request all the data on one country. It shows only the capital, the country, and the port of service to which the call is made.
We need to have the following starters:
- Eureka Discovery
- Feign
- Lombok
- Web
First, as in the previous service in the file application.properties will have the following content:
spring.application.name = capitals-service
eureka.client.serviceUrl.defaultZone = http://localhost:8761/eureka
server.port = 8100
That is, we define the application name, then specify where the Eureka server is and where it must register, and, finally, the port where you will hear the program.
Using RestTemplate
To make a RESTful request, countries-services uses the class RestTemplate from the org.springframework.web.client package.
@GetMapping("/template/{country}")
public CapitalsBean getCountryUsingRestTemplate(@PathVariable String country) {
    Map<String, String> uriVariables = new HashMap<>();
    uriVariables.put("country", country);
    ResponseEntity<CapitalsBean> responseEntity = new RestTemplate().getForEntity(
            "http://localhost:8000/{country}",
            CapitalsBean.class,
            uriVariables );
    CapitalsBean response = responseEntity.getBody();
    return response;
}
As seen, simply put the variable we will send on the request into one hashmap, which, in this case, is only the country. Then it creates an object, ResponseEntity, calling at the static function RestTemplate.getForEntity(), passing as parameters, the URL, the class where the response should be stored, and the variables sent in the request.
Then we capture the object CapitalsBean that we use in the Body object of ResponseEntity.
But, using this method has one problem: we have written the URL where the different instances of microservice are located in our program. We also need to write a lot of code to make a simple call.
Simple Request Using Feign
A more elegant way to do that would call using Feign. Feign is a tool for Spring that allows us to make calls using declarative functions.
To use Feign, we must include the label @EnableFeignClients in our class. In this example, we put it in classCapitalsServiceApplication
@SpringBootApplication
@EnableFeignClients("com.profesorp.capitalsservice")
public class CapitalsServiceApplication {
    public static void main(String[] args) {
        SpringApplication.run(CapitalsServiceApplication.class, args);
    }
}
If you do not pass any parameters to the tag @EnableFeignClients, look for Feign's client in your main package. If we put a value, only look for clients in the sent package. So, in the example, just look in the packagecom.profesorp.capitalsservice
Now we can define the client feing with interfaceCapitalsServiceProxy
@FeignClient(name="simpleFeign",url="http://localhost:8000/")
public interface CapitalsServiceProxySimple {
    @GetMapping("/{country}")
    public CapitalsBean getCountry(@PathVariable("country") String country);
}
At first, the class is labeled with @FeignClient, specifying the URL where the server is located and that it must call. Pay attention to the fact that we only write the hostname and port (localhost:8000). The parameter name must be set but its content is not important.
Then we define the different entry points that we have available. In our case, there is only one defined, but we could include the call to /time/{time}.
To use this client, we simply put this code in our program:
@Autowired
private CapitalsServiceProxySimple simpleProxy;
@GetMapping("/feign/{country}")
public CapitalsBean getCountryUsingFeign(@PathVariable String country) {
    CapitalsBean response = simpleProxy.getCountry(country);
    return response;
}
Spring injects the variable CapitalsServiceProxySimple and then calls the function getCountry().
Much cleaner, right ? Assuming that our REST server has many entry points we would save a lot of boilerplate code.
But, we still have the problem that the address server is written in our code which makes it impossible to reach different instances of the same service and our microservice will not be truly scalable.
Make a Feign Request Using the Eureka Server
To solve this problem, instead of putting in the server address, we will put in the name of the application and Spring Boot will call the Eureka server, asking for the address where that service is located.
To do so, we create a Feign interface as follows:
@FeignClient(name="countries-service")
public interface CapitalsServiceProxy {
    @GetMapping("/{country}")
    public CapitalsBean getCountry(@PathVariable("country") String country);
}
As you can see, we did not specify the address of the service, but simply put the name. In this case, countries-service is as recorded in the Eureka application server.
This will be done to one instance and then to another sequentially. So that the first request will go to port 8000 and the next to port 8001.
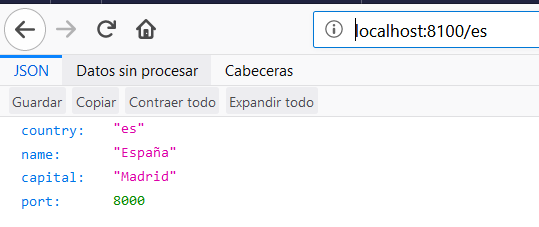
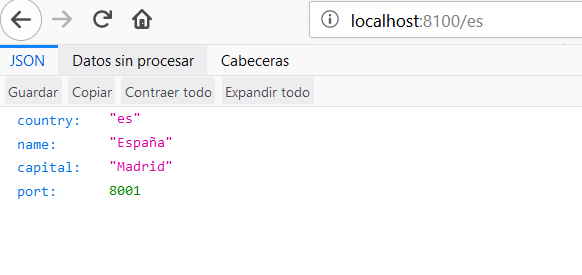
Thus, our application will use all service instances automatically.
Setting Up RIBBON
Feign is using the package Ribbon underneath the hood, and, this is really what makes the requests. Ribbon, by default, uses the rule RoundRobinRule. This rule will sequentially choose each of the instances Eureka shows that you have raised, independent of the time it costs each instance to respond
If you wish to use any of the other three available rules, or even define a new rule, then we have to create a class of configuration for Ribbon, as follows:
import org.springframework.context.annotation.Bean;
import com.netflix.loadbalancer.IPing;
import com.netflix.loadbalancer.IRule;
import com.netflix.loadbalancer.NoOpPing;
import com.netflix.loadbalancer.WeightedResponseTimeRule;
public class RibbonConfiguration {
     @Bean
     public IPing ribbonPing() {
            return new NoOpPing();
     }
     @Bean
     public IRule ribbonRule() {
            return new WeightedResponseTimeRule();
     }
}
In the function ribbonRule(), we return the object WeightedResponseTimeRuleif we want the balancing logic to take into account the response time of each instance.
Now, to specify that we want to use this class to configure Ribbon, add the label:
@RibbonClient(name="countries-service", configuration = RibbonConfiguration.class)to our class CapitalsServiceApplication
@SpringBootApplication
@EnableFeignClients
@RibbonClient(name="countries-service", configuration = RibbonConfiguration.class)
public class CapitalsServiceApplication {
....
}
To check how this is performing, we establish a pause of 10 milliseconds to the server listening on port 8001, and 300 milliseconds to the server listening on port 8000 using the call /time/{time} of service countries-service
> curl localhost:8001/time/10
> curl localhost:8000/time/300
Assuming that we are working on Linux, we can use the following Bash code to generate 100 requests.
COUNTER=0; while [ $COUNTER -lt 100 ]; do
    curl http://localhost:8100/es
    let COUNTER=COUNTER+1
done
After a while, we see the requests that have been made to each port by calling http://localhost:8100/puertos.
 As you can see, there are many more requests to port 8001 to port 8000, which is normal considering that port 8000 has a delay of 300 milliseconds, while the 8001 only received 10.
To end this article, I'll say that Ribbon can be used without Feign by directly using RestTemplate but the study of that case I'll leave for another time.
In addition, for testing and balancing, I've used Docker; the source code for which can be found on my GitHub. You'll see these lines in the application.propertiesfile of the countries-serviceproject:
eureka.client.serviceUrl.defaultZone:http://eurekaserver:8761/eureka
server.port=${SERVER_PORT}
This is also used to dynamically define when the container is released to Docker, with the environment variable SERVER_PORT (the port where each instance must listen).
Opinions expressed by DZone contributors are their own.

Comments