Set Up Spring Data Elasticsearch With Basic Authentication
Guide to configure SSL communication with Elasticsearch via Spring Data Elasticsearch. Additionally, the communication is secured with BASIC authentication.
Join the DZone community and get the full member experience.
Join For FreeRecently, I wrote the Introduction to Spring Data Elasticsearch 5.5 article about Spring Data Elasticsearch usage as a NoSQL database. The article covered just the setup of the unsecured Elasticsearch. However, we need to be able to connect to the secured Elasticsearch as well. Let's follow the previous article and see the needed changes to run and connect to the secured Elasticsearch.
In This Article, You Will Learn
- How to create a secure Elasticsearch
- How to connect to the secured Elasticsearch with Spring Data Elasticsearch
- How to change the password in Elasticsearch
Set Up Secured Elasticsearch
The setup for creating a secure Elasticsearch is pretty similar to the steps in the already-mentioned article. The technologies used in this article, compliant with the compatibility matrix, are:
- Spring Data Elasticsearch 5.5.4
- Spring Boot 3.5.6
- Elasticsearch 8.18.6
The secured Elasticsearch can be created in the following steps.
Create Custom Network
docker network create sat-elk-netRun Secured Elasticsearch Docker Image
docker run -d \
    --name sat-elasticsearch-secured \
    --net sat-elk-net \
    -p 9200:9200 -p 9300:9300 \
    -e "discovery.type=single-node" \
    -e "ELASTIC_PASSWORD=elastic" \
    elasticsearch:8.15.6
The key differences here are:
- omitted
xpack.security.enabled=false - is the usage of
ELASTIC_PASSWORDargument with the desired password value instead ofxpack.security.enabledargument.
Verify Connection
As usual, we can verify the running Elasticsearch with curl command. This time, we need to use the HTTPS protocol and provide these additional parameters:
-uattribute for specifying the user credential (the password has to be the same as above in the docker creation).-kattribute for enabling insured SSL. It usually means accepting a self-signed server certificate.
curl -k -u elastic:elastic https://localhost:9200/The expected JSON response should look like this:
{
  "name" : "474b808d62d1",
  "cluster_name" : "docker-cluster",
  "cluster_uuid" : "W3Jtfr-oRr2MRQGRBx39fQ",
  "version" : {
    "number" : "8.18.6",
    "build_flavor" : "default",
    "build_type" : "docker",
    "build_hash" : "970b6c3ae853753ae66a12c1208c85a3c9728d92",
    "build_date" : "2025-08-25T22:05:47.180118464Z",
    "build_snapshot" : false,
    "lucene_version" : "9.12.1",
    "minimum_wire_compatibility_version" : "7.17.0",
    "minimum_index_compatibility_version" : "7.0.0"
  },
  "tagline" : "You Know, for Search"
}
As you can see, there's no difference compared to the unsecured Elasticsearch.
Note: when we try the HTTP protocol instead of HTTPS, we get this error:
[root]# curl -k -u elastic:elastic http://localhost:9200
curl: (52) Empty reply from server
Spring Data Elasticsearch
Adding Spring Data Elasticsearch to our application is really straightforward. Basically, we need to add only these parts:
- Add
spring-boot-starter-data-elasticsearchmaven dependency. - Add configuration in
application.yaml. - Map the configuration properties from
application.yamltoElasticsearchPropertiesclass. - Extend
ElasticsearchConfigurationclass to define the connection to the secured Elasticsearch.
Maven Dependency
First, we need to add spring-boot-starter-data-elasticsearch dependency in our Maven project (pom.xml) first. The latest available version can be found in the Maven Central repository.
<dependency>
    <groupId>org.springframework.boot</groupId>
    <artifactId>spring-boot-starter-data-elasticsearch</artifactId>
    <version>3.5.6</version>
</dependency>
YAML Configuration
Then, we need to have an application.yaml configuration file with the security enabled and provided user credentials for connecting to the Elasticsearch.
elk:
  host: localhost
  security-enabled: true
  username: elastic
  password: elastic
Mapping Properties
Also, we have the ElasticsearchProperties class for mapping the application.yaml configuration file into Java.
@Configuration
@ConfigurationProperties( prefix = "elk" )
@Getter
@Setter
public class ElasticsearchProperties {

    private boolean securityEnabled;
    private String host;
    private String username;
    private String password;

}
Spring Configuration
The most important part of the client setup for the secured connection is located in the Spring configuration. This is represented by the ElasticsearchSecuredConfig configuration class defined as:
- The configuration is effective only when the security is enabled in our configuration (line 2), see
elk.security-enabled=true(line 3 in theapplication.yaml). - The application configuration is injected into
elkProperties(line 7). - A new bean for the
ClientConfigurationclass is defined (lines 10-14) with the desired configuration. The key points for the secured connection are:- Using
NoopHostnameVerifier(line 14) andTrustAllStrategy(line 22) to establish an SSL connection to Elasticsearch in the DEV environment (e.g., with a self-signed certificate). - Provide the user credentials for the BASIC authentication (line 15).
- Using
@Configuration
@ConditionalOnProperty(name = "elk.security-enabled", havingValue = "true")
@RequiredArgsConstructor
@Slf4j
public class ElasticsearchSecuredConfig extends ElasticsearchConfiguration {

	@Getter
	private final ElasticsearchProperties elkProperties;

	@Override
	public ClientConfiguration clientConfiguration() {
		return ClientConfiguration.builder()
				.connectedTo(elkProperties.getHost())
				.usingSsl(createSSLContext(), new NoopHostnameVerifier() )
				.withBasicAuth(elkProperties.getUsername(), elkProperties.getPassword())
				.build();
	}

    private SSLContext createSSLContext() {
        try {
			return org.apache.http.ssl.SSLContexts.custom()
					.loadTrustMaterial(new TrustAllStrategy())
					.build();
        } catch (Exception e) {
            log.error("cannot create SSLContext", e);
        }
        return null;
    }

}
Verify Connection
When Elasticsearch is running, we should be able to start our application successfully and see an output like this:
. ____ _ __ _ _
/\\ / ___'_ __ _ _(_)_ __ __ _ \ \ \ \
( ( )\___ | '_ | '_| | '_ \/ _` | \ \ \ \
\\/ ___)| |_)| | | | | || (_| | ) ) ) )
' |____| .__|_| |_|_| |_\__, | / / / /
=========|_|==============|___/=/_/_/_/
:: Spring Boot :: (v3.5.6)
2025-10-17T09:30:06.827+02:00 INFO 2584 --- [sat-elk] [ restartedMain] com.github.aha.sat.elk.ElkApplication : Starting ElkApplication using Java 23 with PID 2584 (<spring-advanced-training>\sat-elk\target\classes started by hh310 in <spring-advanced-training>\sat-elk)
2025-10-17T09:30:06.832+02:00 INFO 2584 --- [sat-elk] [ restartedMain] com.github.aha.sat.elk.ElkApplication : No active profile set, falling back to 1 default profile: "default"
2025-10-17T09:30:06.905+02:00 INFO 2584 --- [sat-elk] [ restartedMain] .e.DevToolsPropertyDefaultsPostProcessor : Devtools property defaults active! Set 'spring.devtools.add-properties' to 'false' to disable
2025-10-17T09:30:06.906+02:00 INFO 2584 --- [sat-elk] [ restartedMain] .e.DevToolsPropertyDefaultsPostProcessor : For additional web related logging consider setting the 'logging.level.web' property to 'DEBUG'
2025-10-17T09:30:07.667+02:00 INFO 2584 --- [sat-elk] [ restartedMain] .s.d.r.c.RepositoryConfigurationDelegate : Bootstrapping Spring Data Elasticsearch repositories in DEFAULT mode.
2025-10-17T09:30:07.725+02:00 INFO 2584 --- [sat-elk] [ restartedMain] .s.d.r.c.RepositoryConfigurationDelegate : Finished Spring Data repository scanning in 50 ms. Found 1 Elasticsearch repository interface.
2025-10-17T09:30:08.213+02:00 INFO 2584 --- [sat-elk] [ restartedMain] o.s.b.w.embedded.tomcat.TomcatWebServer : Tomcat initialized with port 8080 (http)
2025-10-17T09:30:08.231+02:00 INFO 2584 --- [sat-elk] [ restartedMain] o.apache.catalina.core.StandardService : Starting service [Tomcat]
2025-10-17T09:30:08.231+02:00 INFO 2584 --- [sat-elk] [ restartedMain] o.apache.catalina.core.StandardEngine : Starting Servlet engine: [Apache Tomcat/10.1.46]
2025-10-17T09:30:08.281+02:00 INFO 2584 --- [sat-elk] [ restartedMain] o.a.c.c.C.[Tomcat].[localhost].[/] : Initializing Spring embedded WebApplicationContext
2025-10-17T09:30:08.281+02:00 INFO 2584 --- [sat-elk] [ restartedMain] w.s.c.ServletWebServerApplicationContext : Root WebApplicationContext: initialization completed in 1375 ms
2025-10-17T09:30:09.025+02:00 INFO 2584 --- [sat-elk] [ restartedMain] o.s.b.d.a.OptionalLiveReloadServer : LiveReload server is running on port 35729
2025-10-17T09:30:10.015+02:00 INFO 2584 --- [sat-elk] [ restartedMain] o.s.b.w.embedded.tomcat.TomcatWebServer : Tomcat started on port 8080 (http) with context path '/'
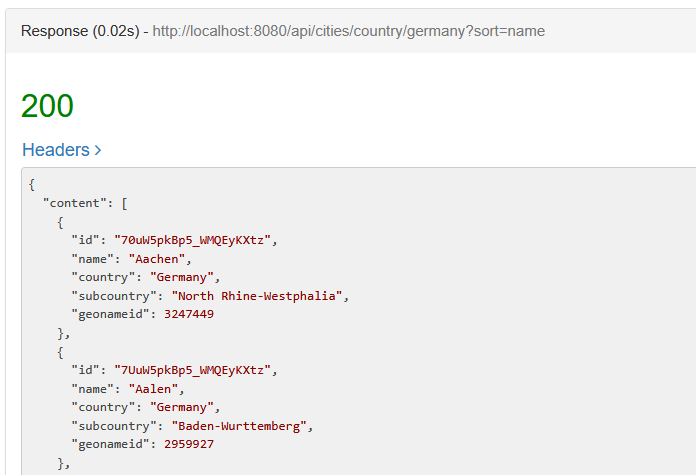
2025-10-17T09:30:10.021+02:00 INFO 2584 --- [sat-elk] [ restartedMain] com.github.aha.sat.elk.ElkApplication : Started ElkApplication in 3.717 seconds (process running for 5.049)Additionally, our setup can be double-checked with the REST call http://localhost:8080/api/cities/country/germany?sort=name. The response should look something like this:
Note: The implementation of the search is skipped here as there's no change compared to the previous article.
Changing Password in Elasticsearch
When we want to change the initially defined password for our elastic user, we can use elasticsearch-reset-password script available in the Docker container. The script can be triggered in an interactive mode for the elastic user (used by us for the authentication), like this:
docker exec -it <CONTAINER_ID> bash
cd bin
elasticsearch@b54fe76aa0a8:~/bin$ elasticsearch-reset-password -i -u elastic
After our confirmation, we are asked to enter the new password twice. The whole process has the output like this:
elasticsearch@474b808d62d1:~/bin$ elasticsearch-reset-password -i -u elastic
This tool will reset the password of the [elastic] user.
You will be prompted to enter the password.
Please confirm that you would like to continue [y/N]y


Enter password for [elastic]:
Re-enter password for [elastic]:
Password for the [elastic] user successfully reset.
Conclusion
This article started with the quick setup of Elasticsearch 8.18.6. Next, all configurations for the secured connection to the Elasticsearch were demonstrated. In the end, the change of the password in the Elasticsearch was explained.
The complete source code demonstrated above is available in my GitHub repository.
Opinions expressed by DZone contributors are their own.
Comments