Transit Gateway With Anypoint Platform
Here we will use the Mulesoft Anypoint platform to attach VPC to the AWS transit gateway to form a single network topology.
Join the DZone community and get the full member experience.
Join For FreeWhat Is AWS Transit Gateway?
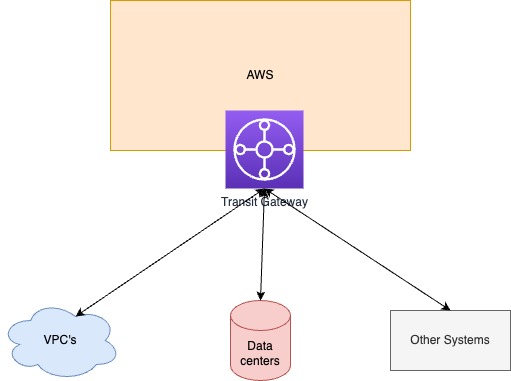
In simple terms, AWS Transit Gateway acts as a router in AWS, simplifying the network access between VPCs, on-premises data center, and third-party software.
Transit Gateway helps provide increased visibility and control over the network by effectively merging the organization’s cloud resources and on-premises data center into one network topology.
This simplicity of the Transit gateway makes it very useful in a scenario where you want to connect to multiple networks, and that is the reason we are going to see how to use MuleSoft with AWS Transit Gateway.
Important points to remember before we start doing setup for the same.
- You will need a licensing account for setting up the transit gateway.
- You can add multiple transit gateways to your Anypoint Platform organization limit, which depends on the number of network connection entitlements available to your account.
- No of entitlements can be confirmed from the Access Management module of the Anypoint platform or can connect with the MuleSoft support team.
- Attaching one Anypoint VPC to an AWS Transit Gateway uses one Anypoint VPN license.
- You can achieve inter-region VPC peering with the help of a Transit gateway, which normally is not possible with Cloudhub. Here you can put different Transit gateways in different regions and connect them to different VPCs to achieve VPC peering in a different region.
- It is also not possible to have direct connect and Anypoint VPN in one same Anypoint VPC, but with Transit gateway, you achieve it with a single Transit gateway.
We can use AWS Transit Gateway with MuleSoft by attaching Anypoint Virtual Private Cloud (VPC) to AWS Transit Gateway in our AWS account.
We are going to follow the below steps to achieve our goal.
- Create Transit Gateway in AWS.
- Create Resource Share in AWS.
- Configure Transit Gateway in Cloudhub.
- Attach VPC to the Transit Gateway in Cloudhub.
- Accept VPC attachment.
- Add Route.
Step 1: Create Transit Gateway in AWS.
- Login into your AWS console.
- Search for "VPC" in the search box at the top.

- In the Region selector, choose the Region under which you have your VPCs; in this case, it is Oregon.
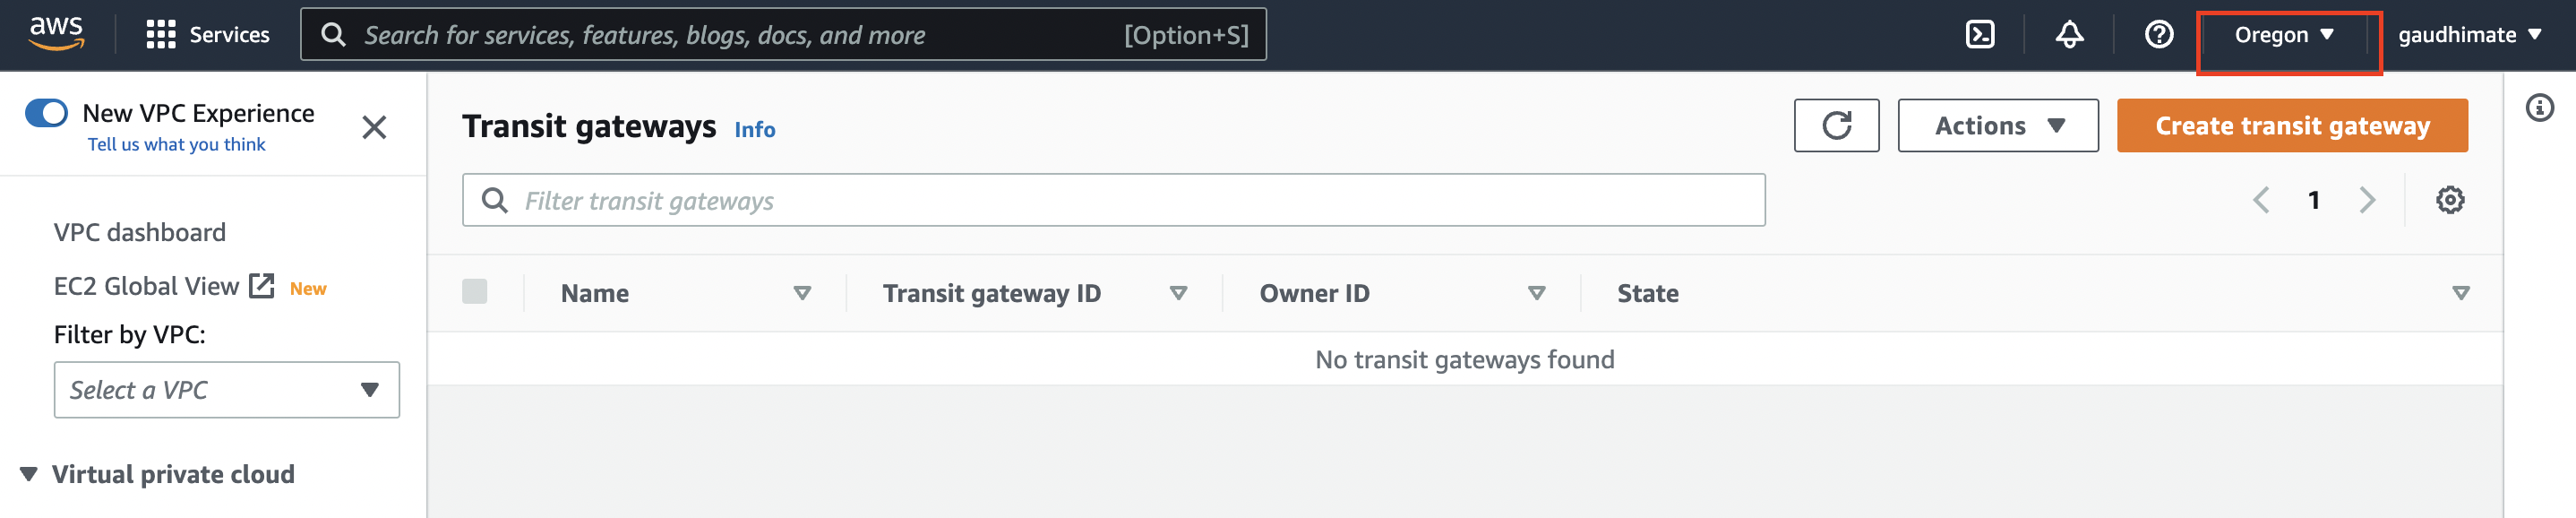
On the navigation pane, choose Transit Gateways. and click on Create transit gateway.
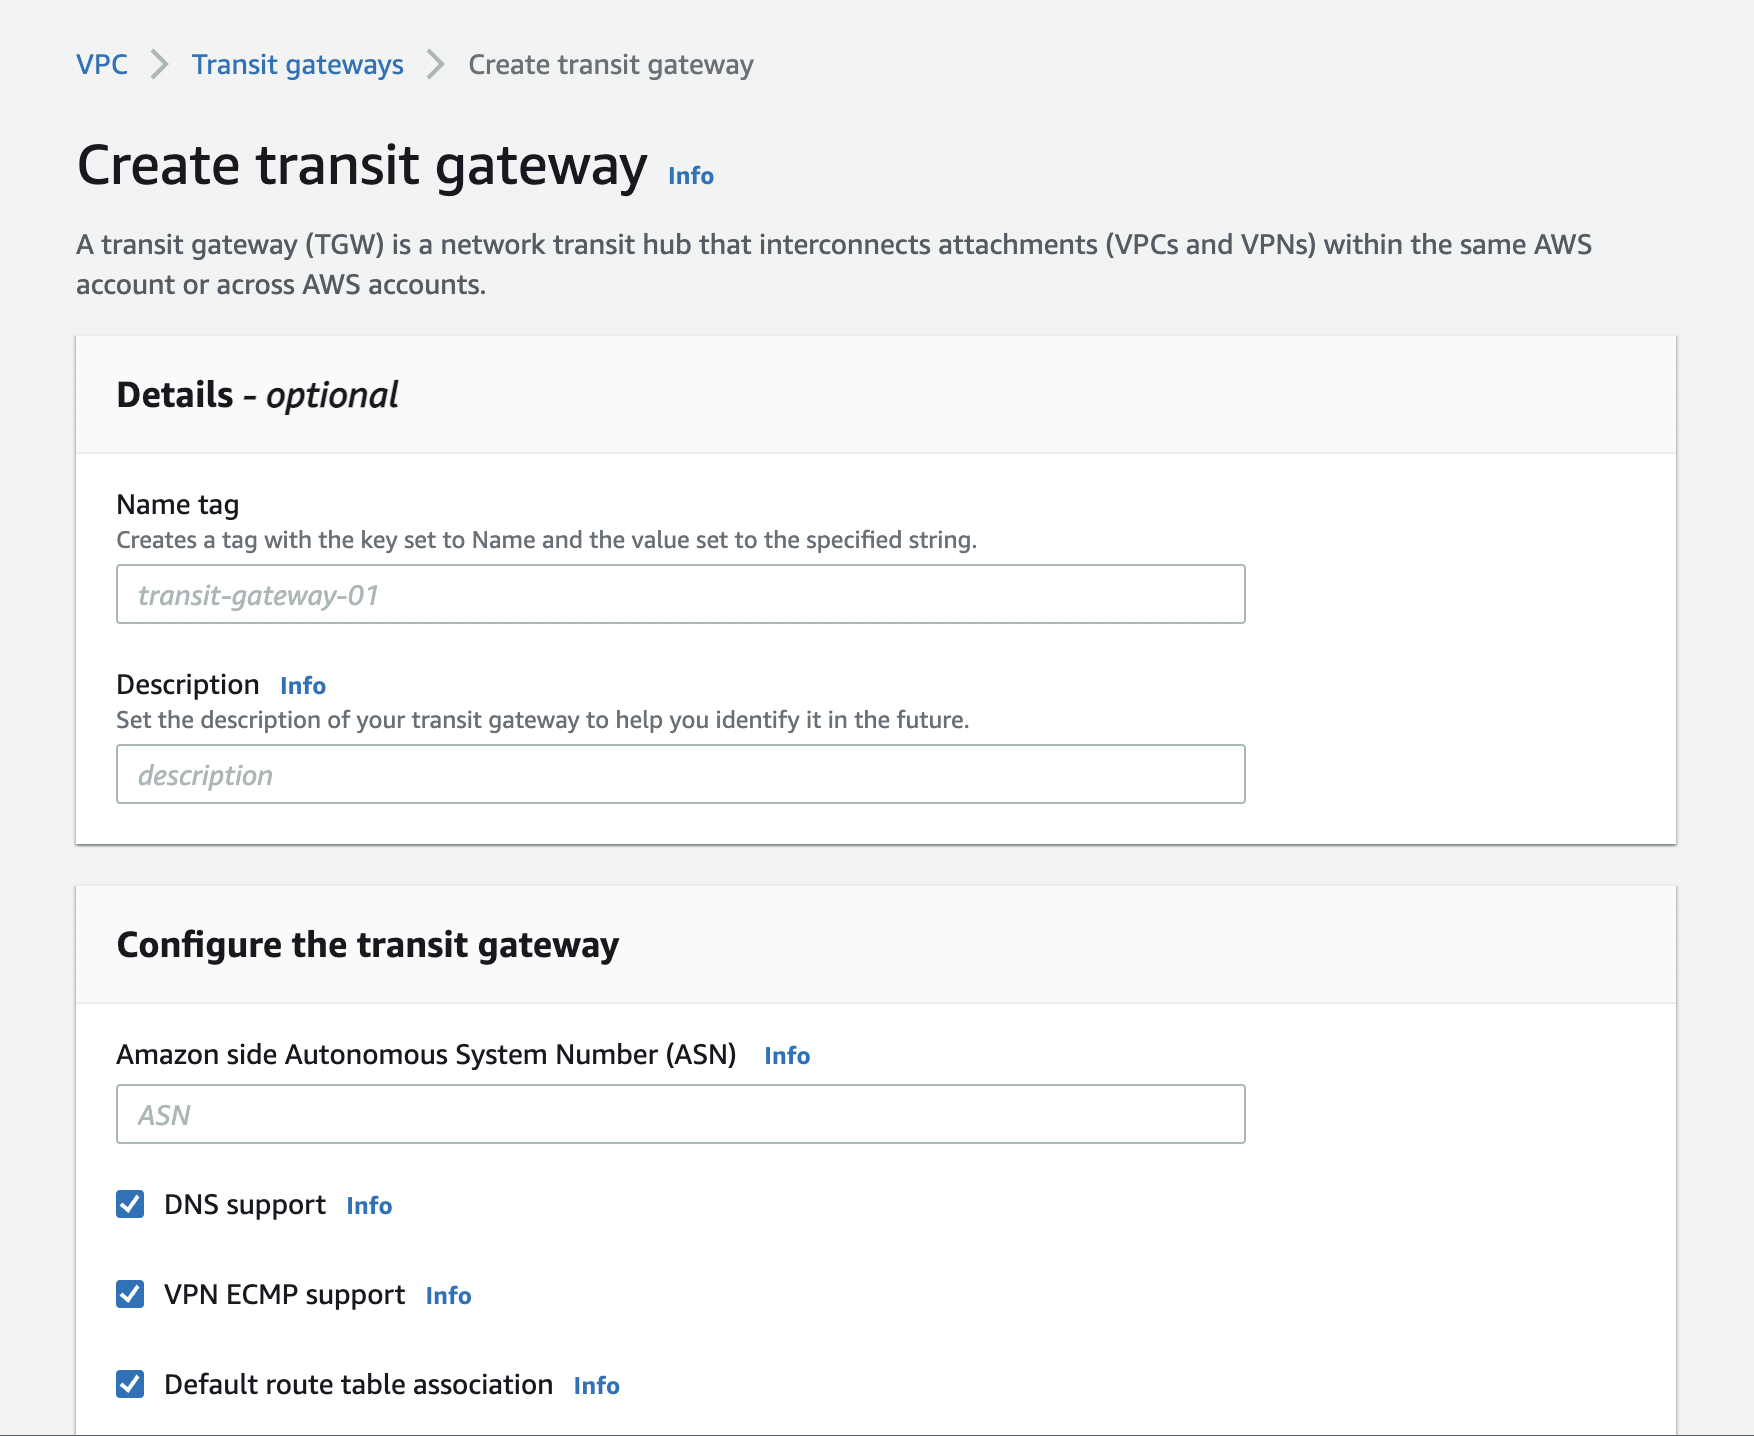
Now we need to fill out the form to create the Transit Gateway as below.
Name tag -> Name for the transit gateway, e.g., transit-gateway-demo
Description -> Description for the transit gateway, e.g., Demo for Transit Gateway
Amazon side Autonomous System Number (ASN) -> This will be a private ASN for your transit gateway. This should be the ASN for the AWS side of a Border Gateway Protocol (BGP) session. If you don't assign any value, a default value will be assigned.
- The range is from 64512 to 65534 for 16-bit ASNs.
- The range is from 4200000000 to 4294967294 for 32-bit ASNs.
If you have a multi-region deployment, then better to use a unique ASN for each of your transit gateways.
CIDR block -> CIDR block for Transit Gateway, e.g. 10.0.0.0/24
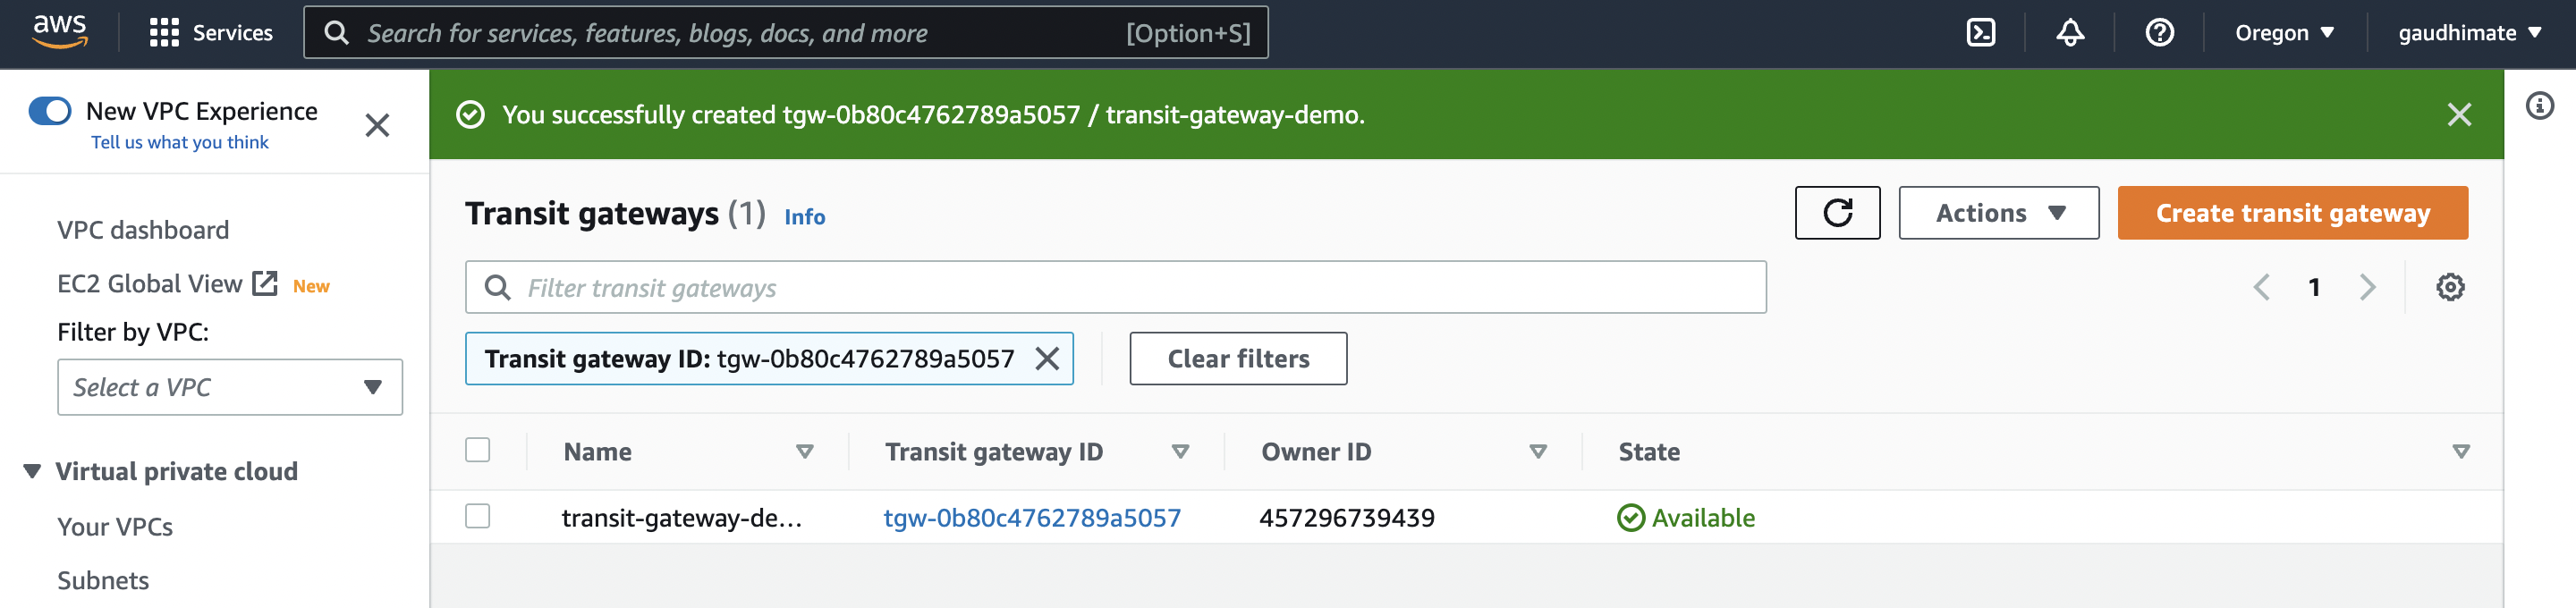
Choose to Create a transit gateway. When the gateway is created, the initial state of the transit gateway is Pending.
- Once Transit Gateway is available for use, it will be in "Available" status.
Step 2: Create Resource Share in AWS.
- Search for "Resource access manager" and go to Resource Shares -> Create resource share
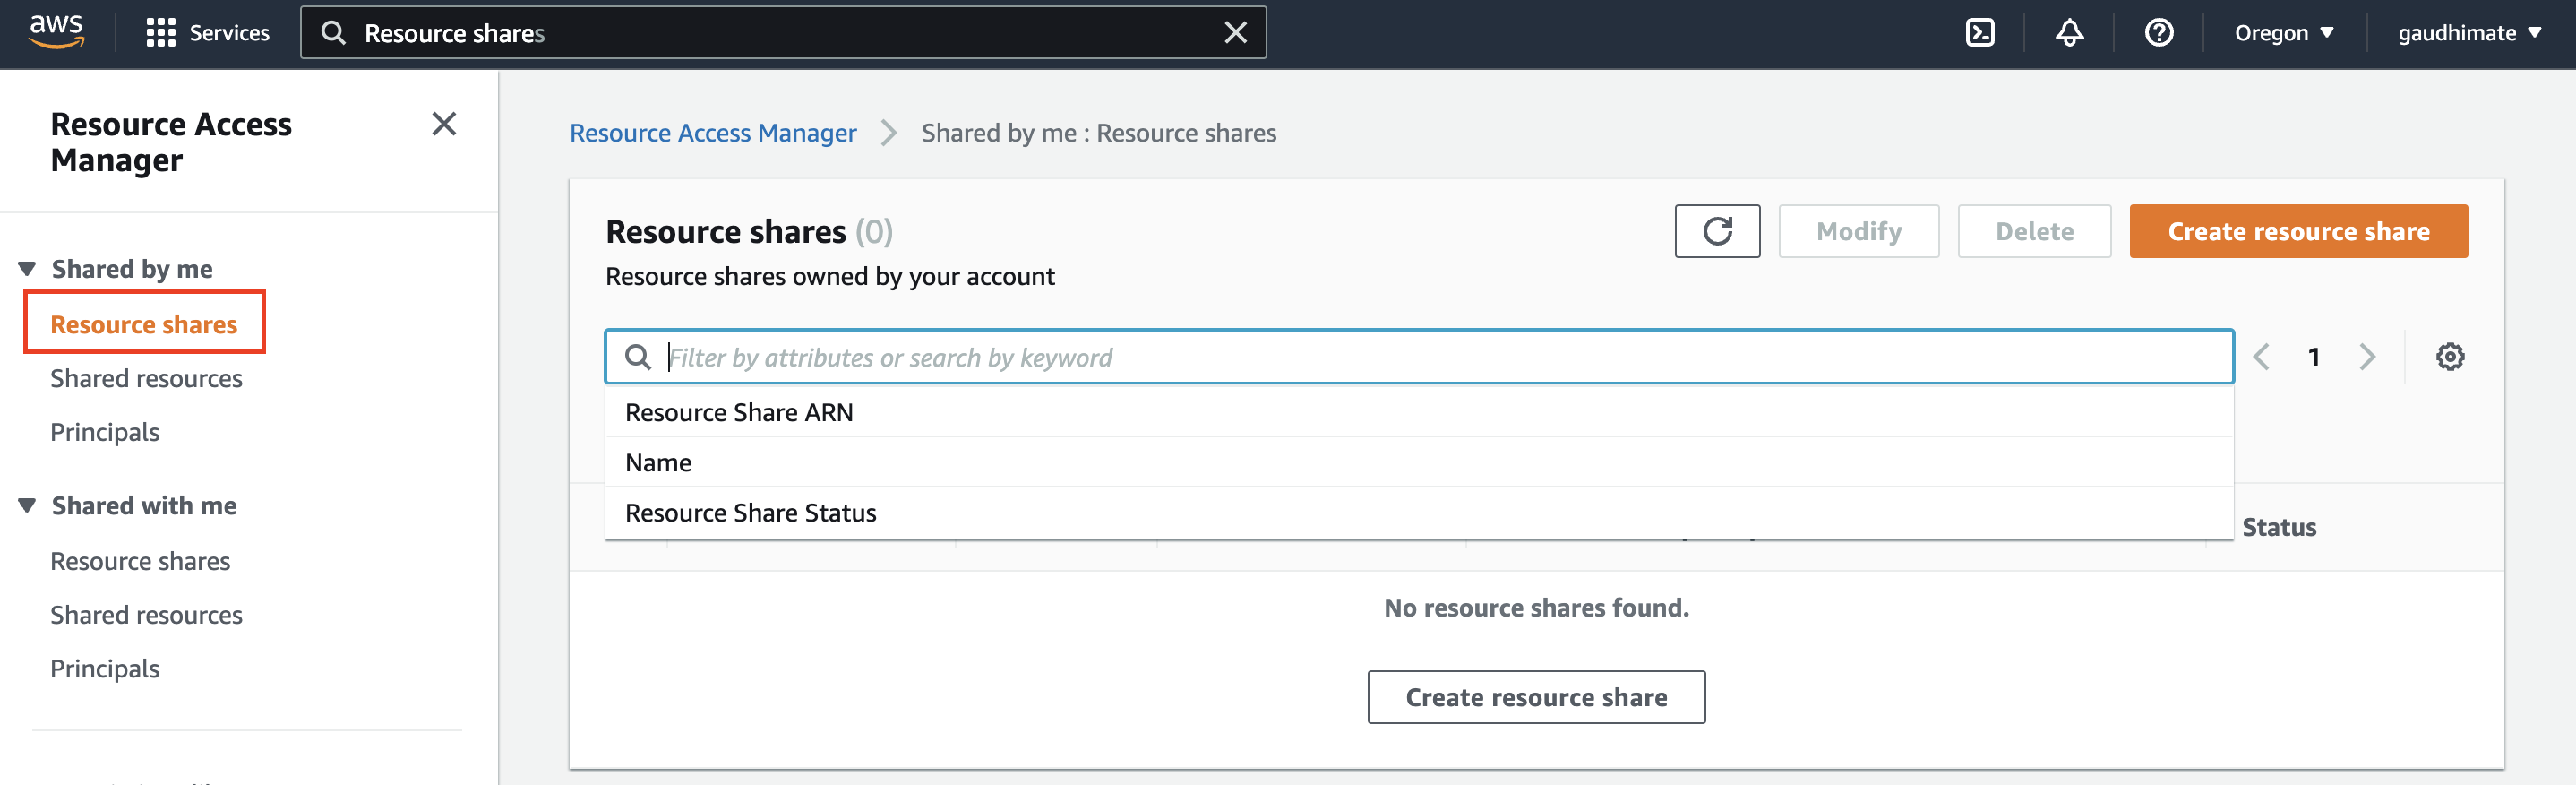
- Fill out the form for Resource sharing.
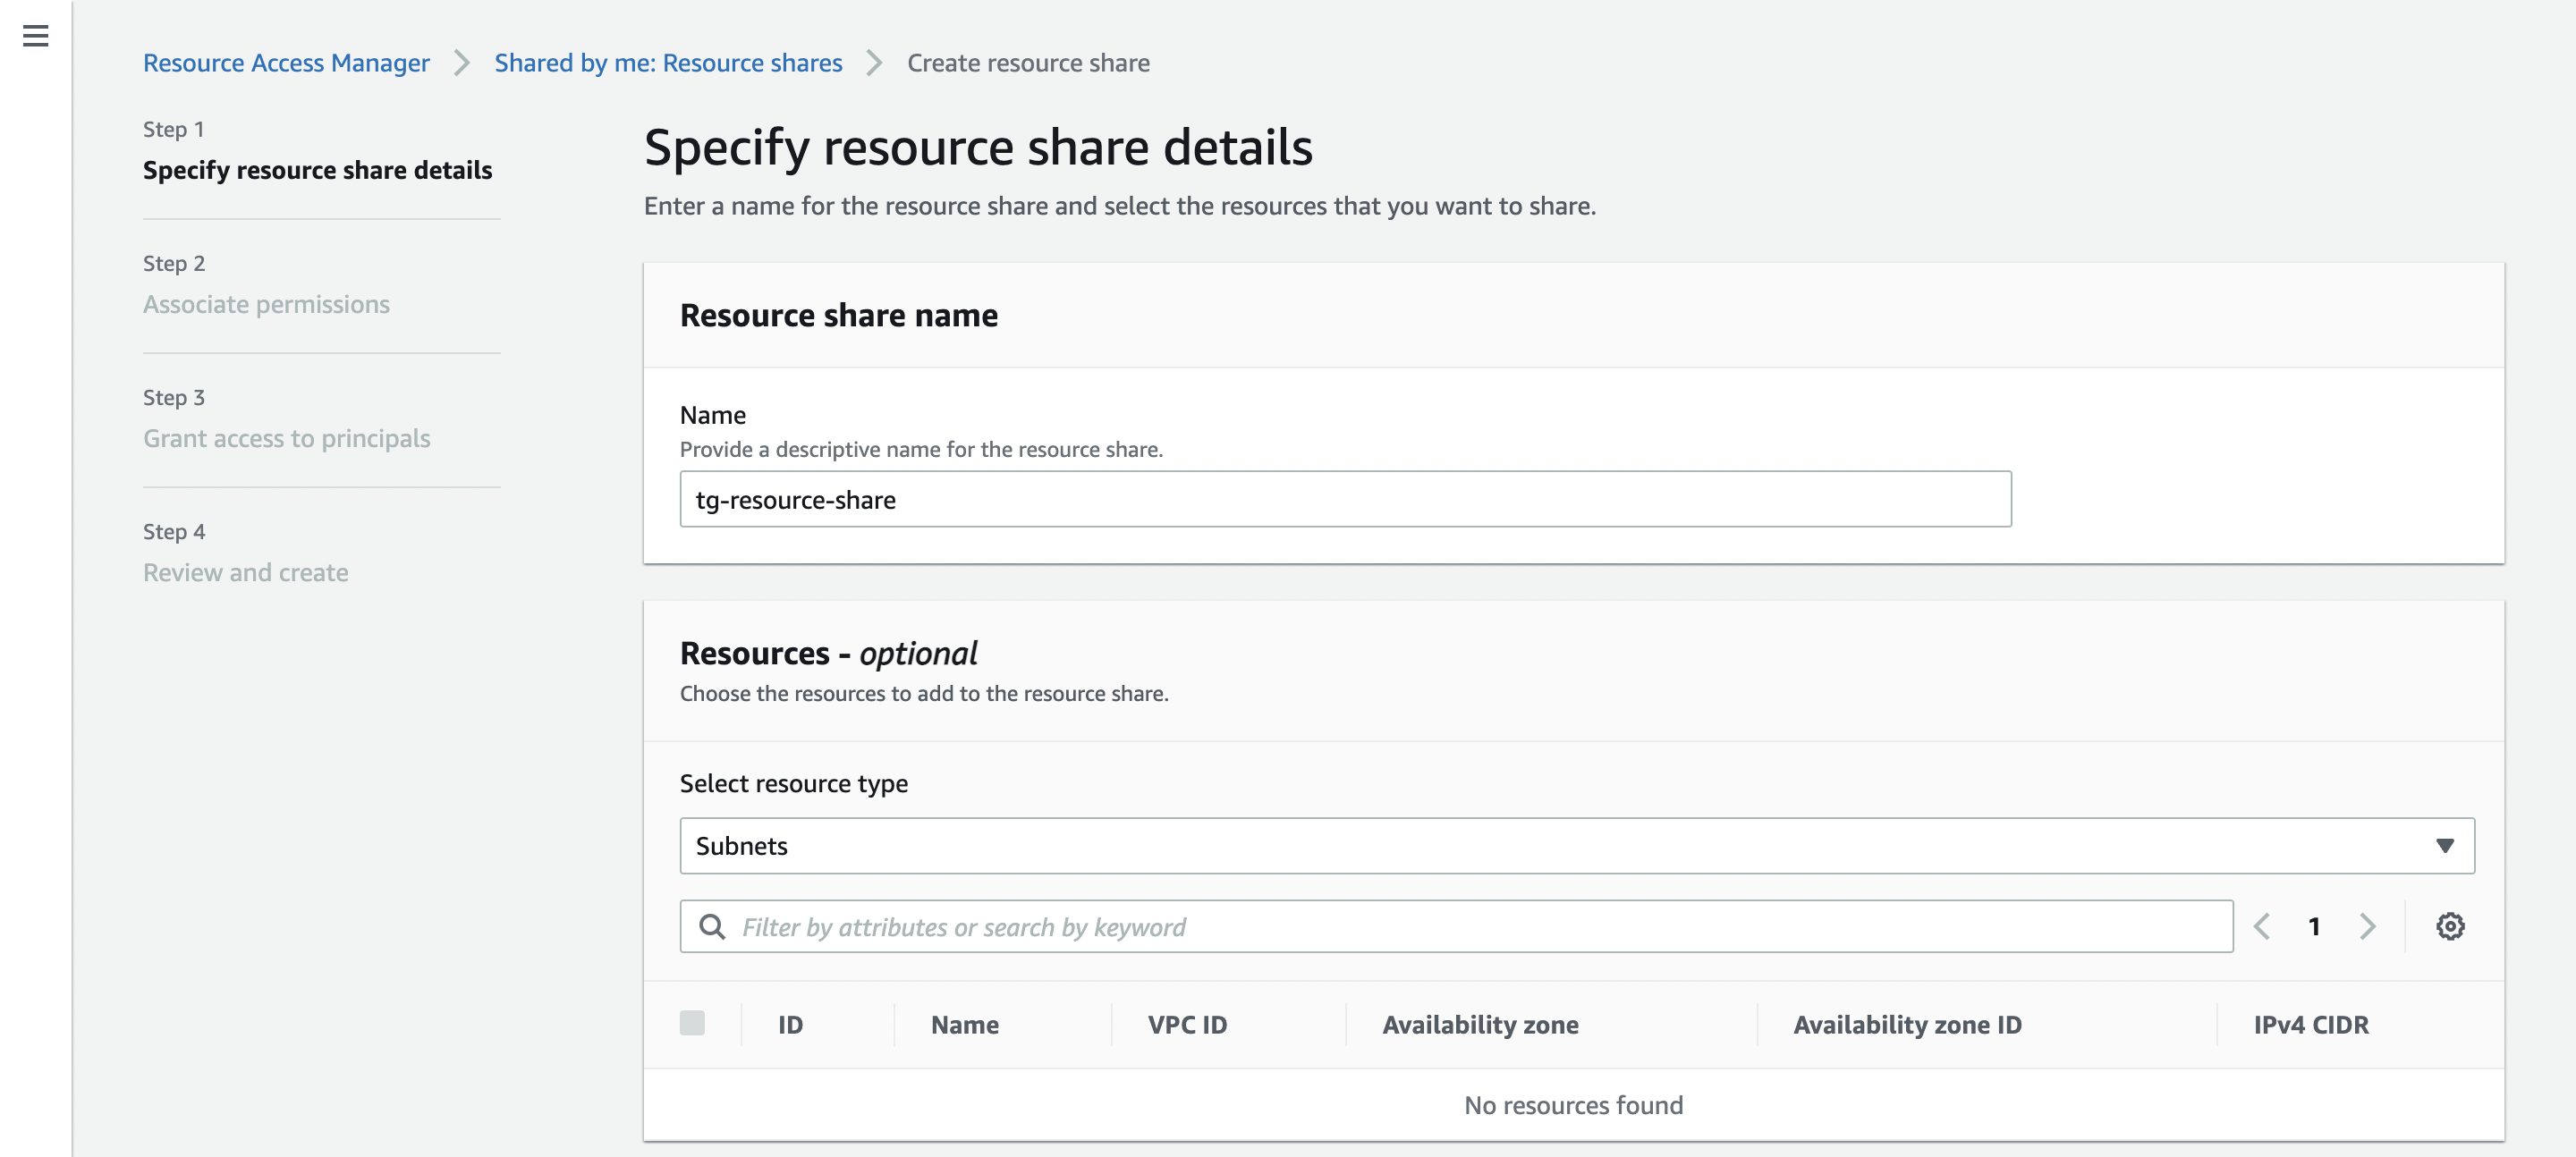
Resource share name -> tg-resource-share
Resource -> Select the resource type as "Transit Gateways" and select the transit gateway that we created in step 1.
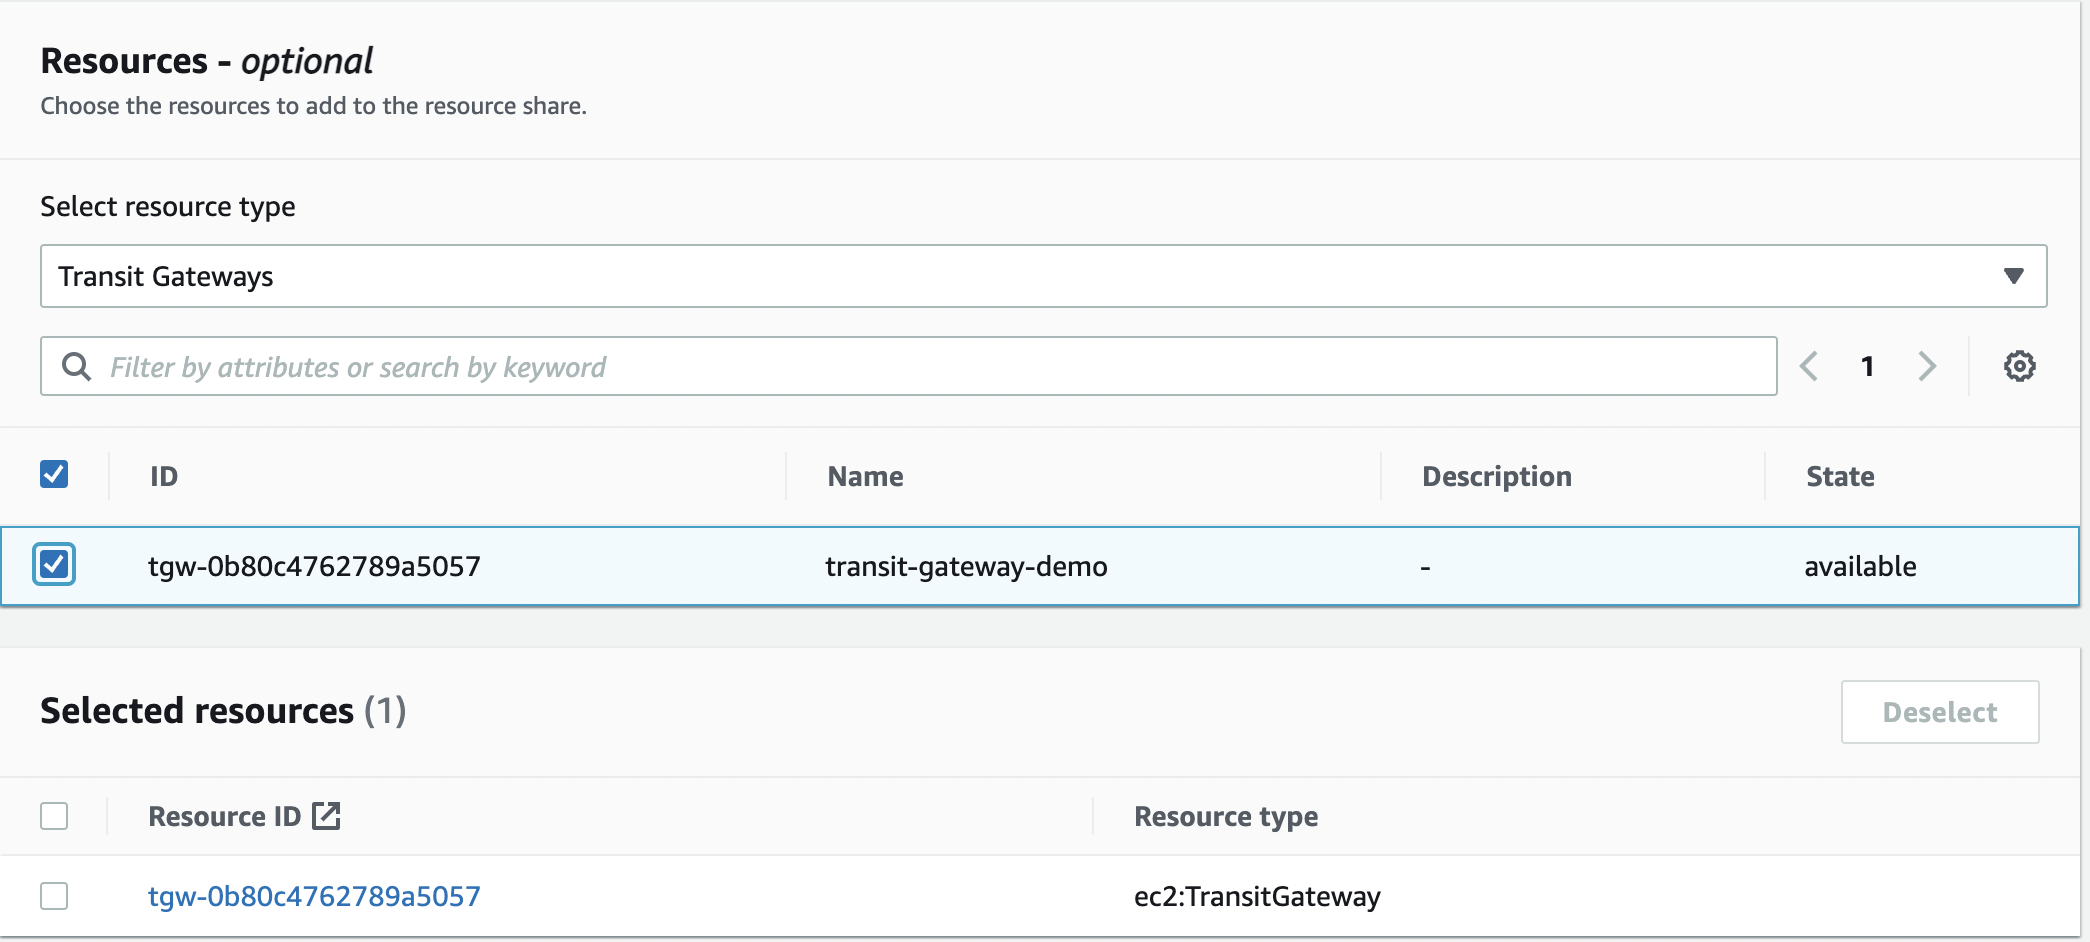
- Click on Next, and choose proper permissions and principals who can access the shared resource.
- Review and then click on "Create share resource."
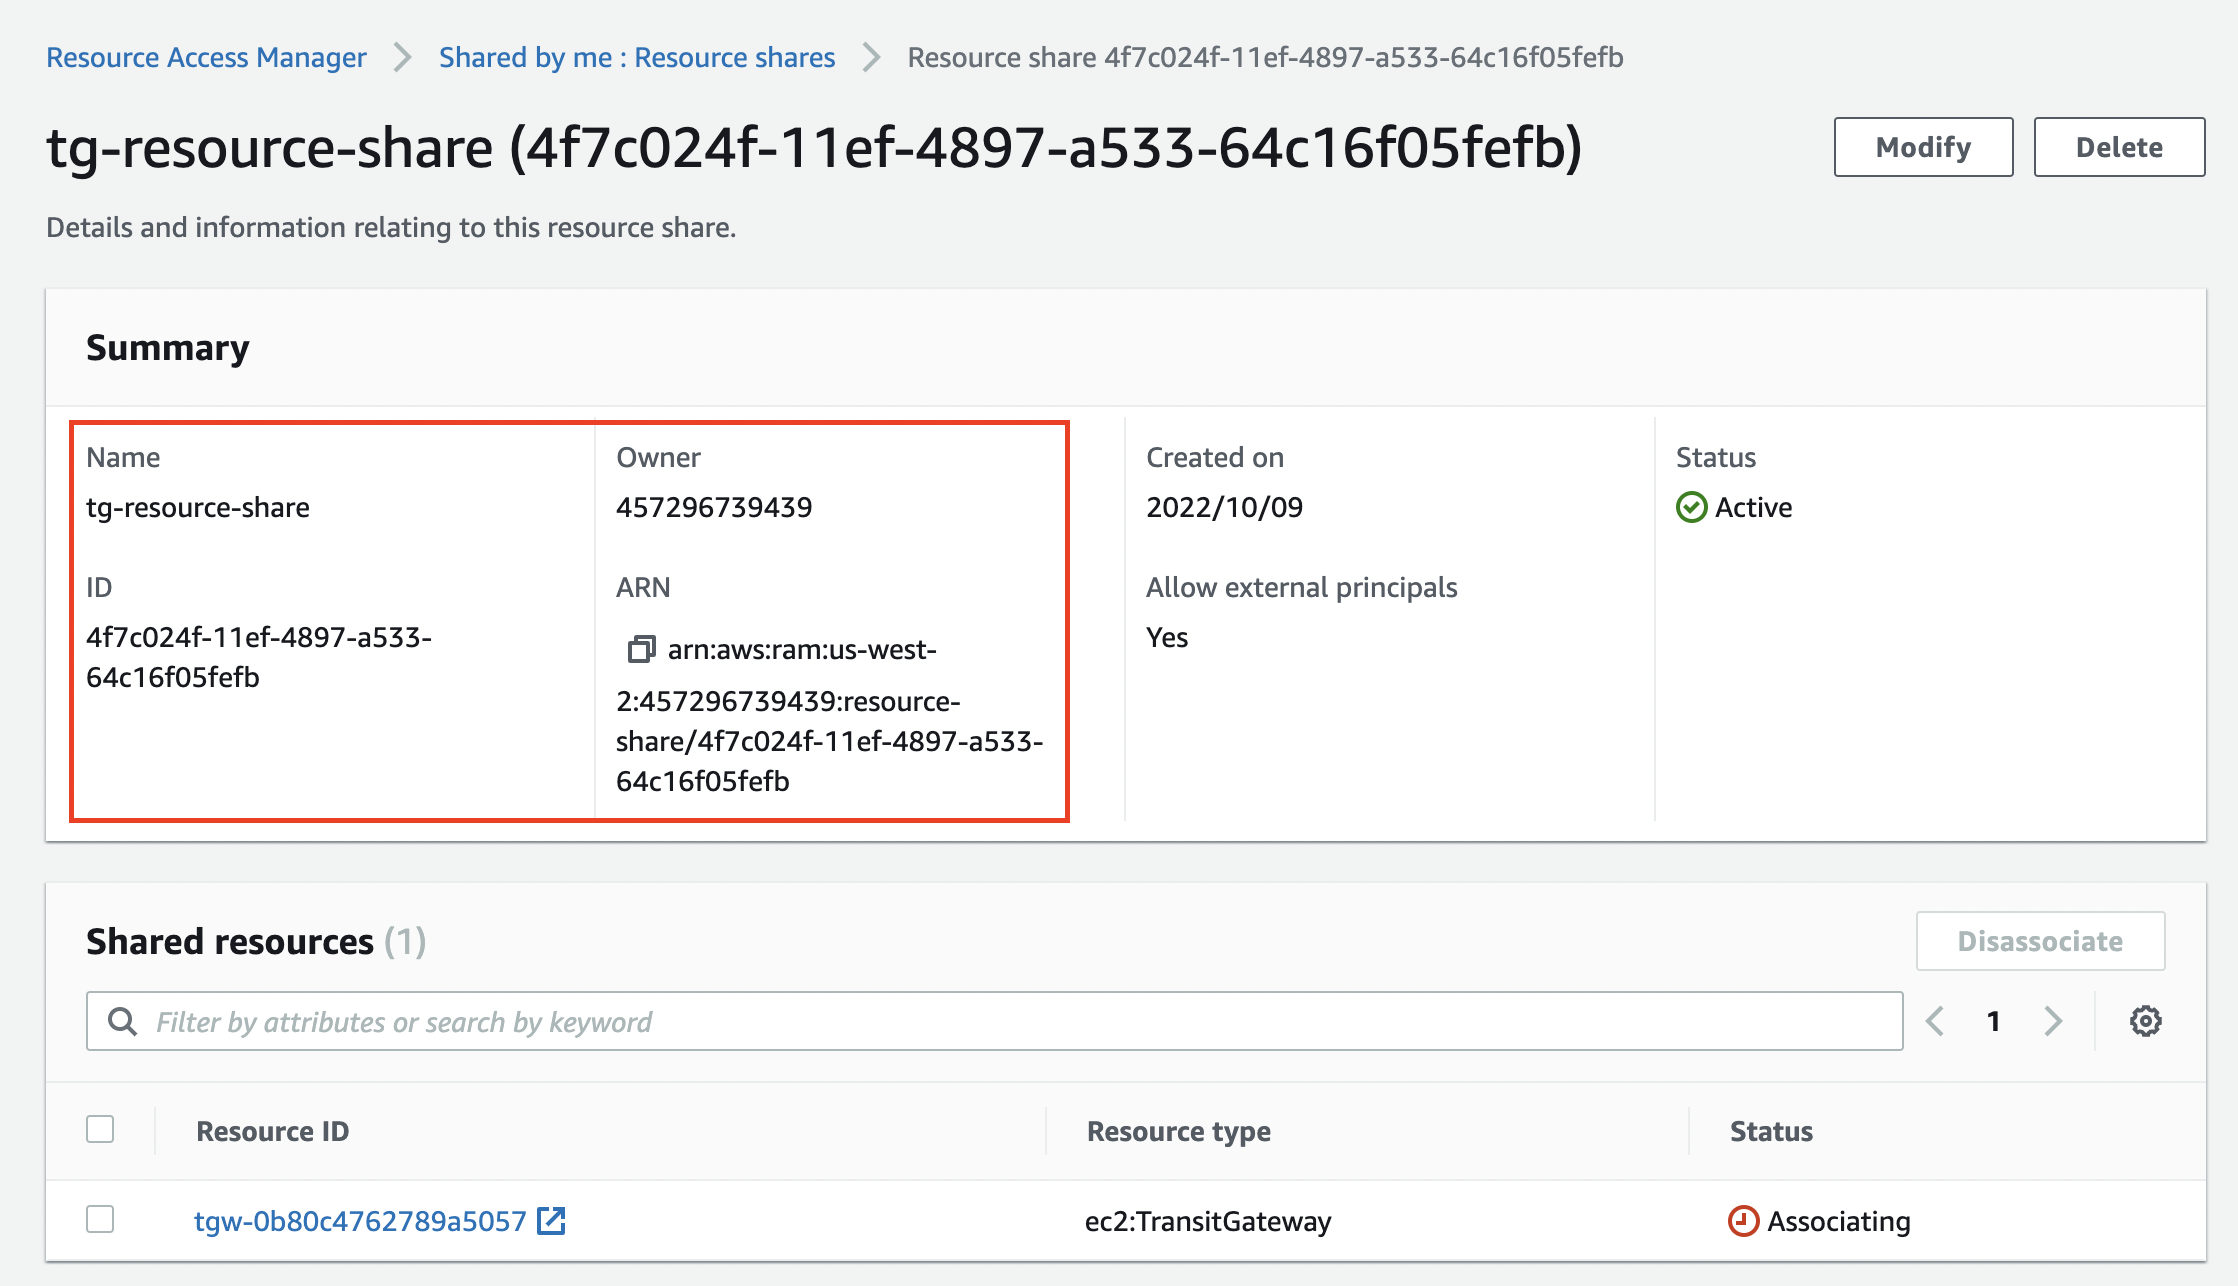
Once it is successfully created, you will get the Owner id and Resource id, which you will need while setting up Transit Gateway in Runtime manager.
Now let's move to the Anypoint platform, make sure you have a licensed account since this feature is not available with a developer account.
Step 3: Configure Transit Gateway in Cloudhub.
- Login into mulesoft.
- Go to Runtime manager --> Transit Gateway.

- Click on Add transit gateway.
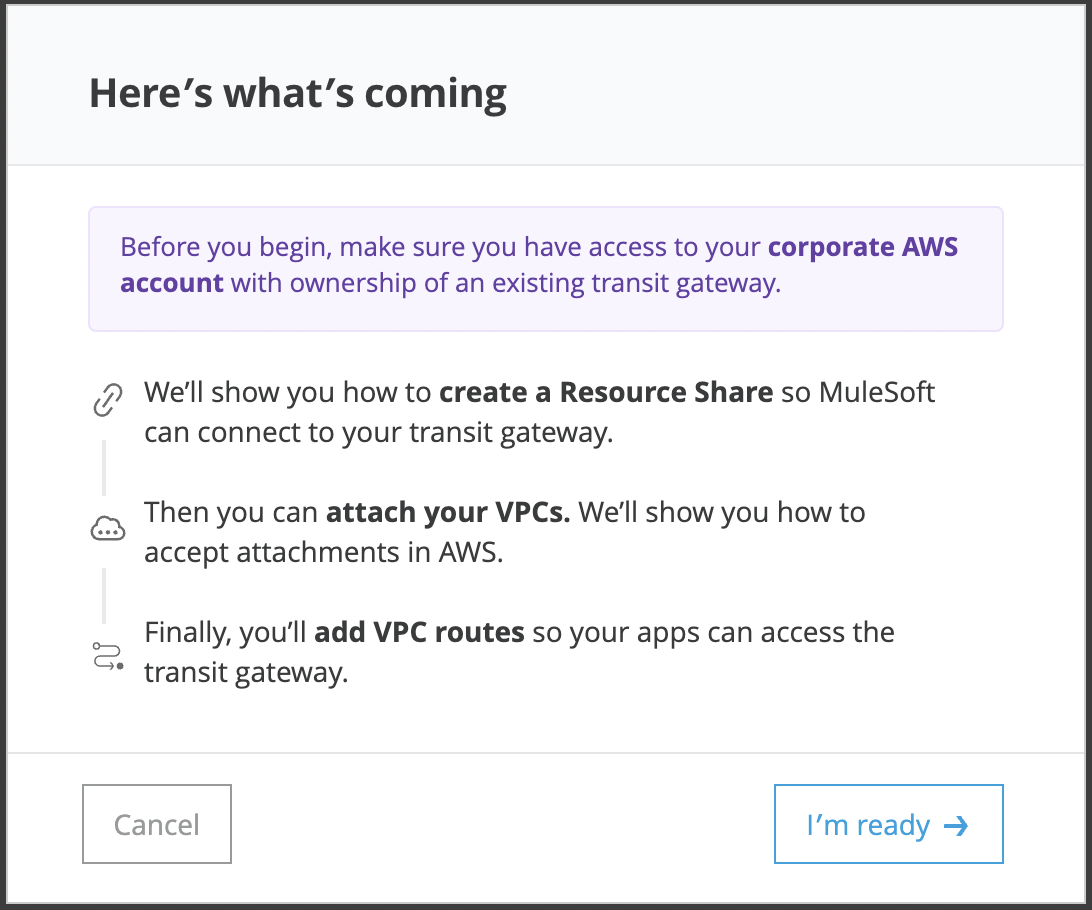
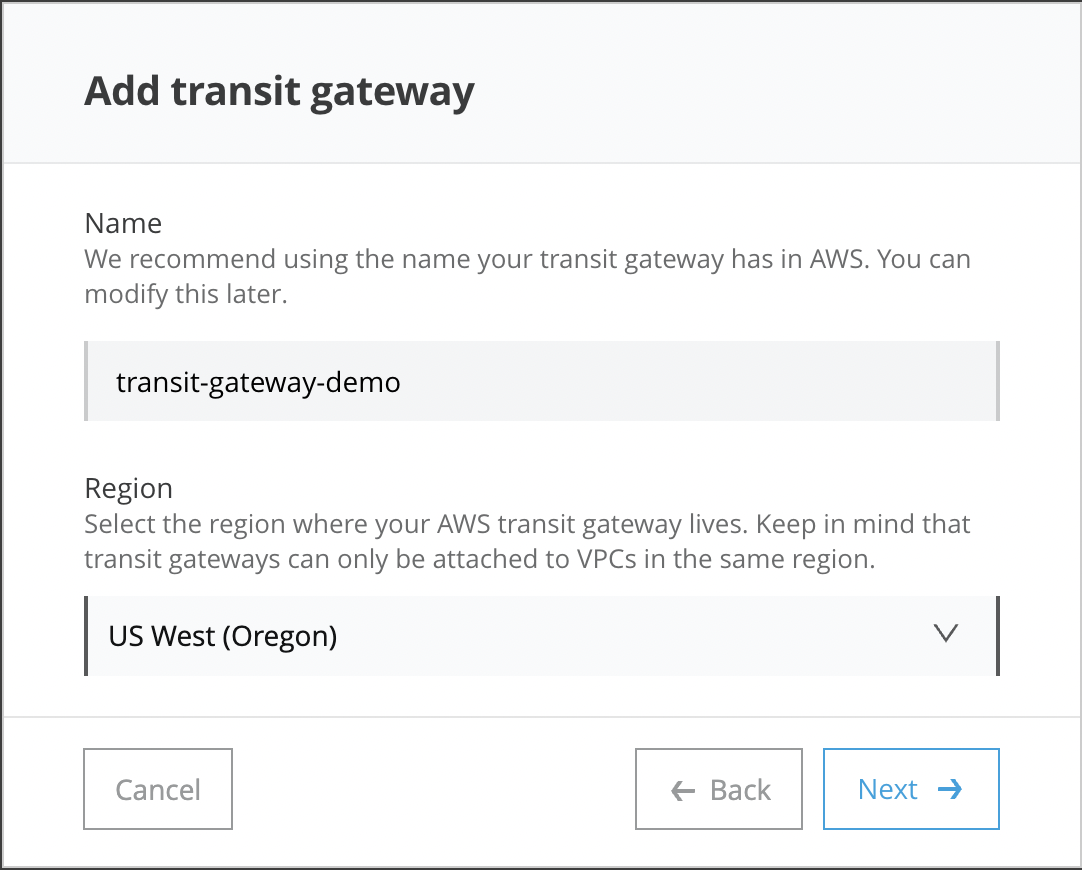
- Click on I'm ready, here, you need to add the transit gateway name that we created in Step 1 and use the same region you used while creating the Transit gateway in AWS.
- Click no Next; since we have already created AWS shared resource, we just need to add the Mulesoft AWS account id under principal.
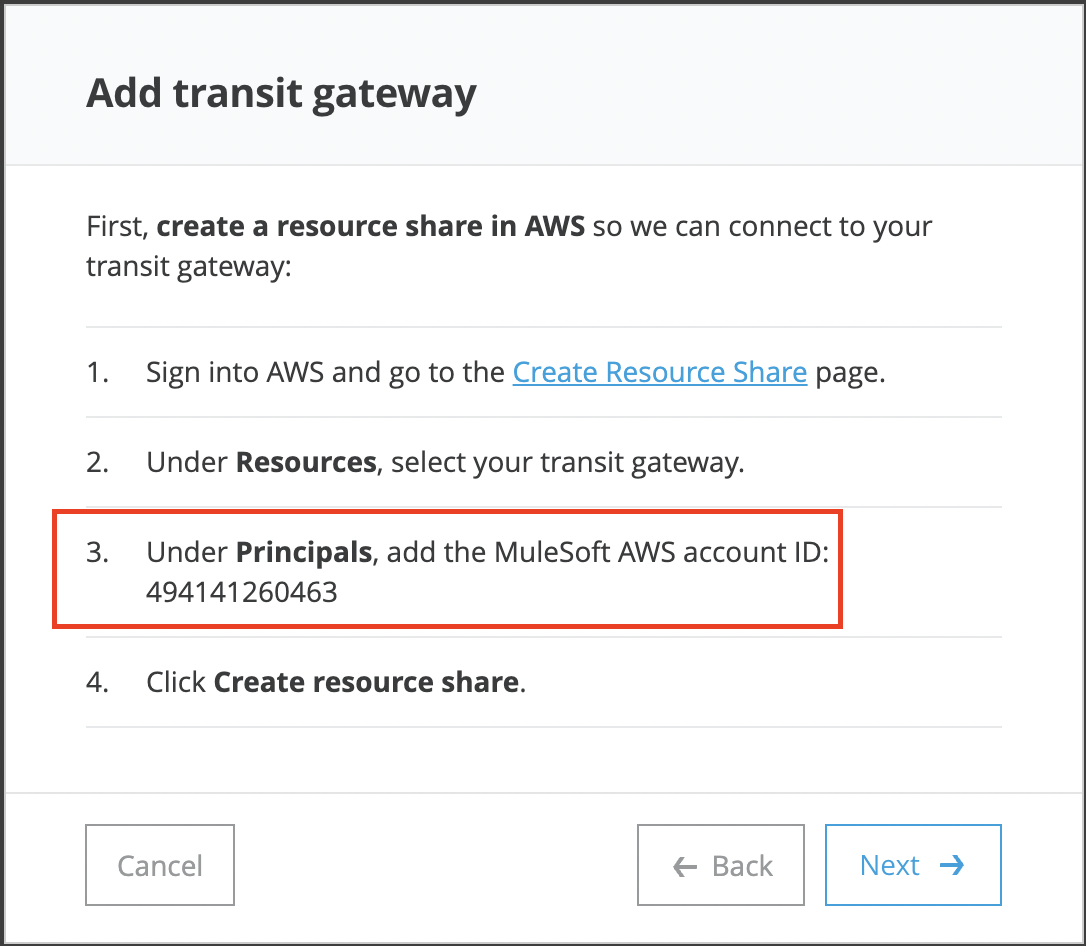
- Edit the shared resource that we created in Step 2 (tg-resource-share), and add Principal 494141260463 as "AWS account" type.
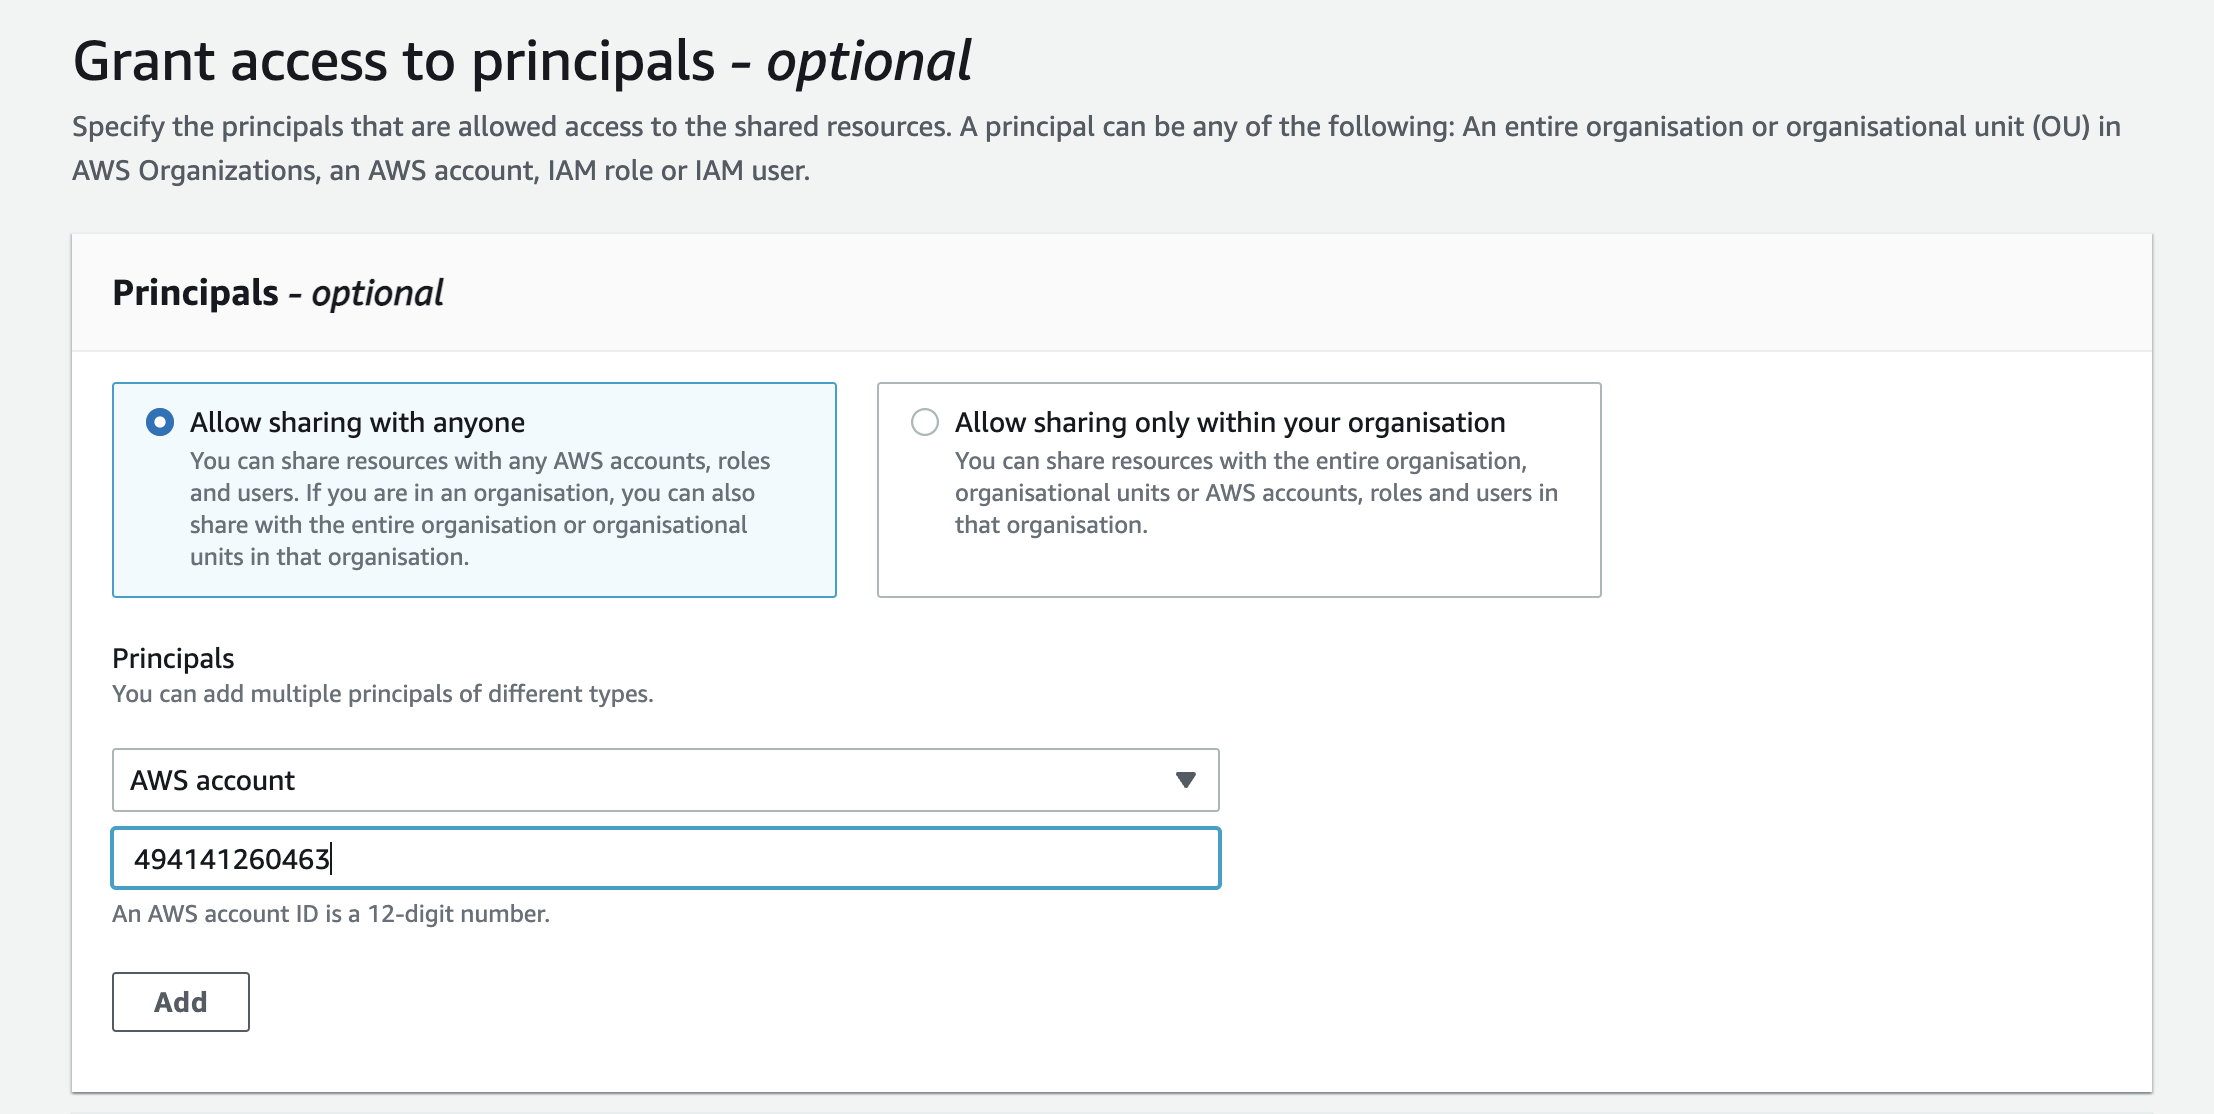
Review and update the shared resource.
- Click on Next; now here, you will need to provide the resource share id and owner id we got after creating AWS shared resource in Step 2.
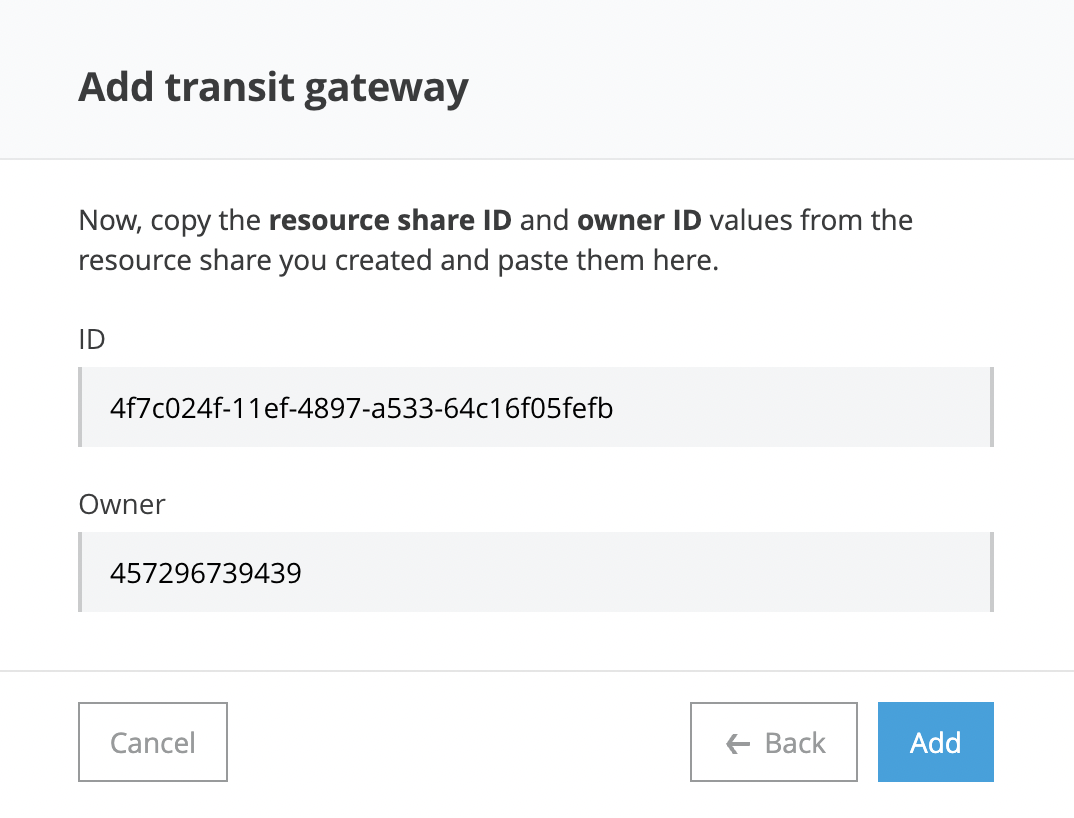
- Click on Add; if everything is correct Transit gateway will be created in the runtime manager.
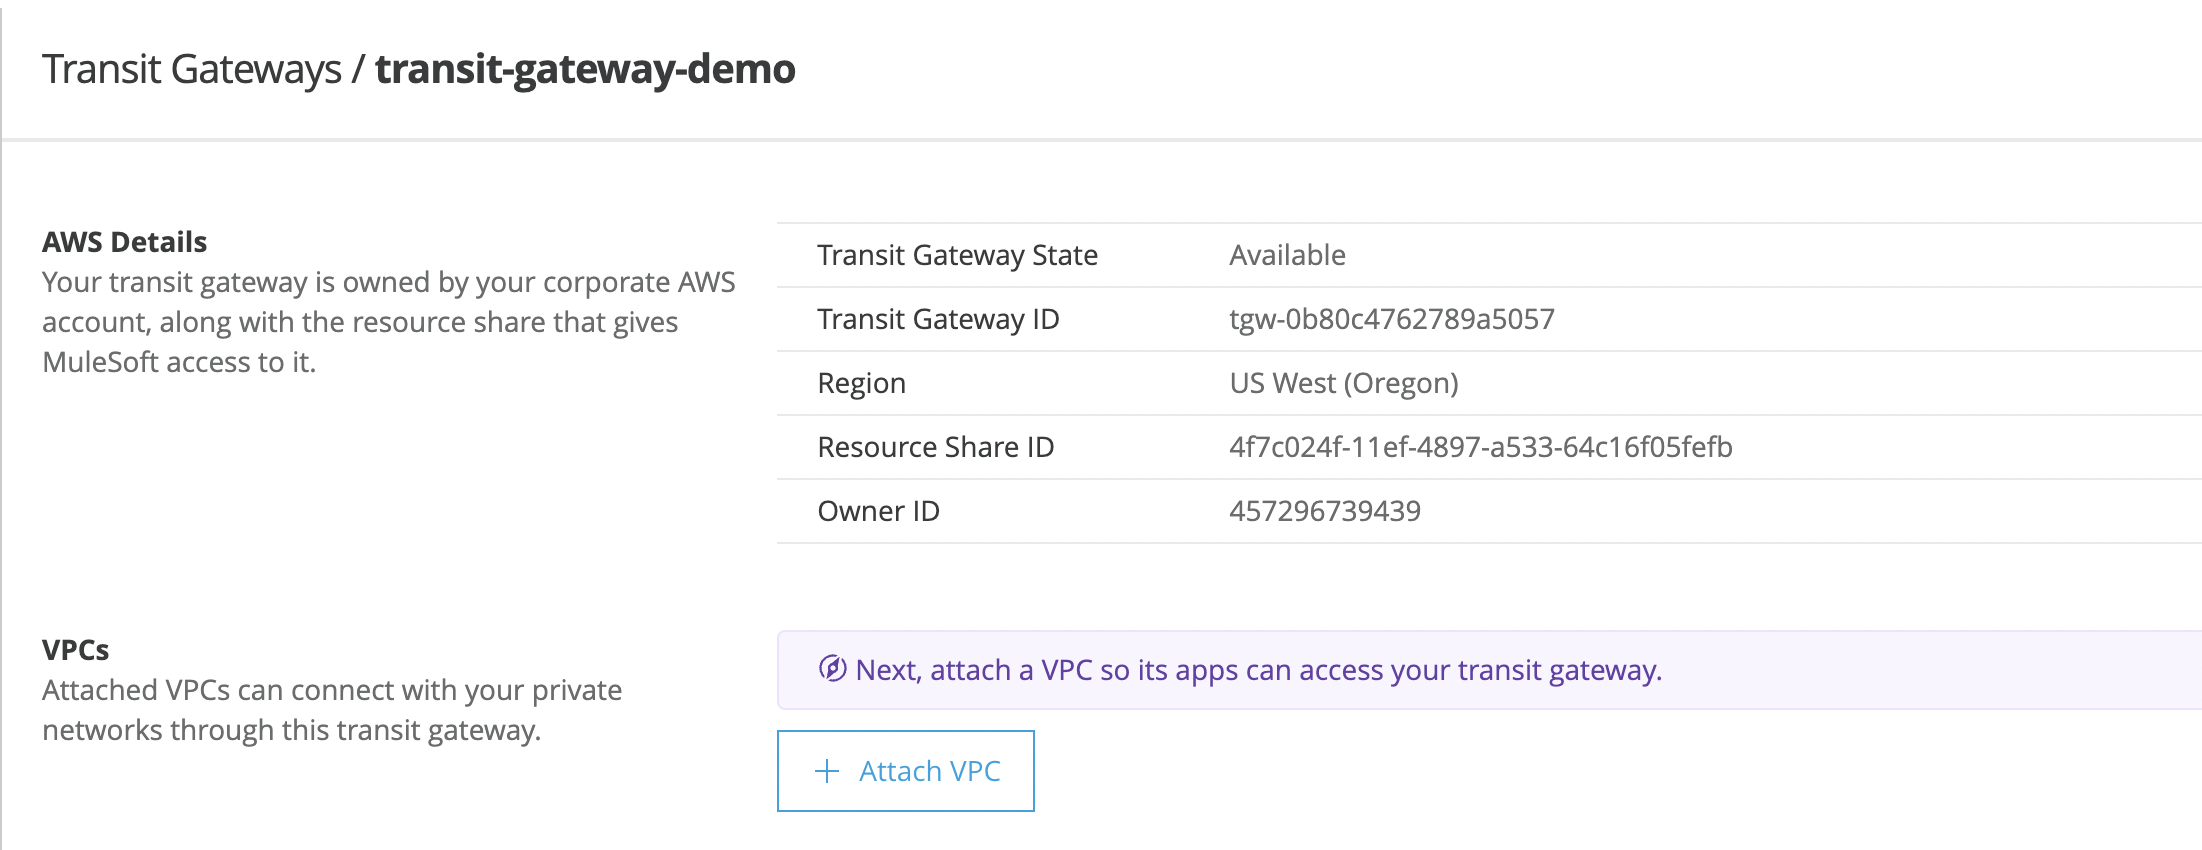
Step 4: Attach VPC to the Transit Gateway in Cloudhub.
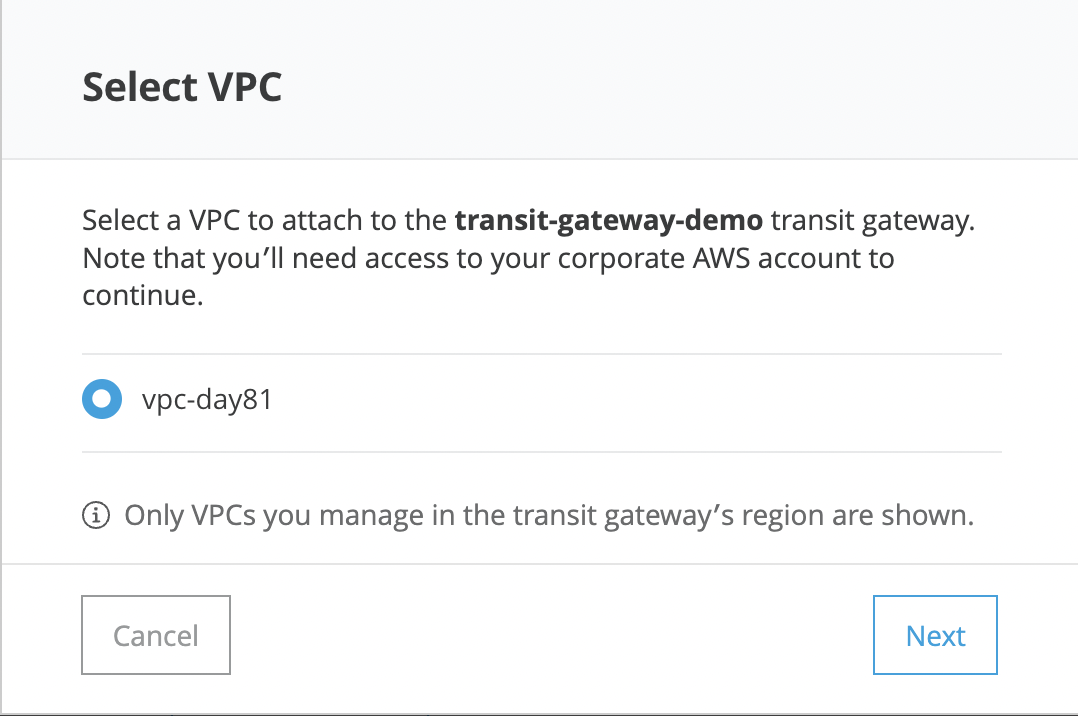
- Click on Attach VPC.
- Select the VPC that you want to attach; remember, VPCs with the same region will be only shown to select.
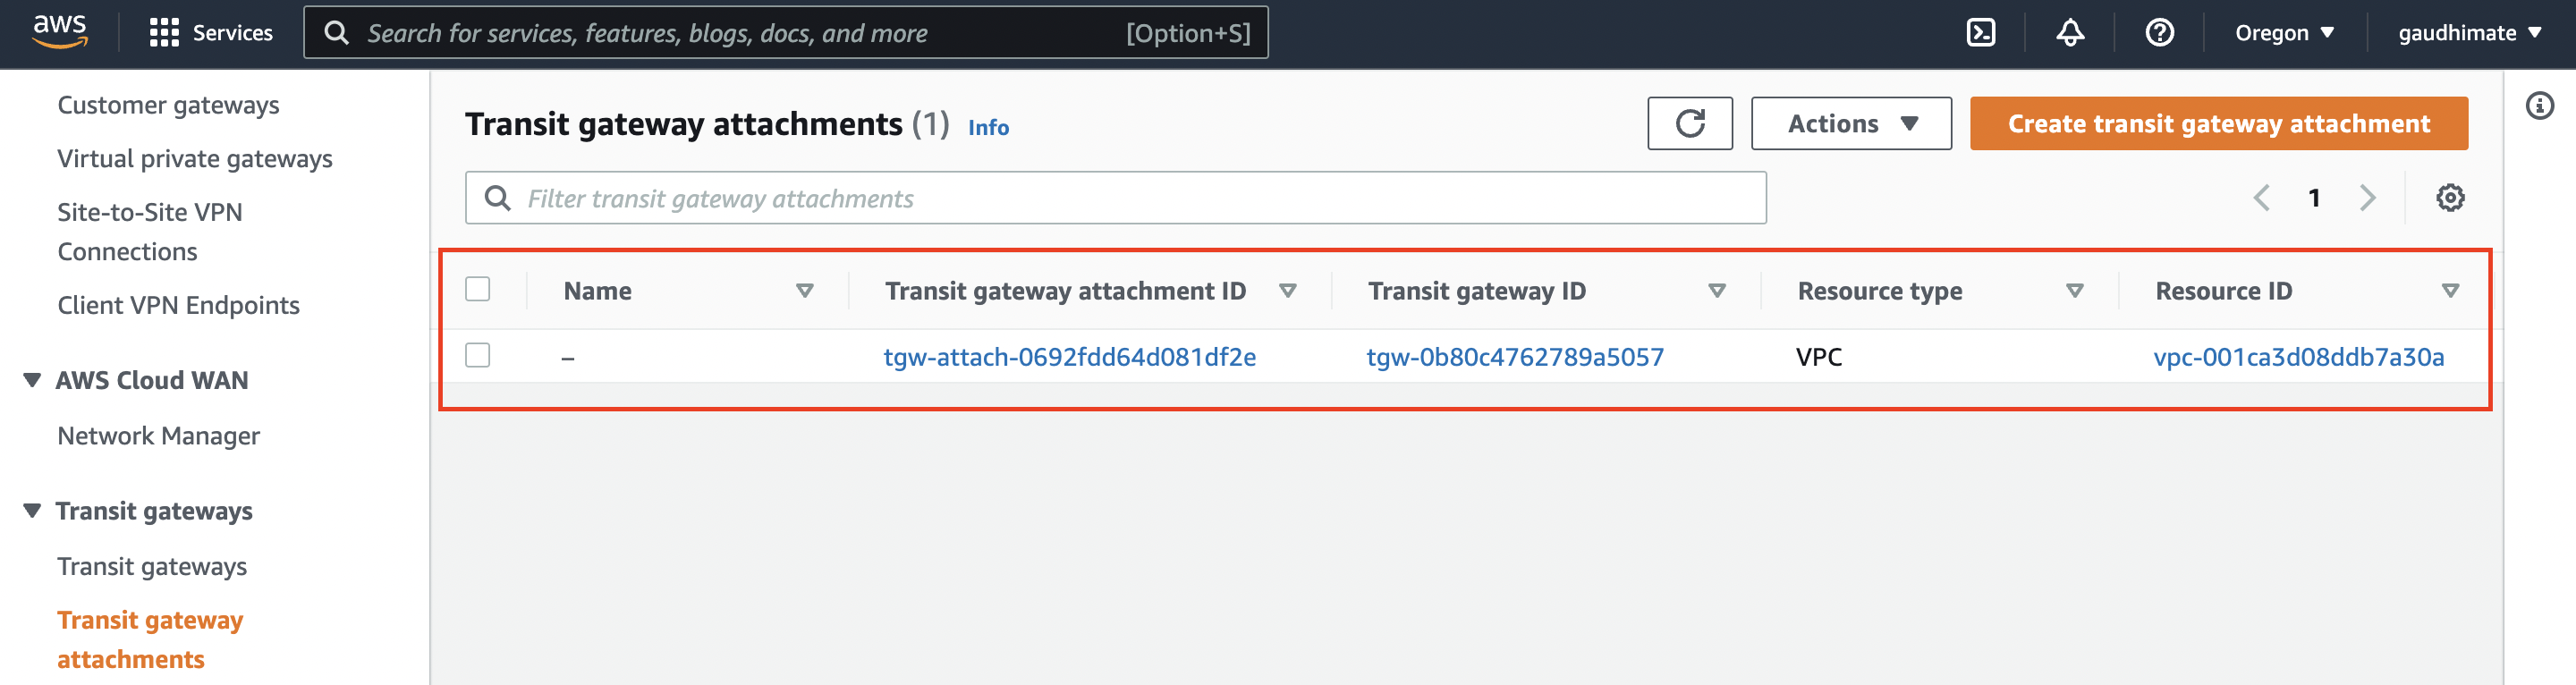
- Go to AWS Transit gateway --> Transit gateway attachments; Mulesoft should have created an attachment.
Step 5: Accept the VPC attachment.
- Now, we need to accept this VPC attachment; initially state of the attachment will be Pending acceptance.
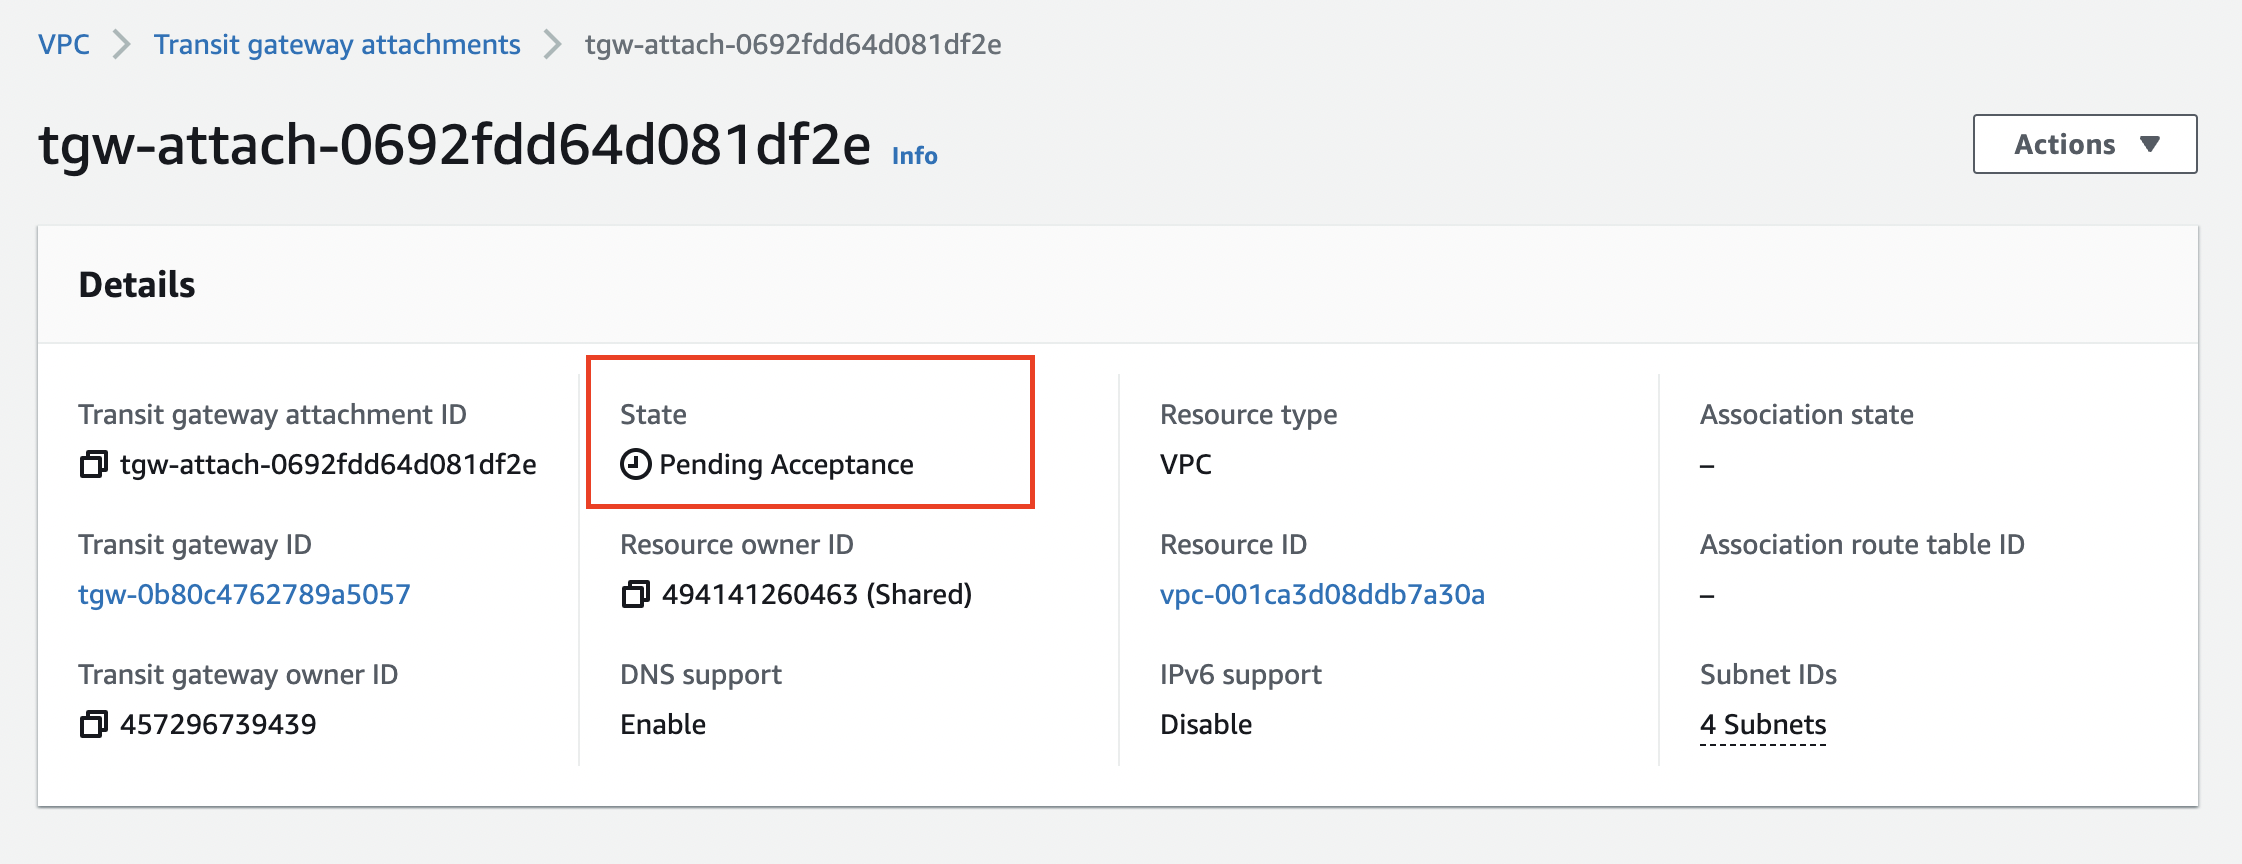
- To accept the attachment, go to Actions --> Accept transit gateway attachment.

- If everything is correct, then we will be able to see VPC attached to our transit gateway with attachment status as "Attached to Transit Gateway."
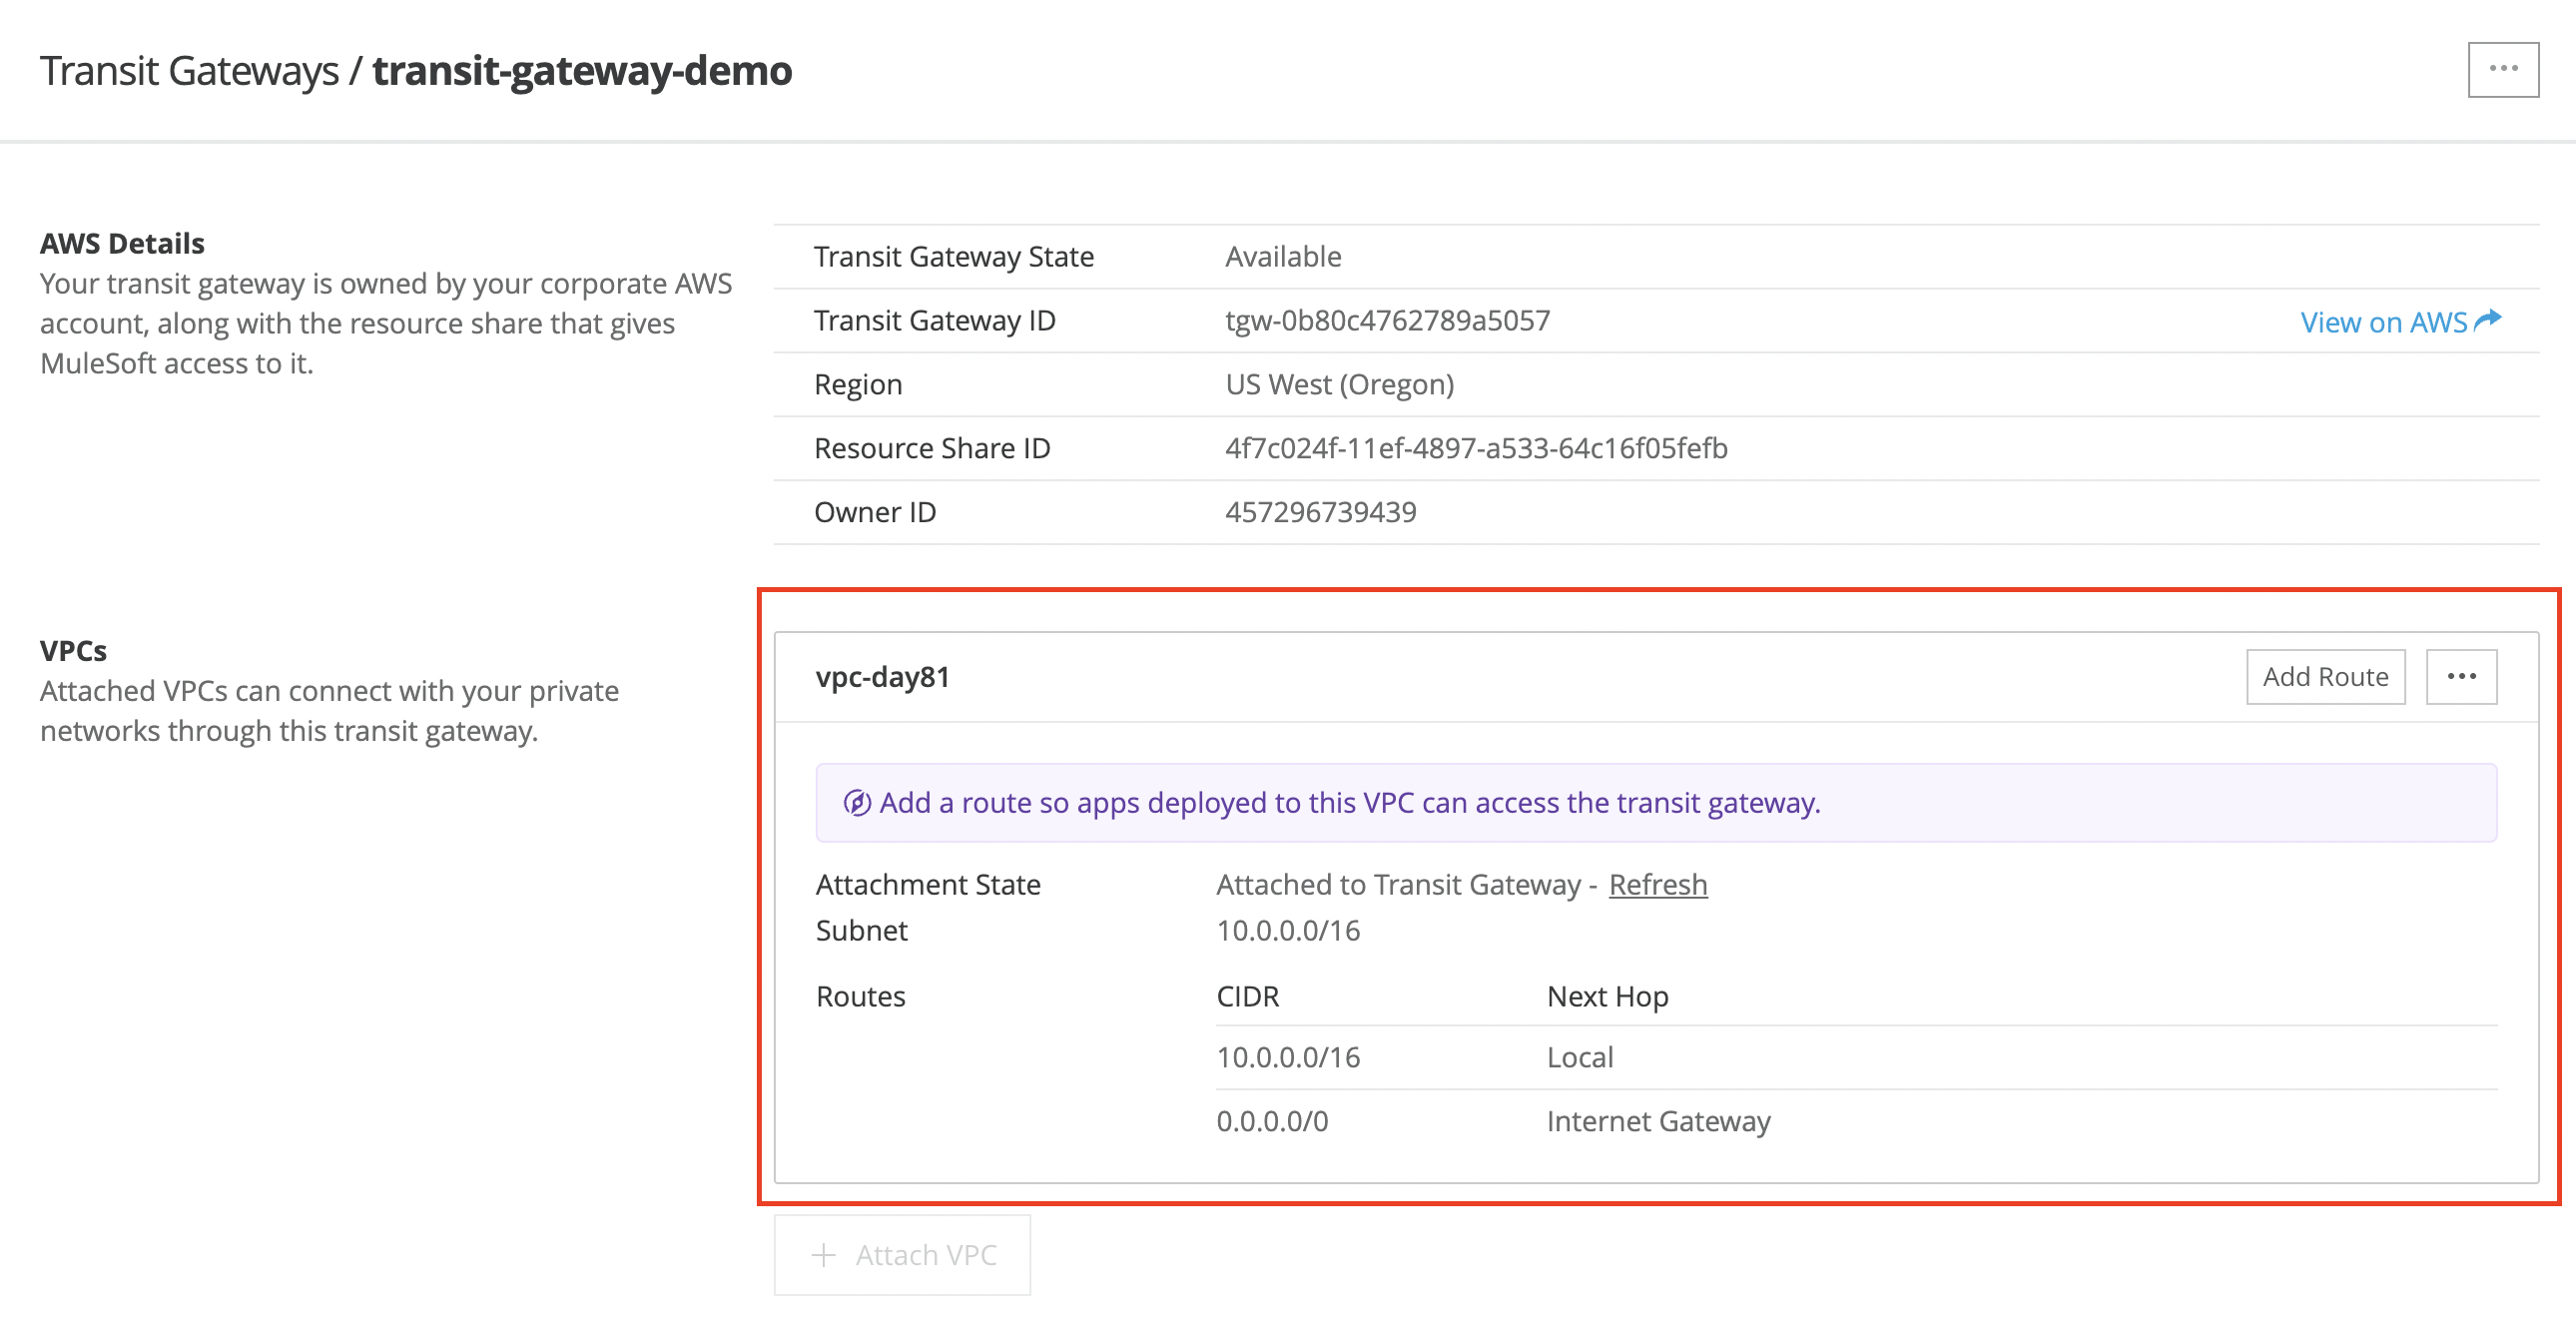
Step 6: Add Route
- Click on the Add Route button; this route will help the application access the Transit gateway by enabling outbound access between Anypoint VPC and the external destination.
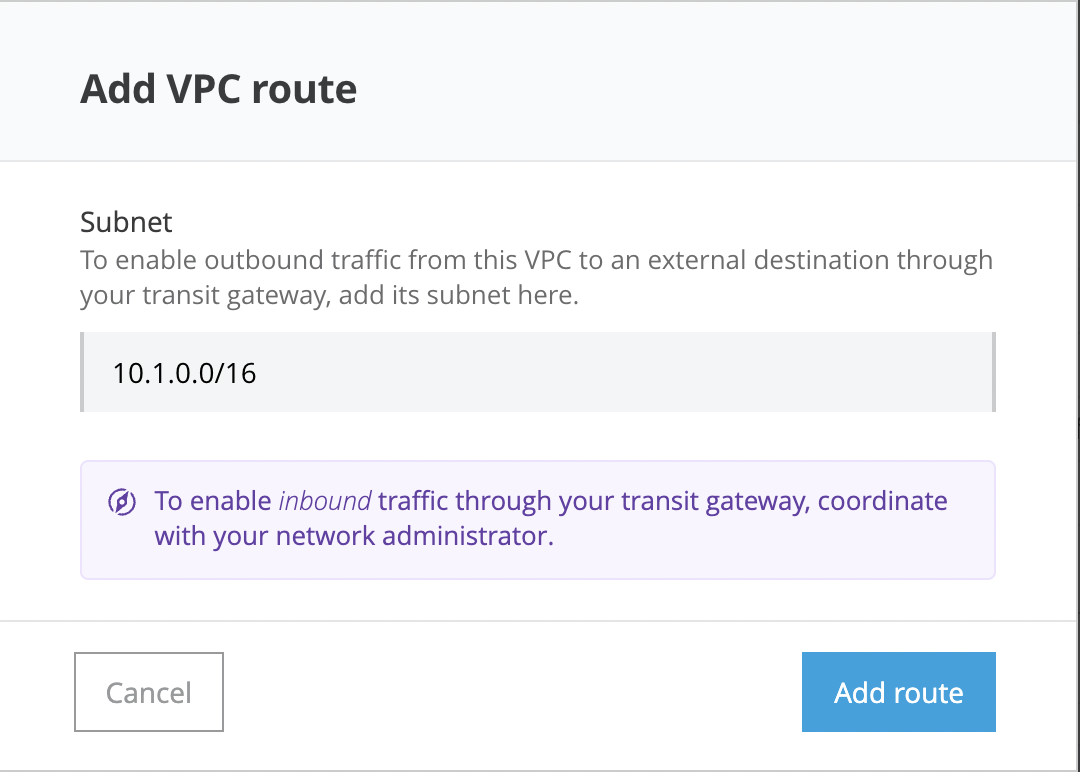
- You can also enable inbound traffic for your Anypoint VPC by configuring it in the AWS transit gateway.
That's it. We have done it, now, you can use any application to test the connectivity to the newly attached network, or you can use Mulesoft's provided network tool to test the connection.
Conclusion
We have seen what Transit gateway is and how we can utilize it to reduce the complexity of connecting to multiple different networks. We also seen how to set up the Transit gateway with the Mulesoft Anypoint Platform.
Opinions expressed by DZone contributors are their own.
Comments