Tutorial: lwip With FreeRTOS and the Freescale FRDM-K64F Board
How to create a lwIP project, which is an open source TCP/IP for small systems, using the Kinetis SDK and FreeRTOS on the FRDM-K64F board.
Join the DZone community and get the full member experience.
Join For FreeThis tutorial is about how to create a lwIP project with FreeRTOS using the Kinetis SDK V1.3.0 with Kinetis Design Studio on the Freescale FRDM-K64F board.

I would like to thank Frank Bargstedt for providing me the many hints and steps for this tutorial. Without his contribution I think I would not have been able to create this article. THANK YOU!
Introduction
lwIP is a small Open Source TCP/IP implementation suitable for small systems. The project can be found on http://savannah.nongnu.org/projects/lwip/. The Kinetis SDK comes with an lwIP port which I’m going to use in this project. The goal is to create a project with lwIP and FreeRTOS running on the FRDM-K64F board.
Preconditions
For this project I assume you have the following available/installed (see links at the end of this article):
- Freescale Kinetis Design Studio (KDS) V3.0.0. Alternatively stock Eclipse with Processor Expert installed (see “Going to Mars: Building a DIY Eclipse IDE for ARM Embedded Microcontrollers“) can be used.
- Freescale Kinetis SDK (KSDK) V1.3.0 and Kinetis SDK Eclipse update installed in Eclipse/KDS
- McuOnEclipse components Components 2015-10-17.zip or later
- FRDM-K64F board with cables, connected to a router with DHCP
Project Creation
In KDS, use the menu File > New > Kinetis Project to create a new project.
Provide a name for the project:
Creating Project
Select the board:
Selecting FRDM-K64F Board
Select the Kinetis SDK with Processor Expert enabled:
KSDK v1.3.0 Processor Expert Project
Then finish, and the proejct is created.
Pin Settings
The next step is to check the pin muxing and pin settings:
PinSettings
By default the ENET pins are not routed:
Default ENET Pins
In a first step have all pins routed:
Routed ENET Pins
Next we have to configure the RMII0_MDIO pin: for this we use the context menu on that pin and select ‘Pin Functional Properties’:
Context menu on RMII0_MDIO
Configure the pin for slow slew rate, enabled open drain, low drive strength, disabled passive filter, pull-up selection with enabled pull-up as below:
Pin Electrical Properties
:!: Important: without the above settings the ENET will not properly work!
fsl_enet Component
Next, add the fsl_enet SDK component from the Components Library to the project:
Adding fsl_enet component
This adds the component to the project. It’s settings can be at the default settings.
fsl_enet added to project
Clock Configuration
In this section the clock gets configured. It is important that the clock is in sync with the PHY clock which runs at 50 MHZ. The settings I need to check are in the Clock Manager:
Clock Manager
By default, the project has multiple clock configurations (which are a waste of code and RAM!):
Clock Configurations
Clicking into the line and using the ‘-‘ icon I can remove the configurations:
Removing Clock Configurations
I reduce it to only one and set it as the Init clock Configuration:
Reduced number of clock configurations
That configuration I set to maximum clock speed with the 50 MHz clock source:
- Clock source: External Reference Clock with 50 MHz from EXTAL0
- MGG Mode set to PEE
- PLL output set to 120 MHz
- Core Clock set to 120 MHz
- Bus Clock set to 60 MHz
- External Bus Clock set to 40 MHz
- Flash Clock set to 24 MHz
Clock Management Settings
fsl_os_abstraction
The default OS abstraction in the Kinetis SDK v1.3.0 comes with unnecessary overhead, so it needs some configuration:
fsl_os_abstraction
I disable the OS Timers for bare metal mode as they are not needed:
Disabled OS Timers
FreeRTOS
Next, FreeRTOS gets added. I’m *not* using the FreeRTOS component which comes with the Kinetis SDK V1.3.0 as it is an older version and does not support advanced features like RTT Tracing (see “ Search Using Segger Real Time Terminal (RTT) with Eclipse“).
So I’m using the McuOnEclipse FreeRTOS component from the repository:
Adding McuOnEclipse FreeRTOS component
This adds FreeRTOS plus the Utility component to the project:
Added FreeRTOS
FreeRTOS gets configured as below:
- To prepare the RTOS to work with the Kinetis SDK, enable the SDK option and add the Kinetis SDK component to it:
 Enabled Kinetis SDK for RTOS
 - Verify the ARM CPU used, in the case of the FRDM-K64F it is an ARM Cortex-M4F with floating point support:
 Kinetis ARM Family Setting
 - As the rest of the SDK is using malloc()/free() too, I set the RTOS memory allocation to Scheme 3 too, with an appropriate Heap Size:
 Memory Allocation Scheme
In the compiler preprocessor settings (menu Project > Properties) I need to tell the SDK that I’m using FreeRTOS with a define:
FSL_RTOS_FREE_RTOSAdded FSL_RTOS_FREE_RTOS Compiler Preprocessor Define
Generating Processor Expert Code
With all the components configured, I can generate Processor Expert code:

Generating Processor Expert Code
If this requires some file changes, a confirmation dialog might show up which I confirm with OK:

Confirm File Changes
PHY Driver
The FRDM-K64F uses the ‘ksz8081’ PHY. To add the driver for it to my project I copy the following files
- fsl_phy_driver.c
- fsl_phy_driver.h
from:
C:\Freescale\KSDK_1.3.0\middleware\tcpip\rtcs\source\port\phyksz8081
PHY Drivers
and add them to my project Sources folder:

Added PHY Driver
Semihosting
I would like to use semihosting (see “Semihosting for Kinetis Design Studio V3.0.0 and GNU ARM Embedded (launchpad)“) to write messages to the debugger console instead of using a physical UART.
First, I add a file ‘fsl_debug_console.h’ to the sources:
which has defines to map debug printf calls to the normal printf:
/*
 * fsl_debug_console.h
 *
 * Map printf for semihosting implementation.
 */

#ifndef SOURCES_FSL_DEBUG_CONSOLE_H_
#define SOURCES_FSL_DEBUG_CONSOLE_H_

#define PRINTF printf
#define debug_printf printf

#endif /* SOURCES_FSL_DEBUG_CONSOLE_H_ */

fsl_debug_console added to project
To tell the linker that I’m using semihosting, I use the following linker commands:
-specs=rdimon.specs -specs=nano.specs
Semihosting Linker Commands
Kinetis SDK Utilities
The Kinetis SDK utilities and internal printf routines do not play well with semihosting, so I had to disable it:

Disabled SDK utilities
This can be easily done with using the context menu on that folder and exclude the resource from build:

Excluded from Build
lwIP
In this step the lwIP stack gets added to the project. There is a port of lwIP inside the Freescale Kinetis SDK V1.3.0 folder:

lwIP in the Kinetis SDK V1.3.0
Copy the lwip folder into the project root folder:
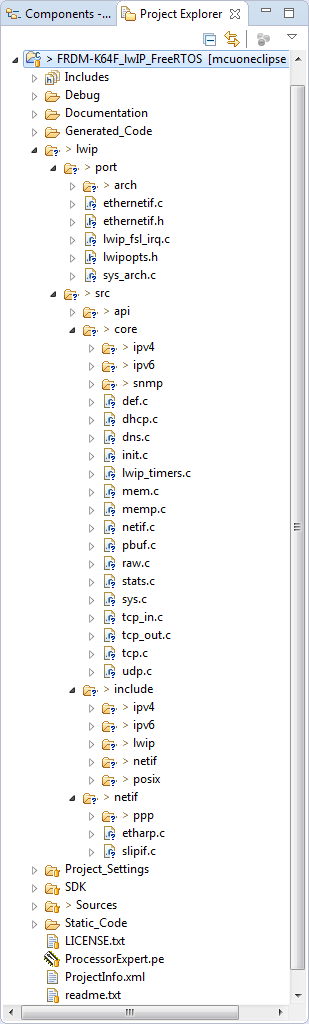
lwip added to project
I’m not going to use IPV6, so I delete the ipv6 folders, otherwise I will get compilation errors with both ipv6 and ipv4 active:

ipv6 removed
In order to the compiler to find all the header files, I’m adding the following include paths to the compiler settings:
"..\lwip\src\include"
"..\lwip\src\include\lwip"
"..\lwip\src\include\ipv4"
"..\lwip\port"
I can copy-paste paths settings to the dialog in Eclipse.

lwip include paths
Application Code
As application code I add this to main.c:
#define DHCP_TIMEOUT 10

#include "lwip/api.h"
#include "lwip/tcpip.h"
#include "lwip/udp.h"
#include "lwip/dhcp.h"
#include "netif/etharp.h"
#include "ethernetif.h"

#include <string.h>
#include <stdio.h>
/* providing a debug_printf() to make the linker happy */
int debug_printf(const char *fmt_s, ...)
{
#if 0
 va_list ap;
 int result;
 /* Do nothing if the debug uart is not initialized.*/
 if (s_debugConsole.type == kDebugConsoleNone)
 {
 return -1;
 }
 va_start(ap, fmt_s);
 result = _doprint(NULL, debug_putc, -1, (char *)fmt_s, ap);
 va_end(ap);

 return result;
#else
 return -1;
#endif
}

#if 1 /* depending on the GNU tools and libraries, a custom _sbrk() is needed */
void *_sbrk ( uint32_t delta ) {
extern char end; /* Defined by the linker */
static char *heap_end;
char *prev_heap_end;

 if (heap_end == 0) {
 heap_end = &end;
 }

 prev_heap_end = heap_end;
 heap_end += delta;
 return (void *) prev_heap_end;
}
#endif

static void LwipInitTask(void* pvArguments) {
 err_t err;
 struct netif fsl_netif0;
 ip_addr_t fsl_netif0_ipaddr, fsl_netif0_netmask, fsl_netif0_gw;

 char msg[] = "This is my message";

 (void)pvArguments;

 // Init lwip stack
 tcpip_init(NULL,NULL);
 printf("%s: lwip init called ..\n", __FUNCTION__);

 // Setup IP Config for DHCP ...
 IP4_ADDR(&fsl_netif0_ipaddr, 0,0,0,0);
 IP4_ADDR(&fsl_netif0_netmask, 0,0,0,0);
 IP4_ADDR(&fsl_netif0_gw, 0,0,0,0);

 /* Add a network interface to the list of lwIP netifs. */
 netif_add(&fsl_netif0, &fsl_netif0_ipaddr, &fsl_netif0_netmask, &fsl_netif0_gw, NULL, ethernetif_init, ethernet_input);
 /* Set the network interface as the default network interface. */
 netif_set_default(&fsl_netif0);
 /* obtain the IP address, default gateway and subnet mask by using DHCP*/
 err = dhcp_start(&fsl_netif0);

 printf("%s : Started DCHP request (%s)\n", __FUNCTION__, lwip_strerr(err));

 for(int i=0; i < DHCP_TIMEOUT && fsl_netif0.dhcp->state != DHCP_BOUND; i++) {
 printf("%s : Current DHCP State : %d\n", __FUNCTION__, fsl_netif0.dhcp->state);
 // Wait a second
 vTaskDelay(1000/portTICK_PERIOD_MS);
 }

 // Make it active ...
 netif_set_up(&fsl_netif0);

 printf("%s : Interface is up : %d\n", __FUNCTION__, fsl_netif0.dhcp->state);
 printf("%s : IP %s\n", __FUNCTION__, ipaddr_ntoa(&fsl_netif0.ip_addr));
 printf("%s : NM %s\n", __FUNCTION__, ipaddr_ntoa(&fsl_netif0.netmask));
 printf("%s : GW %s\n", __FUNCTION__, ipaddr_ntoa(&fsl_netif0.gw));

 if (fsl_netif0.dhcp->state == DHCP_BOUND) {
 // Send out some UDP data
 struct netconn* pConnection;

 // Create UDP connection
 pConnection = netconn_new(NETCONN_UDP);
 // Connect to local port
 err = netconn_bind(pConnection, IP_ADDR_ANY, 12345);
 printf("%s : Bound to IP_ADDR_ANY port 12345 (%s)\n", __FUNCTION__, lwip_strerr(err));

 err = netconn_connect(pConnection, IP_ADDR_BROADCAST, 12346 );
 printf("%s : Connected to IP_ADDR_BROADCAST port 12346 (%s)\n", __FUNCTION__, lwip_strerr(err));

 for(int i = 0; i < 10; i++ ){
 struct netbuf* buf = netbuf_new();
 void* data = netbuf_alloc(buf, sizeof(msg));

 memcpy (data, msg, sizeof (msg));
 err = netconn_send(pConnection, buf);
 printf("%s : Sending to IP_ADDR_BROADCAST port 12346 (%s)\n", __FUNCTION__, lwip_strerr(err));

 netbuf_delete(buf); // De-allocate packet buffer

 // Wait a second
 vTaskDelay(1000/portTICK_PERIOD_MS);
 }

 err = netconn_disconnect(pConnection);
 printf("%s : Disconnected from IP_ADDR_BROADCAST port 12346 (%s)\n", __FUNCTION__, lwip_strerr(err));

 err = netconn_delete(pConnection);
 printf("%s : Deleted connection (%s)\n", __FUNCTION__, lwip_strerr(err));
 }
 // Wait a second
 vTaskDelay(1000/portTICK_PERIOD_MS);

 /* finish the lease of the IP address */
 err = dhcp_release(&fsl_netif0);
 printf("%s : DHCP Release (%s)\n", __FUNCTION__, lwip_strerr(err));

 for(;;) {};
}
And call it inside main() like below. An important point is that the MPU of the K64F needs to be disabled:
 printf("Welcome to the world of lwip!\r\n");

 /* Disable the mpu */
 MPU_BWR_CESR_VLD(MPU, 0);

 /* create lwIP initialization task */
 xTaskCreate(LwipInitTask,
   "LwipInitTask",
   configMINIMAL_STACK_SIZE * 4,
   (void*)NULL,
   tskIDLE_PRIORITY,
   (xTaskHandle*)NULL);
After that, the RTOS gets started with vTaskStartScheduler().
Example Session
With this, I can build, download and debug the application. With the network cable plugged in, the application writes the status to the semihosting console. It starts with a DHCP request and then does some IP broadcasts and at the end releases the address and closes the connection:
Welcome to the world of lwip!
LwipInitTask: lwip init called ..
LwipInitTask : Started DCHP request (Ok.)
LwipInitTask : Current DHCP State : 6
LwipInitTask : Current DHCP State : 6
LwipInitTask : Current DHCP State : 6
LwipInitTask : Current DHCP State : 8
LwipInitTask : Interface is up : 10
LwipInitTask : IP 192.168.0.123
LwipInitTask : NM 255.255.255.0
LwipInitTask : GW 192.168.0.1
LwipInitTask : Bound to IP_ADDR_ANY port 12345 (Ok.)
LwipInitTask : Connected to IP_ADDR_BROADCAST port 12346 (Ok.)
LwipInitTask : Sending to IP_ADDR_BROADCAST port 12346 (Ok.)
LwipInitTask : Sending to IP_ADDR_BROADCAST port 12346 (Ok.)
LwipInitTask : Sending to IP_ADDR_BROADCAST port 12346 (Ok.)
LwipInitTask : Sending to IP_ADDR_BROADCAST port 12346 (Ok.)
LwipInitTask : Sending to IP_ADDR_BROADCAST port 12346 (Ok.)
LwipInitTask : Sending to IP_ADDR_BROADCAST port 12346 (Ok.)
LwipInitTask : Sending to IP_ADDR_BROADCAST port 12346 (Ok.)
LwipInitTask : Sending to IP_ADDR_BROADCAST port 12346 (Ok.)
LwipInitTask : Sending to IP_ADDR_BROADCAST port 12346 (Ok.)
LwipInitTask : Sending to IP_ADDR_BROADCAST port 12346 (Ok.)
LwipInitTask : Disconnected from IP_ADDR_BROADCAST port 12346 (Ok.)
LwipInitTask : Deleted connection (Ok.)
LwipInitTask : DHCP Release (Ok.)
lwip session
Summary
A long-time-waiting thing on my to-do list finally has been accomplished: It takes many pieces to build the basis of a network IP application, and lwip for sure is a good and well documented open source project. With the help of Processor Expert many aspects of the networking application get simplified, and after some tweaks the Kinetis SDK is now working too.
The project created in this tutorial is on GitHub: https://github.com/ErichStyger/mcuoneclipse/tree/master/Examples/KDS/FRDM-K64F120M/FRDM-K64F_lwIP_FreeRTOS.
Published at DZone with permission of Erich Styger. See the original article here.
Opinions expressed by DZone contributors are their own.
Comments